1. Introduction
Thank you for choosing the Hikity 7 Inch Wireless Carplay Car Stereo. This manual provides detailed instructions for the installation, operation, and maintenance of your new car audio system. Please read this manual thoroughly before use to ensure proper functionality and to maximize your enjoyment of the product.

Figure 1.1: Hikity 7 Inch Wireless Carplay Car Stereo (Model 7039B)
2. Product Overview
2.1 Key Features
- Wireless CarPlay & Android Auto: Seamless integration with your smartphone for navigation, music, and calls.
- Bluetooth 5.1 Technology: Stable and fast connectivity for hands-free calls and audio streaming.
- Customizable Audio Experience: Built-in EQ settings (Jazz, Classic, Pop, Rock, Flat) for personalized sound.
- FM Radio Receiver: Access to your favorite local radio stations.
- Backup Camera Support: Enhances parking safety with included rear view camera.
- Mirror Link Function: Display your phone screen directly on the stereo.
- 7-Inch Touchscreen: High-resolution display for clear visuals and easy operation.
2.2 Package Contents
Please check the contents of your package. If any items are missing or damaged, contact customer support.
- Single Din Car Radio (Main Unit)
- Rear View Camera
- External Microphone
- Remote Control
- Power Cable & Horn Cable
- User Manual (this document)

Figure 2.1: Product Dimensions and Package List
3. Setup and Installation
Proper installation is crucial for the performance and safety of your car stereo. It is highly recommended to have the unit installed by a qualified professional.
3.1 Wiring Diagram
Refer to the diagram below for correct wiring connections. Ensure all connections are secure and insulated to prevent short circuits.

Figure 3.1: Rear Panel Connections and Wiring
- Power Cable: Connect to your vehicle's power supply (ACC, B+, GND).
- L-OUT (Left Audio Output): Connect to external amplifier or speakers.
- V-OUT1 (Video Output 1): Connect to external display.
- CVBSIN (Video Input): Connect for external video sources.
- GPS Antenna: Connect the included GPS antenna for navigation features.
- MIC (Microphone Input): Connect the external microphone for hands-free calling.
- R-OUT (Right Audio Output): Connect to external amplifier or speakers.
- V-OUT2 (Video Output 2): Connect to external display.
- CAMIN (Camera Input): Connect the included backup camera.
- ANT (Antenna Input): Connect your car's radio antenna.
3.2 Mounting the Unit
Ensure the single DIN slot in your vehicle is compatible. Secure the unit using the provided mounting brackets and screws. Avoid obstructing any vents or controls.
3.3 Backup Camera Installation
Install the backup camera at the rear of your vehicle, ensuring a clear view. Connect its video output to the CAMIN port on the stereo and its power to your vehicle's reverse light circuit for automatic activation.
4. Operating Instructions
4.1 Wireless CarPlay & Android Auto
This stereo supports both wireless Apple CarPlay and Android Auto, allowing you to integrate your smartphone for navigation, music, messages, and more.

Figure 4.1: CarPlay, Android Auto & Mirror Link Functionality
- Ensure your phone's Bluetooth and Wi-Fi are enabled.
- On the stereo, select the 'CarPlay' or 'Android Auto' icon.
- Follow the on-screen prompts to pair your phone via Bluetooth. Once paired, the system will automatically establish a Wi-Fi connection for wireless CarPlay/Android Auto.
- For wired connection, simply connect your phone to the stereo's USB port.
4.2 Bluetooth 5.1 Connectivity
Connect your smartphone via Bluetooth for hands-free calling and wireless music streaming.
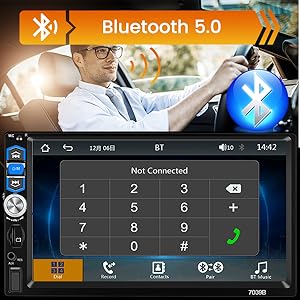
Figure 4.2: Bluetooth 5.1 Interface
- Go to the Bluetooth menu on the stereo.
- Enable Bluetooth on your phone and search for available devices.
- Select 'Hikity' or the device name displayed on the stereo to pair.
- Once connected, you can make/receive calls and play music through the stereo.
4.3 FM Radio Operation
Tune into your favorite FM radio stations.
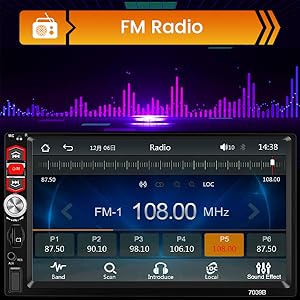
Figure 4.3: FM Radio Interface
- Select the 'Radio' icon from the main menu.
- Use the seek buttons to automatically scan for stations or manually tune using the touchscreen.
- Press and hold a preset button (P1-P6) to save the current station.
4.4 EQ Settings
Customize your audio output with the built-in equalizer.
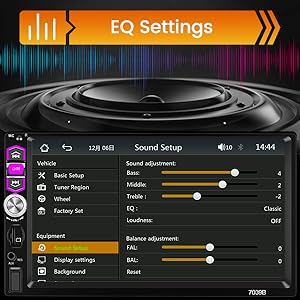
Figure 4.4: EQ Settings Menu
- Navigate to 'Sound Setup' or 'EQ' in the settings menu.
- Choose from preset EQ modes (Jazz, Classic, Pop, Rock, Flat) or adjust bass, middle, and treble levels manually.
- Adjust loudness and balance/fader settings as desired.
4.5 Steering Wheel Control (SWC)
Program your vehicle's steering wheel buttons to control the stereo.
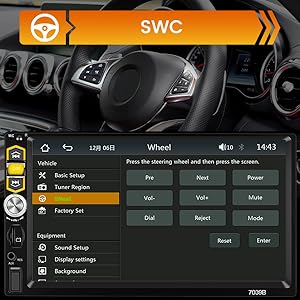
Figure 4.5: Steering Wheel Control Setup
- Go to 'SWC' or 'Steering Wheel Control' in the settings.
- Follow the on-screen instructions to assign functions to your steering wheel buttons. Typically, you press a function on the screen, then press the corresponding button on your steering wheel.
4.6 Mirror Link
Display your smartphone's screen directly on the car stereo via USB connection.

Figure 4.6: Mirror Link Functionality
- Connect your smartphone to the stereo's USB port.
- Select the 'Mirror Link' icon on the stereo.
- Follow any prompts on your phone to allow screen mirroring.
4.7 Backup Camera Display
The stereo automatically displays the rear view when the vehicle is in reverse gear.
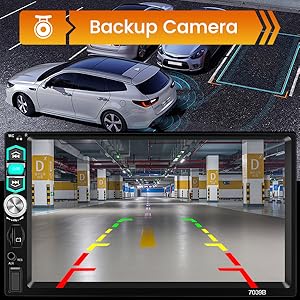
Figure 4.7: Backup Camera View
- Ensure the backup camera is correctly installed and wired to the reverse light trigger.
- When shifting into reverse, the stereo will automatically switch to the camera view.
5. Maintenance
- Cleaning: Use a soft, dry cloth to clean the touchscreen and unit. Avoid abrasive cleaners or solvents.
- Temperature: Do not expose the unit to extreme temperatures or direct sunlight for prolonged periods.
- Moisture: Keep the unit dry. Moisture can damage internal components.
6. Troubleshooting
| Problem | Possible Cause | Solution |
|---|---|---|
| No power | Incorrect wiring; Blown fuse | Check power cable connections; Replace fuse if necessary. |
| No sound | Speaker wires disconnected; Volume too low; Mute enabled | Check speaker connections; Increase volume; Disable mute. |
| Bluetooth not connecting | Bluetooth not enabled on phone/stereo; Incorrect pairing process | Ensure Bluetooth is on; Re-attempt pairing process. |
| CarPlay/Android Auto not working wirelessly | Wi-Fi not enabled; Phone not compatible; Software glitch | Ensure phone Wi-Fi is on; Check phone compatibility; Restart both phone and stereo. |
| Backup camera not displaying | Camera not connected; Reverse trigger wire not connected | Check camera video input and power connections; Ensure reverse trigger wire is connected to vehicle's reverse light. |
| Touchscreen unresponsive | Temporary software issue | Restart the unit (turn off car ignition and restart); If issue persists, contact support. |
7. Specifications
| Feature | Specification |
|---|---|
| Product Dimensions | 7.01 x 1.89 x 4.41 inches |
| Item Weight | 1.76 pounds (0.8 Kilograms) |
| Model Number | 7039B |
| Connectivity Technology | Bluetooth, Auxiliary, USB |
| Controller Type | Remote |
| Special Features | Touchscreen, Wireless Carplay, Android Auto, Equalizer |
| Compatible Devices | Smartphone |
| Connector Type | USB |
| Audio Output Mode | Stereo |
| Surround Sound Channel Configuration | 4.0 |
| Video Encoding | MKV/AVI/TS/TP/MP4/M4V |
8. Warranty and Support
Hikity products come with a standard manufacturer's warranty. For specific warranty details, please refer to the warranty card included with your product or contact customer support.
Customer Support
If you encounter any issues or have questions regarding your Hikity car stereo, please contact our customer support team:
- Email: hikityservices@163.com
- Online: Visit the official Hikity website for FAQs and additional support resources.

Figure 8.1: Hikity Customer Support


