
1. Important Safety Instructions
Please read all instructions carefully before operating your Canoly Masticating Juicer. Retain this manual for future reference.
- Always unplug the juicer from the power outlet before assembling, disassembling, or cleaning.
- Do not immerse the motor base in water or any other liquid.
- Keep hands and utensils out of the feed chute during operation to prevent injury. Always use the food pusher provided.
- Ensure all parts are correctly assembled before turning on the appliance.
- Do not operate the juicer if the power cord or plug is damaged, or if the appliance malfunctions or is dropped.
- This appliance is for household use only.
2. Product Overview
The Canoly Masticating Juicer is designed for efficient cold press juicing, extracting maximum nutrients from fruits and vegetables. Its slow masticating process minimizes oxidation, preserving vitamins and enzymes.
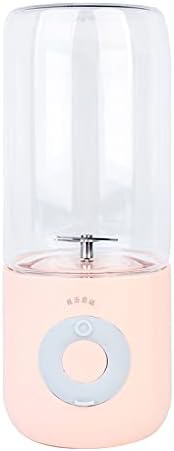
Image: The Canoly Masticating Juicer Machine. This image displays the compact design of the juicer, featuring a clear juicing chamber with a visible auger, and a control panel on the base. The overall color is a light, muted tone, indicating a modern aesthetic.
Key Components:
- Motor Base: Houses the powerful 300-watt motor.
- Feed Chute: A large 4.1-inch (104mm) opening for inserting whole or large pieces of produce.
- Auger (Squeezing Screw): Slowly presses and grinds produce to extract juice.
- Filter Screen: Separates juice from pulp.
- Juice Outlet: Dispenses the extracted juice.
- Pulp Outlet: Expels the dry pulp.
- Food Pusher: Used to guide produce into the feed chute.
- Juice Container: Collects the fresh juice.
- Pulp Container: Collects the discarded pulp.
3. Setup and Assembly
Follow these steps to correctly assemble your juicer before first use:
- Place the motor base on a stable, flat, and dry surface.
- Align the juicing bowl with the motor base and twist until it locks securely into place.
- Insert the filter screen into the juicing bowl, ensuring it sits firmly.
- Insert the auger into the center of the filter screen, pushing down and twisting slightly until it is fully seated.
- Attach the top cover (feed chute assembly) onto the juicing bowl, aligning the marks and twisting clockwise until it clicks into the locked position.
- Place the juice container under the juice outlet and the pulp container under the pulp outlet.
- Ensure the power cord is accessible but not obstructing the juicer's operation.
4. Operating Instructions
Prepare your ingredients and begin juicing:
- Prepare Ingredients: Wash all fruits and vegetables thoroughly. For best results and to prevent clogging, cut harder produce (like carrots or pineapple) into smaller pieces that fit comfortably into the 4.1-inch feed chute. Softer fruits like oranges can often be inserted whole.
- Power On: Plug the juicer into a 110 Volts (AC) power outlet. Press the 'ON' button to start the juicer.
- Feed Produce: Slowly feed the prepared ingredients into the feed chute. Use the food pusher only when necessary to gently guide the produce down. Do not force ingredients into the chute.
- Juicing Process: The juicer will slowly masticate the produce, separating the juice into the juice container and the pulp into the pulp container.
- Continuous Juicing: You can continue adding ingredients until the juice or pulp containers are full, or you have finished juicing.
- Power Off: Once finished, press the 'OFF' button and unplug the juicer from the power outlet.
Note: For optimal juice extraction and to prevent motor strain, alternate between hard and soft ingredients if juicing a variety of produce.
5. Maintenance and Cleaning
Regular cleaning ensures the longevity and hygiene of your juicer. Always unplug the appliance before cleaning.
- Disassembly: Disassemble the juicer in reverse order of assembly: remove the top cover, then the auger, filter screen, and juicing bowl from the motor base.
- Rinse Immediately: Rinse all detachable parts under running water immediately after use. This prevents pulp from drying and sticking, making cleaning easier.
- Hand Wash: Hand wash all removable parts with warm, soapy water. Use the provided cleaning brush to remove any stubborn pulp residue from the filter screen, as this area can accumulate fine fibers.
- Motor Base: Wipe the motor base with a damp cloth. Never immerse the motor base in water.
- Drying: Allow all parts to air dry completely before reassembling or storing to prevent mold or odors.
Product Care Instructions: Hand Wash Only. While the product specifications state 'Is Dishwasher Safe: Yes', for optimal care and to prolong the life of your juicer's components, hand washing is recommended, especially for the filter screen and auger.
6. Troubleshooting
If you encounter issues with your juicer, refer to the common problems and solutions below:
- Juicer does not turn on:
- Ensure the power cord is securely plugged into a working outlet.
- Check that all parts are correctly assembled and locked into place. The juicer has safety features that prevent operation if not properly assembled.
- Low juice yield or wet pulp:
- Ensure produce is cut into appropriate sizes.
- Feed produce slowly and do not overload the juicer.
- Clean the filter screen thoroughly, as clogged mesh can reduce juice extraction efficiency.
- Juicer stops during operation:
- The juicer may have overheated. Unplug it and let it cool down for at least 30 minutes before restarting.
- Check for blockages in the feed chute or pulp outlet. Clear any obstructions.
- Excessive noise or vibration:
- Ensure the juicer is placed on a stable, flat surface.
- Verify that all components are correctly assembled and securely locked.
7. Specifications
| Brand | Canoly |
| Model Number | Canoly-002 |
| Color | Silver |
| Product Dimensions | 7.52"D x 17.4"W x 13.46"H |
| Maximum Power | 300 Watts |
| Voltage | 110 Volts (AC) |
| Blade Material | Stainless Steel |
| Capacity | 0.21 Quarts |
| Product Care Instructions | Hand Wash Only |
8. Warranty and Support
For detailed warranty information, please refer to the warranty card included in your product packaging or visit the official Canoly website. Keep your purchase receipt as proof of purchase for any warranty claims.
If you require further assistance or have questions not covered in this manual, please contact Canoly customer support through their official channels. No official seller videos are available for this product at this time.

