1. Introduction
The Walimex pro Stager 400 HSS Studio Flash is a powerful HSS-compatible studio flash designed for professional photographers. It offers 400 Ws flash power, continuously adjustable from 1/1 to 1/128. This manual provides essential information for the safe and efficient operation of your studio flash.
Key features include an integrated 2.4 GHz receiver with 16 channels and 5 groups for optional radio trigger control, HSS (High Speed Sync) mode up to 1/8000s, a user-friendly control panel, and a modern 25W LED modeling light. The high-quality aluminum finish and practical Bowens/walimex Pro bayonet mount enhance its design and versatility.

Figure 1.1: Walimex pro Stager 400 HSS Studio Flash with standard reflector. This image shows the Walimex pro Stager 400 HSS Studio Flash unit with its standard reflector mounted, ready for use.
2. Safety Instructions
- Read all instructions before use.
- Do not operate the flash unit in wet or damp conditions.
- Ensure the power supply matches the unit's requirements.
- Avoid direct eye exposure to the flash light, especially at full power.
- Do not attempt to disassemble or repair the unit yourself. Refer to qualified service personnel.
- Keep out of reach of children.
- Always disconnect the power cable before cleaning or when not in use.
- Ensure proper ventilation around the unit during operation to prevent overheating.
3. Package Contents
Please check that all items listed below are included in your package:
- 1x Walimex Pro Stager 400 HSS Studio Flash with LED modeling light
- 1x Standard Reflector
- 1x Power Cable (4 m)
- 1x Sync Cable (4 m)
- 1x Flash Tube
- 1x Protective Cap
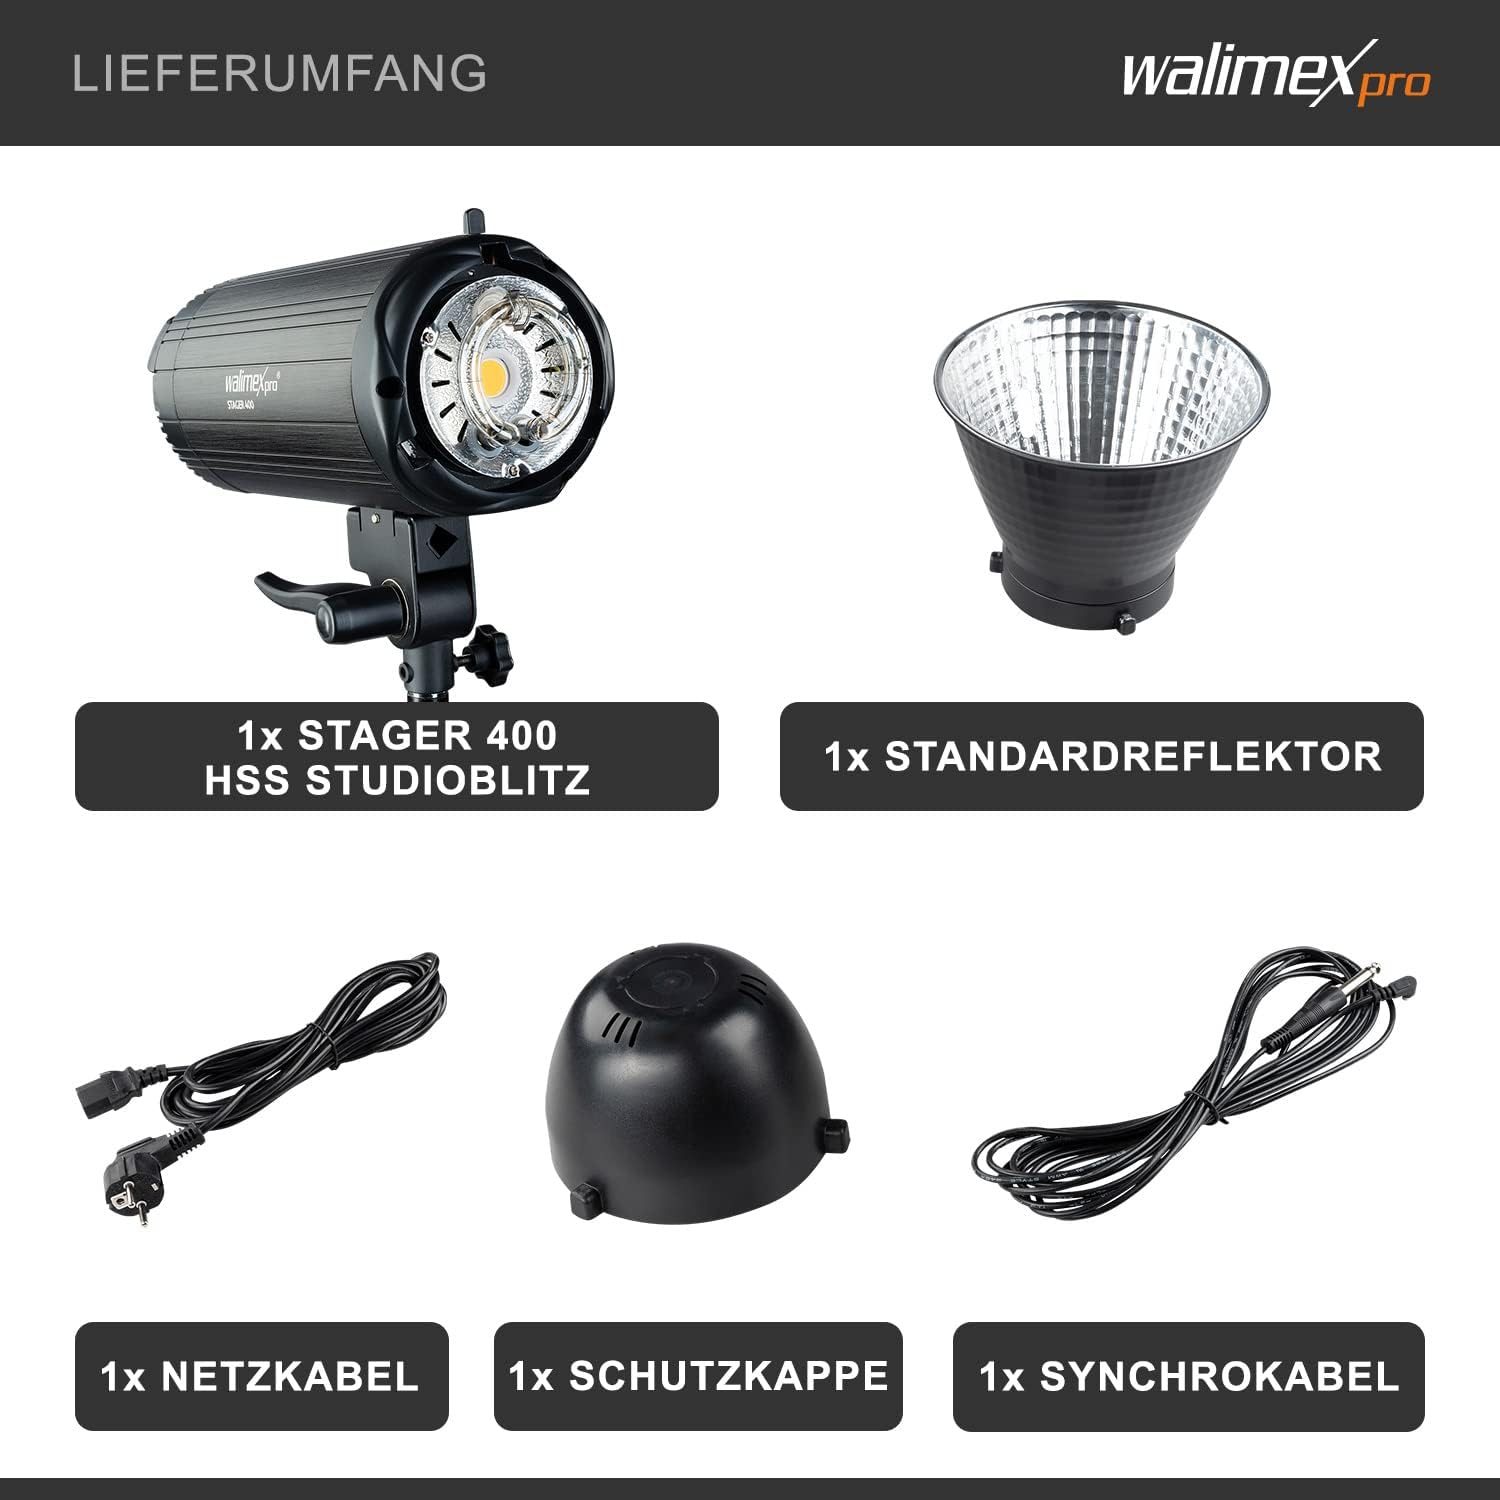
Figure 3.1: Package Contents. This image shows the complete package contents: the Stager 400 HSS studio flash, standard reflector, power cable, protective cap, and sync cable.
4. Setup
4.1 Attaching the Flash Tube
- Ensure the flash unit is powered off and unplugged.
- Carefully insert the flash tube into its socket on the front of the unit. Ensure it is seated firmly.
4.2 Mounting the Reflector/Light Shaper
- Align the standard reflector (or any compatible Bowens/Walimex Pro bayonet mount light shaper) with the bayonet mount on the front of the flash unit.
- Twist the reflector clockwise until it locks securely into place.
4.3 Mounting the Flash Unit
- Attach the flash unit to a sturdy light stand using the integrated mounting bracket.
- Tighten the locking knob on the bracket to secure the flash in position.
4.4 Connecting Power and Sync Cables
- Connect the power cable to the power input on the flash unit and then to a suitable power outlet.
- For wired synchronization, connect the sync cable to the sync port on the flash unit and to your camera or trigger.
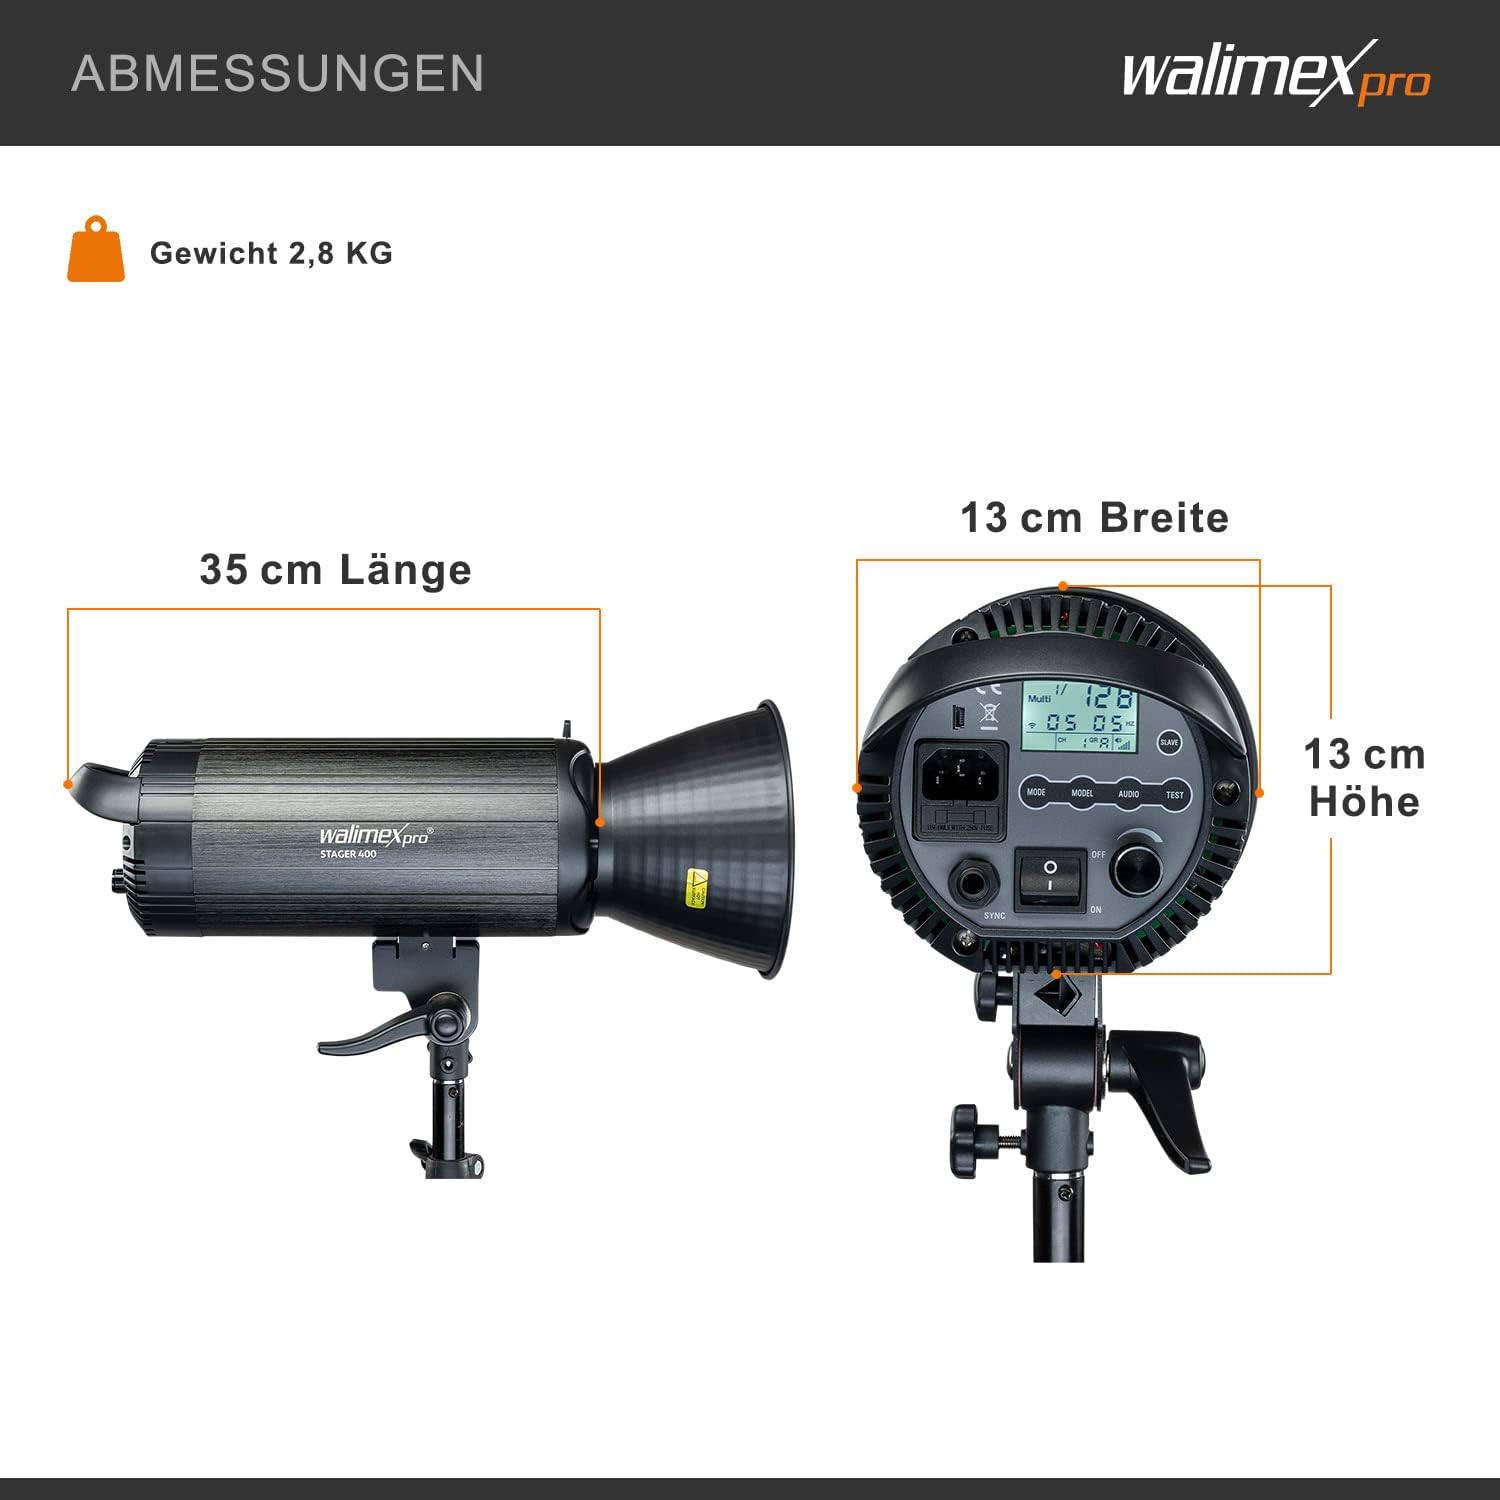
Figure 4.1: Product Dimensions. This diagram illustrates the length (35 cm), width (13 cm), and height (13 cm) of the Walimex pro Stager 400 HSS Studio Flash, along with its weight of 2.8 kg.
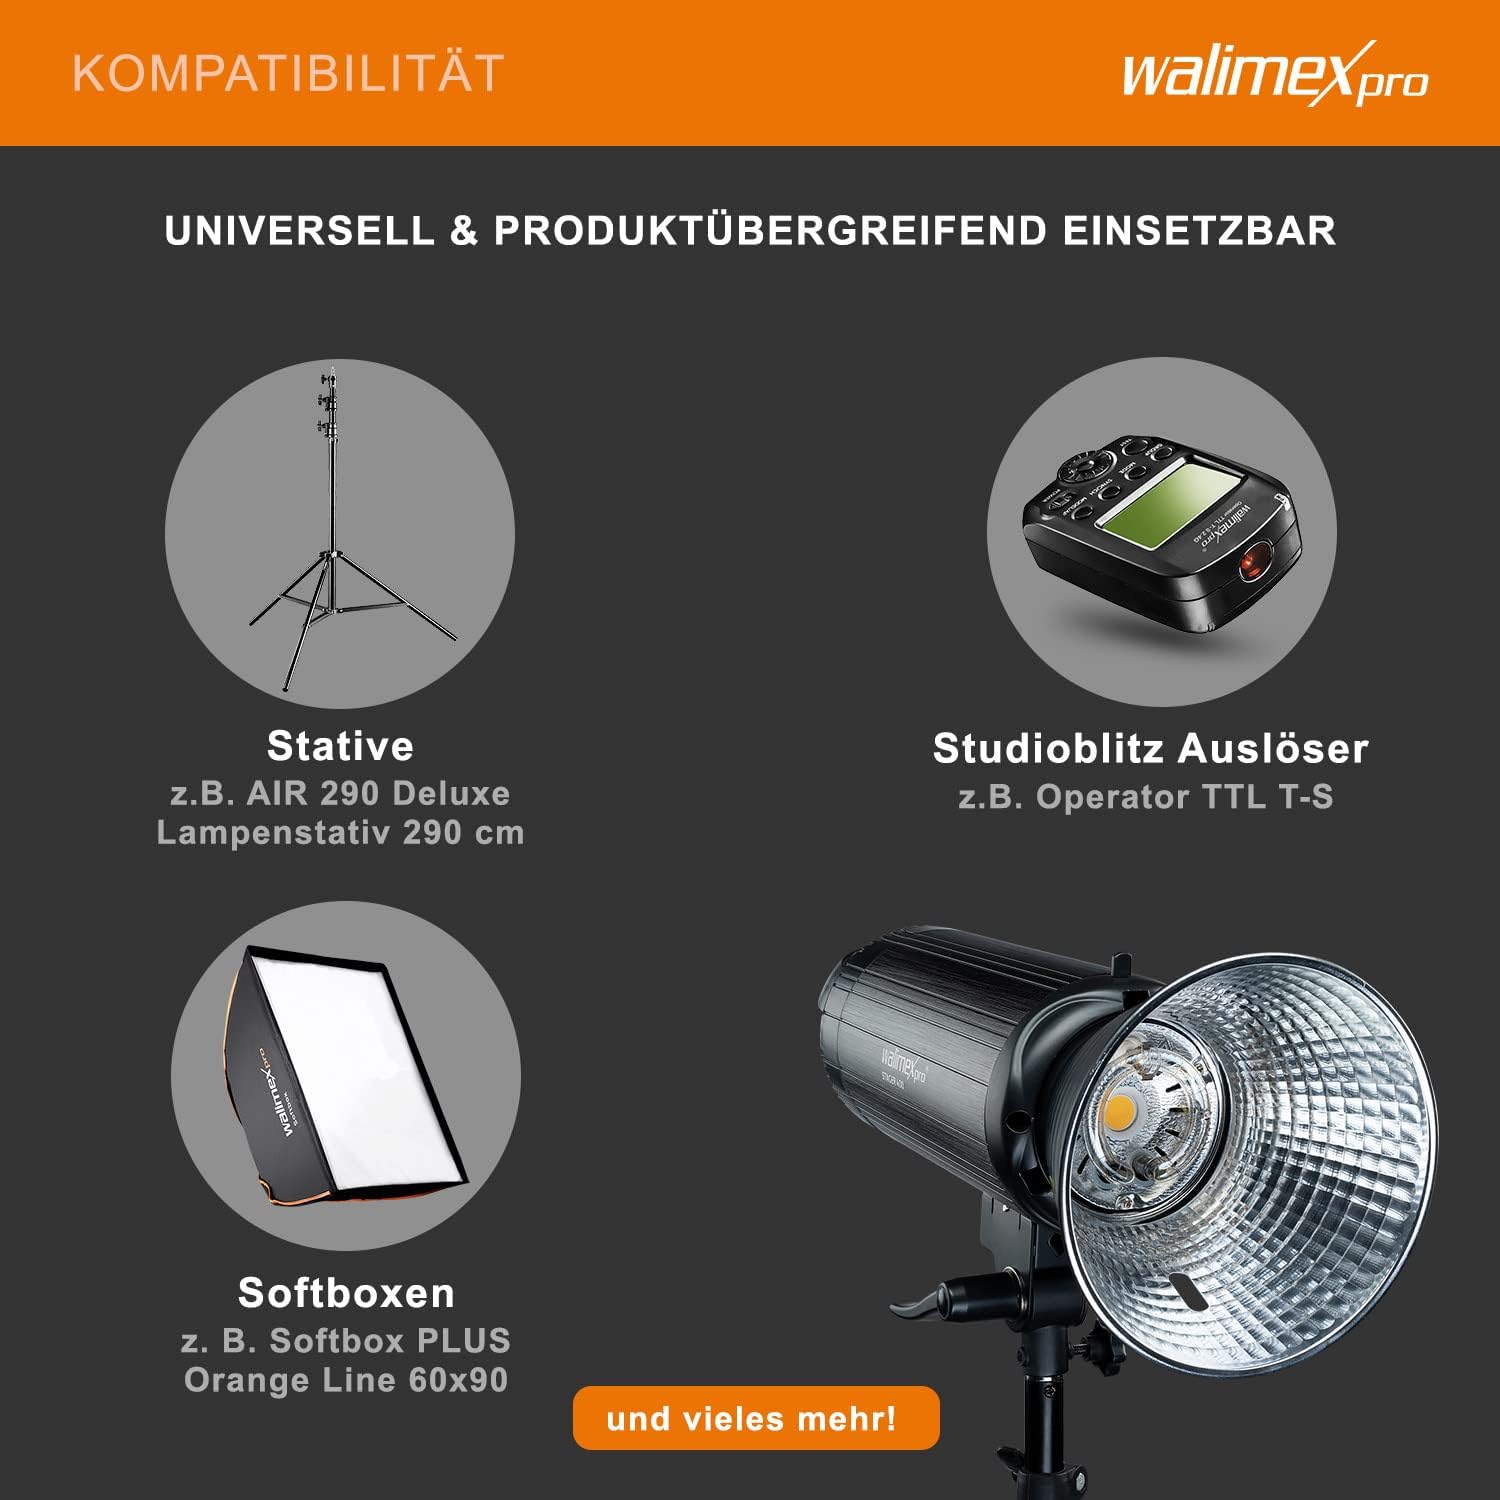
Figure 4.2: Compatibility. This image demonstrates the compatibility of the Walimex pro Stager 400 HSS Studio Flash with various accessories such as light stands (e.g., AIR 290 Deluxe), studio flash triggers (e.g., Operator TTL-S), and softboxes (e.g., Softbox PLUS Orange Line 60x90).
5. Operating Instructions
5.1 Powering On/Off
Locate the power switch on the rear panel of the flash unit. Flip the switch to the 'ON' position to power on the unit. Flip it to 'OFF' to power down.
5.2 Adjusting Flash Power
Use the control dial or buttons on the control panel to adjust the flash power. The Walimex pro Stager 400 HSS offers continuous adjustment from 1/1 (full power) down to 1/128 power.
5.3 Using the LED Modeling Light
The unit features a 25W LED modeling light. This light can be turned on or off via a dedicated button on the control panel to help visualize lighting effects before firing the flash.
5.4 High Speed Sync (HSS) Mode
The HSS mode allows for flash synchronization at shutter speeds up to 1/8000s, enabling you to freeze fast motion or use wide apertures in bright conditions. Activate HSS mode via the control panel or a compatible radio trigger.

Figure 5.1: HSS Mode Comparison. This image illustrates the effect of High Speed Sync (HSS) mode, showing how it effectively freezes fast motion (left, 'MIT HSS-MODUS') compared to standard flash synchronization (right, 'OHNE HSS-MODUS').
5.5 Radio Control
The integrated 2.4 GHz receiver supports 16 channels and 5 groups. To use radio control, you will need an optional Walimex Pro radio trigger. Set the flash unit and the trigger to the same channel and group for wireless operation.
5.6 First and Second Curtain Sync
The flash supports both first and second curtain sync modes, offering creative control over motion blur effects. Select the desired mode through the flash unit's menu or your camera's settings if supported.

Figure 5.2: Control Panel and LED Modeling Light. This image highlights the user-friendly control panel with display and buttons, along with the powerful 25W LED modeling light of the Walimex pro Stager 400 HSS Studio Flash.
6. Maintenance
6.1 Cleaning
- Always unplug the unit before cleaning.
- Use a soft, dry cloth to wipe the exterior of the flash unit.
- For stubborn dirt, a slightly damp cloth can be used, followed by a dry cloth.
- Do not use harsh chemicals, solvents, or abrasive cleaners.
- Keep the flash tube and modeling light free from dust and fingerprints. Use a lens cleaning cloth if necessary.
6.2 Storage
- Store the flash unit in a cool, dry place, away from direct sunlight and excessive humidity.
- Use the protective cap to cover the flash tube when not in use to prevent damage.
- If storing for extended periods, ensure the unit is unplugged.
7. Troubleshooting
| Problem | Possible Cause | Solution |
|---|---|---|
| Flash unit does not power on. | Power cable not connected or faulty; power outlet not working. | Check power cable connection. Try a different power outlet. |
| Flash does not fire. | Sync cable not connected; radio trigger not paired; flash in standby mode; flash tube faulty. | Check sync cable. Ensure radio trigger is paired and on correct channel/group. Wake flash from standby. Contact support if flash tube is suspected faulty. |
| Inconsistent flash output. | Low power setting; overheating; faulty flash tube. | Increase power setting. Allow unit to cool down. Contact support if issue persists. |
| HSS mode not working. | Camera or trigger not compatible/set to HSS; flash unit not in HSS mode. | Ensure camera and trigger support HSS and are correctly configured. Activate HSS on the flash unit. |
8. Specifications
| Feature | Specification |
|---|---|
| Brand | Walimex Pro |
| Model | 23358 (Stager 400 HSS) |
| Flash Power | 400 Ws |
| Power Adjustment | 1/1 to 1/128 (continuous) |
| Modeling Light | 25W LED |
| Recycling Time | Less than 0.3 seconds |
| Sync Speed | Up to 1/8000s (HSS) |
| Radio Control | Integrated 2.4 GHz receiver, 16 channels, 5 groups |
| Mounting Type | Hot shoe mount |
| Compatible Mounts | Bowens/Walimex Pro bayonet connector |
| Product Dimensions (L x W x H) | 56 x 29 x 22 cm |
| Product Weight | 4.22 kg |
| Color | Grey |
| Manufacturer | Walser GmbH |
9. Warranty and Support
For warranty information, please refer to the documentation provided with your purchase or contact your retailer. For technical support or service inquiries, please contact Walimex Pro customer service or visit their official website for further assistance.


