
1. Introduction
Thank you for choosing the Avhrit Cordless Pressure Washer. This manual provides essential information for the safe operation, maintenance, and troubleshooting of your new device. Please read this manual thoroughly before first use and keep it for future reference.
2. Safety Information
Always observe basic safety precautions when using electrical appliances to reduce the risk of fire, electric shock, and personal injury.
- Ensure the battery is fully charged before use.
- Do not operate the pressure washer in rain or wet conditions.
- Keep children and pets away from the operating area.
- Wear appropriate personal protective equipment, such as safety glasses.
- Never point the spray nozzle at people, animals, or electrical equipment.
- Disconnect the battery pack when not in use or before performing any maintenance.
3. Package Contents
Verify that all items are present in your package:
- Avhrit Cordless Pressure Washer Unit
- 2 x 21V 4000mAh Batteries
- Charger
- Long Lance with Adjustable Nozzle (0-180°)
- Foam Nozzle with Tank
- 6-in-1 Multi-function Nozzle
- Water Inlet Filter
- Water Hose (10.5 feet)
- Storage Case
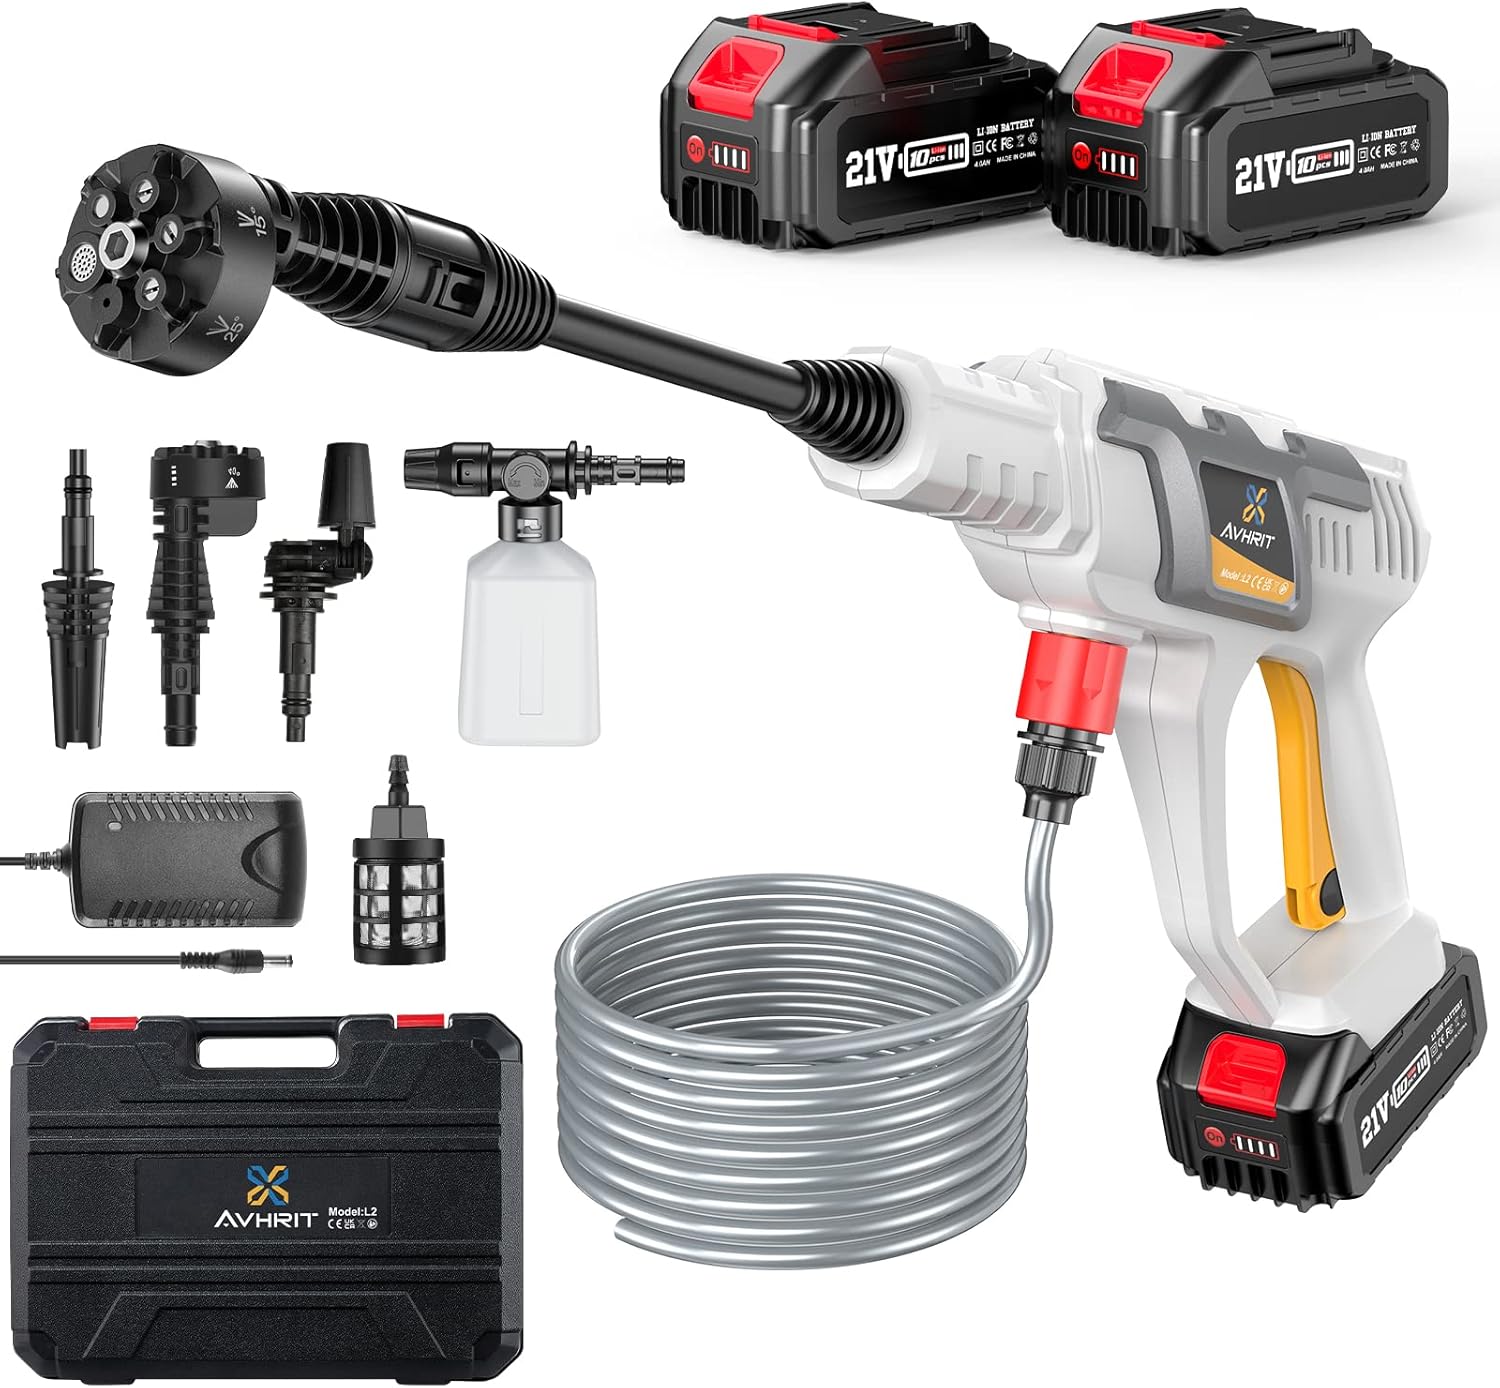
Image: Complete Avhrit Cordless Pressure Washer kit including the main unit, two batteries, charger, various nozzles, hose, and storage case.
4. Product Overview
Familiarize yourself with the main components of your pressure washer:
- Main Unit: Ergonomic handle, battery slot, water inlet, trigger, and safety lock.
- Battery: 21V 4000mAh Li-ion battery for cordless operation.
- Nozzles:
- 0-180° Nozzle: Adjustable spray pattern from 0° for stubborn dirt to 180° for wide area rinsing.
- Foam Nozzle: For applying soap or detergent with rich foam.
- 6-in-1 Nozzle: Combines 0°, 15°, 25°, 40°, Jet, and Shower modes for versatile cleaning.
- Water Hose: Connects the unit to a water source (bucket or tap).
- Water Inlet Filter: Prevents debris from entering the pump.

Image: Visual guide to the four main nozzle types: 0-180° adjustable nozzle, foam nozzle, universe nozzle (likely the 6-in-1), and a detailed view of the 6-in-1 nozzle's spray patterns.
5. Setup and Assembly
- Charge the Battery: Insert the battery into the charger and plug the charger into a power outlet. The indicator light will show charging status. Ensure the battery is fully charged before first use.
- Connect the Water Hose:
- Attach the water inlet filter to one end of the water hose.
- Connect the other end of the water hose to the water inlet on the pressure washer unit. Ensure a secure connection.
- Place the filtered end of the hose into a bucket of water or connect it to a garden tap.
- Attach the Lance and Nozzle:
- Connect the long lance to the front of the pressure washer unit until it clicks into place.
- Select the desired nozzle (0-180° adjustable, foam, or 6-in-1) and attach it to the end of the lance. Ensure it is firmly seated.
- Insert the Battery: Slide the charged battery pack into the battery slot on the bottom of the pressure washer unit until it locks securely.

Image: Step-by-step visual guide demonstrating the simple assembly of the pressure washer, including attaching the lance, hose, and battery.
6. Operating Instructions
- Prime the Pump: Before starting, ensure the water hose is fully submerged in water (if using a bucket) or the tap is open. Squeeze the trigger for a few seconds to allow water to flow through and remove any air from the system.
- Start the Unit: Press the power button on the unit. The unit may have a safety lock; ensure it is disengaged before pulling the trigger.
- Adjust Spray Pattern:
- For the 0-180° nozzle, rotate the nozzle head to adjust the spray angle.
- For the 6-in-1 nozzle, rotate the nozzle head to select the desired spray pattern (0°, 15°, 25°, 40°, Jet, Shower).
- Using the Foam Nozzle:
- Fill the foam tank with appropriate car wash soap or detergent.
- Attach the foam nozzle to the lance.
- Operate the unit to apply a rich foam layer to the surface.
- Cleaning: Hold the pressure washer firmly and direct the spray at the surface to be cleaned. Maintain a safe distance to avoid damage to the surface.
- Stopping the Unit: Release the trigger. For prolonged breaks, engage the safety lock and remove the battery.

Image: A man demonstrating the use of the Avhrit pressure washer to clean a car, highlighting its effectiveness for vehicle washing.

Image: Collage showing the versatility of the pressure washer for cleaning a wooden bench, ground, motorcycles, and cars.
7. Maintenance and Storage
- After Each Use:
- Remove the battery pack.
- Disconnect the water hose and drain any remaining water from the unit and hose.
- Clean the exterior of the unit with a damp cloth. Do not use harsh chemicals.
- Clean the nozzles and water inlet filter to prevent clogging.
- Battery Care:
- Store batteries in a cool, dry place away from direct sunlight and extreme temperatures.
- Charge batteries fully before long-term storage.
- Storage: Store the pressure washer and all accessories in the provided storage case in a dry, frost-free environment.
8. Troubleshooting
| Problem | Possible Cause | Solution |
|---|---|---|
| Unit does not start. | Battery not charged or not inserted correctly. Safety lock engaged. | Charge battery fully. Reinsert battery securely. Disengage safety lock. |
| No water flow or low pressure. | Water source empty. Hose kinked. Water inlet filter clogged. Air in the system. | Ensure sufficient water. Straighten hose. Clean filter. Prime the pump by squeezing trigger until water flows. |
| Foam nozzle not producing foam. | No soap in tank. Soap too thick/thin. Nozzle clogged. | Fill tank with soap. Adjust soap consistency. Clean foam nozzle. |
9. Specifications
| Feature | Detail |
|---|---|
| Model Number | XXLPW301-95DE |
| Power Source | Battery Powered (21V) |
| Battery Capacity | 2 x 4000mAh Li-ion |
| Product Dimensions (L x W x H) | 44 x 14.5 x 33 cm |
| Item Weight | 4 Kilograms |
| Hose Length | 10.5 Feet |
| Color | White |
10. Warranty and Support
For warranty information and customer support, please refer to the documentation included with your purchase or visit the official Avhrit website. Keep your purchase receipt as proof of purchase for any warranty claims.
Spare parts availability information is not provided in this manual. Please contact Avhrit customer service for inquiries regarding spare parts.