
CNCEST QCG23R6SNDYC8+QCG23R8DNDYC8
CNCEST 12V RV Truck Bus Universal Electric Air Conditioner Instruction Manual
Model: QCG23R6SNDYC8+QCG23R8DNDYC8
1. Introduction
This manual provides comprehensive instructions for the installation, operation, and maintenance of your CNCEST 12V RV Truck Bus Universal Electric Air Conditioner. Please read this manual thoroughly before installation and use to ensure proper function and safety. This unit is designed to provide efficient cooling for vehicle cabins up to 6 square meters (64 square feet).
2. Safety Information
WARNING: Failure to follow these safety instructions could result in fire, electric shock, or injury.
- Ensure the power supply matches the unit's voltage (12V DC).
- Installation should be performed by qualified personnel or individuals with strong technical aptitude.
- Do not operate the unit with damaged wiring or components.
- Refrigerant (R134A) is not included and must be handled by certified professionals.
- Keep hands and objects clear of moving parts, especially the fan.
- Ensure proper ventilation during operation.
- Disconnect power before performing any maintenance or repairs.
3. Package Contents
Verify that all items listed below are present in your package:
- 1 x Air Conditioner Kit (Outdoor and Indoor Units)
- 1 x Remote Control
- Refrigerant Hoses
- Power Cord
- Mounting Hardware (screws, nuts, damping pads, sleeves)
- Drainage Pipe
- Expansion Valve
- Insulation Tape
- Mounting Plates

This image presents a comprehensive view of all components included in the CNCEST 12V Air Conditioner kit, featuring the outdoor unit, indoor unit, refrigerant lines, wiring, remote control, and mounting hardware.
4. Specifications
| Feature | Specification |
|---|---|
| Applicable Models | Car (Cab Within 6m² / 64ft²) |
| Voltage | 12V |
| Rated Power | 800W |
| Maximum Current | 60A |
| Refrigerating Capacity | 2000W / 6800BTU |
| Refrigerant | R134A (400-450g / 0.88-0.99lbs) (Not Included) |
| Oil | 90ml-120ml / 0.02-0.03gal POE68 |
| Speed Range | 1000-3000rpm |
| Outdoor Unit Size | 49cm x 21cm x 66cm (19.3" x 8.3" x 26") |
| Indoor Unit Size | 49cm x 33cm (19.3" x 13") |
| Material | Copper, Aluminium, ABS |
| Noise Level | 20 dB |

This image shows the outdoor unit of the CNCEST 12V Air Conditioner with its key dimensions: 49cm (19.3 inches) width, 21cm (8.3 inches) depth, and 66cm (26 inches) height.
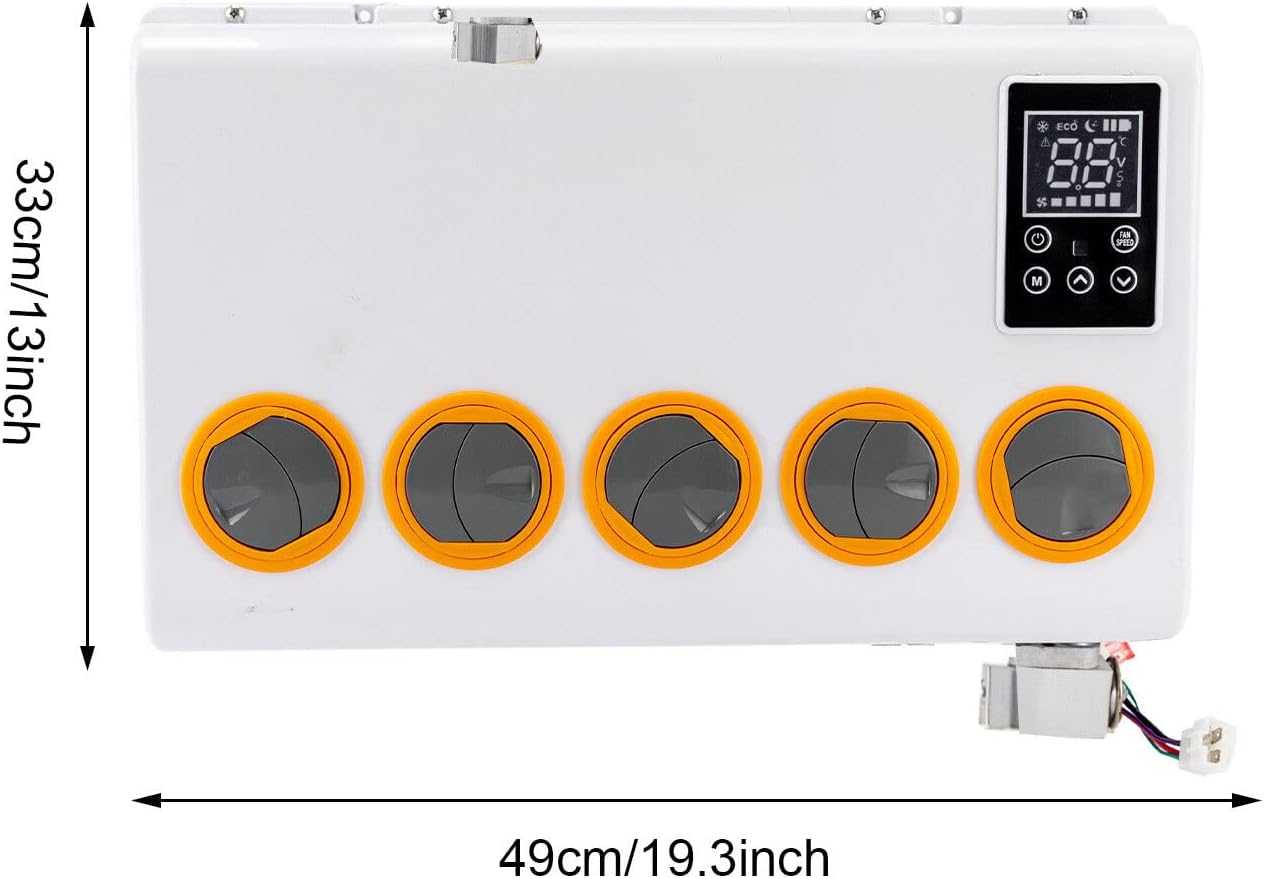
This image displays the indoor unit of the CNCEST 12V Air Conditioner with its dimensions: 49cm (19.3 inches) width and 33cm (13 inches) height.
5. Setup and Installation
The installation process requires careful attention to detail and basic mechanical skills. If you are unsure, seek professional assistance.
- Prepare the Outdoor Unit: Remove the outer casing of the outdoor unit.
- Select Installation Position: Choose a suitable location for the outdoor unit on the exterior of the cab. Mark five points for drilling.
- Drill Holes: Using an 8mm (0.3 inch) drill, create holes at the marked positions.
- Install Rivet Nuts: Use a pull riveter to secure the pull rivet nuts at each drilled hole.
- Attach Damping Pads and Sleeves: Fix the damping pads and sleeves to the marked points on the external machine.
- Mount Outdoor Unit: Securely fix the outdoor unit to the prepared mounting points.
- Install Indoor Unit Expansion Valve: Install the expansion valve onto the indoor unit.
- Fix Indoor Unit Mounting Plate: Secure the mounting plate for the indoor unit inside the cab.
- Mount Indoor Unit: Fix the indoor unit onto its mounting plate.
- Connect High-Pressure Pipe: Connect the 3/8-inch high-pressure pipe to the condenser on the outdoor unit.
- Connect Wiring: Connect the internal and external machine wires, and the main power cord.
- Connect Refrigerant Pipes and Evaporation Box: Connect the internal and external refrigerant pipes and fix the evaporation box.
- Install Drainage Pipe: Attach the drainage pipe to ensure proper water removal.
- Vacuum System: Vacuum the entire system for 15-20 minutes to remove any moisture and air.
- Refill Refrigerant: Refill the system with pure R134A refrigerant, approximately 400-450g (0.88-0.99lbs). This step requires specialized equipment and expertise.
- Connect Power to Battery: Connect the main power cord directly to the vehicle's battery.
- Install Outdoor Casing: Reinstall the outer casing of the outdoor unit.
- Secure Connections: Use winding tape to secure and insulate the internal and external machine connecting pipes and wires.
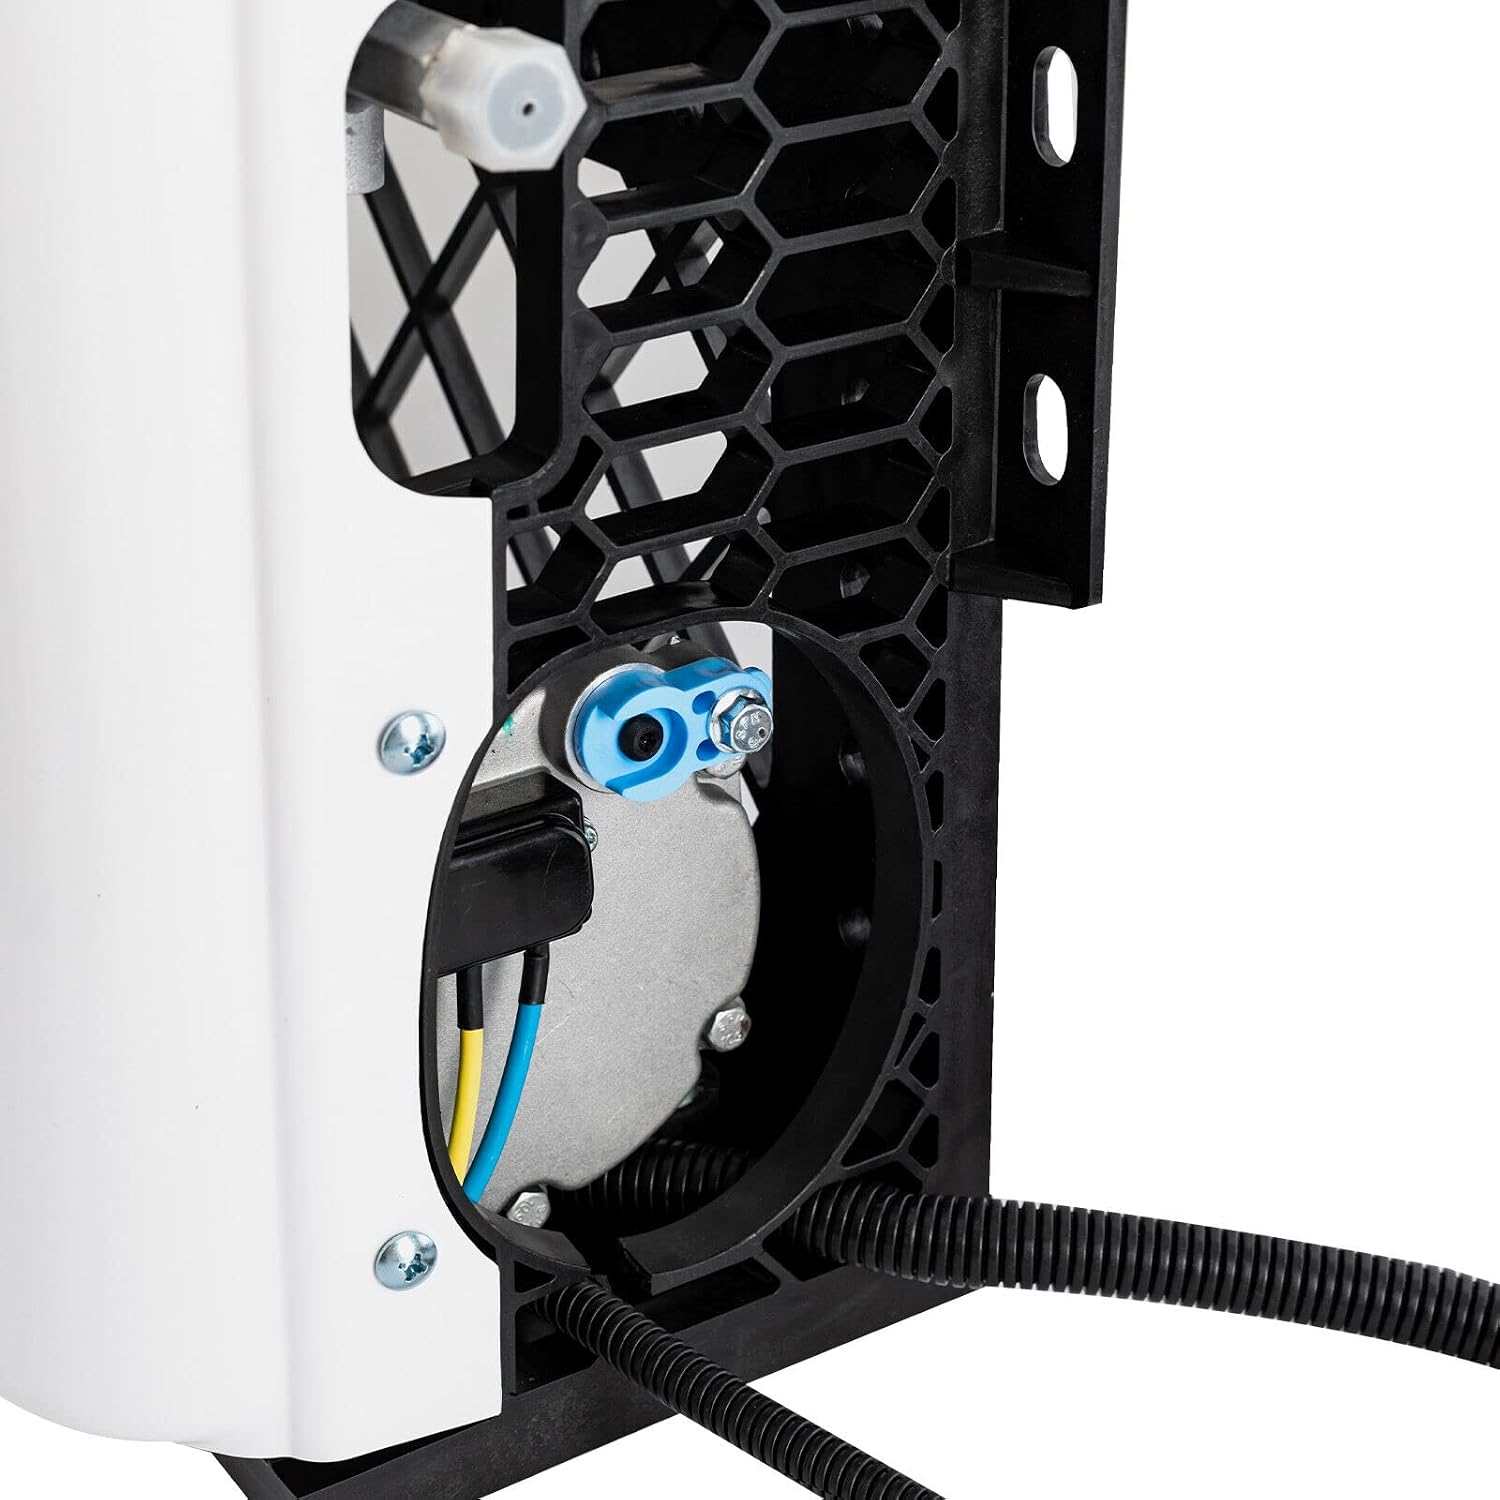
A detailed close-up of the connection point on the outdoor unit, showing the refrigerant line port and associated wiring, crucial for proper installation.

A visual representation of the complete CNCEST 12V Air Conditioner kit, including both indoor and outdoor units, hoses, and accessories. Surrounding panels illustrate its use in various vehicle environments such as truck cabs and RVs.
6. Operating Instructions
The CNCEST 12V Air Conditioner can be operated via the control panel on the indoor unit or the included remote control.
6.1 Control Panel
- Power Button: Press to turn the unit ON or OFF.
- Mode Button: Cycle through available operating modes (e.g., Cooling, Fan).
- Temperature Adjustment: Use the up/down arrows to set the desired temperature.
- Fan Speed: Adjust fan speed (Low, Medium, High).
- Display: Shows current temperature, mode, and other indicators.
6.2 Remote Control
The remote control provides convenient access to all functions from a distance. Ensure the remote has working batteries and is pointed towards the indoor unit's receiver.
- Functions mirror those on the control panel.
- Refer to the remote control's specific button layout for detailed usage.

This image features the indoor unit of the CNCEST 12V Air Conditioner along with a selection of accessories, including mounting plates, insulation, tape, and the remote control.
7. Maintenance
Regular maintenance ensures optimal performance and longevity of your air conditioner.
- Clean Air Filters: Periodically clean or replace the air filters in the indoor unit to maintain airflow and cooling efficiency. Frequency depends on usage and environment.
- Inspect Outdoor Unit: Keep the outdoor unit free from debris, leaves, and dirt. Ensure the fan blades are clear.
- Check Connections: Annually inspect all electrical and refrigerant connections for tightness and signs of wear.
- Drainage: Ensure the drainage pipe is clear and free-flowing to prevent water buildup.
- Refrigerant Level: If cooling performance decreases, have a qualified technician check the refrigerant level.
8. Troubleshooting
Before contacting customer support, review the following common issues and solutions:
| Problem | Possible Cause | Solution |
|---|---|---|
| Unit does not turn on | No power, loose connection, blown fuse | Check battery connection, vehicle fuse box, ensure power cord is securely connected. |
| Insufficient cooling | Dirty air filter, low refrigerant, blocked outdoor unit, cabin too large | Clean air filter, check outdoor unit for obstructions, have refrigerant level checked by a professional. Ensure cabin size is within specifications. |
| Unusual noise | Loose parts, fan obstruction | Inspect for loose components, clear any obstructions from fan blades. |
| Water leakage | Blocked drainage pipe, improper installation | Clear drainage pipe, verify proper slope and connection of drainage system. |
9. Warranty and Customer Support
9.1 Warranty Information
For specific warranty terms and conditions, please refer to the documentation provided at the time of purchase or contact your retailer. Keep your proof of purchase for warranty claims.
9.2 Customer Support
If you encounter issues not covered in this manual or require further assistance, please contact CNCEST customer support through your purchase platform or visit the official CNCEST store for contact information.
CNCEST Store: Visit CNCEST Store on Amazon
Related documentsQCG23R6SNDYC8+QCG23R8DNDYC8

Ask a question about this manual
Ask about setup, troubleshooting, compatibility, parts, safety, or missing instructions. Manuals+ will review the question and use this page’s manual context to help answer it.