1. Safety Instructions
Read all instructions carefully before using the appliance. Keep this manual for future reference.
- Do not attempt to operate this oven with the door open as this can result in harmful exposure to microwave energy.
- Do not place any object between the oven front face and the door or allow soil or cleaner residue to accumulate on sealing surfaces.
- Do not operate the oven if it is damaged. It is particularly important that the oven door closes properly and that there is no damage to the: (1) door (bent), (2) hinges and latches (broken or loosened), (3) door seals and sealing surfaces.
- The oven should not be adjusted or repaired by anyone except properly qualified service personnel.
- Ensure the appliance is properly grounded.
- Do not use corrosive chemicals or vapors in this appliance.
- Do not heat liquids or other foods in sealed containers since they are liable to explode.
- Always use oven mitts when handling hot items from the microwave.
- Supervise children closely when the microwave is in use.
2. Product Overview
The Sharp YC-MG252AE-C is a 25-liter countertop microwave oven with a 900W microwave power and an integrated grill function. It features a digital display and various cooking programs.
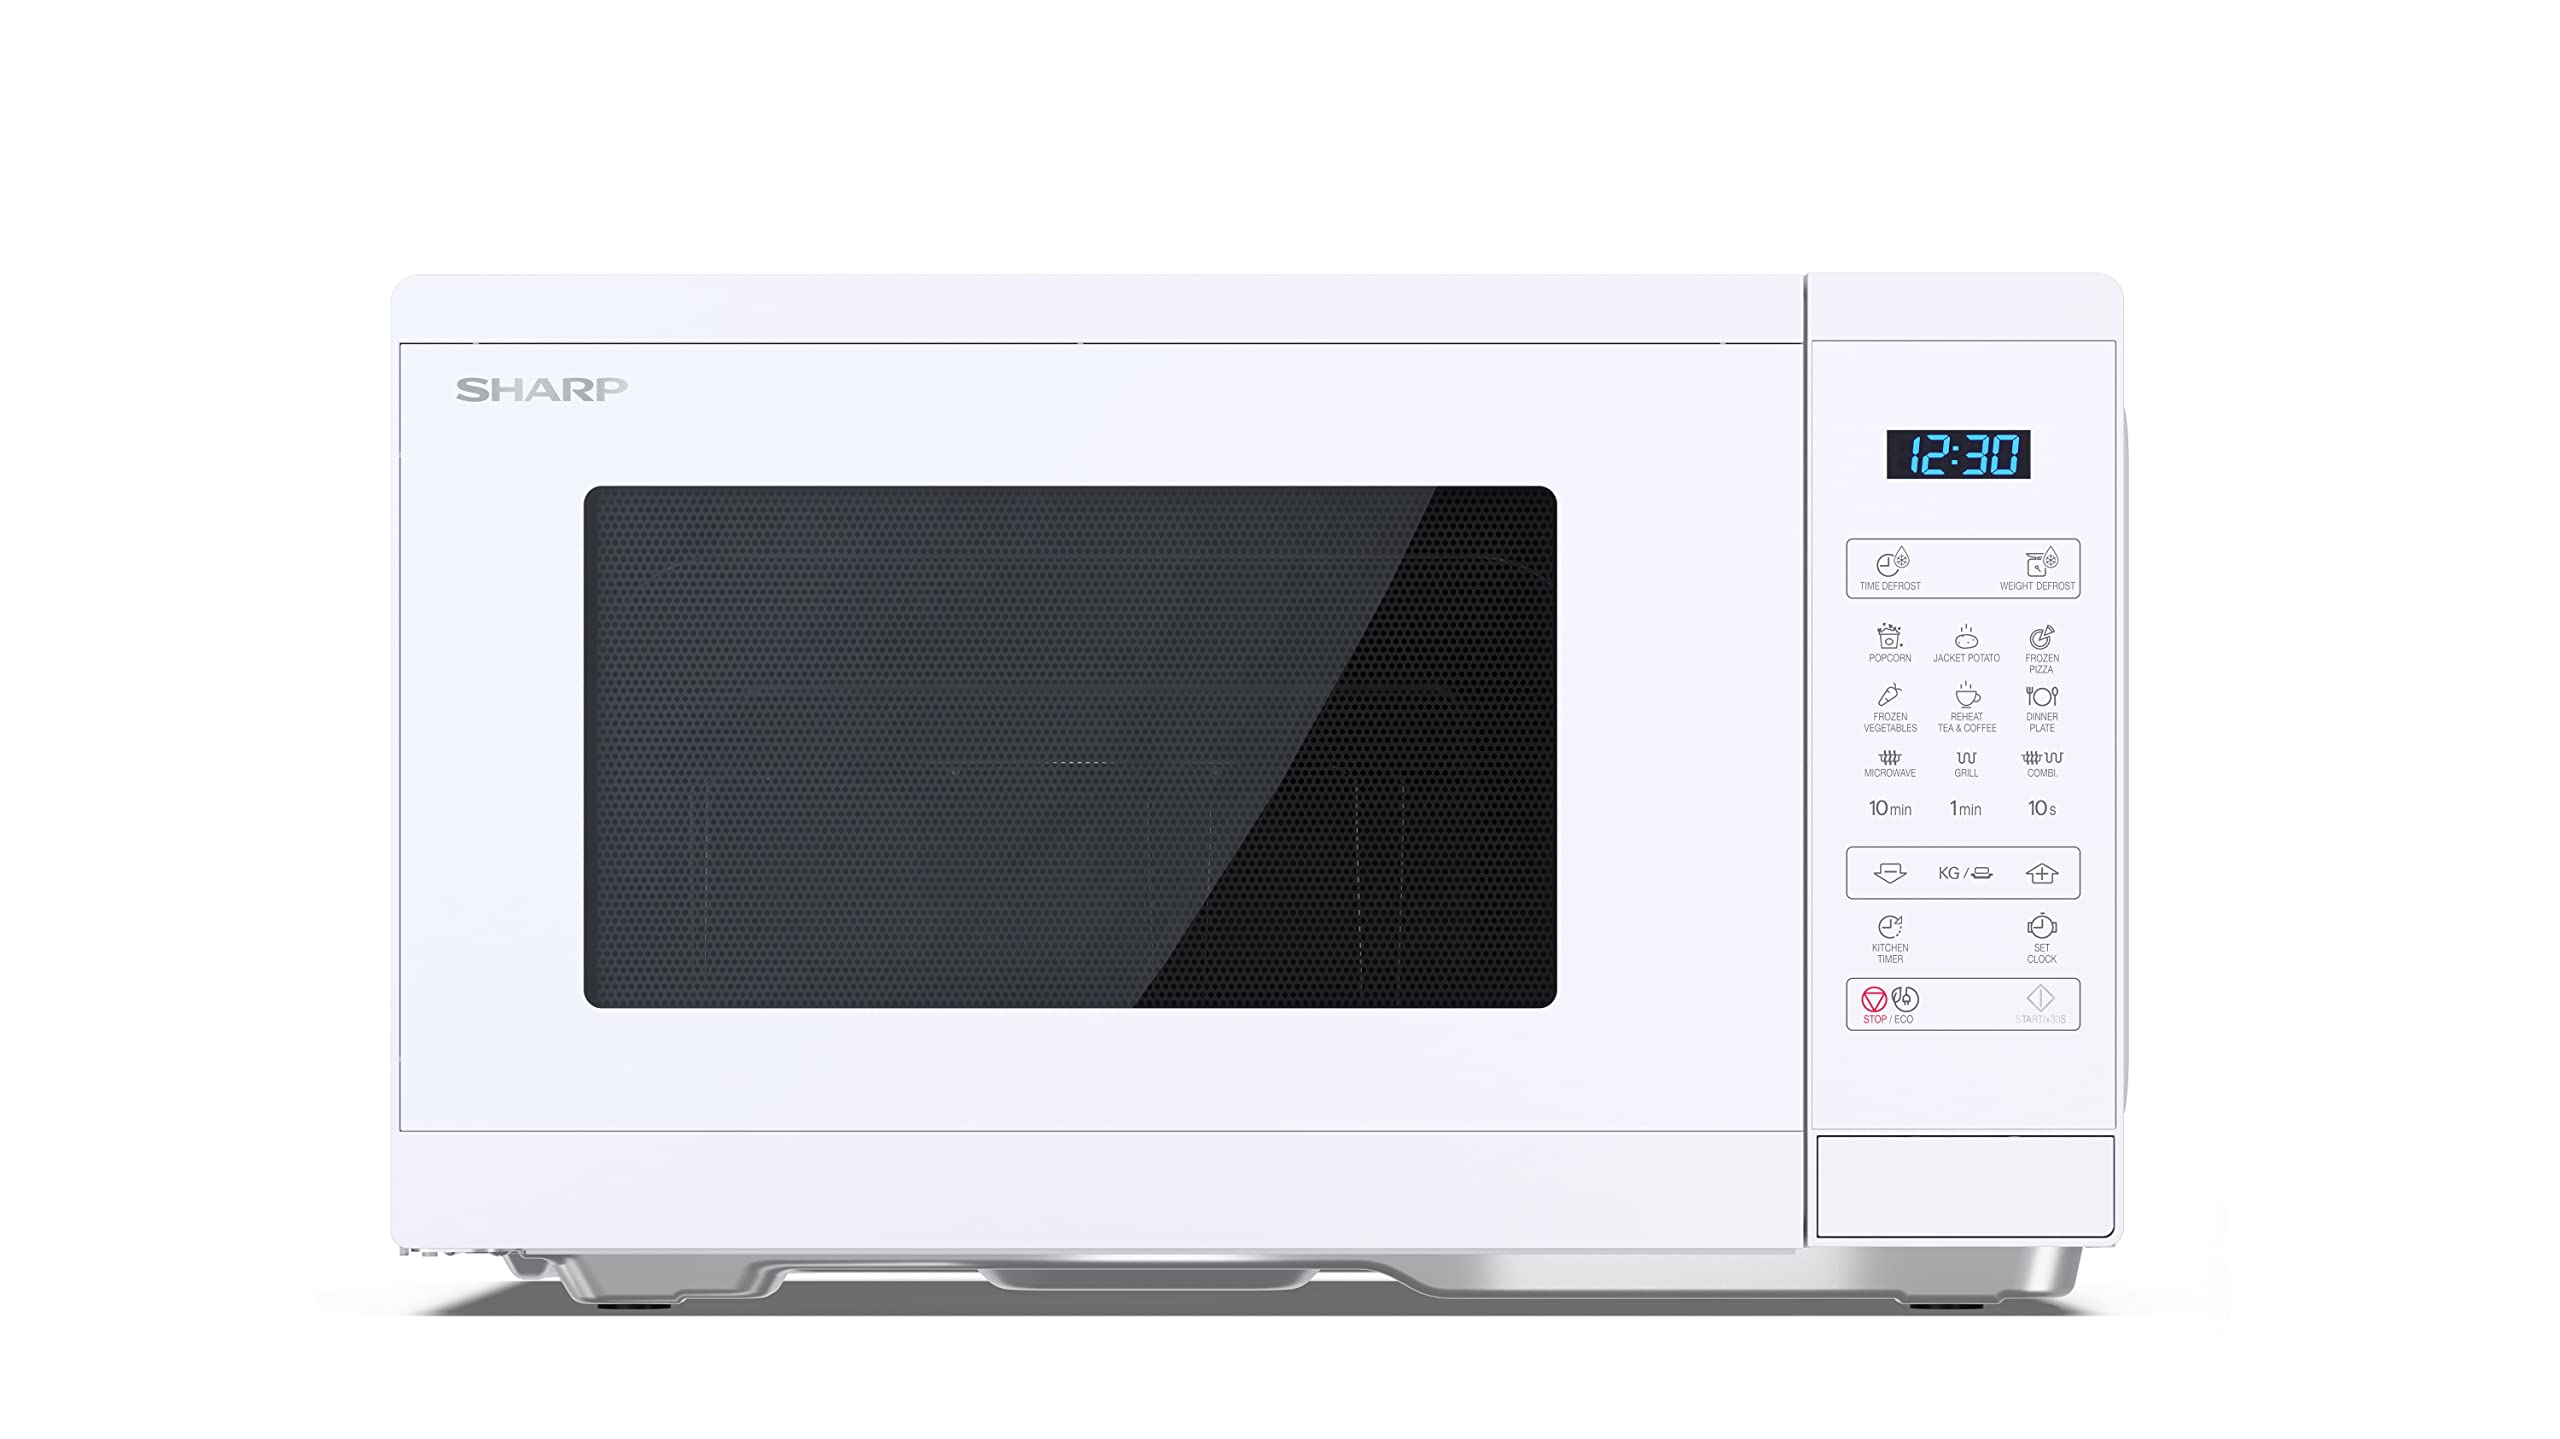
Figure 2.1: Front view of the Sharp YC-MG252AE-C microwave oven, showing the control panel, digital display, and door.
Components:
- Oven Cavity: The interior space where food is cooked.
- Turntable: A glass tray that rotates to ensure even cooking.
- Turntable Support: A ring that supports the glass turntable.
- Control Panel: Contains buttons and a digital display for setting cooking functions.
- Door: Equipped with a safety lock system.
- Grill Rack: A metal rack used for grilling functions.

Figure 2.2: Interior view of the Sharp YC-MG252AE-C microwave oven, showing the glass turntable and the included metal grill rack.
3. Setup
3.1 Unpacking
- Remove all packaging materials from inside and outside the oven.
- Check the oven for any damage, such as a misaligned or bent door, damaged door seals, or dents in the cavity. Do not operate the oven if it is damaged.
- Retain the packaging materials for future transport or disposal.
3.2 Placement
- Place the microwave oven on a flat, stable surface that can support its weight and the heaviest food item likely to be cooked in it.
- Ensure adequate ventilation: leave a minimum of 20 cm (8 inches) of space above the oven, 10 cm (4 inches) at the rear, and 5 cm (2 inches) on each side.
- Do not block any ventilation openings.
- Keep the oven away from heat sources and strong magnetic fields.
- Do not place the oven in a cabinet unless specifically designed for built-in installation (this model is a countertop unit).
3.3 Electrical Connection
- Plug the power cord into a standard 230V, 50Hz grounded electrical outlet.
- Do not use extension cords or adapters.
- Ensure the electrical circuit is adequately rated for the oven's power consumption (900W).
3.4 First Use
- Before first use, clean the interior of the oven with a damp cloth.
- Place the turntable support and glass turntable inside the oven cavity.
- Set the clock (refer to the "Setting the Clock" section in Operation).
4. Operation
The control panel features a digital display and various buttons for different functions. Familiarize yourself with the layout.

Figure 4.1: Close-up of the control panel on the Sharp YC-MG252AE-C, showing the digital display and function buttons.
4.1 Setting the Clock
- Press the "CLOCK" button once. The hour digits will flash.
- Use the "10min", "1min", "10s" buttons to set the hour.
- Press "CLOCK" again. The minute digits will flash.
- Use the "10min", "1min", "10s" buttons to set the minutes.
- Press "CLOCK" a third time to confirm the setting.
4.2 Microwave Cooking
- Place food in a microwave-safe container on the turntable.
- Close the door securely.
- Press the "MICROWAVE" button repeatedly to select the desired power level (e.g., 100% for full power).
- Use the "10min", "1min", "10s" buttons to set the cooking time.
- Press the "START/+30s" button to begin cooking.
4.3 Grill Cooking
- Place food on the grill rack, then place the rack on the turntable.
- Close the door securely.
- Press the "GRILL" button.
- Use the "10min", "1min", "10s" buttons to set the grilling time.
- Press the "START/+30s" button to begin grilling.
4.4 Combination Cooking (Microwave + Grill)
- Place food in a suitable container on the turntable or grill rack.
- Close the door securely.
- Press the "COMBI" button repeatedly to select the desired combination mode (e.g., C-1 for 55% microwave, 45% grill; C-2 for 36% microwave, 64% grill).
- Use the "10min", "1min", "10s" buttons to set the cooking time.
- Press the "START/+30s" button to begin.
4.5 Defrosting
The oven offers two defrosting methods: Time Defrost and Weight Defrost.
Time Defrost
- Press the "TIME DEFROST" button.
- Use the "10min", "1min", "10s" buttons to set the defrosting time.
- Press "START/+30s" to begin.
Weight Defrost
- Press the "WEIGHT DEFROST" button.
- Use the "KG / g" button to select the weight (e.g., 0.2 kg to 2.0 kg).
- Press "START/+30s" to begin.
4.6 Auto Cook Programs
The oven includes several pre-set auto cook programs for convenience. Refer to the icons on the control panel for specific programs like Popcorn, Jacket Potato, Frozen Pizza, Frozen Vegetables, Tea & Coffee, and Dinner Plate.
- Press the button corresponding to the desired auto cook program (e.g., "POPCORN").
- For some programs, you may need to press the button repeatedly to select the weight or quantity.
- Press "START/+30s" to begin.
4.7 Kitchen Timer
- Press the "KITCHEN TIMER" button.
- Use the "10min", "1min", "10s" buttons to set the desired time.
- Press "START/+30s" to start the timer. This function does not activate the microwave.
4.8 Stop/Cancel
- Press the "STOP/CLEAR" button once to pause cooking.
- Press it twice to cancel the current program and clear the settings.
5. Maintenance
5.1 Cleaning the Oven
- Always unplug the oven from the power outlet before cleaning.
- Clean the oven cavity after every use with a damp cloth to prevent food particles from drying and sticking.
- For stubborn stains, use a mild detergent or a microwave-safe cleaner. Do not use abrasive cleaners or scouring pads.
- The glass turntable and turntable support can be washed in warm soapy water or in a dishwasher.
- Wipe the exterior surfaces with a damp cloth. Avoid getting water into the ventilation openings.
- Clean the door seals and sealing surfaces regularly to ensure proper door closure.
5.2 Replacing the Oven Light
The oven light is a non-user-replaceable part. If the oven light fails, contact qualified service personnel for replacement.
6. Troubleshooting
| Problem | Possible Cause | Solution |
|---|---|---|
| Oven does not start |
|
|
| Food not heating |
|
|
| Turntable not rotating |
|
|
| Sparks or arcing inside oven |
|
|
If the problem persists after trying these solutions, contact qualified service personnel.
7. Specifications
| Model Number | YC-MG252AE-C |
| Type | Countertop Microwave Oven with Grill |
| Capacity | 25 Liters |
| Microwave Power Output | 900 Watts |
| Voltage | 230 Volts |
| Frequency | 50 Hz |
| Material | Stainless Steel, Glass |
| Dimensions (L x W x H) | 34.5 x 47.2 x 28 cm (approx. 13.6 x 18.6 x 11 inches) |
| Weight | 13.87 kg (approx. 30.6 lbs) |
| Features | Defrost, Timer, Turntable, Programmable |

Figure 7.1: Diagram showing the dimensions of the Sharp YC-MG252AE-C microwave oven.
8. Warranty & Support
For warranty information and customer support, please refer to the warranty card included with your product or visit the official Sharp website. Keep your proof of purchase for any warranty claims.
In case of technical issues or questions not covered in this manual, please contact Sharp customer service.