
1. Introduction
This manual provides essential information for the safe and efficient operation of your Phezer 1inch/25.4mm Automatic Online Inkjet Coding Machine, Model PW2-1. It covers product features, setup procedures, operational guidelines, maintenance, and troubleshooting to ensure optimal performance and longevity of the device. Please read this manual thoroughly before operating the machine and retain it for future reference.
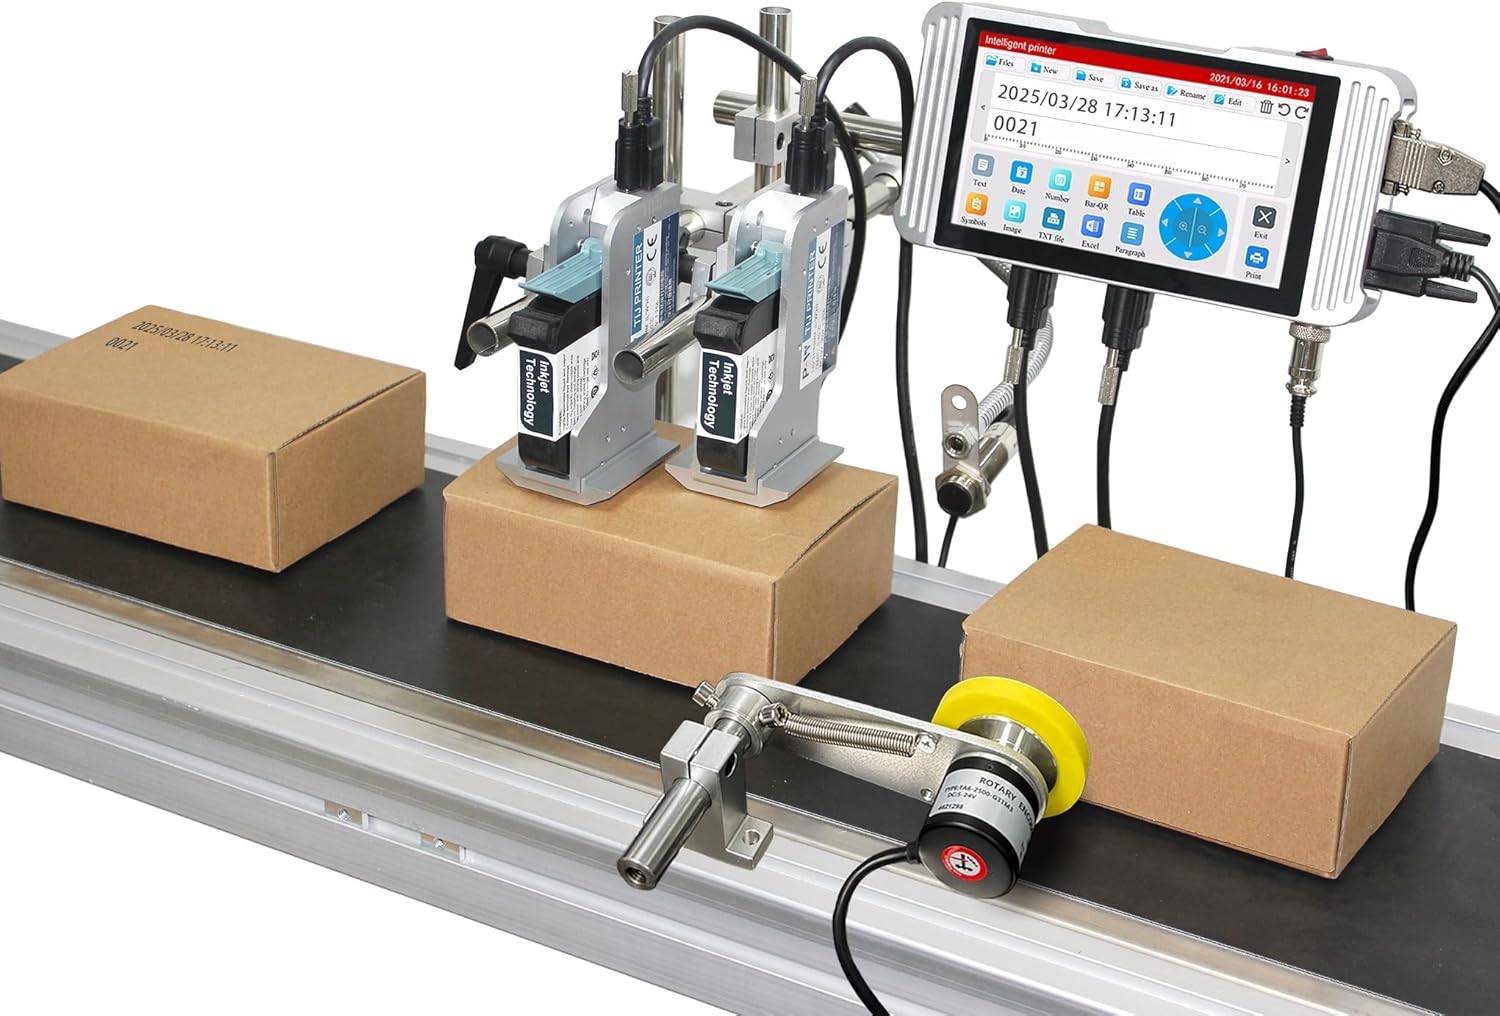
Image: The Phezer Automatic Online Inkjet Coding Machine, Model PW2-1, set up on a production line with two print heads actively marking packages.
2. Safety Information
Always adhere to the following safety precautions to prevent injury and damage to the equipment:
- Ensure the machine is properly grounded before operation.
- Do not operate the machine with wet hands or in damp environments.
- Use only original Phezer ink cartridges to ensure compatibility and prevent damage.
- Keep hands and loose clothing away from moving parts during operation.
- Disconnect power before performing any maintenance or cleaning.
- Avoid direct contact with ink. In case of contact, wash thoroughly with soap and water.
- Ensure adequate ventilation in the operating area.
3. Package Contents
Verify that all components listed below are included in your package:
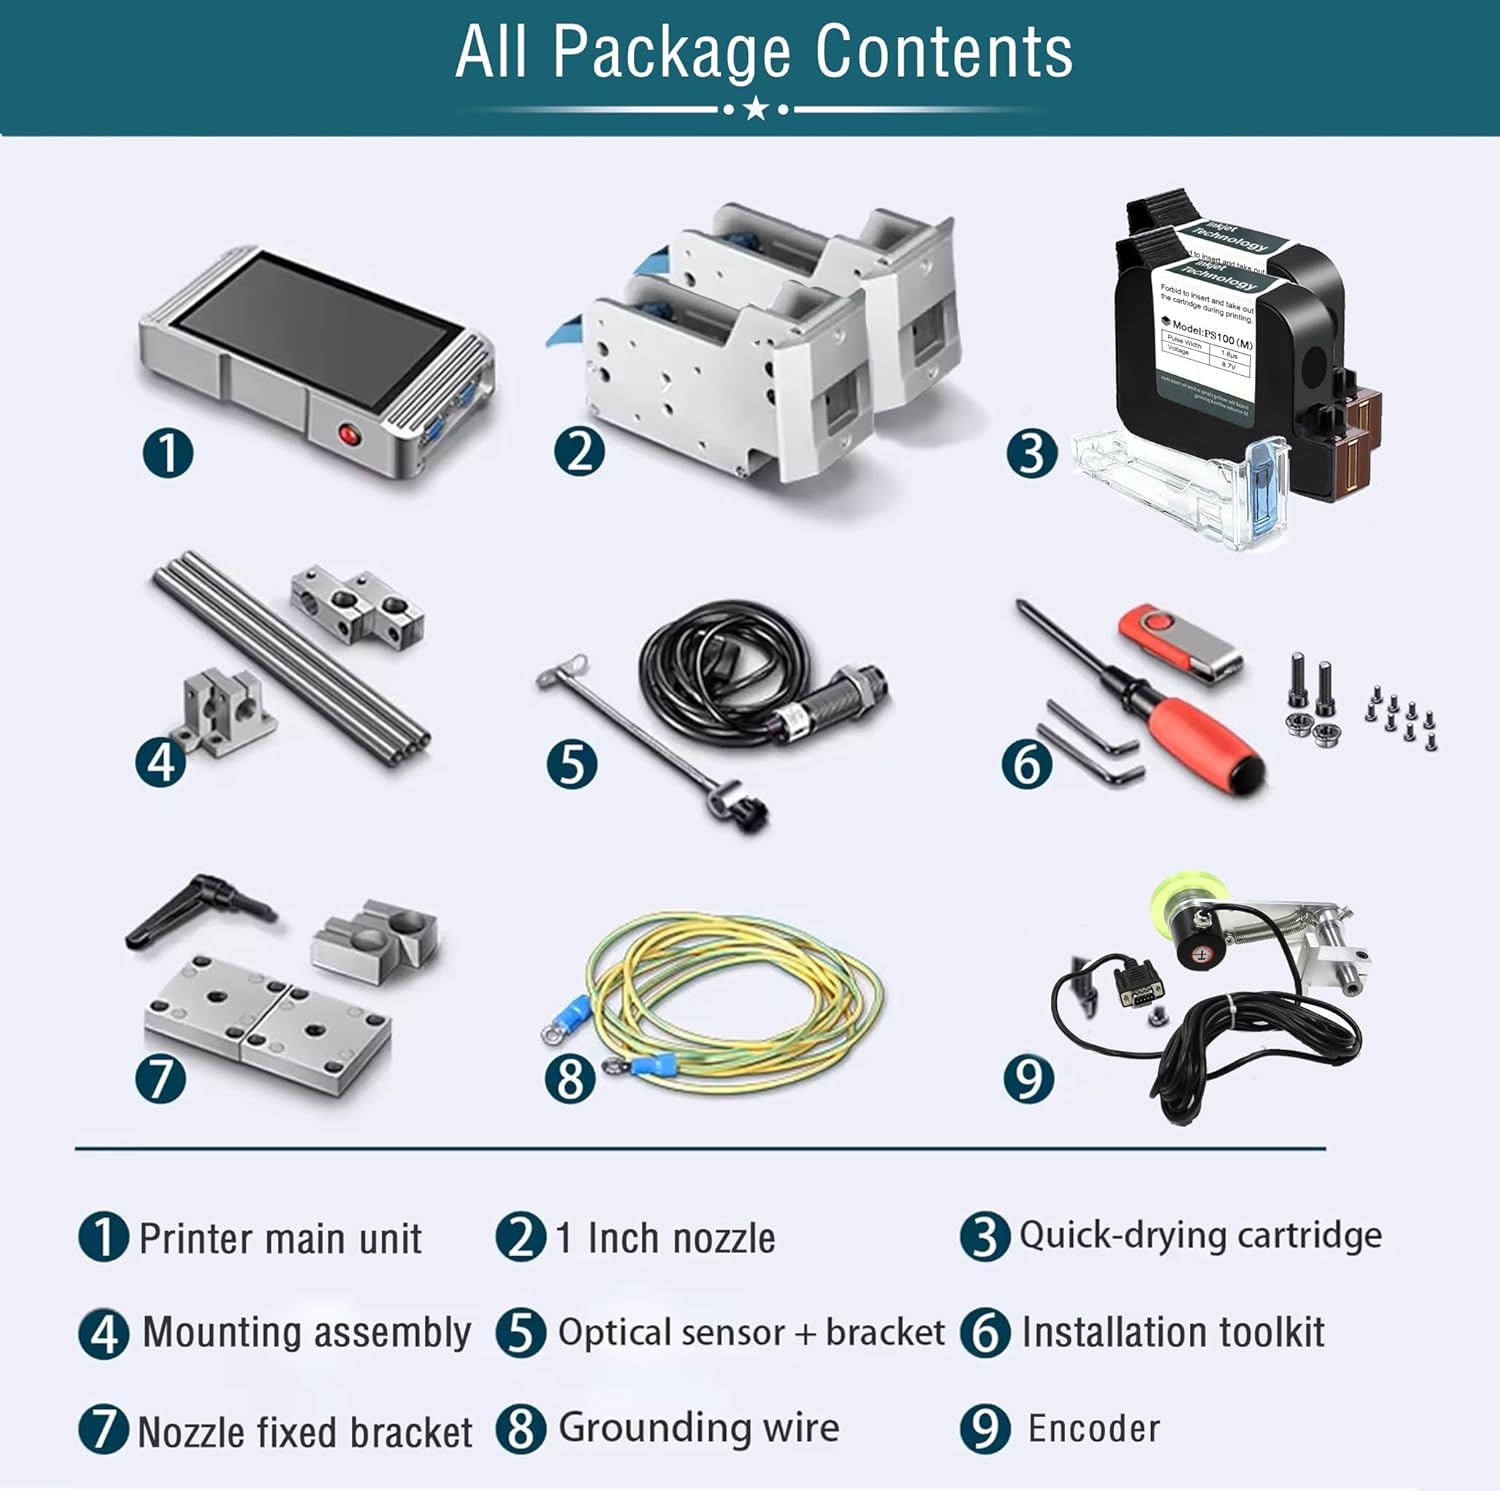
Image: A visual representation of all components included in the product package, clearly labeled for identification.
- Printer main unit (Controller)
- 1-inch Nozzle(s)
- Quick-drying Ink Cartridge(s)
- Mounting Assembly
- Optical Sensor + Bracket
- Installation Toolkit
- Nozzle Fixed Bracket
- Grounding Wire
- Encoder
4. Setup
4.1 Component Identification and Assembly
Familiarize yourself with the main components and their connections.

Image: A diagram showing the interconnected components: Bracket, Print Head, Sensor, and Controller, indicating how they form the complete printing system.
- Attach the print head(s) to the mounting assembly using the provided screws.
- Secure the mounting assembly to your production line conveyor or desired location.
- Connect the print head cables to the main printer unit (controller).
- Install the optical sensor and encoder on the conveyor belt, ensuring they are positioned to detect products and measure speed accurately.
- Connect the sensor and encoder cables to the controller.
- Connect the grounding wire to a suitable ground point.

Image: This image demonstrates two common nozzle placement configurations: a single print head setup and a dual print head setup for versatile marking on different planes.
4.2 Ink Cartridge Installation
The printer uses original HP ink cartridges for optimal results.

Image: A detailed view of a quick-drying ink cartridge, highlighting its design and protective elements.
- Open the print head cover.
- Carefully insert the ink cartridge into the designated slot until it clicks into place.
- Close the print head cover.
- Ensure the cartridge is securely seated to prevent ink leakage or printing errors.
4.3 Power Connection
Connect the power adapter to the printer and then to a suitable power outlet. Power on the device using the main power switch.
5. Operating Instructions
5.1 User Interface Overview
The printer features a 7-inch HD LED industrial touch screen for intuitive operation.

Image: A close-up view of the printer's 7-inch HD touch screen, displaying the main operational icons for print, file management, editing, and settings.

Image: A user's hand demonstrating interaction with the printer's touch screen, highlighting the ease of use for editing print content.
5.2 Creating and Editing Print Content
The system supports printing various types of static and variable data.

Image: An overview of the diverse print content capabilities, including multi-message coding, time/date variables, optional font libraries, graphics, logos, font size adjustment, multi-language printing, barcodes, QR codes, and DM-GS1 codes.
- Text: Enter static text or variable data.
- Date/Time: Automatically insert current date and time, or set expiration dates.
- Barcodes/QR Codes: Generate and print various barcode and QR code formats.
- Logos/Images: Upload and print custom logos or images.
- Variable Data: Utilize functions for dynamic data printing, such as serial numbers or batch codes.
The system allows for flexible adjustment of ink blackness and supports real-time preview of edited content.

Image: This graphic illustrates the adjustable ink blackness levels (normal to nine times black) and parameters for pulse width voltage, boot time (7 seconds), and rolling preview functionality.
5.3 Language Settings
The printer supports over 20 languages for global usability.

Image: A screenshot of the printer's multi-language interface, showing support for Simplified Chinese, Traditional Chinese, English, Russian, Japanese, German, French, Korean, Italian, Polish, Dutch, Finnish, Arabic, Danish, Czech, Swedish, Vietnamese, Greek, and Turkish.
5.4 Printing Process
Once content is prepared, initiate printing. The system is designed for high-speed, automatic operation.

Image: The Phezer inkjet printer actively coding packages on a conveyor belt, illustrating its high-speed operation of up to 90 meters per minute.
- Ensure products are correctly positioned on the conveyor belt.
- The optical sensor will detect the product, triggering the print head.
- The printer can achieve speeds of up to 70 meters per minute.
5.5 Applications
The printer is versatile and compatible with a wide range of surfaces and industries.

Image: A collage showcasing the printer's wide range of applications, including coding on food boxes, glass jars, plastic bags, metal caps, plastic caps, plastic film, wood, recycled paper bags, and masks.

Image: Examples of clear and precise marking effects on various materials such as cartons, bottles, polybags, cosmetics packaging, labels, paper boxes, batteries, CPE, plastic film, and wood.

Image: A grid illustrating the diverse industrial applications of the marking machine, including Food & Beverage, Packaging, Medicine, Cosmetics, Automotive, Circuit Board manufacturing, Building Materials, and Retail Supermarkets.
6. Maintenance
Regular maintenance ensures the longevity and optimal performance of your inkjet coding machine.
- Cleaning the Print Head: Gently wipe the print head nozzle with a lint-free cloth moistened with isopropyl alcohol. Perform this regularly, especially after extended periods of use or if print quality degrades.
- Ink Cartridge Replacement: When an ink cartridge is depleted, replace it promptly with a new, genuine Phezer cartridge. Follow the installation steps outlined in Section 4.2.
- General Cleaning: Keep the exterior of the machine and the touch screen clean using a soft, dry cloth. Avoid abrasive cleaners.
- Storage: If the machine will not be used for an extended period, remove the ink cartridges and store them according to manufacturer instructions. Power off and disconnect the machine.
7. Troubleshooting
This section addresses common issues you might encounter.
| Problem | Possible Cause | Solution |
|---|---|---|
| No power | Power cable disconnected; power outlet fault | Check power cable connection; try a different outlet |
| Poor print quality (faded, streaky) | Low ink; clogged nozzle; incorrect print settings | Replace ink cartridge; clean print head (Section 6); adjust ink blackness settings |
| Printer not detecting products | Sensor misaligned or dirty; sensor cable disconnected | Adjust sensor position; clean sensor lens; check sensor cable connection |
| Printing too fast/slow | Encoder issue; speed settings incorrect | Check encoder connection; adjust print speed settings in the menu |
| Error message on screen | Specific system fault | Note the error code and refer to the manufacturer's support for detailed guidance. |
8. Specifications
Key technical specifications for the Phezer 1inch/25.4mm Automatic Online Inkjet Coding Machine (Model PW2-1):
| Feature | Detail |
|---|---|
| Model Name | PW2-1 |
| Printing Technology | Inkjet |
| Print Head Size | 1-inch / 2 Nozzles |
| Max Print Speed (Monochrome) | 70 ppm (70 meters/minute) |
| Max Print Resolution | 4800 x 1200 dpi |
| Control Method | Touch Screen (7-inch HD LED) |
| Connectivity Technology | USB |
| Supported Languages | 20+ languages |
| Material Type | Aluminum |
| Product Dimensions | 5.51 x 15.75 x 8.27 inches |
| Item Weight | 11 pounds (approx. 5 kg) |
| Included Components | Inkjet Cartridges, Mounting Assembly, Optical Sensor, Encoder, Toolkit |

Image: A comparison chart detailing the specifications of Phezer printer models PW1/PW1-1, PW2/PW2-1, and PW6, highlighting screen size, resolution, printing height, and CPU.
9. Warranty and Support
For warranty information, please refer to the documentation included with your purchase or contact Phezer customer service. Phezer is committed to providing reliable coding solutions and customer satisfaction.
For technical support, inquiries, or assistance, please visit the official Phezer website or contact their support team:
- Official Website: www.phezer.com
- WhatsApp Support: Contact via WhatsApp