1. Introduction
Thank you for choosing the ESSAGER 15W Wireless Car Charger. This device is designed to provide convenient and fast wireless charging for your compatible smartphone while driving. It features an auto-clamping mechanism, intelligent coil alignment, and versatile installation options for your car's dashboard, windshield, or air vent.
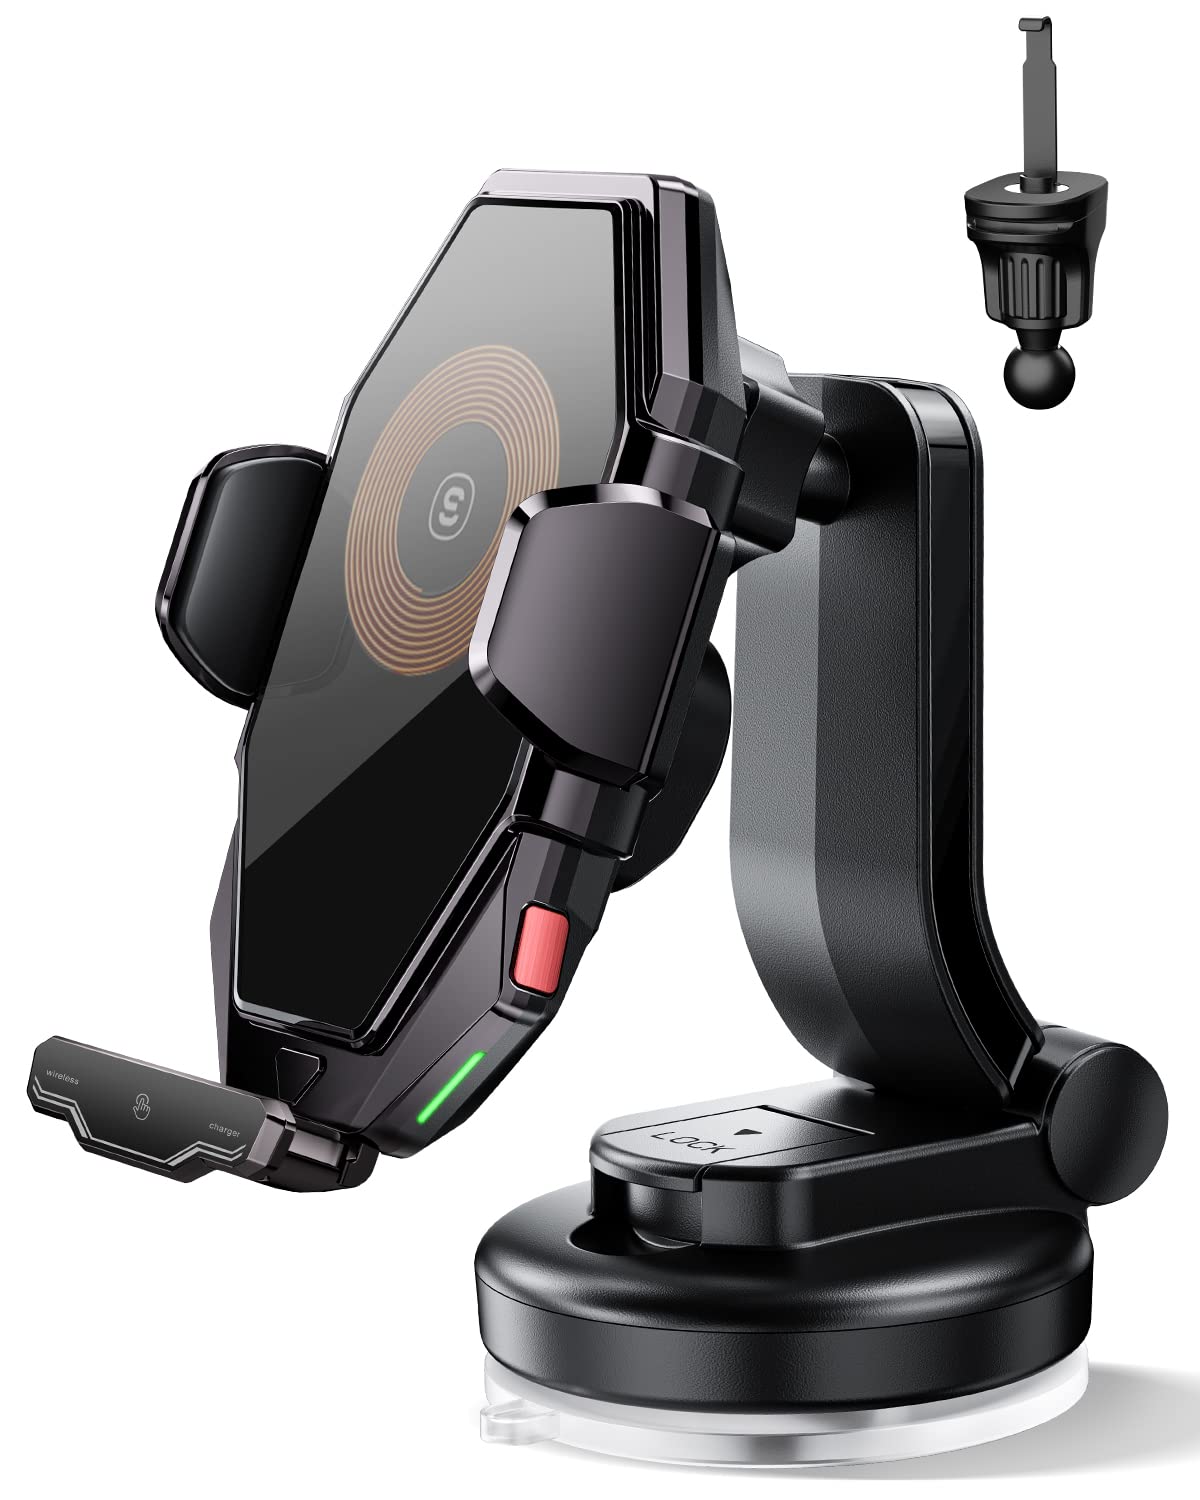
Image 1.1: The ESSAGER 15W Wireless Car Charger mounted in a vehicle, showcasing its design and placement.
2. Key Features
- Automatic Coil Alignment: Equipped with advanced sensors, the charger automatically recognizes and aligns with your phone's wireless charging coil for efficient and fast charging.
- Dual Control Mechanism: Features both a touch sensor and a physical button for releasing your phone, offering convenience and reliability in various conditions.
- 15W Fast Wireless Charging: Delivers up to 15W of power for rapid charging of compatible devices, including various iPhone and Samsung Galaxy models.
- Integrated Backup Battery: A built-in battery allows the clamping mechanism to function even when the car's power is off, ensuring easy phone removal.
- Versatile Installation Options: Includes both an air vent clamp and a suction cup base for flexible mounting on your car's air vent, dashboard, or windshield.
- 360° Adjustable Viewing: Allows for free switching between horizontal and vertical screen orientations, enhancing navigation convenience.
3. Package Contents
Please check the package for the following items:
- ESSAGER 15W Wireless Car Charger Mount
- Air Vent Clamp
- Suction Cup Base
- USB-C Charging Cable
4. Setup Instructions
4.1 Choosing an Installation Method
The charger offers two primary installation methods: air vent or dashboard/windshield. Select the method that best suits your vehicle and driving preferences.
4.2 Air Vent Installation
- Attach the air vent clamp to the back of the wireless car charger mount. Ensure it is securely fastened.
- Carefully insert the vent clamp onto a suitable air vent slat in your vehicle. Adjust the angle for optimal viewing.
- Ensure the mount is stable and does not obstruct airflow or driver visibility.
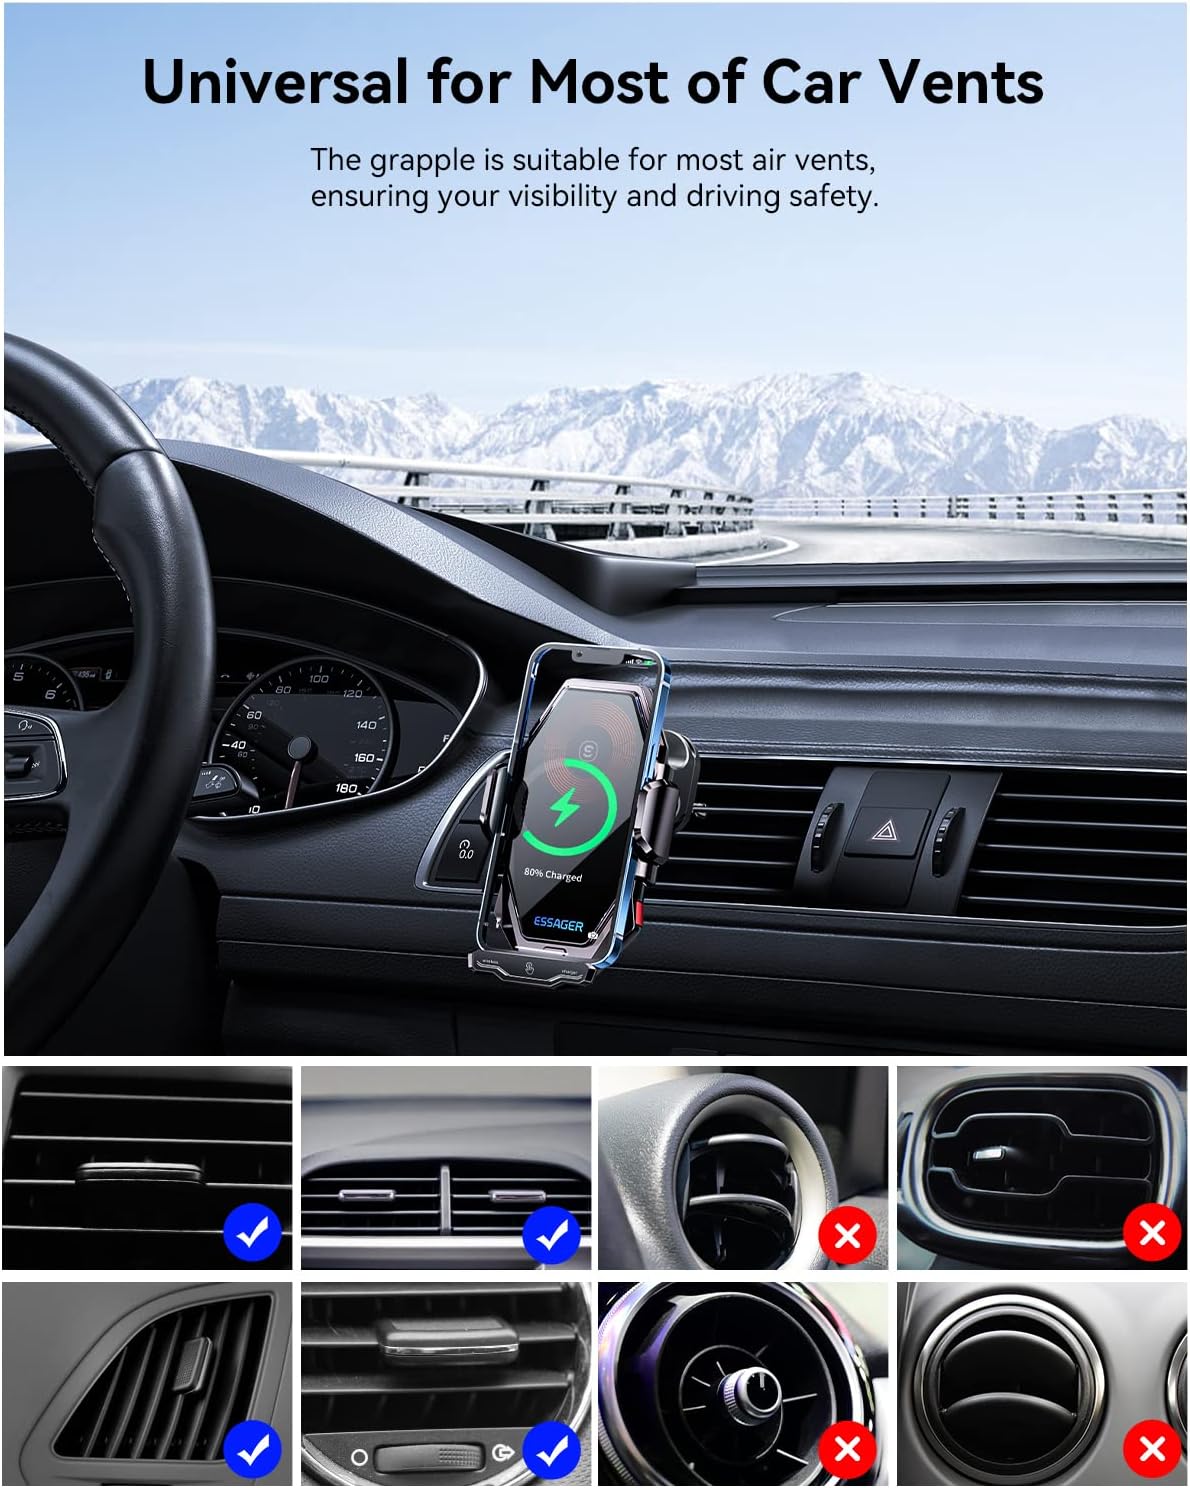
Image 4.1: The wireless car charger securely attached to a car's air vent, demonstrating compatibility with various vent types.
4.3 Dashboard/Windshield Installation
- Attach the suction cup base to the back of the wireless car charger mount. Tighten the securing ring.
- Choose a clean, flat surface on your dashboard or windshield. Ensure the area is free from dust and grease.
- Press the suction cup firmly onto the chosen surface and engage the locking lever to create a strong vacuum seal.
- Adjust the arm and ball joint to achieve your desired viewing angle.

Image 4.2: The wireless car charger shown installed on both a car dashboard and windshield, highlighting its adaptability.
4.4 Power Connection
Connect the provided USB-C charging cable to the port on the bottom of the charger mount. Plug the other end into a compatible car charger adapter (not included) in your vehicle's power outlet. The charger will power on, and the clamping arms will open briefly.
5. Operating Instructions
5.1 Placing Your Phone
- Ensure the charger is powered on and the clamping arms are open.
- Gently place your Qi-compatible smartphone into the mount. The charger's sensors will detect the phone.
- The clamping arms will automatically close to secure your phone, and the charging coil will adjust to align with your phone's charging area.

Image 5.1: Illustration of the automatic coil alignment feature, showing the charger adjusting to the phone's charging position.
5.2 Wireless Charging
Once your phone is securely clamped and aligned, wireless charging will begin automatically. The charger supports up to 15W fast wireless charging for compatible devices. A charging indicator light may illuminate to confirm charging status.
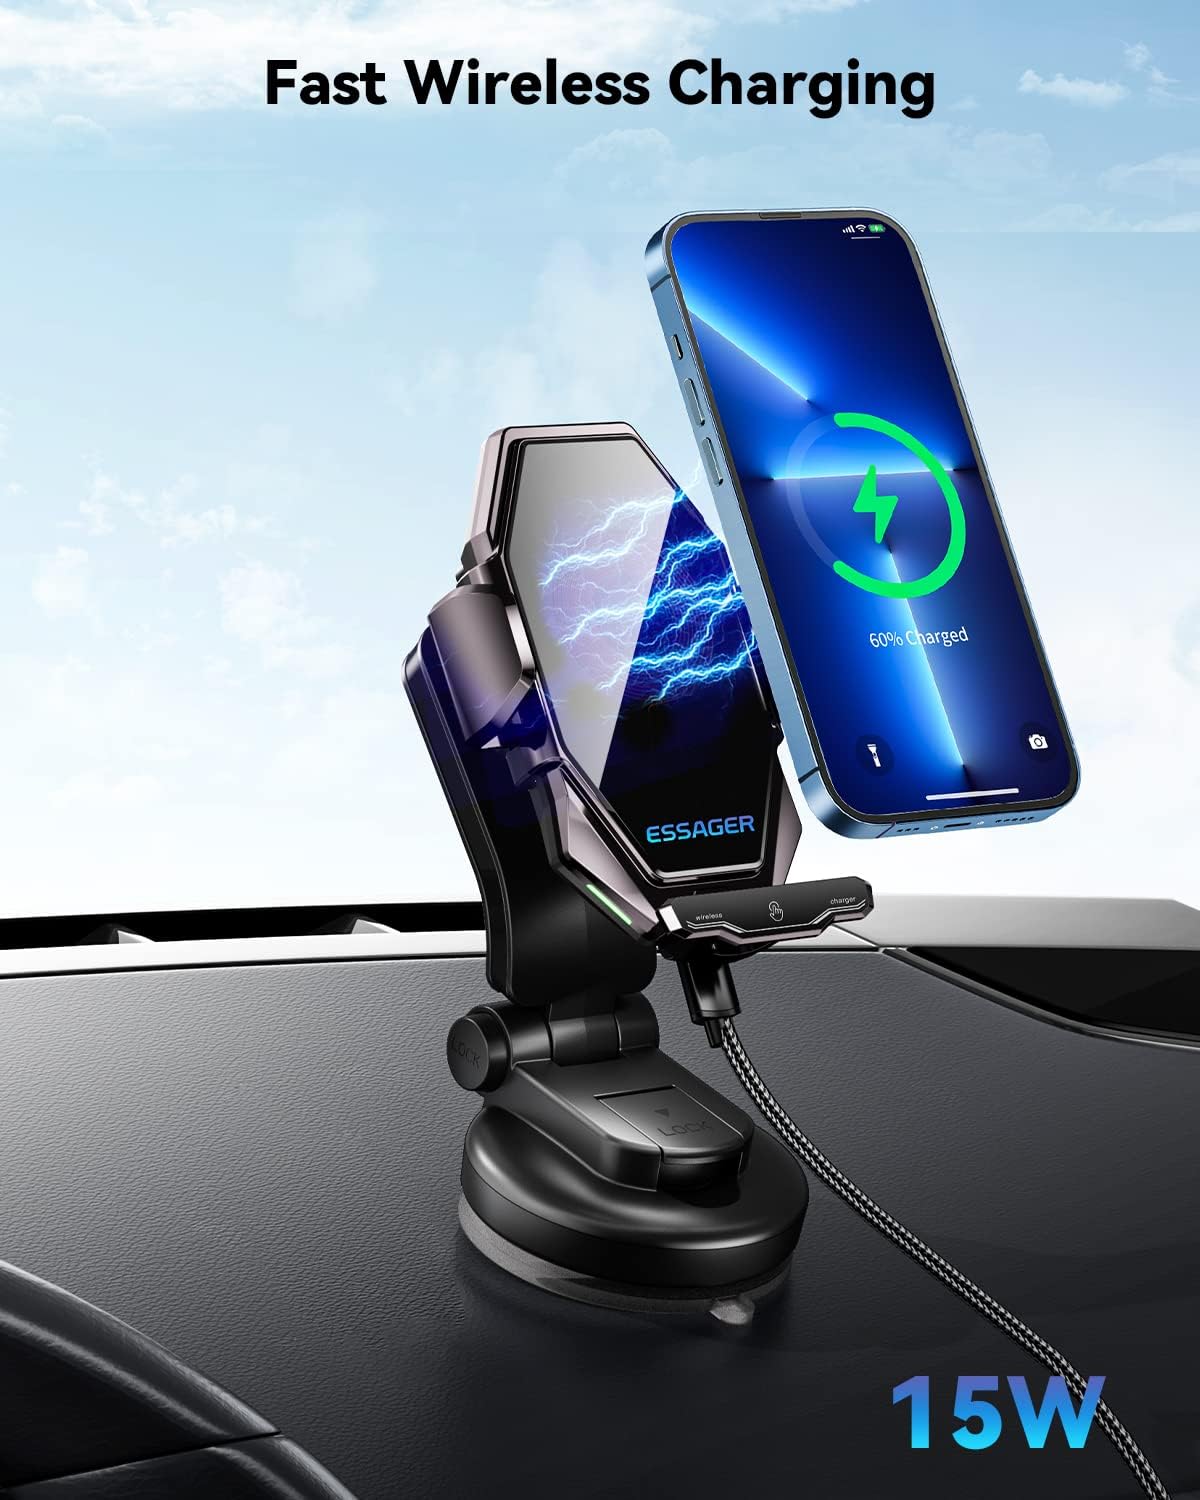
Image 5.2: A smartphone actively receiving 15W fast wireless charging while mounted in the ESSAGER car charger.
5.3 Removing Your Phone
To remove your phone, you have two options:
- Touch Sensor: Lightly touch the sensor area on the side or bottom of the charger. The clamping arms will automatically open.
- Physical Button: Press the physical release button, typically located on the side of the charger. The arms will open.
The built-in battery ensures that you can still release your phone even if the car's engine is turned off and external power is disconnected.
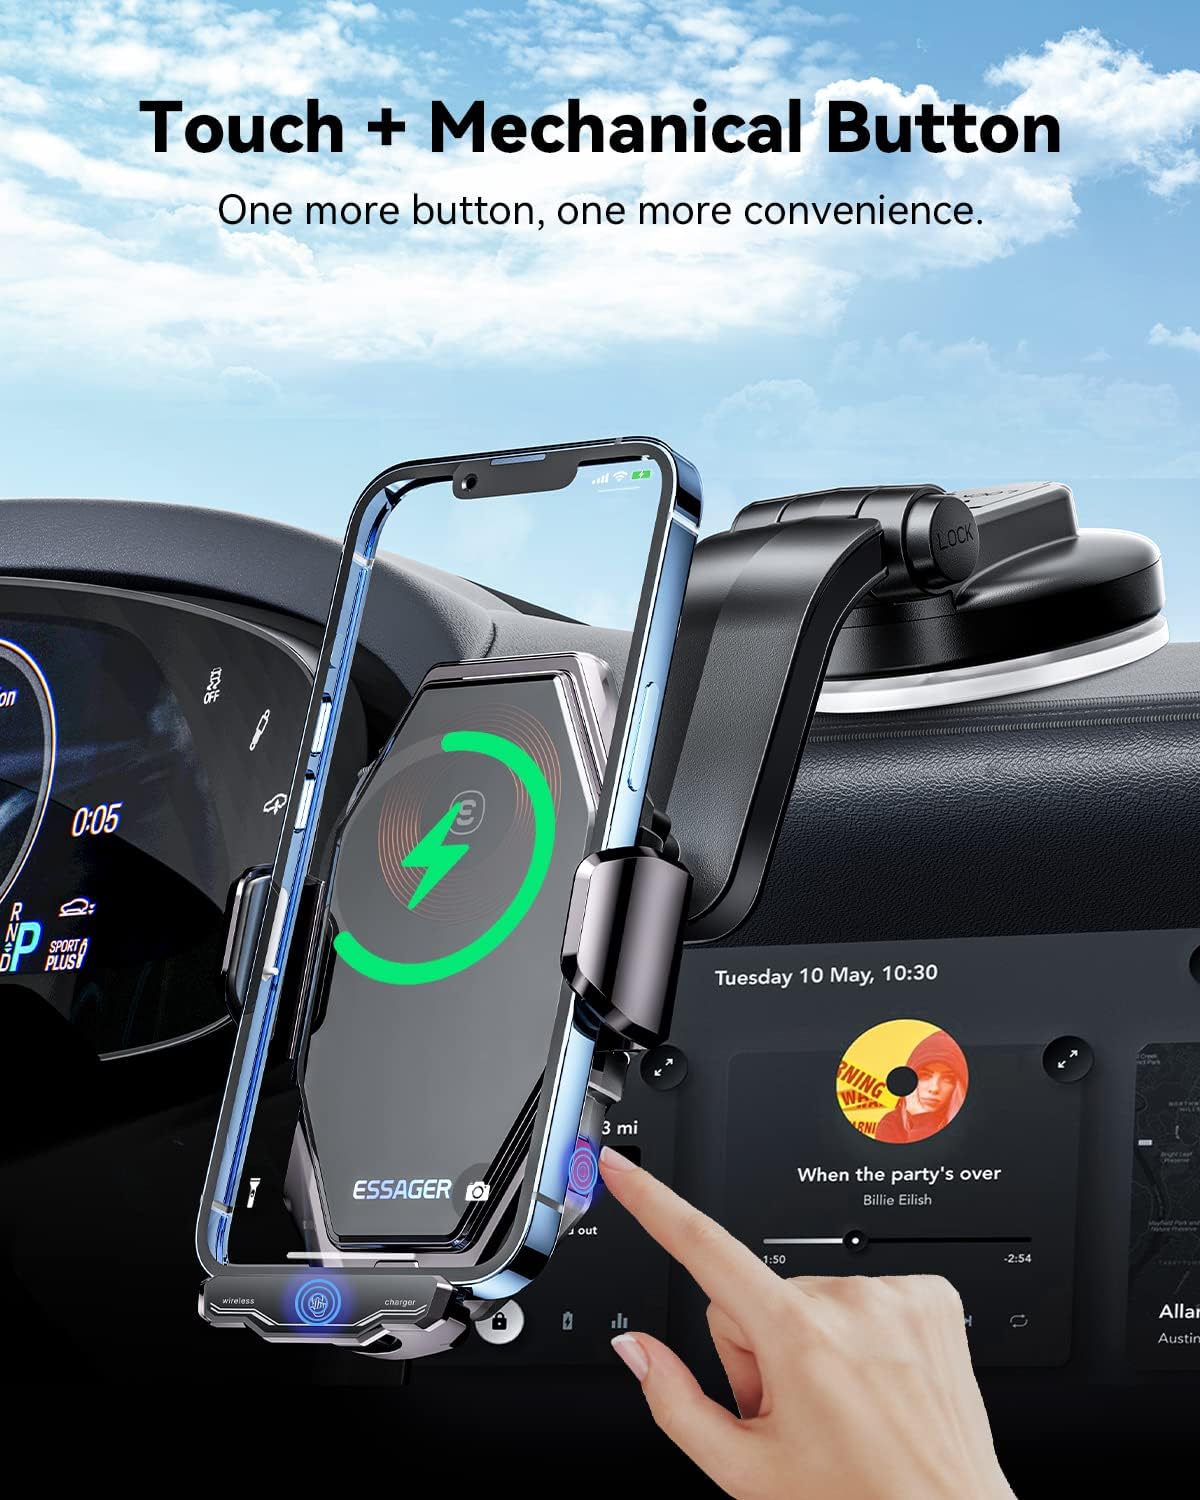
Image 5.3: A hand demonstrating the use of both the touch sensor and mechanical button for releasing a phone from the charger.
5.4 Adjusting Viewing Angle
The charger mount features a 360-degree rotating ball joint and a 240-degree flip bar, allowing you to adjust your phone's position for optimal viewing in both portrait and landscape orientations. Loosen the securing nut behind the ball joint, adjust, and then tighten to lock the position.
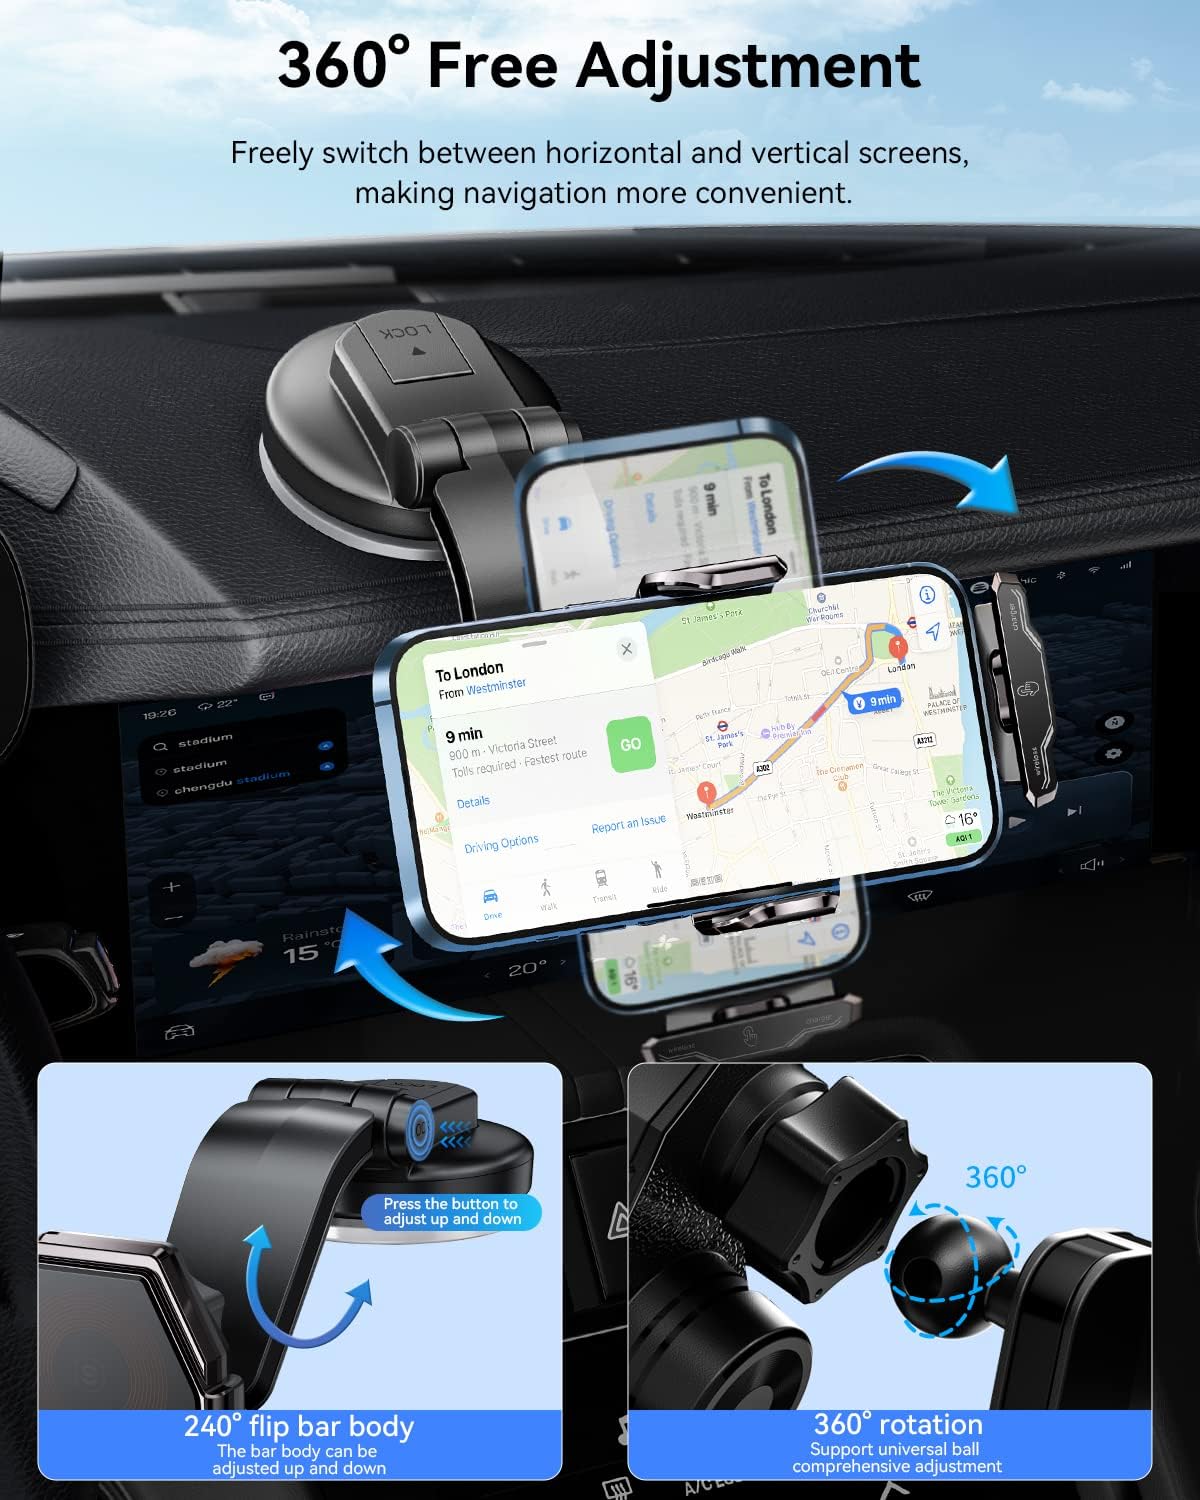
Image 5.4: Visual guide demonstrating the 360-degree rotation and 240-degree flip bar for flexible screen adjustment.
6. Safety Information
- Do not expose the device to extreme temperatures, direct sunlight for prolonged periods, or high humidity.
- Avoid dropping or subjecting the charger to strong impacts.
- Use only a compatible car charger adapter (QC 3.0 or higher recommended for fast charging) to power the device.
- Keep the charger away from water or other liquids.
- Do not attempt to disassemble, repair, or modify the charger. Contact customer support if service is required.
- Ensure the charger does not obstruct your view of the road or interfere with vehicle controls.
7. Troubleshooting
7.1 Phone Not Charging
- Check Power Connection: Ensure the USB-C cable is securely connected to both the charger and a powered car adapter.
- Phone Compatibility: Verify that your smartphone supports Qi wireless charging.
- Phone Placement: Re-position your phone to ensure proper alignment with the charger's coil. The automatic alignment feature should assist with this.
- Phone Case: Thick phone cases or cases with metal/magnetic attachments may interfere with wireless charging. Try removing the case.
- Power Adapter: Ensure your car charger adapter provides sufficient power (e.g., a QC 3.0 adapter for 15W charging).
7.2 Clamping Arms Not Opening/Closing
- Check Power: Ensure the charger is receiving power from the car or that its internal backup battery is charged.
- Use Physical Button: If the touch sensor is unresponsive, try using the physical release button.
- Obstructions: Check for any obstructions preventing the arms from moving freely.
7.3 Mount Not Holding Securely
- Suction Cup: For dashboard/windshield mounts, ensure the surface is clean and smooth. Re-apply the suction cup, pressing firmly and engaging the locking lever.
- Air Vent Clamp: Ensure the vent clamp is fully inserted and tightened onto the air vent slat.
8. Specifications
| Brand | ESSAGER |
| Model | Wireless Car Charger |
| Wattage | 15 Watts (Max) |
| Input Voltage | 5 Volts (DC) |
| Output Current | 3 Amps |
| Connector Type | Wireless (USB-C for power input) |
| Compatible Devices | Qi-enabled Smartphones (e.g., iPhone 8 and newer, Samsung Galaxy S6 and newer) |
| Item Weight | 11.4 ounces |
| Package Dimensions | 9.09 x 5.43 x 4.72 inches |
9. Warranty and Support
For warranty information or technical support, please refer to the documentation provided with your purchase or contact ESSAGER customer service directly. Keep your proof of purchase for warranty claims.


