1. Introduction
This manual provides detailed instructions for the safe and effective operation, setup, and maintenance of your HBUDS 7D3A 165ft Self-Leveling Sewer Camera. Please read this manual thoroughly before using the device to ensure proper functionality and to prevent damage or injury. Keep this manual for future reference.
2. Safety Information
- Always ensure the device is powered off before performing any maintenance or cleaning.
- Do not expose the monitor unit to water or excessive moisture. The camera head and cable are waterproof (IP68), but the monitor and control unit are not.
- Use only the provided charger and battery. Using unauthorized accessories may cause damage or fire.
- Avoid bending the camera cable sharply, as this can damage the internal wiring.
- Keep the device away from children and pets.
- Do not attempt to disassemble or repair the unit yourself. Contact qualified service personnel for assistance.
- Ensure adequate ventilation when charging the battery.
3. Package Contents
Verify that all items are present in your package:
- Control Box with 7-inch TFT Color Monitor
- Self-Leveling Camera Head (IP68 waterproof)
- 165ft (50m) Fiberglass Push Cable with Meter Counter
- 12V 4500mAh Rechargeable Lithium-Ion Battery
- 16GB SD Card
- Power Adapter/Charger
- Camera Skids/Guides (various sizes)
- User Manual (this document)
- Protective Carrying Case
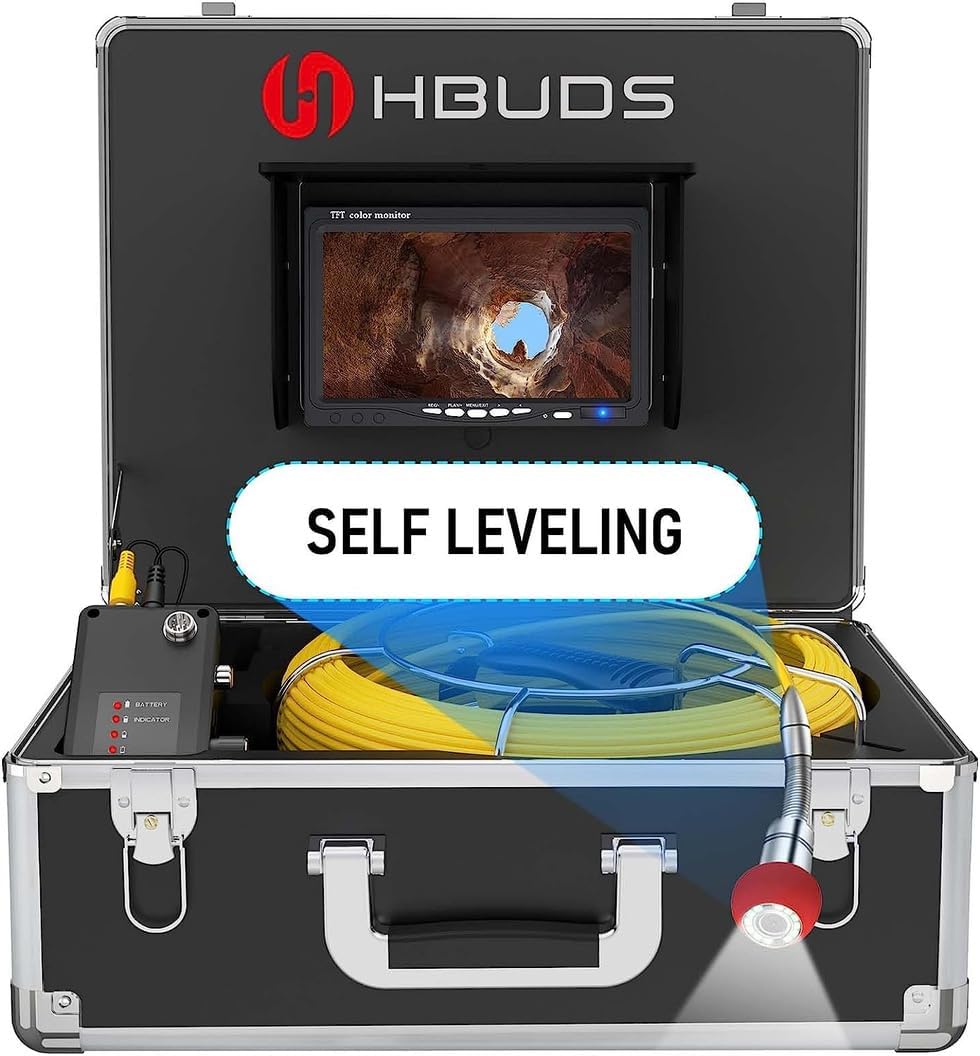
Figure 3.1: Complete HBUDS 7D3A Sewer Camera kit within its protective carrying case, showing the monitor, cable reel, camera head, and control unit.
4. Product Overview
The HBUDS 7D3A is a professional sewer inspection camera system designed for inspecting drain pipes, sewer lines, ducts, and other confined spaces. Key features include:
- Self-Leveling Camera Head: Ensures the image remains upright regardless of the camera's orientation within the pipe.
- 7-inch TFT Color Monitor: Provides a clear, high-definition display for real-time viewing of inspections.
- Meter Counter: Integrated into the cable, allowing for precise measurement of the camera's insertion depth.
- DVR Recording Function: Enables recording of video and capturing still images to the included 16GB SD card.
- Long-lasting Battery: A 12V 4500mAh rechargeable battery offers extended operating time.
- IP68 Waterproof Camera: Suitable for use in wet and submerged environments.
- Adjustable LED Lights: 12 bright white LEDs provide illumination in dark conditions, with adjustable brightness.
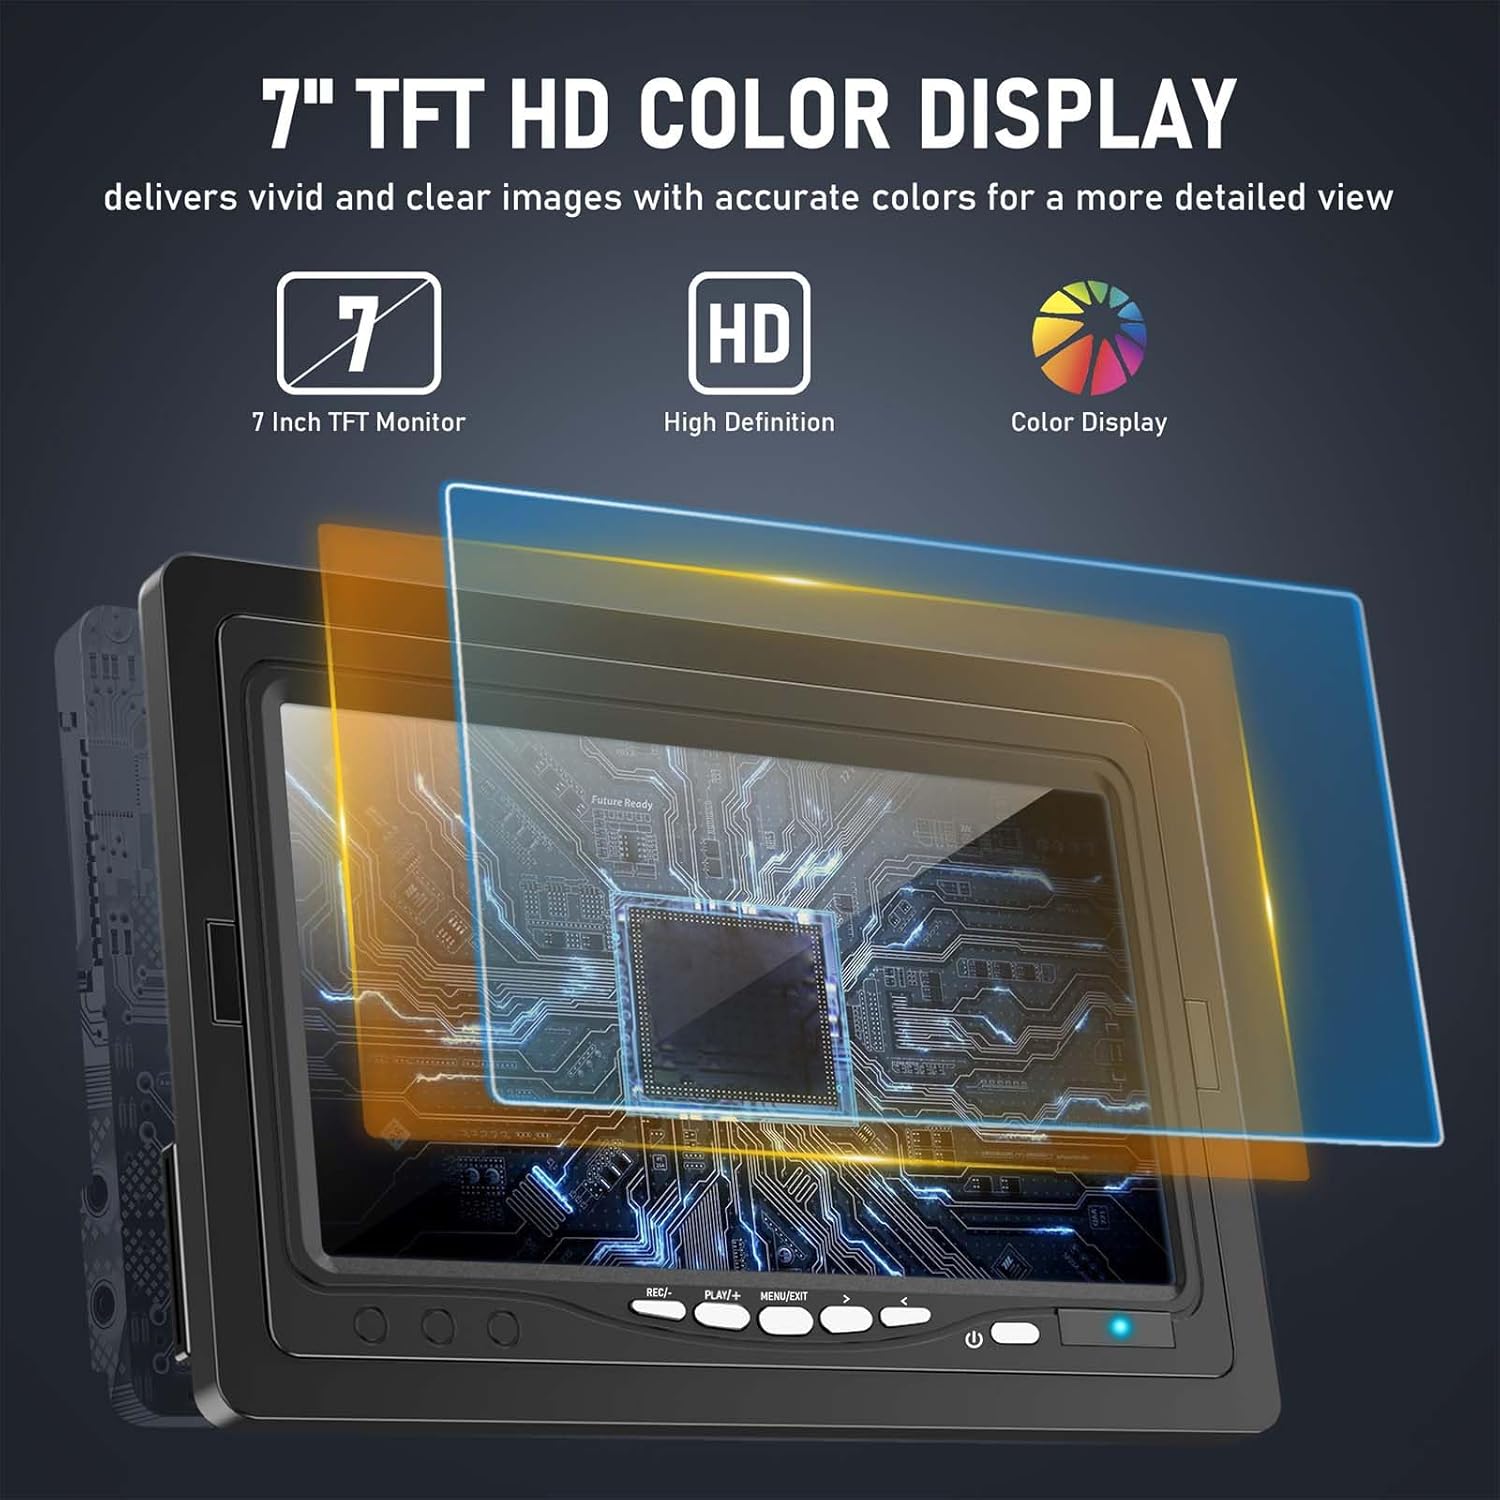
Figure 4.1: The 7-inch TFT HD color display provides clear and detailed images for effective inspection.

Figure 4.2: Illustration of the self-leveling camera head, which maintains an upright image orientation during inspection.

Figure 4.3: The camera cable features clear meter markings for accurate distance measurement during pipe insertion.

Figure 4.4: The DVR recording function allows users to capture video and photos, stored on the included 16GB SD card.

Figure 4.5: The robust 12V 4500mAh rechargeable battery provides extended operational time for the inspection system.
5. Setup
- Charge the Battery: Connect the provided power adapter to the battery pack and a power outlet. The battery indicator lights will show charging status. Ensure the battery is fully charged before first use (approximately 6-8 hours for a full charge).
- Insert SD Card: Locate the SD card slot on the control unit. Insert the included 16GB SD card firmly until it clicks into place. Ensure the card is inserted in the correct orientation.
- Connect Camera and Monitor:
- Connect the camera cable connector to the corresponding port on the control unit.
- Connect the monitor cable to the video output port on the control unit.
- Ensure all connections are secure.
- Attach Camera Skids (Optional): Depending on the pipe diameter, select an appropriate camera skid/guide and attach it to the camera head. This helps center the camera in larger pipes and protects the camera lens.
6. Operating Instructions
- Power On: Press and hold the power button on the control unit to turn on the system. The monitor will display the live camera feed.
- Adjust LED Lights: Use the dedicated button(s) on the control unit to adjust the brightness of the 12 LED lights on the camera head. Increase brightness in dark environments for clearer images.
- Insert Camera: Carefully feed the camera head and cable into the pipe. Use the meter markings on the cable to track the insertion depth. The self-leveling feature will automatically keep the image upright on the monitor.
- Record Video: Press the "Record" button on the control unit to start video recording. Press it again to stop. Recorded videos are saved to the SD card.
- Capture Photo: Press the "Photo" button to capture a still image of the current view. Photos are saved to the SD card.
- Review Media: Access the menu on the monitor to review recorded videos and photos. Use the navigation buttons to browse.
- Retrieve Camera: Once the inspection is complete, carefully retract the camera cable from the pipe. Avoid pulling forcefully to prevent damage.
- Power Off: Press and hold the power button to turn off the system.

Figure 6.1: The HBUDS sewer camera is suitable for inspecting various environments, including residential drains, industrial pipes, and underground conduits.
7. Maintenance
- Cleaning the Camera Head and Cable: After each use, thoroughly clean the camera head and cable with water and a mild detergent. Wipe them dry with a soft cloth. Do not use abrasive cleaners or solvents.
- Monitor Cleaning: Use a soft, dry cloth to clean the monitor screen. For stubborn smudges, a screen cleaner designed for electronics can be used sparingly.
- Battery Care: Store the battery in a cool, dry place. If not used for an extended period, charge the battery every 3-6 months to maintain its lifespan.
- Storage: Store the entire system in its protective carrying case in a dry, temperature-controlled environment, away from direct sunlight.
8. Troubleshooting
| Problem | Possible Cause | Solution |
|---|---|---|
| No image on monitor |
|
|
| Poor image quality |
|
|
| Cannot record video/photo |
|
|
| Self-leveling not working |
|
|
9. Specifications
| Model Number | 7D3A |
| Cable Length | 165ft (50m) |
| Camera Head Diameter | Approx. 23mm (0.9 inches) |
| Camera Features | Self-leveling, IP68 Waterproof, 12 Adjustable White LEDs |
| Monitor Size | 7-inch Color TFT |
| Video Capture Resolution | 720p |
| Storage Media | SD Card (16GB included) |
| Battery | 12V 4500mAh Lithium Ion (included) |
| Working Time | Up to 6 hours (approx.) |
| Product Dimensions | 16 x 14 x 8 inches (Case) |
| Item Weight | 13 pounds |
10. Warranty and Support
HBUDS products are designed for reliability and performance. For warranty information, please refer to the documentation provided with your purchase or contact the seller directly.
If you encounter any issues or require technical assistance, please do not hesitate to contact HBUDS customer support through the Amazon message system with your order information. Our team is available to provide support and ensure your satisfaction.
For more information about HBUDS products, visit the official HBUDS Store on Amazon.