
1. Setup
1.1 Unboxing and Initial Inspection
Upon receiving your RILAND 2-in-1 Gasless MIG Welder, carefully unbox all components. The package typically includes the main welding unit, MIG torch, ground clamp, a small spool of flux-cored wire, and a chipping hammer/wire brush. Inspect all items for any signs of damage during transit.

Image: The RILAND 2-in-1 Gasless MIG Welder with its MIG torch, ground clamp, flux-cored wire, and chipping hammer/wire brush.
1.2 Component Identification
Familiarize yourself with the welder's control panel and connection points:
- Digital Display: Shows the current amperage.
- Adjusting Knob: Used to set the material thickness, which the synergic control system uses to automatically adjust welding parameters.
- Power Indicator: Illuminates when the unit is powered on.
- Abnormal Indicator (OC): Lights up or flashes to indicate issues such as wire feeding problems or abnormal power supply.
- Mode Switch: Toggles between Flux-core MIG and MMA (Stick) welding modes.
- Terminals: Positive and negative terminals for connecting the ground clamp and MIG torch/MMA electrode holder.
- Cooling Fan: Located at the rear, ensures proper ventilation during operation.

Image: Close-up of the welder's front panel, highlighting the LED display, adjusting knob, power indicator, abnormal indicator, and terminals.
1.3 Wire Spool Installation (Flux-Core MIG)
Follow these steps to install the flux-cored wire spool:
- Open the side panel of the welding unit.
- Remove the retaining pieces from the wire spool holder.
- Place the flux-cored wire spool onto the holder, ensuring the wire unwinds from the bottom.
- Thread the wire through the plastic guide tube and into the wire feeder mechanism.
- Secure the retaining pieces back onto the spool holder.
- Remove the nozzle and contact tip from the MIG torch.
- With the welder powered on, press the trigger on the MIG torch to feed the wire through the torch cable until it exits the end.
- Reinstall the contact tip (ensure it matches your wire diameter, 0.030" is typically pre-installed for the included wire) and then the nozzle.
1.4 Connecting Accessories
Connect the ground clamp to the appropriate terminal on the welder. For MIG welding, ensure the ground clamp is securely attached to a clean, bare metal section of your workpiece to establish a good electrical circuit. For MMA (Stick) welding, connect the electrode holder to the correct terminal and the ground clamp to the other.
2. Operating Instructions
2.1 Powering On and Mode Selection
Before operating, ensure all connections are secure and you are wearing appropriate personal protective equipment (PPE), including a welding helmet, gloves, and protective clothing. Turn on the main power switch located at the rear of the welding unit. The power indicator light on the front panel will illuminate. Use the mode switch to select either Flux-core MIG or MMA (Stick) welding, depending on your application.
2.2 Adjusting Settings (Synergic Control)
The RILAND welder features a RICHIP synergic control system, simplifying parameter adjustments. Rotate the main knob on the front panel to select the thickness of the material you intend to weld. The welder will automatically adjust the optimal voltage, amperage, and wire feeding speed based on your selection. The digital display will show the corresponding amperage.
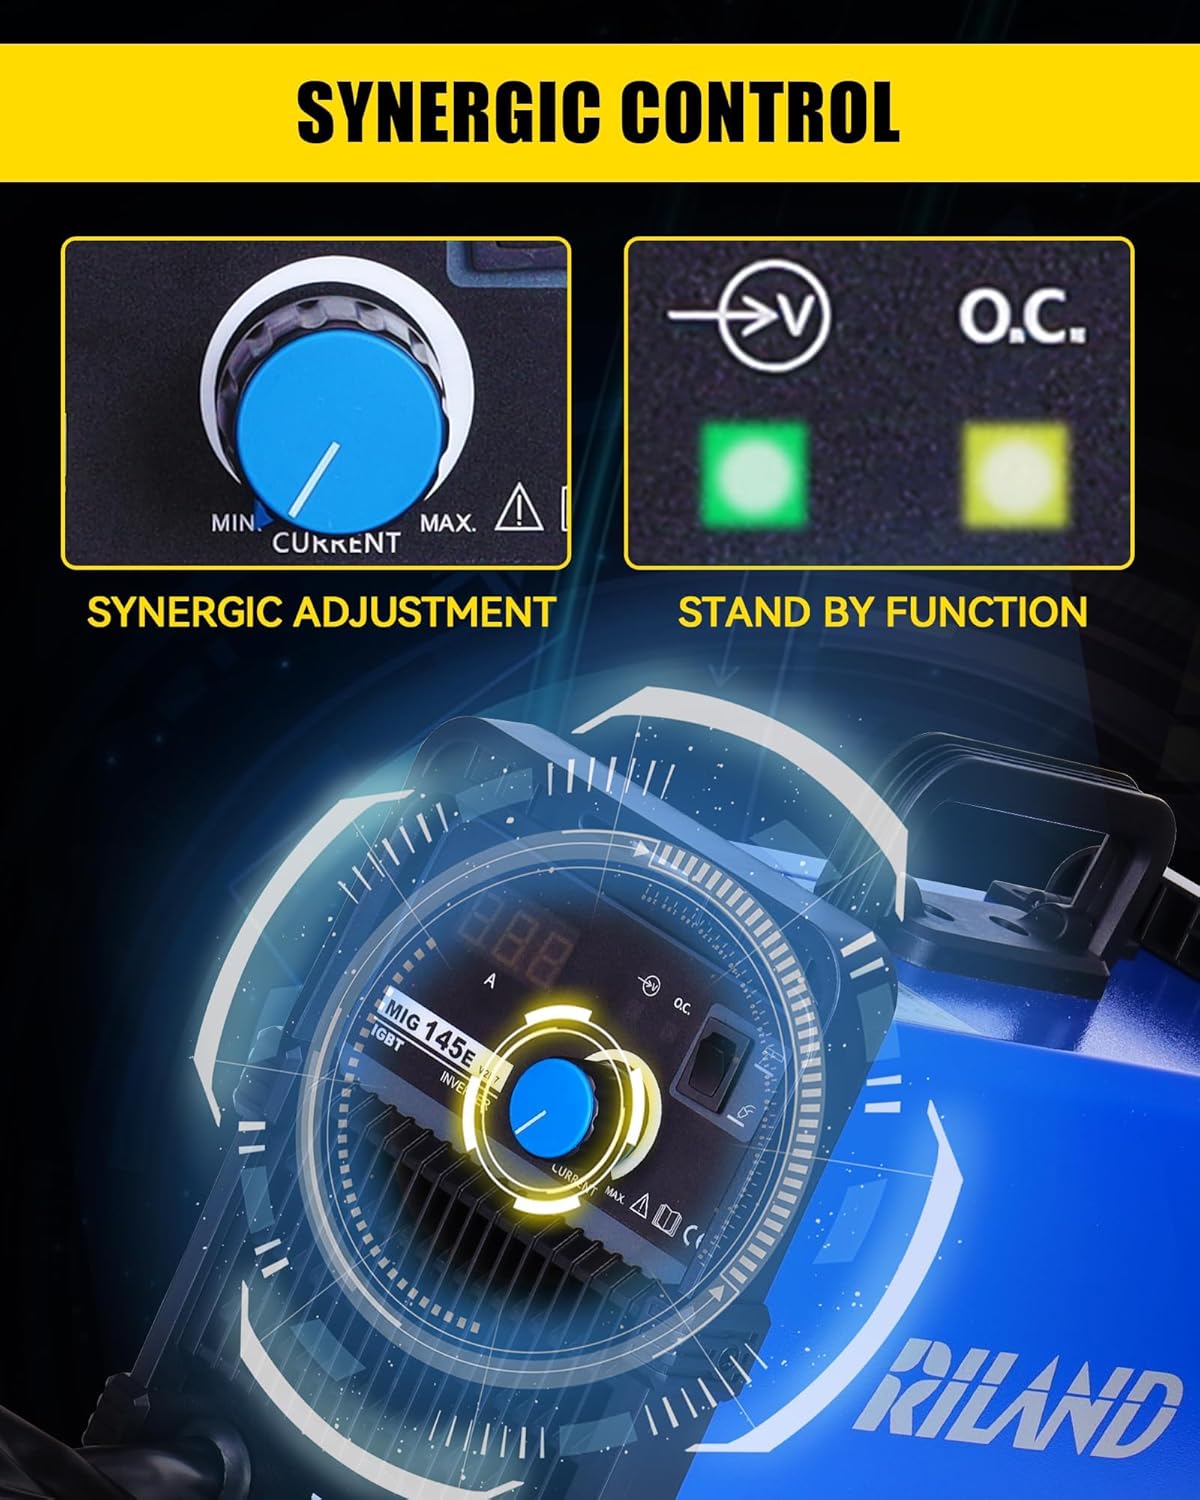
Image: The synergic control panel with the adjusting knob and digital display.
2.3 Welding Process
With settings adjusted and safety gear in place, you are ready to weld. For MIG welding, position the MIG torch at the starting point of your weld. Press the trigger to initiate the arc and begin welding. Maintain a consistent travel speed and arc length for a smooth and strong weld bead. For MMA (Stick) welding, strike the electrode against the workpiece to initiate the arc and maintain a steady hand to control the weld pool.

Image: Illustrates various metal types suitable for welding with this machine, including cast iron, mild steel, sheet metal, square pipe, and metal cage.
3. Maintenance
3.1 General Cleaning
To ensure the longevity and optimal performance of your RILAND welder, regular cleaning is essential. Keep the cooling fan vents clear of dust and debris to prevent overheating. Use a dry, soft cloth to wipe down the exterior of the unit. Avoid using abrasive cleaners or solvents.
3.2 Wire Feeder Maintenance
Periodically inspect the wire feeder rollers for any wear or accumulation of wire dust. Ensure the wire feeder tension is correctly set to prevent wire slippage or crushing. Clean or replace contact tips and nozzles on the MIG torch as they wear out to maintain consistent arc quality.
4. Troubleshooting
4.1 Common Issues
- No Power: Check if the power cable is securely plugged into both the welder and a functioning power outlet. Ensure the main power switch is in the 'ON' position.
- Abnormal Indicator (OC) On/Flashing: A solid 'OC' light may indicate an internal fault or an issue with the power supply. A flashing 'OC' light often points to wire feeding problems, such as a tangled wire, clogged contact tip, or incorrect wire spool installation.
- Poor Arc/Weld Quality: This can be caused by incorrect material thickness settings, improper wire feeding speed, or a poor ground connection. Ensure your workpiece is clean and the ground clamp has good contact. Adjust the material thickness knob incrementally to find the optimal setting.
4.2 Overheating Protection
The RILAND welder is equipped with over-current, over-voltage, and over-heating protection. If the unit overheats, it will automatically shut down to prevent damage. Allow the welder to cool down before resuming operation. Ensure adequate ventilation around the unit during use.
5. Technical Specifications
| Specification | Detail |
|---|---|
| Manufacturer | RILAND |
| Item Model Number | RL-MIG145E-VINE |
| Item Weight | 16.42 pounds (approx. 6 kg) |
| Package Dimensions | 15.31 x 13 x 10.25 inches |
| Power Source | AC/DC (110V) |
| Technology | RICHIP, IGBT Inverter |
| Welding Modes | Gasless MIG, MMA Stick |
| Included Components | Welding machine, MIG torch, ground clamp, flux-cored wire, chipping hammer/wire brush |

Image: The compact dimensions of the RILAND welder, highlighting its portability.
6. Warranty and Support
For detailed warranty information and terms of service, please refer to the official User Manual (PDF) that came with your RILAND 2-in-1 Gasless MIG Welder. You can also download the PDF manual from the product's Amazon listing:
For technical support, troubleshooting assistance, or to inquire about replacement parts, please contact RILAND customer service directly. You may also find helpful resources and additional products by visiting the official RILAND Store:
Consider purchasing extended protection plans for your product, if available, to ensure long-term peace of mind.


