1. Safety Information
Read and follow all assembly and disassembly instructions carefully to ensure safe use of the product. Improper installation or use can lead to damage or injury.
- Secure Installation: Ensure the pool dome is installed securely and firmly to prevent it from being blown away by wind. Always use the provided ground stakes and pegs for anchoring.
- Supervision: Never leave children unsupervised near the pool dome, even when it is closed.
- Material Integrity: Regularly inspect the PVC material and fiberglass construction for any signs of wear, tears, or damage. Do not use the dome if it is compromised.
- Weather Conditions: In strong winds or severe weather conditions, it is recommended to fully retract or disassemble the dome to prevent damage.
2. Product Overview
The vidaXL Pool Dome Cover Tent provides protection for your swimming pool, enhancing your swimming experience. Constructed from UPF 30 PVC and fiberglass, it offers protection against sun and rain while keeping external debris such as leaves, insects, and dust out of your pool.
Its transparent design allows for clear visibility of the surroundings. The dome also contributes to faster water heating and reduced heat loss during the night, extending your swimming season.

Figure 2.1: The vidaXL Pool Dome Cover Tent installed over a round above-ground pool in a garden setting.
3. Setup Instructions
Assembly of the pool dome requires careful attention to detail. It is recommended to have at least two people for installation.
3.1. Unpacking and Component Check
- Carefully unpack all components and lay them out on a clean, flat surface.
- Verify that all parts listed in the packaging contents are present and undamaged.
3.2. Positioning the Dome
- Place the base of the dome around your pool, ensuring it is centered and evenly spaced.
- Ensure the ground is level and clear of any sharp objects that could damage the PVC material.
3.3. Assembling the Frame
Follow the detailed instructions provided in your product packaging for assembling the fiberglass frame. Ensure all connections are secure.
3.4. Attaching the Cover
Carefully attach the transparent PVC cover to the assembled frame, ensuring it is taut and free of wrinkles. Refer to the specific diagrams in your product manual for correct attachment points.
3.5. Anchoring the Dome
To prevent the dome from being moved by wind, it must be securely anchored to the ground.
- Identify the anchoring points on the dome's base.
- Use the provided ground stakes and pegs (Figure 3.1) to firmly secure these points into the ground. Ensure they are driven deep enough to provide stable support.

Figure 3.1: Ground stakes and pegs for anchoring the pool dome.
4. Operating Instructions
The pool dome features a unique hinge mechanism for easy opening and closing.
4.1. Opening the Dome
- Gently push the dome segments along their tracks. The hinge mechanism allows the dome to retract smoothly.
- Continue pushing until the desired opening is achieved. The dome can be partially or fully opened.
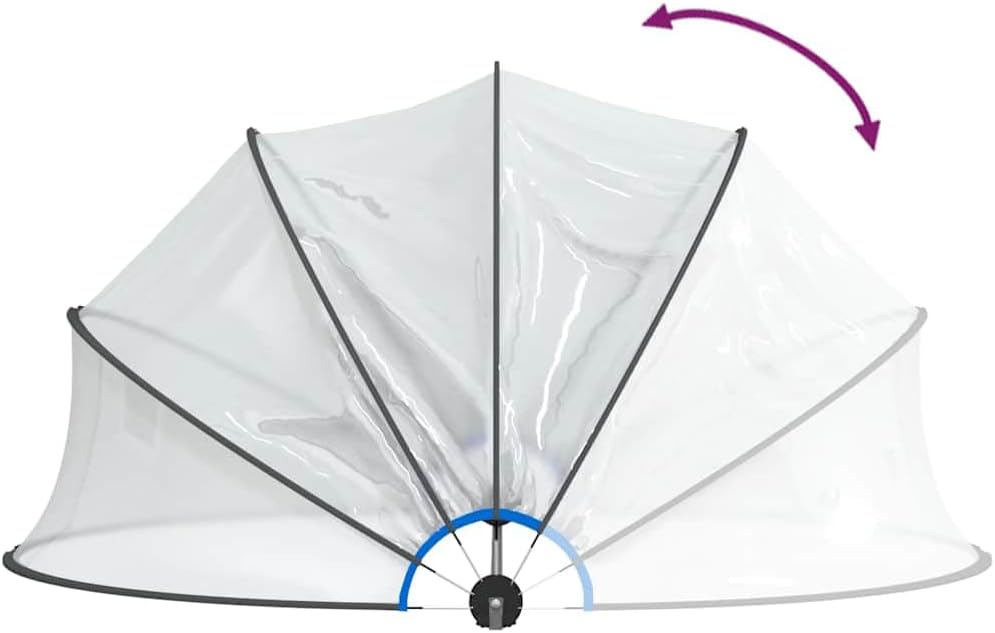
Figure 4.1: Illustration of the dome opening process.
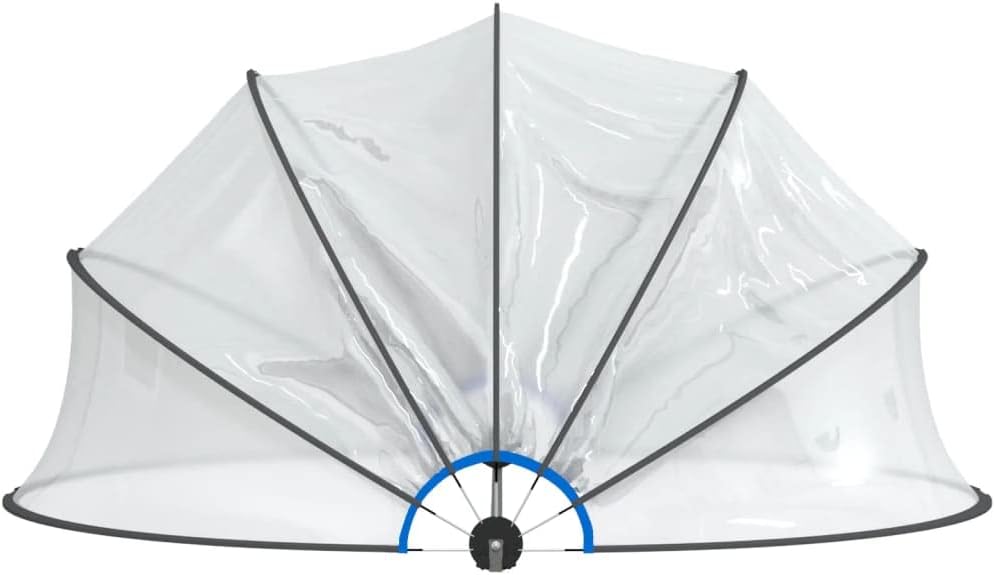
Figure 4.2: Pool dome in a partially open position.
4.2. Closing the Dome
- Pull the dome segments back along their tracks until they meet and form a complete enclosure.
- Ensure all segments are properly aligned and secured to fully cover the pool.

Figure 4.3: Pool dome in a fully closed position.
5. Maintenance
Regular maintenance will prolong the life and effectiveness of your pool dome.
- Cleaning: Clean the PVC cover regularly with mild soap and water. Avoid abrasive cleaners or brushes that could scratch the transparent material. Rinse thoroughly with clean water.
- Frame Inspection: Periodically check the fiberglass frame for any signs of damage, cracks, or loose connections. Tighten any loose fasteners.
- Anchoring Check: Ensure ground stakes and pegs remain firmly in place, especially after strong winds. Re-secure if necessary.
- Storage: If disassembling for seasonal storage, clean and dry all components thoroughly before storing them in a cool, dry place away from direct sunlight.
6. Troubleshooting
| Problem | Possible Cause | Solution |
|---|---|---|
| Dome is unstable or moves in wind. | Improper anchoring; loose ground stakes. | Ensure all ground stakes and pegs are firmly driven into the ground. Check for soft ground conditions. |
| Difficulty opening or closing the dome. | Tracks are dirty or obstructed; frame misalignment. | Clean the tracks of any debris. Inspect the frame for any bends or misalignments and correct if possible. |
| PVC cover appears cloudy or less transparent. | Dirt/grime buildup; prolonged sun exposure. | Clean the cover thoroughly with mild soap and water. While the material is UV resistant, prolonged intense sun exposure can affect clarity over time. |
| Water accumulates on top of the dome. | Insufficient tension in the cover; structural sag. | Ensure the cover is tautly attached to the frame. Check frame integrity for any sagging. |
7. Specifications
| Feature | Detail |
|---|---|
| Brand | vidaXL |
| Model Number | 93815 |
| Dimensions (L x W) | 467 x 234 cm (4.67L x 2.34W meters) |
| Color | Transparent |
| Material | Polychlorure de vinyle (PVC) |
| Item Weight | 24.65 Kilograms |
| Shape | Round |
| Closure Type | Folding mechanism |
| International Article Code | 08720845754488 |
| Country of Origin | China |

Figure 7.1: Dimensional drawing of the pool dome.
8. Warranty and Support
vidaXL products are designed for quality and durability. For specific warranty details, please refer to the terms and conditions provided at the time of purchase or contact vidaXL customer support.
- Returns: This product is eligible for returns within 30 days of purchase, subject to applicable legal guarantees.
- Customer Support: For any questions, assistance with assembly, or troubleshooting, please contact vidaXL specialized customer support. Contact information can typically be found on the vidaXL website or your purchase documentation.
- Care Instructions: Maintenance and care instructions in English are available upon request from customer support.


