Introduction
This manual provides detailed instructions for the assembly, operation, and maintenance of your Ohuhu Portable Tunnel Greenhouse, Model GGH-05. Please read this manual thoroughly before setup and use to ensure proper functionality and longevity of the product. This greenhouse is designed to provide a protected environment for various plants, including vegetables, potatoes, tomatoes, and herbs.
Safety Information
WARNING:
This product may expose you to chemicals known to the State of California to cause cancer. For more information, go to www.P65Warnings.ca.gov.
- Ensure all components are securely fastened during assembly and before use.
- Do not use the greenhouse in extreme weather conditions without additional anchoring.
- Keep children and pets away from the assembly area.
- Regularly inspect the greenhouse for any damage or wear.
Package Contents
Verify that all parts are present before beginning assembly. If any parts are missing or damaged, please contact customer support.
- Thickened & Rustproof Electrophoretic-Coating Poles (various lengths)
- Reinforced Bottom Metal Connectors
- PE Cover with Heavy-Duty Zippers and Double Stitching
- Windproof Ropes
- Upgraded Plastic Ground Pegs
- Side Pouches for Weight (sand, soil, or water bottles)

Image: Key components of the Ohuhu Portable Tunnel Greenhouse, including thickened poles, reinforced metal connectors, heavy-duty zippers, and double stitching on the PE cover.
Assembly Instructions
No tools are required for assembly. All components are labeled for easy identification.
- Step 1: Unpack Components
Carefully remove all parts from the packaging and lay them out. Identify each component using the provided labels.
- Step 2: Assemble the Base Frame
Connect the bottom poles using the reinforced metal connectors to form the rectangular base of the greenhouse. Ensure all connections are secure.

Image: Detail of a reinforced metal connector, illustrating how frame poles are joined.
- Step 3: Construct the Arch Frame
Attach the curved poles to the base frame and connect them at the top to form the gothic arch structure. Refer to the diagram for correct pole placement.
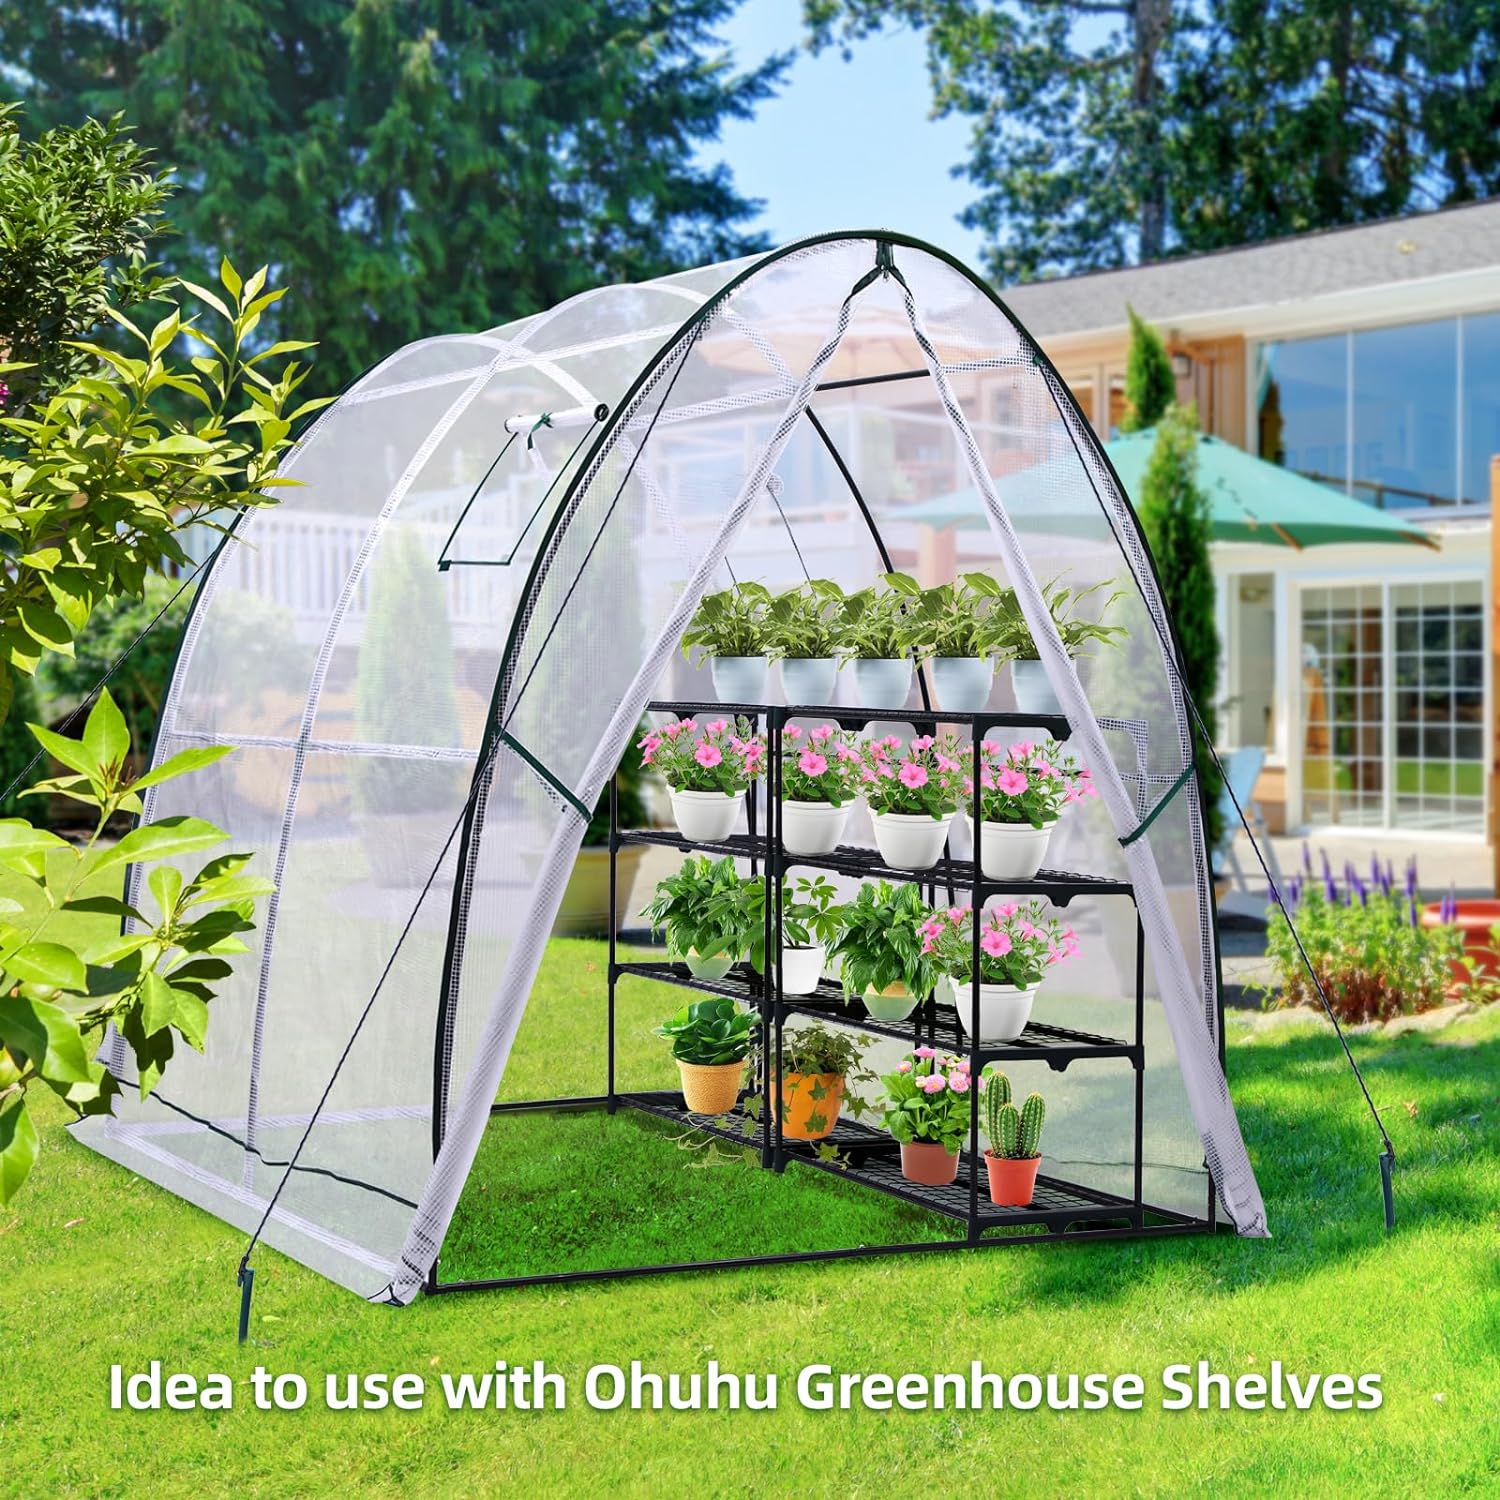
Image: An illustration of the greenhouse frame structure, highlighting the gothic arch design.
- Step 4: Install the PE Cover
Drape the PE cover over the assembled frame. Ensure the cover is centered and aligned correctly. The cover features dual doors and mesh windows.

Image: The Ohuhu Portable Tunnel Greenhouse fully assembled, demonstrating its overall appearance and size.
- Step 5: Secure the Greenhouse
Utilize the side pouches at the bottom of the cover by filling them with sand, soil, or water bottles to add weight and enhance stability. Secure the greenhouse further using the provided windproof ropes and upgraded plastic ground pegs.

Image: Details on improving stability, showing side pouches filled with weights and the design of the new ground pegs for better grip.
Operating Instructions
Ventilation
The greenhouse is equipped with two zipper doors at the front and back, and two mesh windows on the sides to facilitate proper ventilation and air circulation. Open these as needed to regulate temperature and humidity inside the greenhouse.

Image: Illustration of dual doors providing ventilation, with arrows indicating airflow.

Image: Mesh windows on the sides of the greenhouse, designed to block pests while allowing air circulation.
Access
Use the heavy-duty zippers on the front and back doors for convenient entry and exit. Ensure zippers are fully closed when not in use to maintain the internal environment.
Maintenance
- Cleaning: Periodically clean the PE cover with mild soap and water to remove dirt and debris, ensuring maximum light penetration. Avoid abrasive cleaners.
- Inspection: Regularly check the frame poles, connectors, zippers, and cover for any signs of wear, damage, or loose connections. Address any issues promptly to prevent further damage.
- Seasonal Storage: The greenhouse is lightweight and portable. For prolonged periods of non-use or during severe weather, it is recommended to disassemble and store the greenhouse in a dry, protected area.
- Winter Use: The gothic arch design helps snow and rain slide off, preventing accumulation. However, in heavy snowfall, it is advisable to gently clear snow from the cover to prevent excessive weight.
Troubleshooting
- Greenhouse Instability: Ensure side pouches are filled with sufficient weight (sand, soil, or water bottles). Verify that windproof ropes are taut and ground pegs are securely inserted into the ground. Consider additional anchoring in very windy conditions.
- Poor Ventilation: Ensure both zipper doors and side mesh windows are open when ventilation is desired. Check for any obstructions blocking airflow.
- Zipper Malfunction: If zippers become stiff, apply a silicone-based lubricant. If a zipper is damaged, contact customer support for replacement parts.
- Water Accumulation: The gothic arch design is intended to shed water. If water accumulates, check for any sags in the cover and ensure the frame is correctly assembled and taut.
Specifications
| Model Number | GGH-05 |
| Dimensions (L x W x H) | 70.8 x 70.8 x 79.2 inches (180 x 180 x 200 cm) |
| Item Weight | 16.59 pounds |
| Cover Material | Polyethylene (PE) |
| Frame Material | Plastic (Electrophoretic-Coating Poles) |
| Number of Doors | 2 |
| Number of Vents/Windows | 2 (Mesh Windows) |
Warranty and Support
For warranty information or technical support, please contact Ohuhu customer service. Details can typically be found on the product packaging or the official Ohuhu website.
Online Support: Visit the official Ohuhu website for FAQs and contact information.
Return Policy: Refer to your purchase retailer's return policy for details regarding returns and exchanges.


