1. Introduction
The Taurus Air Fry Digital Grill is a versatile kitchen appliance designed for healthier cooking. It functions as both an oil-free fryer and an oven, utilizing hot air circulation to cook food with little to no added oil. This manual provides essential information for safe operation, setup, maintenance, and troubleshooting to ensure optimal performance and longevity of your appliance.

The Taurus Air Fry Digital Grill, showcasing its spacious interior with three levels for cooking various dishes simultaneously, including vegetables, chicken, and fries.
2. Important Safety Instructions
When using electrical appliances, basic safety precautions should always be followed to reduce the risk of fire, electric shock, and injury to persons.
- Read all instructions before using the appliance.
- Do not touch hot surfaces. Use handles or knobs.
- To protect against electric shock, do not immerse cord, plugs, or main unit in water or other liquid.
- Close supervision is necessary when any appliance is used by or near children.
- Unplug from outlet when not in use and before cleaning. Allow to cool before putting on or taking off parts.
- Do not operate any appliance with a damaged cord or plug or after the appliance malfunctions or has been damaged in any manner.
- The use of accessory attachments not recommended by the appliance manufacturer may cause injuries.
- Do not use outdoors.
- Do not let cord hang over edge of table or counter, or touch hot surfaces.
- Do not place on or near a hot gas or electric burner, or in a heated oven.
- Extreme caution must be used when moving an appliance containing hot oil or other hot liquids.
- Always attach plug to appliance first, then plug cord into the wall outlet. To disconnect, turn any control to "off", then remove plug from wall outlet.
- Do not use appliance for other than intended use.
3. Product Overview
Familiarize yourself with the main components and accessories of your Taurus Air Fry Digital Grill.
Components and Accessories

Rotisserie Spit: Ideal for evenly cooking a whole chicken or roasts. The image shows the rotisserie accessory and a chicken being cooked inside the grill.

Rotating Mesh Basket: Perfect for achieving crispy results on items like fries, nuts, or popcorn with continuous tumbling. The image displays the mesh basket accessory.

Mesh Racks and Drip Tray: The appliance includes multiple mesh racks for multi-level cooking and a drip tray to collect excess oil and crumbs, making cleanup easier. The image shows the grill with its dimensions and the included racks and tray.
4. Setup and First Use
Follow these steps before using your Air Fry Digital Grill for the first time.
- Unpack the Appliance: Carefully remove the grill and all accessories from the packaging.
- Remove Packaging Materials: Ensure all protective films, stickers, and packaging inserts are removed from inside and outside the appliance.
- Initial Cleaning: Wash all removable parts (mesh racks, drip tray, rotisserie spit, mesh basket) with warm soapy water. Wipe the interior and exterior of the main unit with a damp cloth. Dry all parts thoroughly before reassembling.
- Placement: Place the appliance on a stable, level, heat-resistant surface, away from walls or other appliances to allow for proper air circulation. Ensure there is at least 10 cm of free space on all sides.
- Power Connection: Plug the power cord into a grounded electrical outlet.
- First Use Burn-Off: It is recommended to run the appliance empty for about 10-15 minutes at 180°C (356°F) during the first use. This helps to burn off any manufacturing residues and odors. A slight odor or smoke may be present, which is normal. Ensure the area is well-ventilated.
5. Operating Instructions
Learn how to operate your Taurus Air Fry Digital Grill for various cooking needs.
Control Panel

A detailed view of the intuitive touch screen control panel, featuring 8 pre-set cooking programs for various food types.
The digital touch screen allows for easy control of cooking settings. It features a clear display for time and temperature, along with various function icons.
Basic Operation
- Power On/Off: Press the power icon to turn the appliance on or off.
- Setting Temperature: Use the temperature control buttons (usually '+' and '-') to adjust the cooking temperature between 40°C and 200°C (104°F and 392°F). The image below shows the temperature range capability.

The appliance set to a temperature, highlighting its wide temperature range from 40°C to 200°C for versatile cooking.
- Setting Time: Use the time control buttons to set the cooking duration, typically from 0 to 60 minutes.
- Start/Pause: Press the start/pause button to begin or temporarily stop the cooking process.
Pre-set Programs
The grill comes with 8 pre-set programs for common dishes, simplifying your cooking experience. Select the desired program icon on the touch screen, and the appliance will automatically set the optimal time and temperature.
| Program | Typical Food Items | Notes |
|---|---|---|
| Fries | French fries, potato wedges | For crispy results, shake the basket halfway through. |
| Chicken | Chicken wings, drumsticks, small whole chicken | Use rotisserie for whole chicken. |
| Fish | Fish fillets, shrimp | Cook until flaky. |
| Meat | Steaks, pork chops | Adjust time for desired doneness. |
| Vegetables | Broccoli, bell peppers, carrots | Toss with a little oil for best results. |
| Bake | Cakes, muffins, pastries | Use appropriate bakeware. |
| Pizza | Frozen or fresh pizza | Ensure pizza fits on the rack. |
| Dehydrate | Fruits, vegetables, jerky | Low temperature, long cooking time. |
Using Accessories
- Rotisserie Function: Insert the rotisserie spit through the center of the food (e.g., whole chicken). Secure with forks. Place the spit into the designated slots inside the grill. Select the rotisserie icon on the control panel to activate rotation.
- Rotating Mesh Basket: Place food inside the mesh basket and secure the lid. Insert the basket into the rotisserie slots. Activate the rotation function for even cooking.
- Mesh Racks: Use the mesh racks for air frying, baking, or dehydrating. Place food directly on the racks or use oven-safe dishes. The multi-level design allows for cooking different items simultaneously.
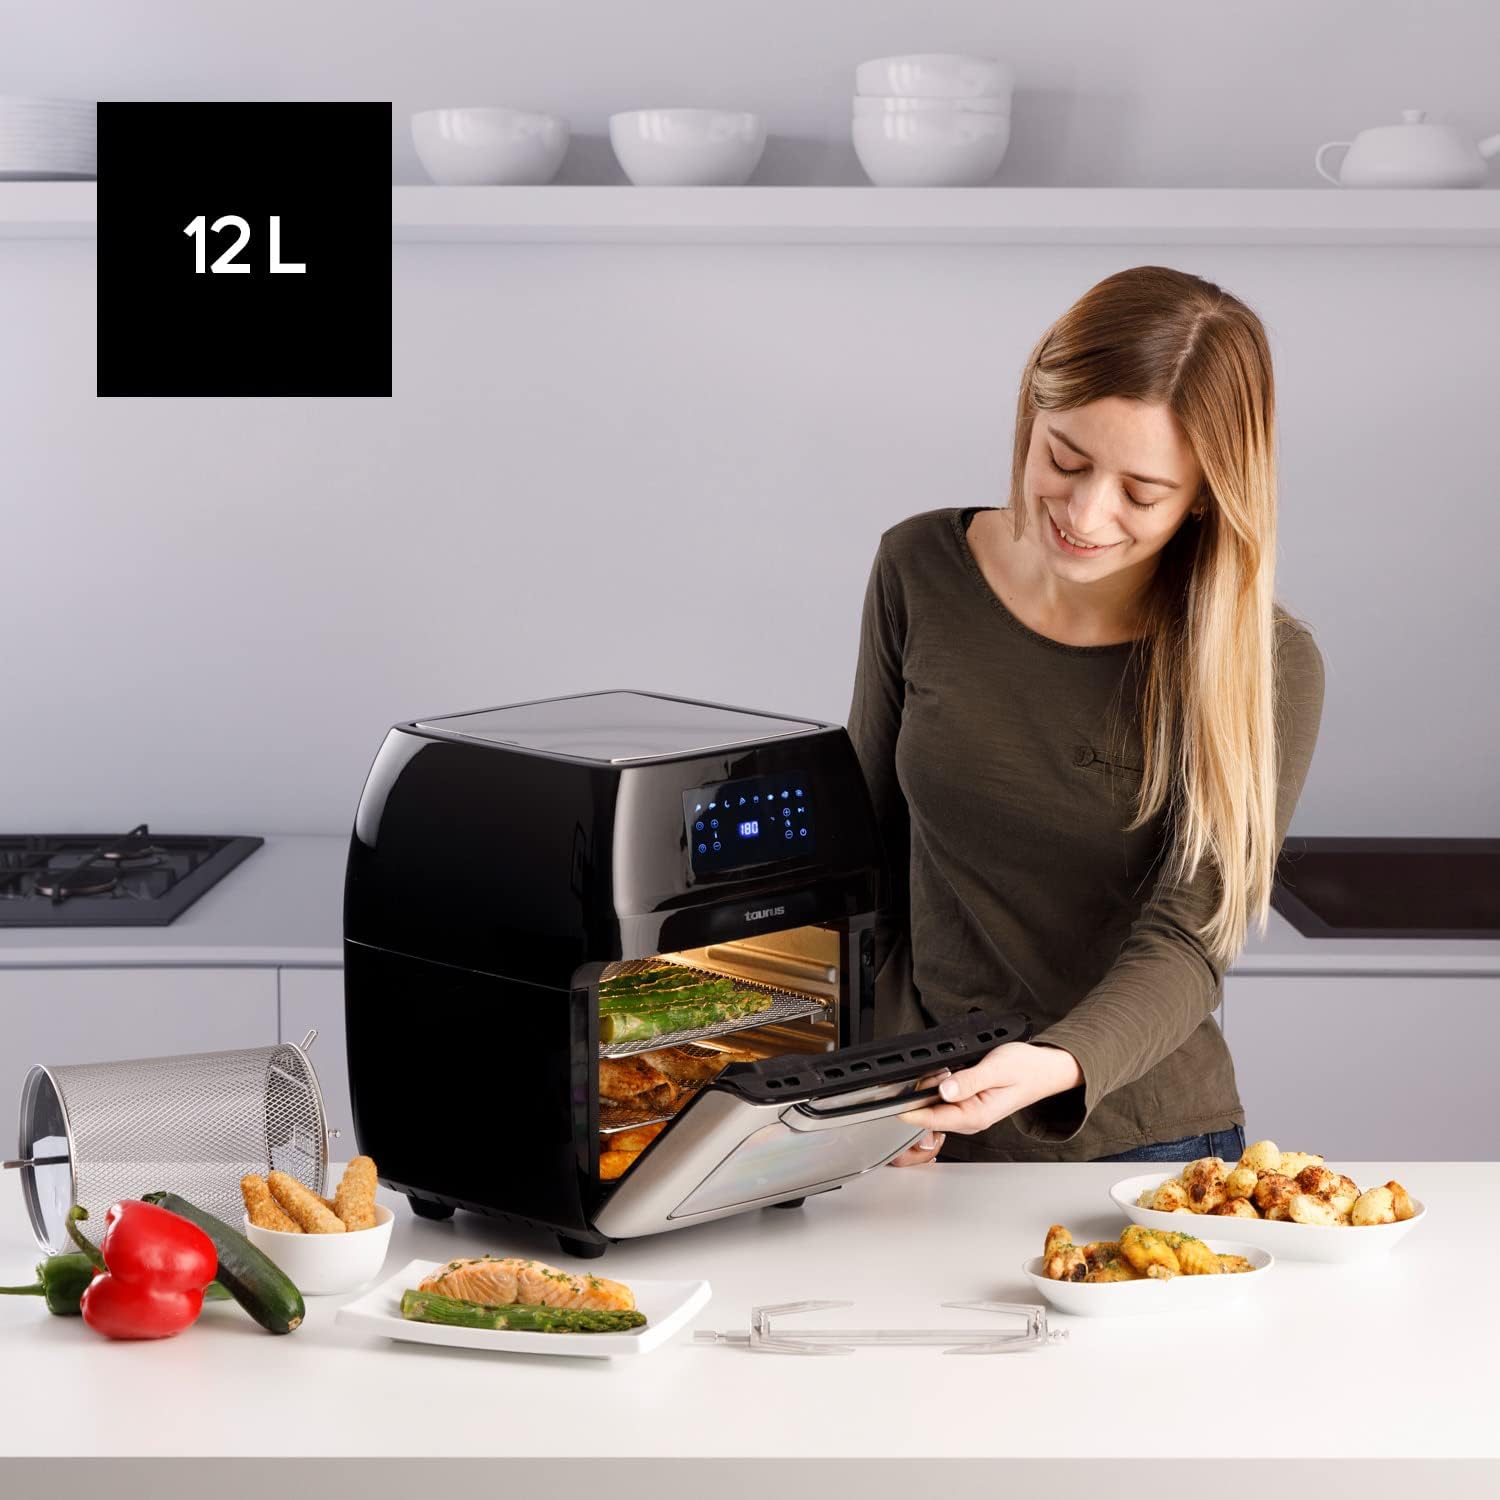
A user opening the 12-liter capacity Air Fry Digital Grill, demonstrating its large interior suitable for family-sized meals, with various cooked dishes around.
6. Maintenance and Cleaning
Regular cleaning ensures the longevity and optimal performance of your appliance.
- Unplug and Cool Down: Always unplug the appliance from the power outlet and allow it to cool completely before cleaning.
- Clean Removable Parts: The mesh racks, drip tray, rotisserie spit, and mesh basket are removable and dishwasher-safe for easy cleaning. For stubborn food residue, soak in warm soapy water before washing.
- Clean Interior: Wipe the interior of the grill with a damp cloth and mild detergent. Avoid abrasive cleaners or scouring pads that could damage the non-stick coating.
- Clean Exterior: Wipe the exterior surface with a soft, damp cloth. Do not use harsh chemicals or abrasive materials.
- Storage: Ensure all parts are clean and dry before storing the appliance. Store in a cool, dry place.
7. Troubleshooting
Refer to this section for common issues and their solutions.
| Problem | Possible Cause | Solution |
|---|---|---|
| Appliance does not turn on. | Not plugged in; Power outlet malfunction; Appliance malfunction. | Ensure the power cord is securely plugged into a working outlet. Try a different outlet. If problem persists, contact customer support. |
| Food is not cooked evenly. | Overcrowding; Incorrect temperature/time; Food not shaken/turned. | Do not overcrowd the basket/racks. Adjust temperature and time as needed. For smaller items, shake or turn food halfway through cooking. |
| White smoke coming from appliance. | Grease residue; High fat content food. | Clean the drip tray and interior thoroughly. For high-fat foods, drain excess fat from the drip tray during cooking. |
| Food is not crispy. | Too much moisture; Not enough oil (for certain foods); Overcrowding. | Pat food dry before cooking. A light spray of oil can help. Ensure proper air circulation by not overcrowding. |
8. Technical Specifications
| Specification | Detail |
|---|---|
| Brand | Taurus |
| Model Number | 973981000 |
| Capacity | 12 Litres |
| Power | 1700 Watts |
| Voltage | 230 Volts |
| Material | Stainless Steel |
| Dimensions (L x W x H) | 39 x 34.5 x 43 cm |
| Weight | 7.91 Kilograms |
| Special Feature | Programmable |
9. Warranty and Customer Support
For warranty information and customer support, please refer to the documentation included with your purchase or visit the official Taurus website. Keep your proof of purchase for any warranty claims.