
1. Introduction
The ABLEWE USB 3.0 KVM Switch allows two computers to share up to four USB 3.0 peripheral devices. This device eliminates the need to constantly swap cables between computers, enhancing work efficiency. It is ideal for sharing devices such as printers, scanners, mice, keyboards, webcams, and USB flash drives between two systems.
This USB 3.0 switch offers broad compatibility, operating driver-free with Windows 10/8/8.1/7/Vista/XP, Mac OS, Linux, and Chrome OS. Simply plug and play for immediate functionality.

Figure 1.1: ABLEWE USB 3.0 KVM Switch connection diagram.
2. Package Contents
Please check the package contents to ensure all items are present:
- 1 x ABLEWE USB 3.0 KVM Switch
- 2 x USB 3.0 A-to-A Cables
- 1 x Micro USB Power Cable
- 1 x User Manual

Figure 2.1: Package contents of the ABLEWE USB 3.0 KVM Switch.
3. Product Features and Diagram
The ABLEWE USB 3.0 KVM Switch is designed for ease of use and efficient device sharing.
Key Features:
- 4-Port USB 3.0 Sharing: Connect up to four USB 3.0 devices.
- 2-Computer Connectivity: Seamlessly switch between two host computers.
- Button Switch: Easy one-button toggle between connected computers.
- LED Indicator: Clearly shows which computer is currently active (Green or Blue). The indicator light is designed to be non-dazzling.
- USB 3.0 Speed: Supports data transfer speeds up to 5Gbps, backward compatible with USB 2.0.
- Micro USB Power Port: Provides stable power for high-power consumption devices (e.g., HDDs, SSDs, digital video cameras).
- Driver-Free: No software installation required for most operating systems.
Product Diagram:

Figure 3.1: Front view of the ABLEWE USB 3.0 KVM Switch.

Figure 3.2: Key features of the ABLEWE USB 3.0 KVM Switch.
4. Setup Instructions
Follow these steps to set up your ABLEWE USB 3.0 KVM Switch:
- Connect Computers: Use the two provided USB 3.0 A-to-A cables to connect your two computers to the input ports labeled 'PC 1' and 'PC 2' on the KVM switch.
- Connect USB Devices: Plug your USB peripheral devices (e.g., keyboard, mouse, printer, USB drive) into the four USB 3.0 output ports on the KVM switch.
- Connect Power (Optional but Recommended): If you are using high-power USB devices such as external hard drives (HDDs), solid-state drives (SSDs), or digital video cameras, connect the included Micro USB power cable to the 'DC 5V' port on the switch and to a 5V 2A USB power adapter (not included). This ensures stable performance for all connected devices.
- Power On: Ensure both connected computers are powered on. The KVM switch is driver-free and should be recognized automatically by your operating system.
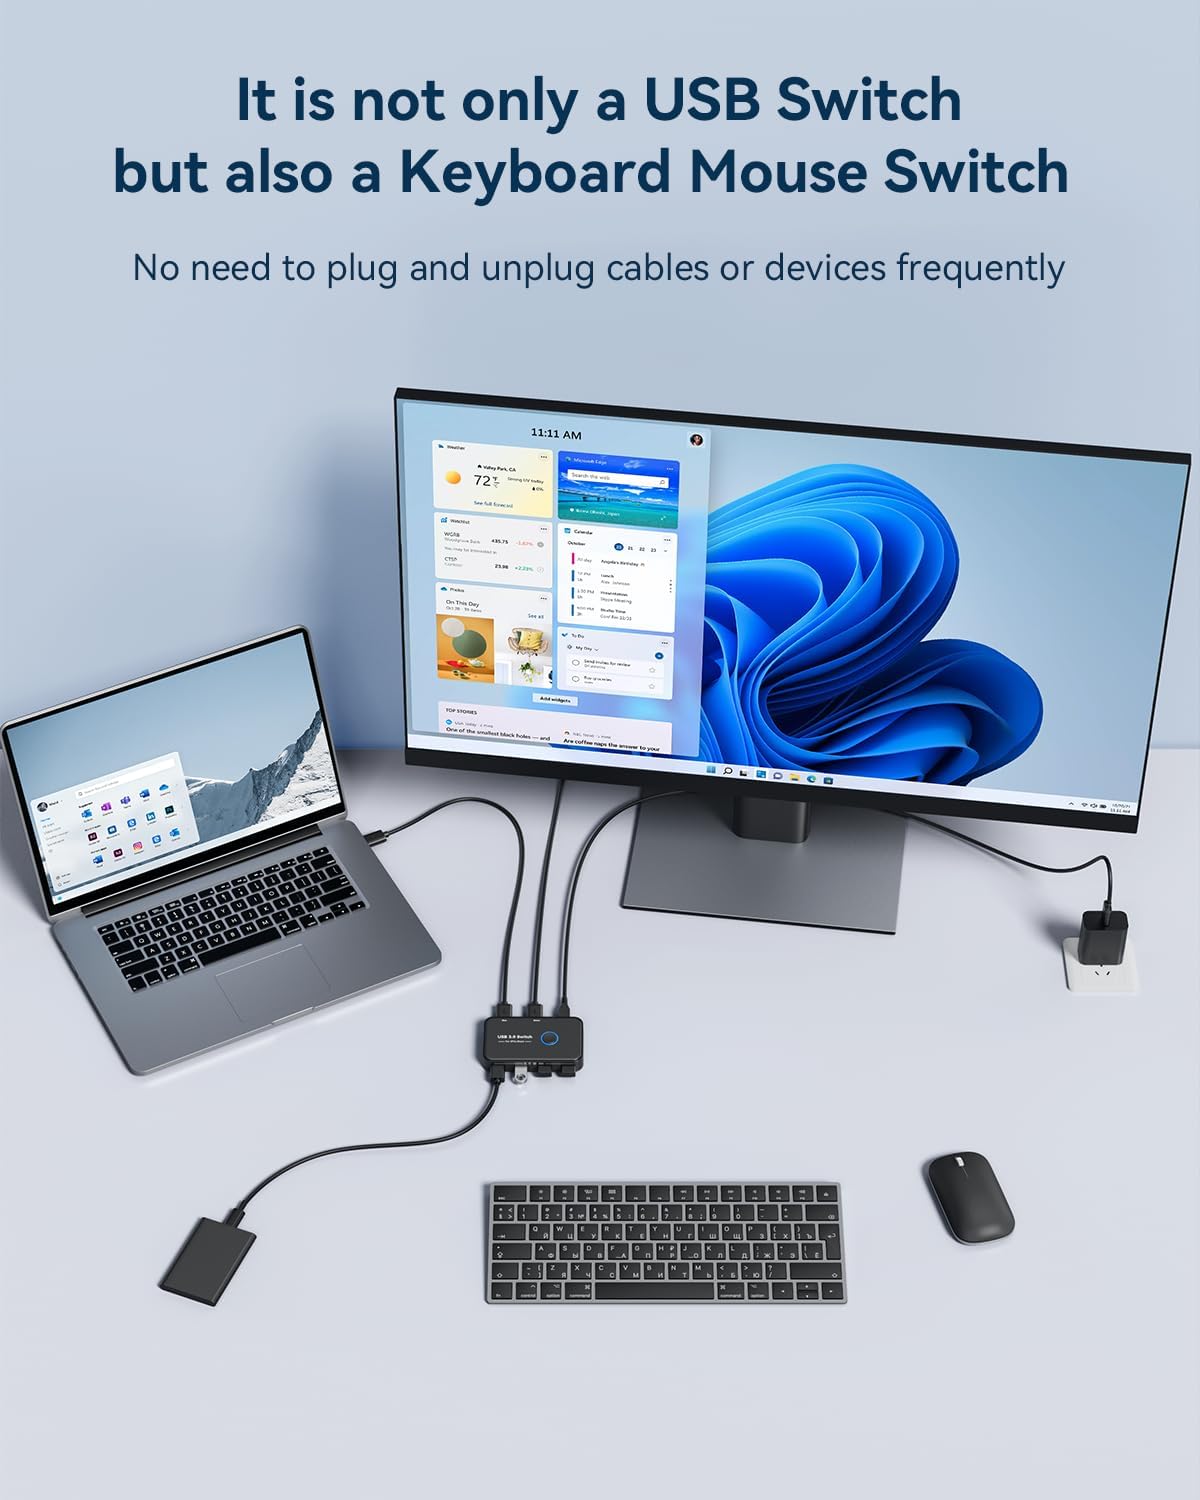
Figure 4.1: Example setup with a laptop and desktop sharing peripherals.

Figure 4.2: Connecting the Micro USB power cable for stable performance.
Connecting to a USB-C Laptop:
If your laptop only has USB-C ports, you will need an OTG USB-C to USB-A adapter to connect the provided USB-A to USB-A cable from the KVM switch to your laptop.

Figure 4.3: Connecting to a USB-C laptop.
5. Operating Instructions
Operating the ABLEWE USB 3.0 KVM Switch is straightforward:
- Switching Computers: To switch control of the shared USB devices between your two computers, simply press the large circular button on the top of the KVM switch.
- LED Indicator: The LED indicator light around the button will change color (Green or Blue) to show which computer is currently active and has control of the connected USB devices.

Figure 5.1: One-button switching operation.
6. Maintenance
To ensure the longevity and optimal performance of your ABLEWE USB 3.0 KVM Switch, follow these maintenance guidelines:
- Keep the device in a clean, dry environment, away from dust and moisture.
- Avoid exposing the switch to extreme temperatures or direct sunlight.
- Do not attempt to open or modify the device, as this will void the warranty.
- Clean the exterior with a soft, dry cloth. Do not use liquid cleaners or solvents.
- Ensure cables are not bent sharply or under excessive tension to prevent damage.
7. Troubleshooting
If you encounter issues with your ABLEWE USB 3.0 KVM Switch, please refer to the following troubleshooting tips:
- Devices Not Recognized or Unstable:
- Ensure the Micro USB power cable is connected to the switch and a 5V 2A power adapter, especially when using high-power devices like external hard drives or SSDs. Insufficient power can lead to device instability or non-recognition.
- Try connecting the problematic USB device directly to the computer to verify its functionality.
- Check all cable connections. Ensure they are securely plugged into both the switch and the computers/devices.
- Try using different USB cables if available, as faulty cables can cause connection issues.
- Switching Issues (e.g., device not switching properly, unrecognized USB device error):
- Press the switch button again to toggle to the other computer, wait a few seconds, and then switch back to the desired computer. This can often resolve temporary recognition issues.
- Ensure both computers are fully powered on and their operating systems are running correctly.
- If a specific device consistently fails to switch, try connecting it to a different USB port on the KVM switch.
- Slow Data Transfer Speed:
- Ensure you are using USB 3.0 compatible devices and cables. While the switch is backward compatible, USB 2.0 devices will operate at USB 2.0 speeds.
- Verify that the USB 3.0 ports on your computers are functioning correctly.
- No LED Indicator Light:
- Ensure the KVM switch is properly connected to at least one active computer via a USB 3.0 A-to-A cable. The switch draws power from the connected computers.
8. Specifications
| Feature | Description |
|---|---|
| Brand | ABLEWE |
| Model | B0C2PNDDFS |
| Item Weight | 5.9 ounces (0.17 Kilograms) |
| Package Dimensions | 6.26 x 5.24 x 0.63 inches |
| Color | Black |
| Special Features | Button Switch, LED Indication |
| Compatible Devices | Desktop, Keyboard, Mouse, Printer, Scanners |
| Connector Type | USB |
| Data Transfer Speed | Up to 5Gbps (USB 3.0) |
| Power Input | Micro USB 5V 2A (for stable performance with high-power devices) |
| Operating Systems | Windows 10/8/8.1/7/Vista/XP, Mac OS, Linux, Chrome OS |
9. Warranty and Support
ABLEWE provides a 12-month warranty for this USB switch, covering manufacturing defects and ensuring product reliability.
Additionally, ABLEWE offers lifetime technical support to assist you with any questions or issues you may encounter during the use of your product.
For warranty claims or technical assistance, please contact ABLEWE support through the retailer's platform or visit the official ABLEWE website for contact information.