
NEXPOW MS22C-003
NEXPOW Auto Inflator Portable Air Compressor User Manual
Model: MS22C-003
1. Introduction
Thank you for choosing the NEXPOW Auto Inflator Portable Air Compressor. This cordless and portable device is designed for convenient and efficient inflation of various items, including car tires, bicycle tires, motorcycle tires, and sports balls. Equipped with a powerful 7500mAh battery and a digital dual screen, it offers precise pressure control and automatic shut-off for safe and accurate inflation. This manual provides detailed instructions for proper use, maintenance, and troubleshooting to ensure optimal performance and longevity of your device.
2. Package Contents
Please verify that all items are present in your package:
- NEXPOW Auto Inflator Portable Air Compressor Unit
- Inflation Hose
- Presta Valve Adapter
- Ball Needle
- Swimming Ring Nozzle
- USB Charging Cable
- 12V DC Car Power Cable (Cigarette Lighter Adapter)
- Storage Pouch

Image: The NEXPOW portable air compressor unit shown with its included accessories: inflation hose, various nozzles (Presta valve, ball needle, swimming ring), USB charging cable, 12V DC car power cable, and a black storage pouch.
3. Product Overview
3.1 Components and Controls
Familiarize yourself with the main components and control buttons of the air compressor:
- Digital Dual Screen: Displays preset pressure value, real-time pressure value, battery level, inflation mode, and pressure units (PSI, BAR, KPA, KG/CM²).
- Power Button: Turns the device on/off and starts/stops inflation.
- Mode Button: Cycles through preset inflation modes (Car, Motorcycle, Bicycle, Ball).
- +/- Buttons: Adjusts the preset pressure value.
- Unit Button: Changes the pressure unit.
- LED Light Button: Activates and cycles through LED lighting modes (Torch, SOS, Strobe).
- Inflation Port: Where the inflation hose connects.
- USB Output Port: For emergency power supply to other devices.
- Charging Port: For charging the internal battery.
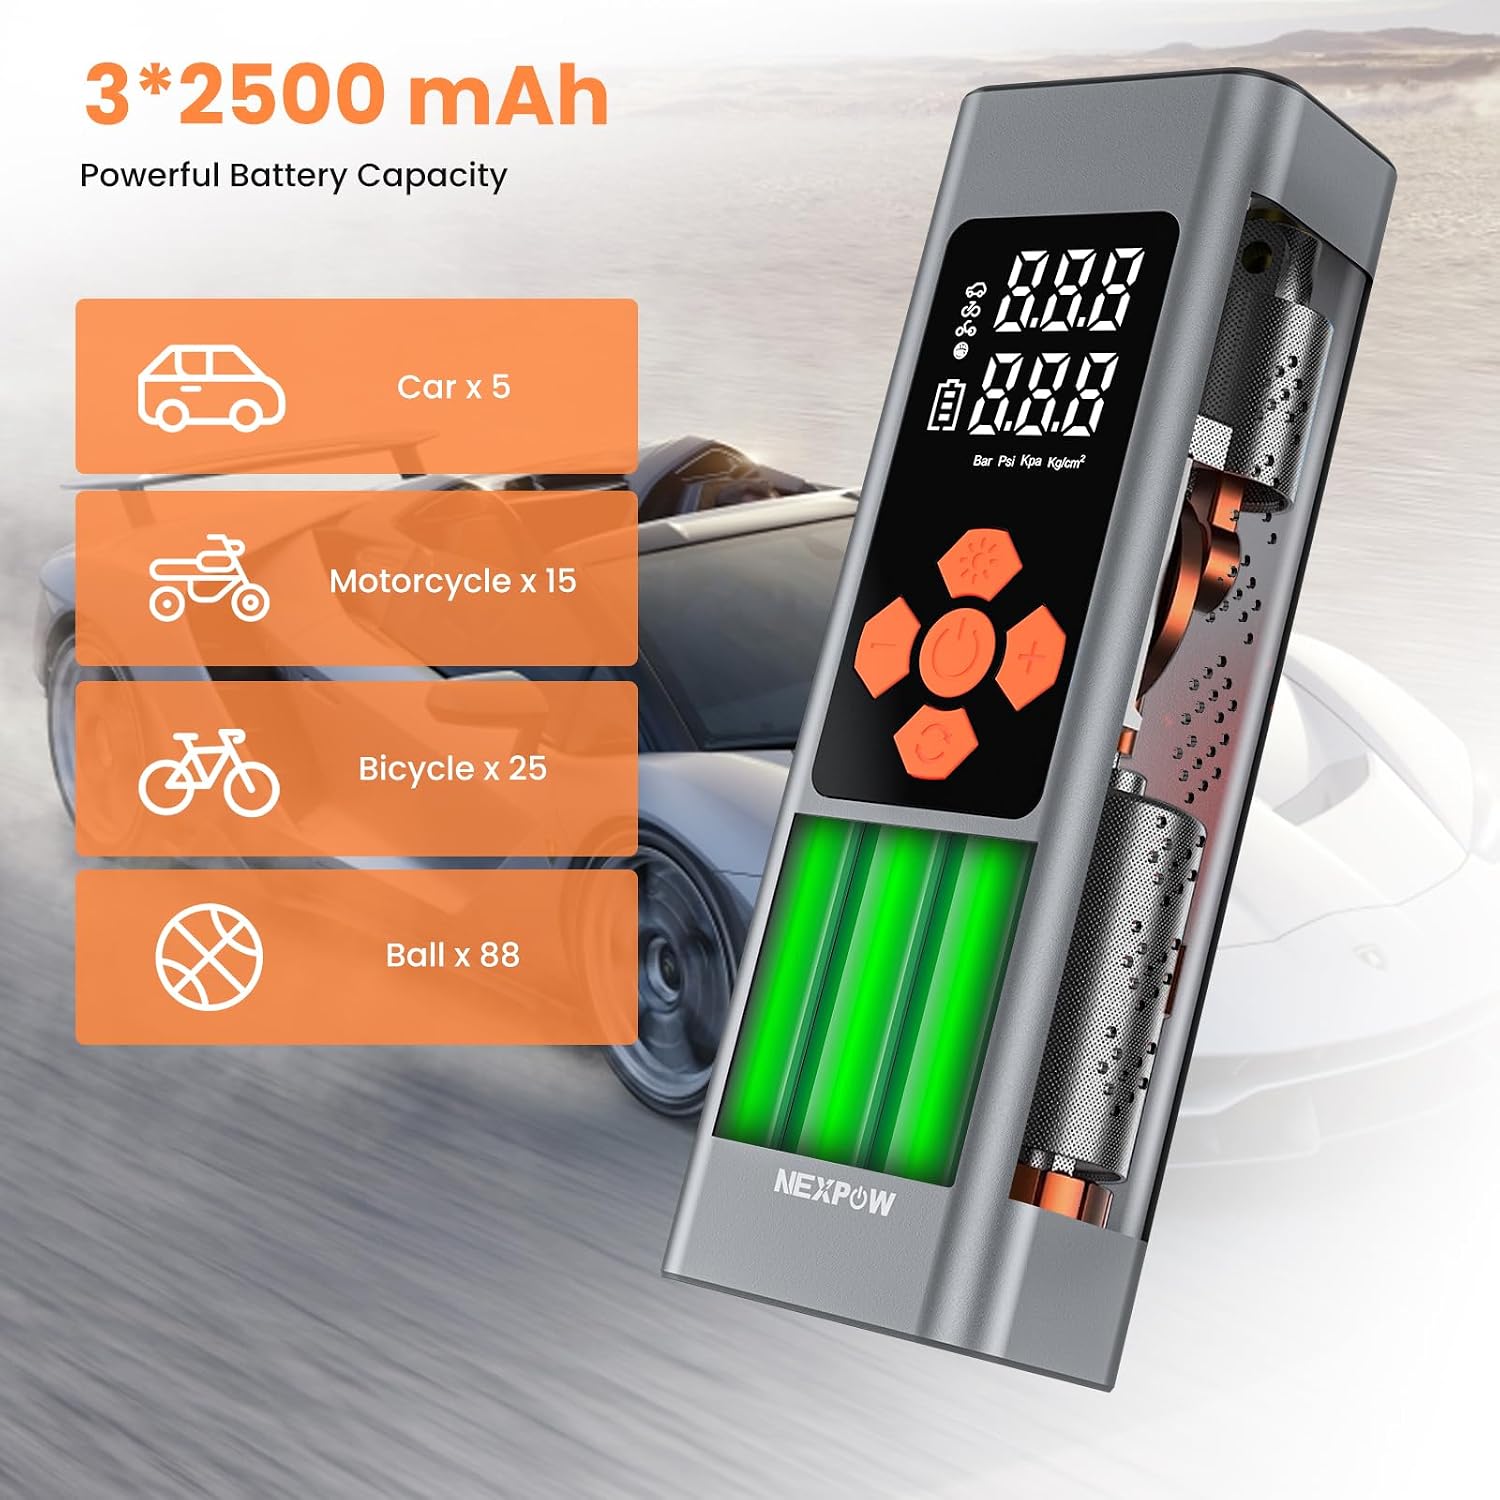
Image: A detailed view of the air compressor's digital screen, highlighting the preset and real-time pressure displays, and the control buttons for mode selection, pressure adjustment, and unit conversion.
4. Setup
4.1 Charging the Device
Before first use, fully charge the air compressor. Connect the USB charging cable to the device's charging port and to a suitable USB power adapter (not included). The battery indicator on the screen will show charging status. A full charge provides up to 18 minutes of continuous inflation.
4.2 Power Options
The device offers two power options:
- Cordless Operation: Powered by the internal 7500mAh rechargeable battery. Ideal for portability and quick inflation anywhere.
- 12V DC Operation: Connect the included 9.8 ft DC 12V power cord to your car's cigarette lighter socket. This option provides continuous power and is useful if the battery is low or for extended use.

Image: Demonstrates the two power options for the air compressor: operating wirelessly using its internal battery, and operating via the 12V DC car cigarette lighter adapter for continuous power.
4.3 Attaching the Inflation Hose and Nozzles
Screw the inflation hose securely onto the inflation port of the compressor. Select the appropriate nozzle for the item you wish to inflate (e.g., Presta valve adapter for certain bike tires, ball needle for sports balls) and attach it to the end of the inflation hose.

Image: A view of the air compressor highlighting its internal storage compartment at the bottom, designed to neatly hold the various inflation nozzles and adapters.
5. Operating Instructions
5.1 Powering On and Mode Selection
- Press and hold the Power Button to turn on the device. The digital screen will illuminate.
- Press the Mode Button to cycle through the 4 preset inflation modes: Car, Motorcycle, Bicycle, and Ball. Each mode has a default pressure value.
- Alternatively, you can manually adjust the pressure value from 3 to 150 PSI using the +/- buttons.
- Press the Unit Button to switch between pressure units (PSI, BAR, KPA, KG/CM²).

Image: Illustrates the four preset inflation modes available on the NEXPOW air compressor: Car, Motorcycle, Bicycle, and Ball, each with a suggested default pressure setting displayed on the screen.
5.2 Inflation Process
- Connect the inflation hose (with the appropriate nozzle) securely to the valve of the item you wish to inflate. The real-time pressure of the item will be displayed on the screen.
- Ensure the preset pressure value is set to your desired level.
- Press the Power Button to start inflation. The compressor will begin to inflate, and the real-time pressure will increase on the screen.
- The compressor will automatically stop once the preset pressure value is reached, ensuring accurate and safe inflation.
- Disconnect the hose from the valve and the compressor.
5.3 LED Lighting Modes
The air compressor features three LED lighting modes for various situations:
- Torch Mode: Provides continuous illumination for general use in low-light conditions.
- SOS Mode: Emits a Morse code SOS signal, useful for emergency signaling.
- Strobe Mode: Produces a rapid flashing light, ideal for attracting attention in emergencies.
Press the LED Light Button repeatedly to cycle through these modes.
5.4 Emergency Power Supply (Power Bank Function)
The built-in USB output port allows the air compressor to function as an emergency power bank for charging small electronic devices like smartphones. Connect your device's charging cable to the USB output port on the compressor.
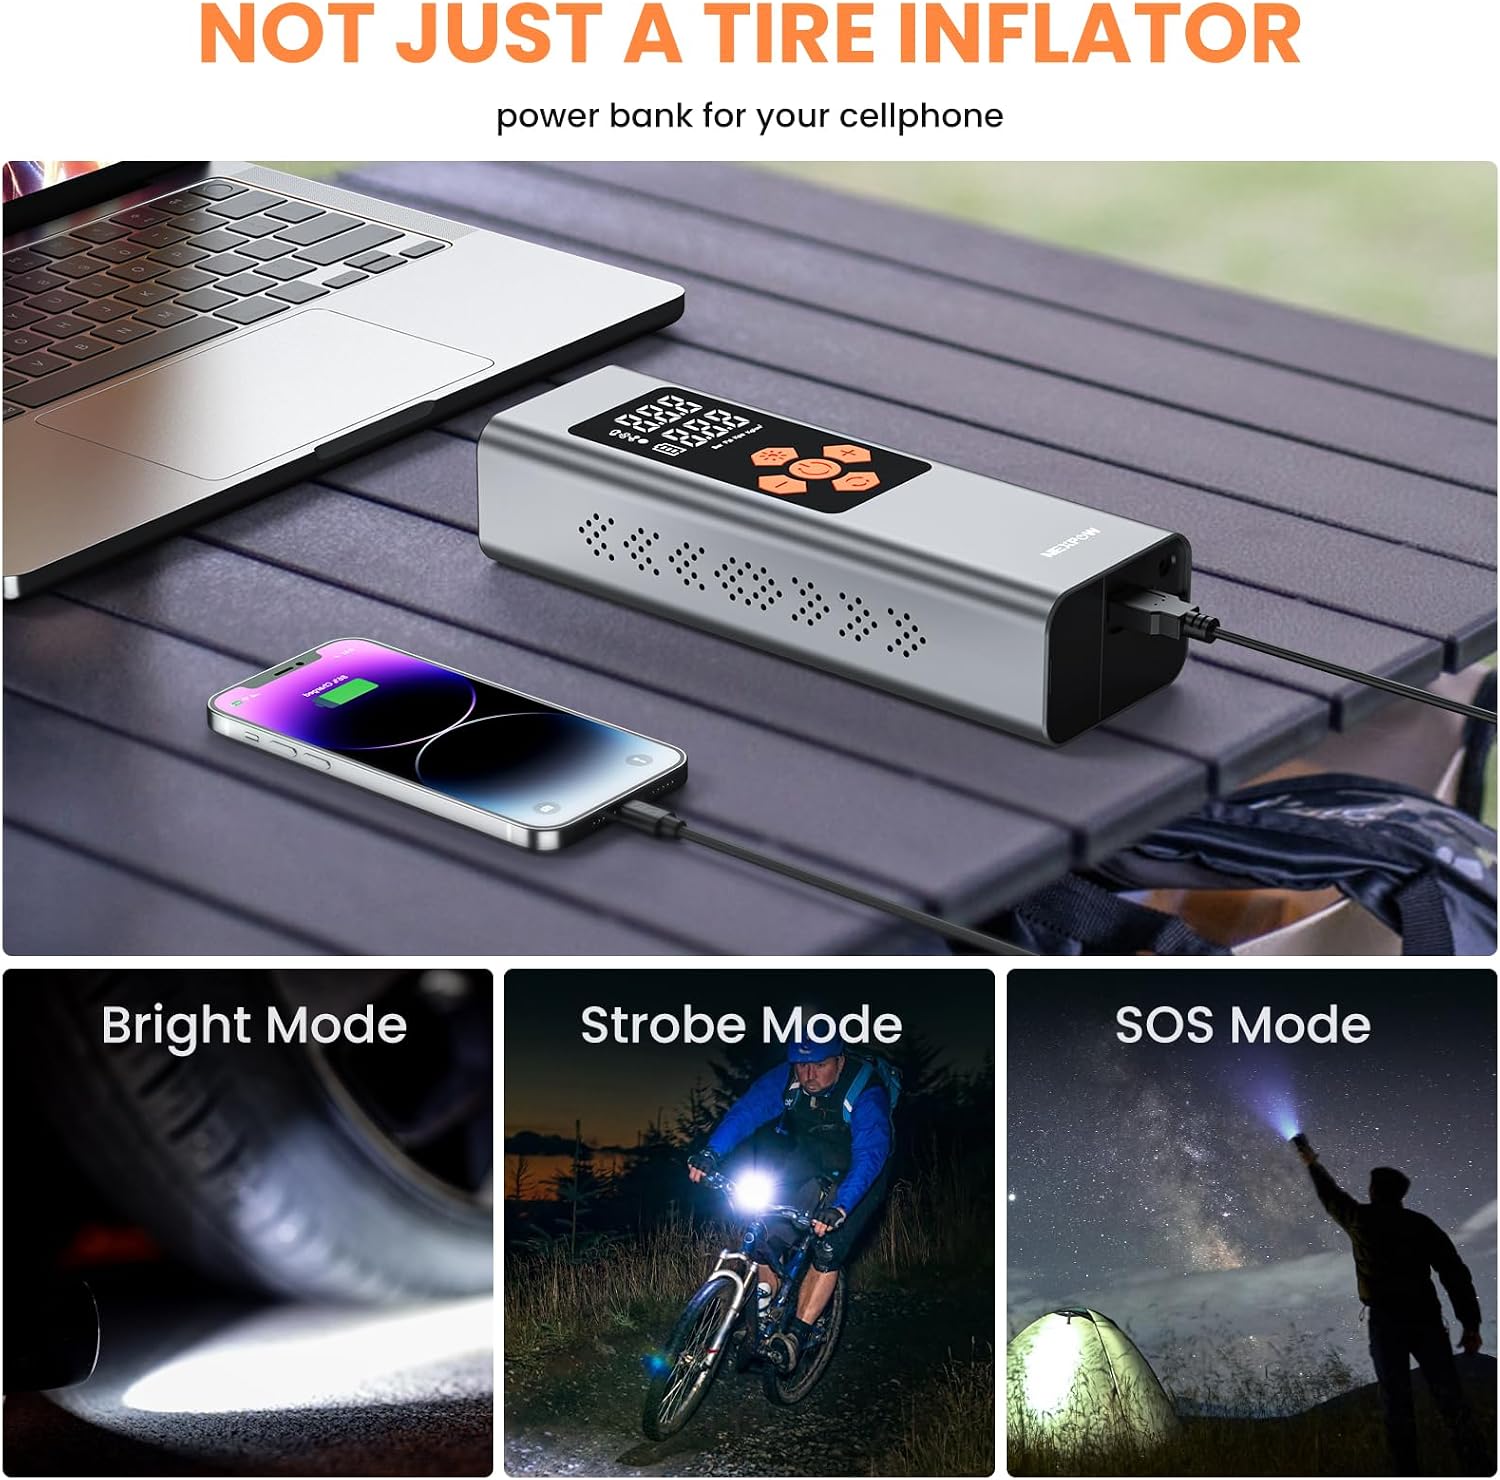
Image: Shows the NEXPOW air compressor connected via USB to charge a smartphone, illustrating its power bank capability. Also depicts the three LED lighting modes: Bright, Strobe, and SOS, in different scenarios.
6. Maintenance
- Cleaning: Wipe the device with a soft, damp cloth. Do not use harsh chemicals or abrasive cleaners. Ensure the device is off and disconnected from any power source before cleaning.
- Storage: Store the air compressor in a cool, dry place, away from direct sunlight and extreme temperatures. Keep it out of reach of children. Utilize the included storage pouch for protection.
- Battery Care: To prolong battery life, avoid fully discharging the battery frequently. If storing for an extended period, charge the battery to approximately 50-70% every 3-6 months.
7. Troubleshooting
| Problem | Possible Cause | Solution |
|---|---|---|
| Device does not turn on. | Battery is depleted. | Charge the device using the USB cable or connect to 12V DC car power. |
| Inflation stops prematurely. | Preset pressure reached. | This is normal operation. If more inflation is needed, increase the preset pressure. |
| Inaccurate pressure reading. | Hose not securely connected to valve or compressor. | Ensure all connections are tight. |
| Device overheats during use. | Continuous operation for too long. | Allow the device to cool down for 10-15 minutes before resuming operation. Avoid prolonged continuous use. |
8. Specifications
- Model: MS22C-003
- Maximum Inflation Pressure: 150 PSI
- Battery Capacity: 7500 mAh (3 x 2500 mAh Lithium Ion)
- Power Source: Battery Powered / 12V DC
- Rated Wattage: 60 watts
- Noise Level: 65 dB
- Product Dimensions: 6.86 x 4.57 x 20.83 cm
- Item Weight: 671 g (1.48 lbs)
- Material: Aluminum
- Special Features: Portable, Cordless, Digital Display, Automatic Shut-off, LED Lighting (Torch, SOS, Strobe), Power Bank Function
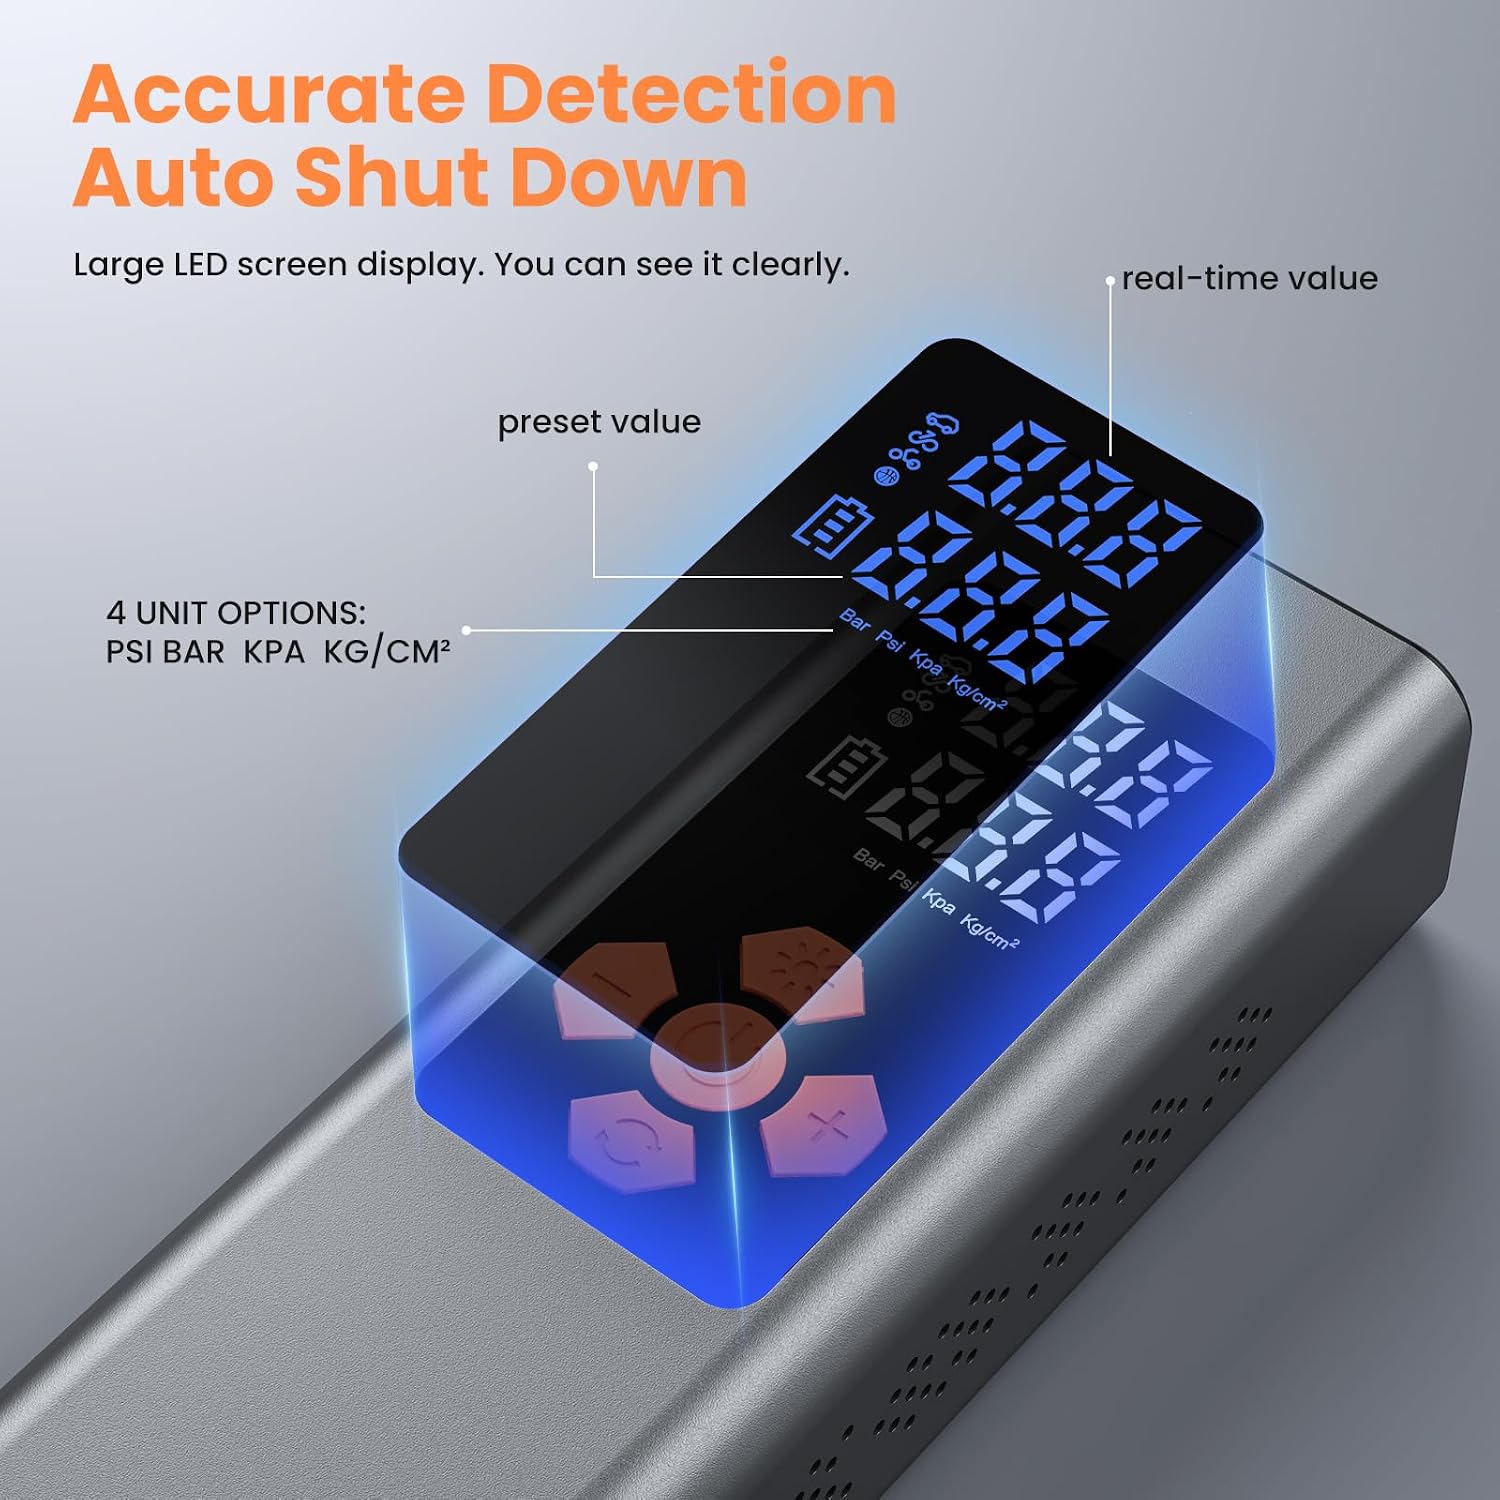
Image: Illustrates the powerful 7500mAh battery capacity of the NEXPOW air compressor, showing approximate inflation counts for different items on a single charge: 5 car tires, 15 motorcycle tires, 25 bicycle tires, or 88 balls.
9. Warranty and Support
For warranty information and customer support, please refer to the documentation included with your product or visit the official NEXPOW website. If you encounter any issues or have questions regarding your NEXPOW Auto Inflator Portable Air Compressor, please contact NEXPOW customer service for assistance.
Ask a question about this manual
Ask about setup, troubleshooting, compatibility, parts, safety, or missing instructions. Manuals+ will review the question and use this page’s manual context to help answer it.