
1. Safety Information
Read all instructions carefully before installation and operation. Failure to follow these instructions may result in damage to the product, vehicle, or personal injury. Keep this manual for future reference.
- Ensure the vehicle's ignition is off and the battery is disconnected before starting installation.
- Consult a professional if you are unsure about any installation steps.
- Do not operate the device in a manner that distracts you from driving.
- Avoid exposing the device to extreme temperatures, direct sunlight for prolonged periods, or moisture.
2. Product Overview
The Roinvou Qualcomm 8-Core Android 15 Car Radio is a 9-inch QLED touch screen multimedia system designed for Toyota Camry models from 2007 to 2011. It features a Qualcomm 8-core 1.8GHz CPU, 4GB RAM, 64GB internal storage, and runs on Android 15. Key features include wireless CarPlay and Android Auto, 6GHz WiFi, Bluetooth 5.1, DSP, EQ, FM/RDS radio, GPS navigation, and support for a rear view camera.

3. Package Contents
Verify that all items are present in the package:
- Toyota Camry Car Stereo
- Power Cable
- RCA Harness
- GPS Antenna
- Rear Camera Input Cable
- Dual USB Cable
- AHD Backup Camera
- External Microphone
- Installation Tool & Accessories

4. Installation Guide
This section provides step-by-step instructions for installing the Roinvou car radio. Professional installation is recommended.
4.1 Removing the OEM Radio Unit
- Using a plastic pry tool, carefully pry out the air vent trim panel located above the OEM radio.
- Disconnect the emergency light cable and the vehicle status indicator light cable from the back of the trim panel.
- Use a socket tool to remove the two fixing screws located at the top of the OEM head unit.
- Carefully pry out the center console panel around the gear shifter. Shift the gear into "D" to provide more space, then unscrew the gear shift knob.
- When lifting the center console panel, be careful to disconnect all connecting cables on the back.
- Use a socket tool to remove the two fixing screws at the bottom of the OEM head unit.
- Gently pull out the OEM head unit and disconnect all cables at the back of the unit.
- Unscrew the fixing screws on both sides of the OEM head unit and remove the mounting brackets.
- Remove the OEM air conditioning control panel from the old unit.
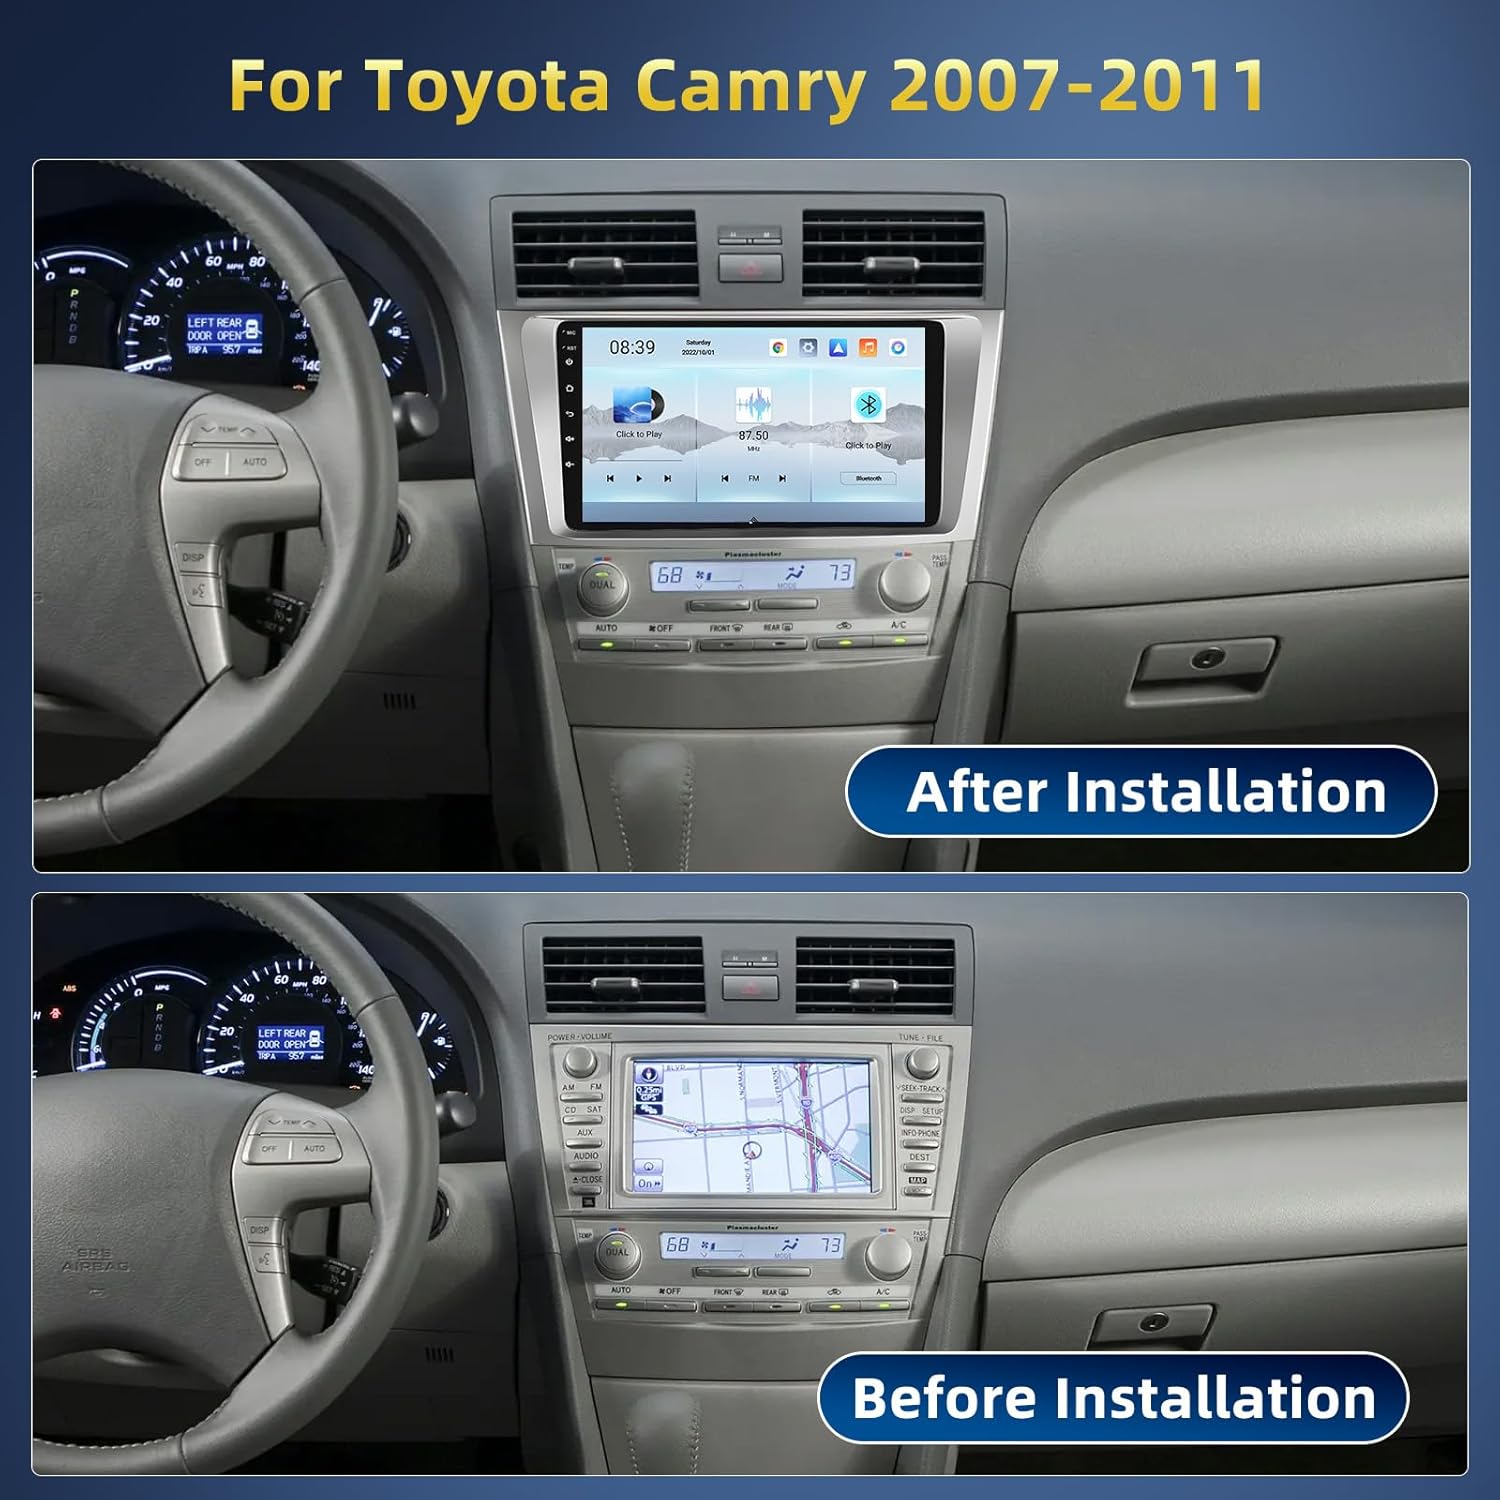
4.2 Wiring Connections
- From the OEM wiring harness, connect the three necessary wires to the new unit's power cable.
- If your Camry is a newer model (check compatibility), connect the steering wheel control cable.
- If your Camry is a newer model (check compatibility), connect the radio antenna cable. For older models, these two cables can be disregarded.
- Connect the new Roinvou device to the air conditioning control panel.
- Connect all air control panel cables and the cables on the back of the new unit. Refer to the wiring diagram for specific connections.

4.3 Rear View Camera Installation
- Open the trim panel on the tailgate of your vehicle.
- Locate the positive wire of the reverse light.
- Connect the red wire of the camera extension cable to the reverse light's positive pole.
- Install the AHD backup camera behind the license plate.
- Route the camera cable through the license plate light housing into the vehicle interior.
- Connect the camera extension cable to the car radio compartment.
- Connect the reverse camera extension cable to the reverse trigger wire.
- Connect the blue wire in the reverse trigger wire harness to the third wire in the power wire harness.

4.4 Final Assembly
- Align the new unit with the clips and secure it in the car.
- Reinstall the air vent trim panel, ensuring all cables are reconnected.
- Reinstall the center console panel, ensuring all internal cables are reconnected to their original positions.
- Re-attach the gear shift knob.
5. Operating Instructions
5.1 Basic Functions
- Power On/Off: Press and hold the power button on the unit or steering wheel.
- Volume Control: Use the physical knobs or steering wheel controls to adjust volume.
- Home Screen: Tap the Home icon to return to the main interface.
5.2 Wireless CarPlay & Android Auto
Connect your smartphone wirelessly for seamless integration of navigation, music, and calls.
- Ensure Bluetooth is enabled on your smartphone and the car radio.
- On the car radio, navigate to the CarPlay/Android Auto application.
- Search for your phone in the Bluetooth settings and pair the devices.
- Follow the on-screen prompts on both your phone and the car radio to complete the connection.

5.3 GPS Navigation
The unit supports various navigation applications. Ensure the GPS antenna is properly installed for optimal signal reception.
- Tap the Navigation icon on the home screen to launch your preferred GPS app.
- Enter your destination and follow the voice-guided directions.

5.4 FM/RDS Radio
Access local radio stations and receive real-time traffic, news, and weather updates via RDS.
- Tap the Radio icon to open the FM/RDS interface.
- Use the scan function or manual tuning to find stations.
- Save your favorite stations for quick access.
5.5 Bluetooth 5.1
Connect your phone for hands-free calling and audio streaming.
- Go to Bluetooth settings on the unit.
- Pair your phone to make and receive calls, and play music wirelessly.
5.6 DSP/EQ Sound Adjustment
Customize your audio experience with the built-in Digital Sound Processor (DSP) and Equalizer (EQ).
- Access the DSP/EQ settings to fine-tune sound modes, balance, and fade.
- Choose from preset sound effects or create custom profiles.
5.7 Split Screen & Picture-in-Picture
Multitask by running two applications simultaneously on the screen.
- Long-press an app icon and drag it to one side of the screen to activate split-screen mode.
- Select another app to run on the other side.
5.8 Steering Wheel Control (SWC)
Program your steering wheel buttons to control the car radio for safe operation.
- Navigate to the SWC settings in the unit's menu.
- Follow the on-screen instructions to map functions to your steering wheel buttons.
5.9 Rear View Camera
The unit automatically displays the rear view camera feed when the vehicle is in reverse gear.
- Ensure the camera is properly installed and wired as per Section 4.3.
- The display will switch to the camera view when reverse gear is engaged.
6. Maintenance
- Screen Cleaning: Use a soft, lint-free cloth to clean the touch screen. Avoid abrasive cleaners.
- Software Updates: Periodically check for software updates from the manufacturer to ensure optimal performance and access to new features.
- Cooling Fan: The unit features a built-in cooling fan for efficient heat dissipation. Ensure the fan vents are not obstructed.

7. Troubleshooting
| Problem | Possible Cause | Solution |
|---|---|---|
| Unit does not power on. | Incorrect wiring, blown fuse. | Check power connections and vehicle fuses. Ensure battery is connected. |
| No sound. | Volume too low, incorrect audio settings, speaker wiring issues. | Increase volume, check DSP/EQ settings, verify speaker connections. |
| GPS signal lost or inaccurate. | GPS antenna not properly installed or obstructed. | Ensure GPS antenna is securely connected and placed in an unobstructed location (e.g., dashboard). |
| Bluetooth connection issues. | Phone not discoverable, incorrect pairing, interference. | Ensure phone Bluetooth is on and discoverable. Re-pair the device. Clear previous pairings. |
| Rear view camera not displaying. | Incorrect camera wiring, camera malfunction. | Check camera power and video signal connections. Ensure reverse gear is engaged. |
8. Specifications
| Feature | Detail |
|---|---|
| Product Dimensions | 11.57 x 1.57 x 5.51 inches |
| Item Weight | 2.75 pounds |
| Brand | Roinvou |
| Screen Size | 9 Inches |
| Resolution | 1280 x 720 (QLED) |
| Operating System | Android 15 |
| Processor | Qualcomm 8-Core 1.8GHz |
| Memory (RAM + ROM) | 4GB RAM + 64GB ROM |
| Connectivity | Bluetooth 5.1, 6GHz WiFi, USB |
| Special Features | CarPlay, Android Auto, DSP, EQ, FM/RDS Radio, GPS Navigation, Mirror Link, Split Screen, Picture-in-Picture, 3D Car Dynamic Effects, SWC, AHD Backup Camera Support, Voice Control, Weather Forecast |
9. Warranty and Support
This product comes with a standard manufacturer's warranty. For warranty claims, technical support, or any inquiries, please contact Roinvou customer service through your purchase platform or refer to the contact information provided with your product packaging.
Return Policy: This product is eligible for a 30-day refund/replacement policy as per Amazon's terms.


