1. Introduction and Overview
This manual provides essential information for the safe and efficient use of your Broil King Crown 410 Liquid Propane 4-Burner Grill (Model 865054). Please read all instructions thoroughly before assembly and operation to ensure proper function and safety.
The Broil King Crown 410 is designed for outdoor cooking, featuring four stainless steel Dual-Tube burners that deliver up to 40,000 BTUs of cooking power. It offers a total cooking surface of 420 square inches, including a porcelain-coated warming rack. Key features include the stainless steel Flav-R-Wave cooking system for even heat distribution and enhanced flavor, Linear-Flow valves with 180° Sensi-Touch control for precise temperature management, and a Sure-Lite electronic ignition system for reliable startups.

Image 1.1: Front view of the Broil King Crown 410 Liquid Propane 4-Burner Grill with the lid closed.
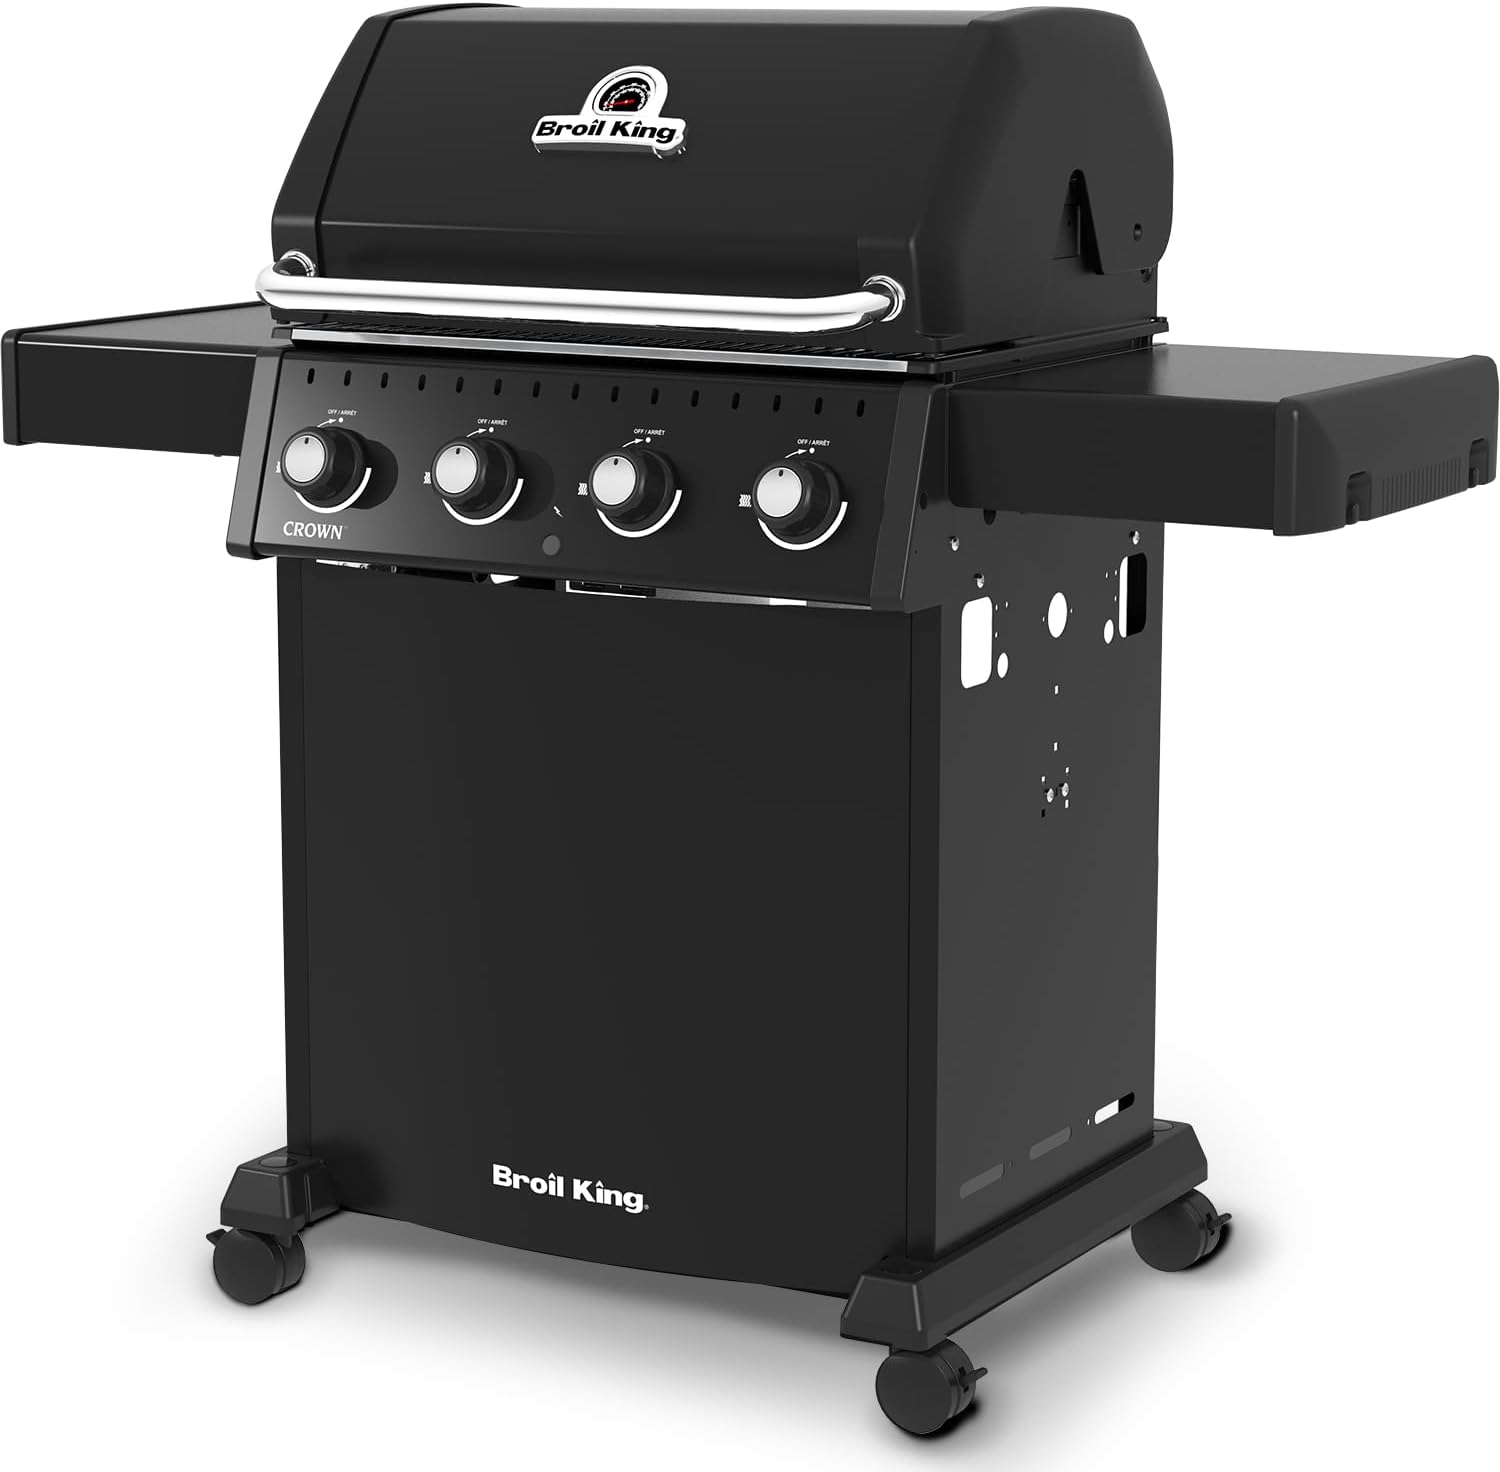
Image 1.2: Angled view of the Broil King Crown 410 grill, showcasing its design.

Image 1.3: The Broil King Crown 410 grill positioned in an outdoor patio environment.
2. Safety Information
WARNING: For outdoor use only. Do not store or use gasoline or other flammable vapors and liquids in the vicinity of this or any other appliance.
WARNING: This product can expose you to chemicals including carbon monoxide, which is known to the State of California to cause birth defects or other reproductive harm. For more information go to www.P65Warnings.ca.gov.
2.1 Liquid Propane (LP) Gas Safety
- Always ensure the LP tank is securely connected and free from leaks before operation. Perform a leak test as described in the assembly section.
- Never store a spare LP cylinder under or near the grill.
- Always turn off the gas supply at the cylinder after each use.
- Do not obstruct the flow of combustion and ventilation air to the grill.
2.2 General Safety Guidelines
- Maintain a minimum clearance of 10 inches from the back and sides of the grill to combustible materials.
- Never leave the grill unattended while operating.
- Keep children and pets away from the grill at all times.
- Use heat-resistant gloves when handling hot components.
- Ensure the grill is placed on a level, stable surface.
3. Assembly Instructions
Assembly of the Broil King Crown 410 grill is required. Before beginning, carefully unpack all components and verify that all parts are present according to the packing list provided with your grill. It is recommended to have a second person assist with assembly.
Follow the step-by-step instructions and diagrams included in the dedicated assembly guide that accompanies your product. Ensure all fasteners are tightened securely, but do not overtighten. Pay close attention to gas line connections to prevent leaks.

Image 3.1: Dimensions of the Broil King Crown 410 grill, useful for planning placement.

Image 3.2: Engaging the wheel lock for stability after positioning the grill.

Image 3.3: Close-up of the side shelf folding mechanism for compact storage.
4. Operating Instructions
4.1 Pre-Operation Check
- Ensure the LP cylinder is full and properly connected to the grill's regulator.
- Perform a leak test on all gas connections using a soapy water solution. Bubbles indicate a leak. Do not operate the grill if a leak is detected.
- Open the lid of the grill before lighting any burners.

Image 4.1: Front view of the grill with the lid open, revealing the cooking grates and warming rack.
4.2 Lighting the Burners
- Open the LP cylinder valve slowly.
- Push and turn any burner control knob to the HIGH position.
- Press the Sure-Lite electronic ignition button repeatedly until the burner lights. You should hear a clicking sound and see a flame.
- Once the first burner is lit, you can light adjacent burners by turning their control knobs to HIGH.
- If a burner does not light within 5 seconds, turn off the gas at the control knob and the LP cylinder, wait 5 minutes, and repeat the lighting procedure.
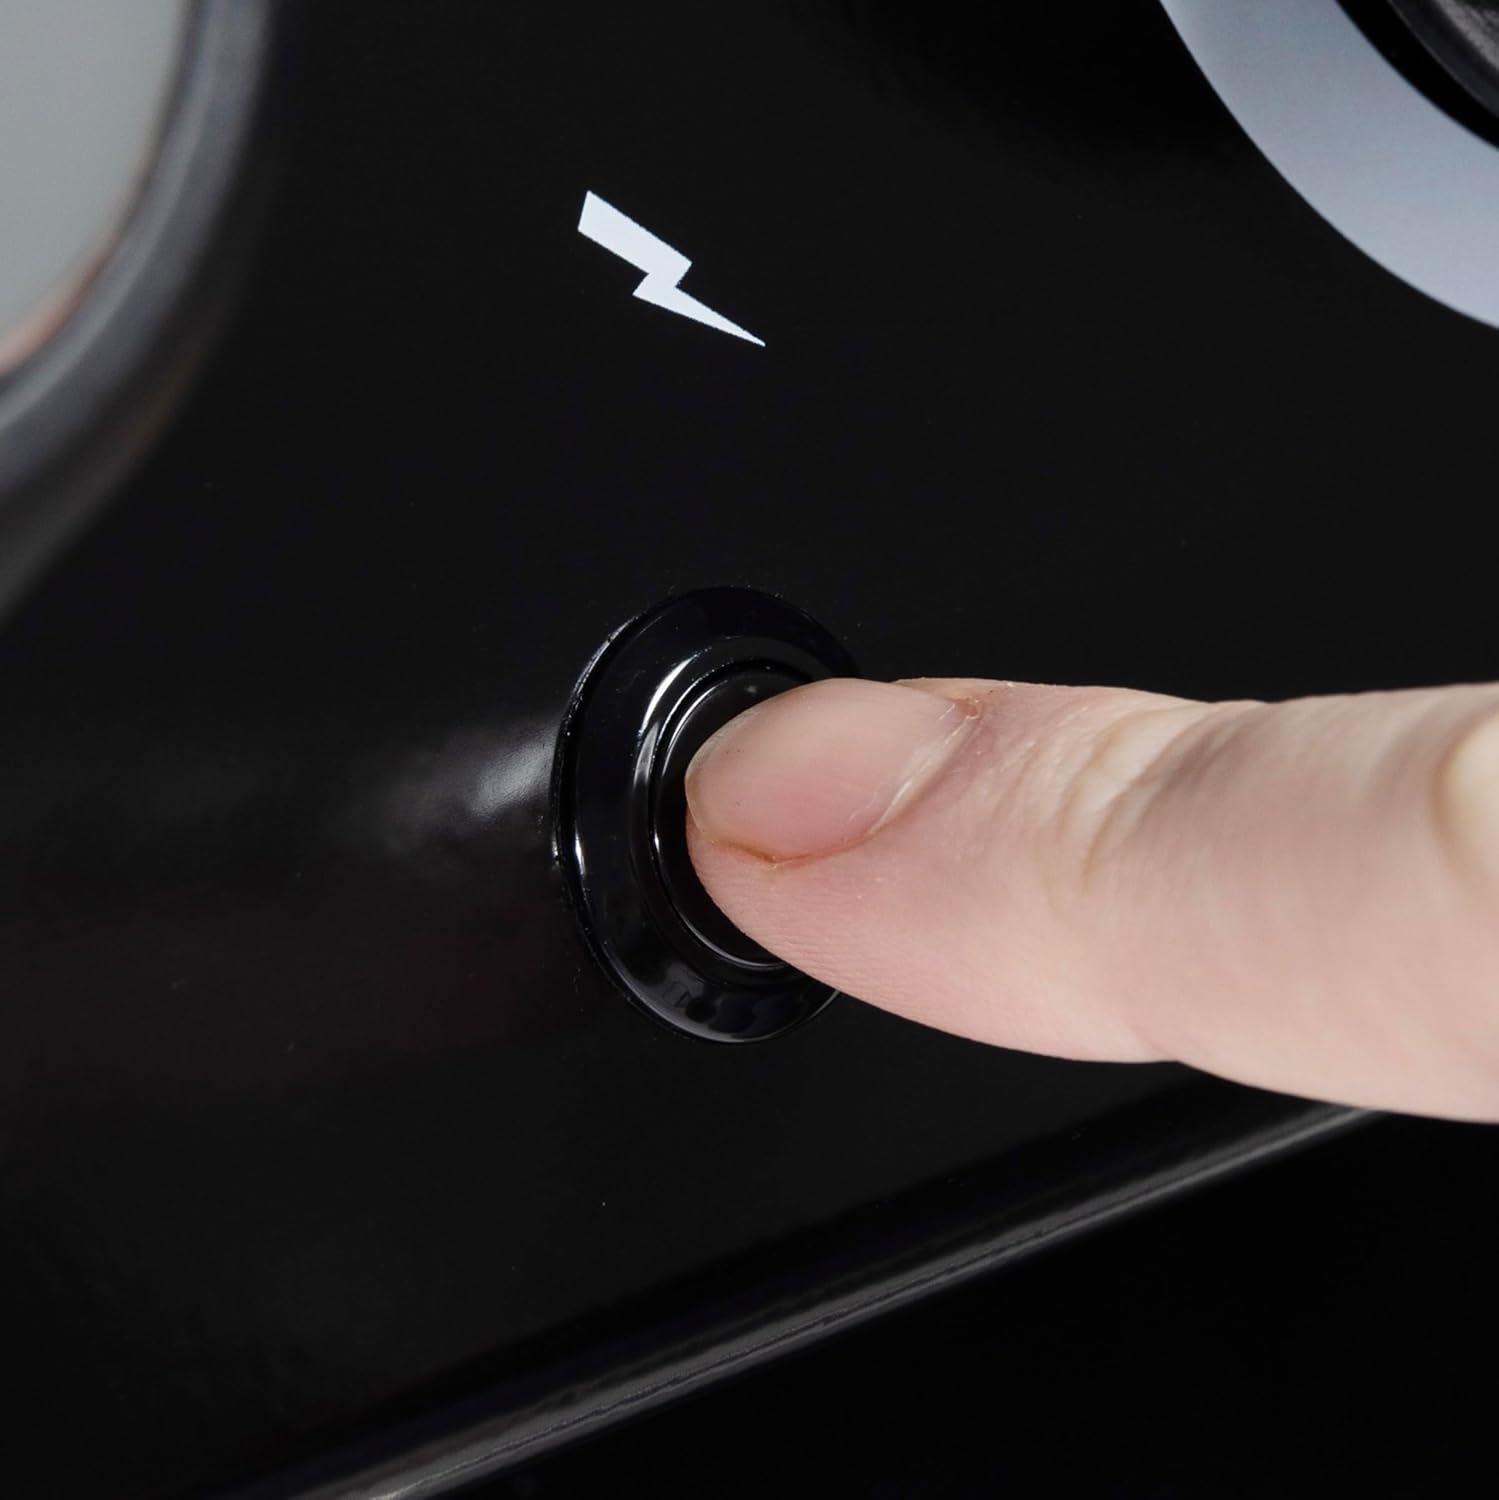
Image 4.2: Activating the Sure-Lite electronic ignition system.

Image 4.3: Adjusting burner intensity using the Sensi-Touch control knob.

Image 4.4: View of the Dual-Tube burners in operation, showing consistent flame.
4.3 Temperature Control and Cooking
- The Linear-Flow valves with 180° Sensi-Touch control allow for precise temperature adjustments from low to high.
- Monitor the internal grill temperature using the deluxe Accu-Temp thermometer integrated into the lid.
- The stainless steel Flav-R-Wave cooking system is designed to vaporize drippings, infusing food with smoky flavor and ensuring even heat distribution across the cooking surface.

Image 4.5: Food cooking on the grill grates, demonstrating the cooking capacity.

Image 4.6: Sausages and pineapple grilling, showcasing diverse cooking options.

Image 4.7: The Flav-R-Wave system positioned above the burners for heat distribution.

Image 4.8: Diagram illustrating the internal components, including burners, Flav-R-Wave, and cooking grates.

Image 4.9: Diagram explaining the Flav-R-Wave system's function in vaporizing drippings for enhanced flavor.

Image 4.10: Diagram illustrating the even heat distribution provided by the Dual-Tube burners.

Image 4.11: Diagram showing the optimized air circulation and heat flow within the grill chamber.

Image 4.12: Diagram depicting the overall cooking process, including heat and smoke interaction with food.
4.4 Shutting Down the Grill
- Turn all burner control knobs to the OFF position.
- Close the valve on the LP cylinder.
5. Maintenance
Regular cleaning and maintenance will extend the life of your Broil King grill and ensure optimal performance.
5.1 Cleaning Cooking Grids
The stainless steel cooking grids are reversible. For best results, clean them after each use while the grill is still warm. Use a grill brush to remove food residue. For stubborn residue, allow the grates to cool, then wash with warm soapy water and a non-abrasive scrubber.
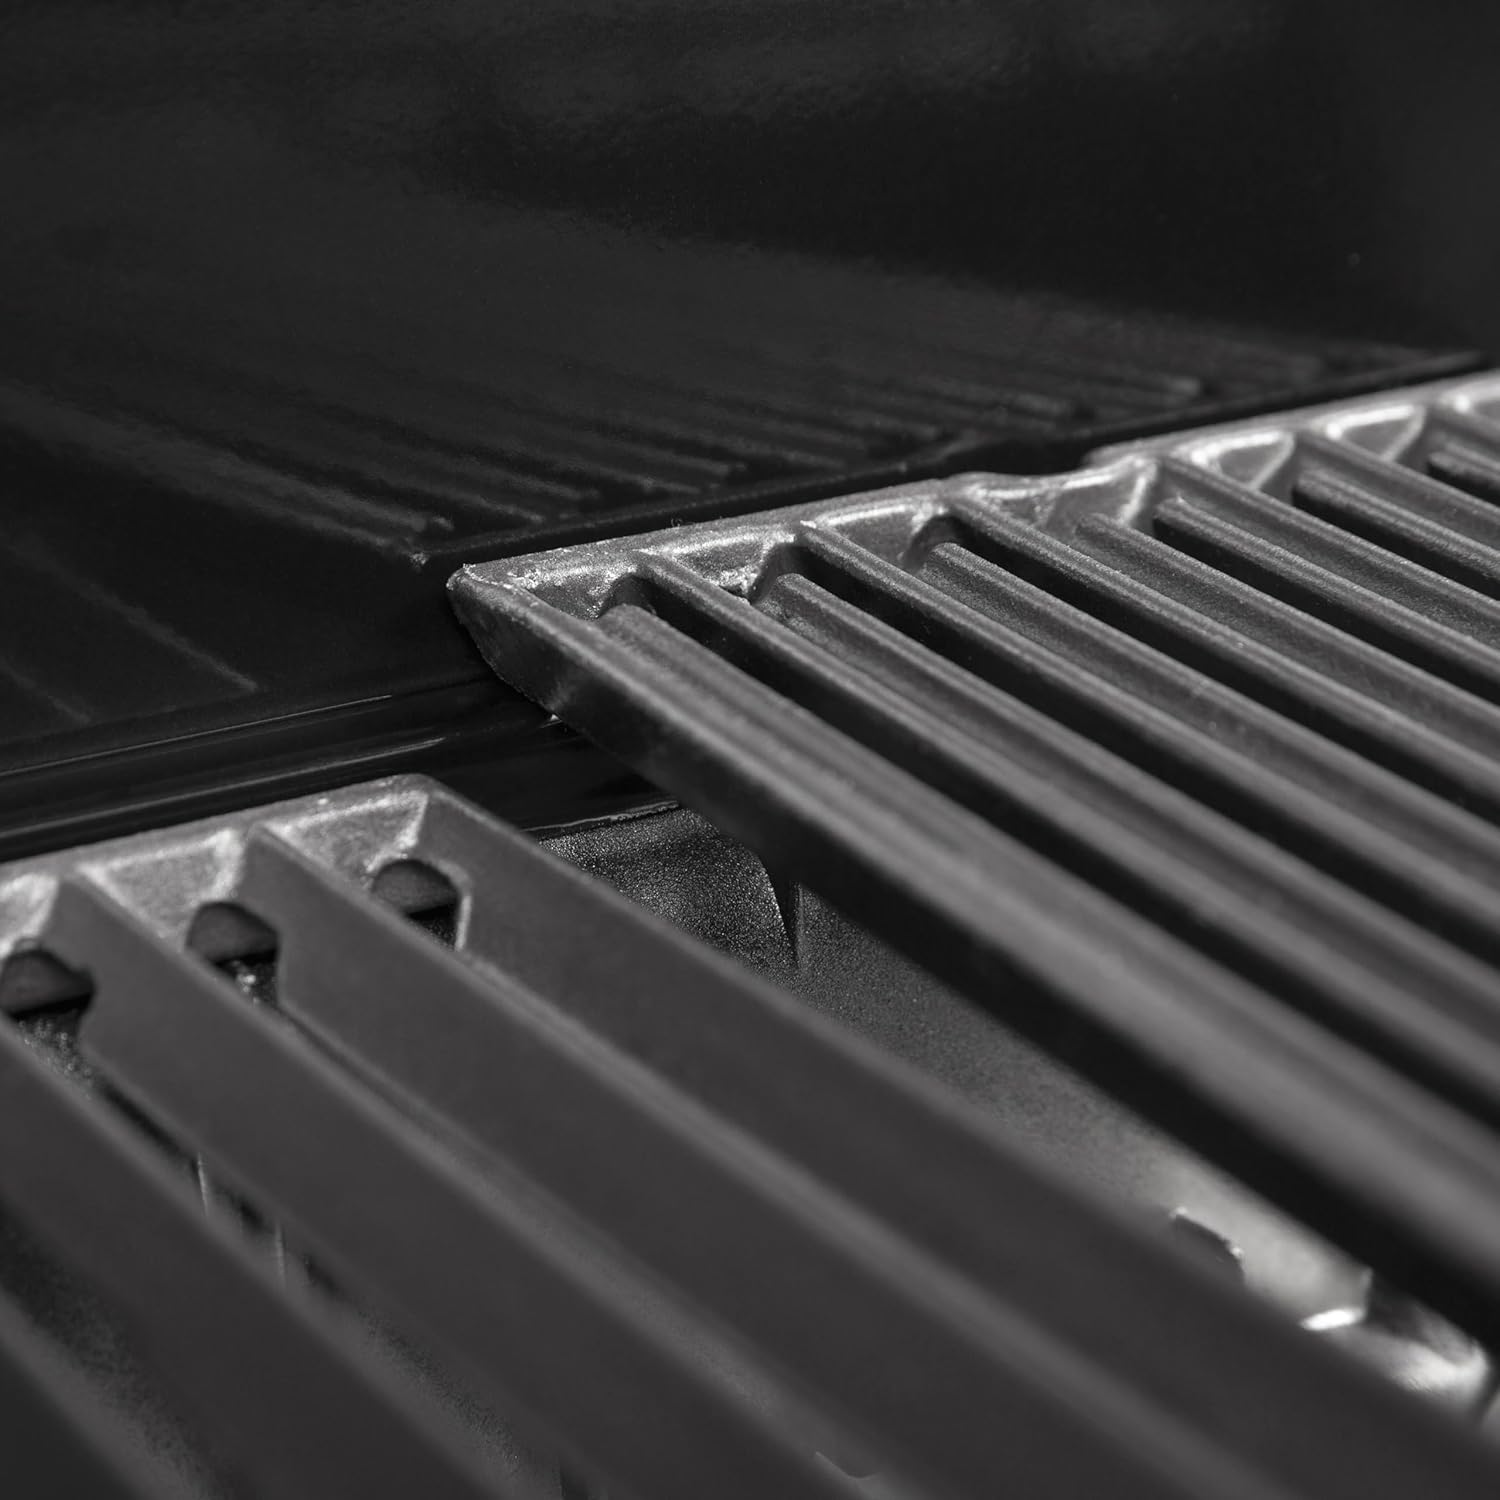
Image 5.1: Close-up of the durable cooking grates, highlighting their construction.
5.2 Cleaning the Flav-R-Wave System
The Flav-R-Wave plates should be cleaned periodically to prevent excessive grease buildup. Allow them to cool, then scrape off any accumulated debris with a plastic scraper or stiff brush. They can also be washed with warm soapy water.
5.3 Grease Management
The grill is equipped with a grease collection tray to catch drippings. Regularly check and empty this tray to prevent grease fires. The tray is removable for easy cleaning.

Image 5.2: Removing the grease tray for cleaning and maintenance.
5.4 Exterior Cleaning
Clean the exterior surfaces with warm soapy water and a soft cloth. For stainless steel components, use a stainless steel cleaner to maintain their finish. Avoid abrasive cleaners or pads that can scratch surfaces.
5.5 Storage
When not in use for extended periods, store the grill in a dry, protected area. Disconnect the LP cylinder and store it outdoors in a well-ventilated area, away from direct sunlight or heat sources. Consider using a grill cover to protect against elements.
6. Troubleshooting
This section addresses common issues you might encounter with your grill. For problems not listed here, contact Broil King customer support.
| Problem | Possible Cause | Solution |
|---|---|---|
| Burner fails to light with igniter. |
|
|
| Uneven heat across cooking surface. |
|
|
| Low flame or low heat. |
|
|
7. Specifications
| Brand | Broil King |
| Model Name | Crown 410 |
| Model Number | 865054 |
| Fuel Type | Liquid Propane (LP) |
| Main Burner Count | 4 Dual-Tube Burners |
| Total BTU Output | 40,000 BTUs |
| Total Cooking Surface Area | 420 sq. in. (including warming rack) |
| Product Dimensions (D x W x H) | 24"D x 56"W x 46.5"H |
| Item Weight | 139 Pounds |
| Material | Stainless Steel (burners, Flav-R-Wave, handle, frame) |
| Special Features | Superior Heat Retention, Sure-Lite Electronic Ignition, Linear-Flow Valves with 180° Sensi-Touch Control, Accu-Temp Thermometer |
| UPC | 062703115283 |
8. Warranty and Support
For warranty information, please refer to the warranty card included with your product or visit the official Broil King website. For technical assistance, replacement parts, or any other inquiries, please contact Broil King customer support.
Contact information can typically be found on the manufacturer's website or in the packaging materials.


