
AINAVI AINAVI 10.2-inch Android 12 Car Stereo Head Unit
AINAVI 10.2-inch Android 12 Car Stereo Head Unit User Manual
Model: AINAVI 10.2-inch Android 12 Car Stereo Radio Touchscreen Head Unit for Toyota Highlander (2014-2019)
1. Introduction
This manual provides detailed instructions for the installation, operation, maintenance, and troubleshooting of your AINAVI 10.2-inch Android 12 Car Stereo Head Unit. Please read this manual thoroughly before using the product to ensure proper operation and to maximize your user experience. Keep this manual for future reference.
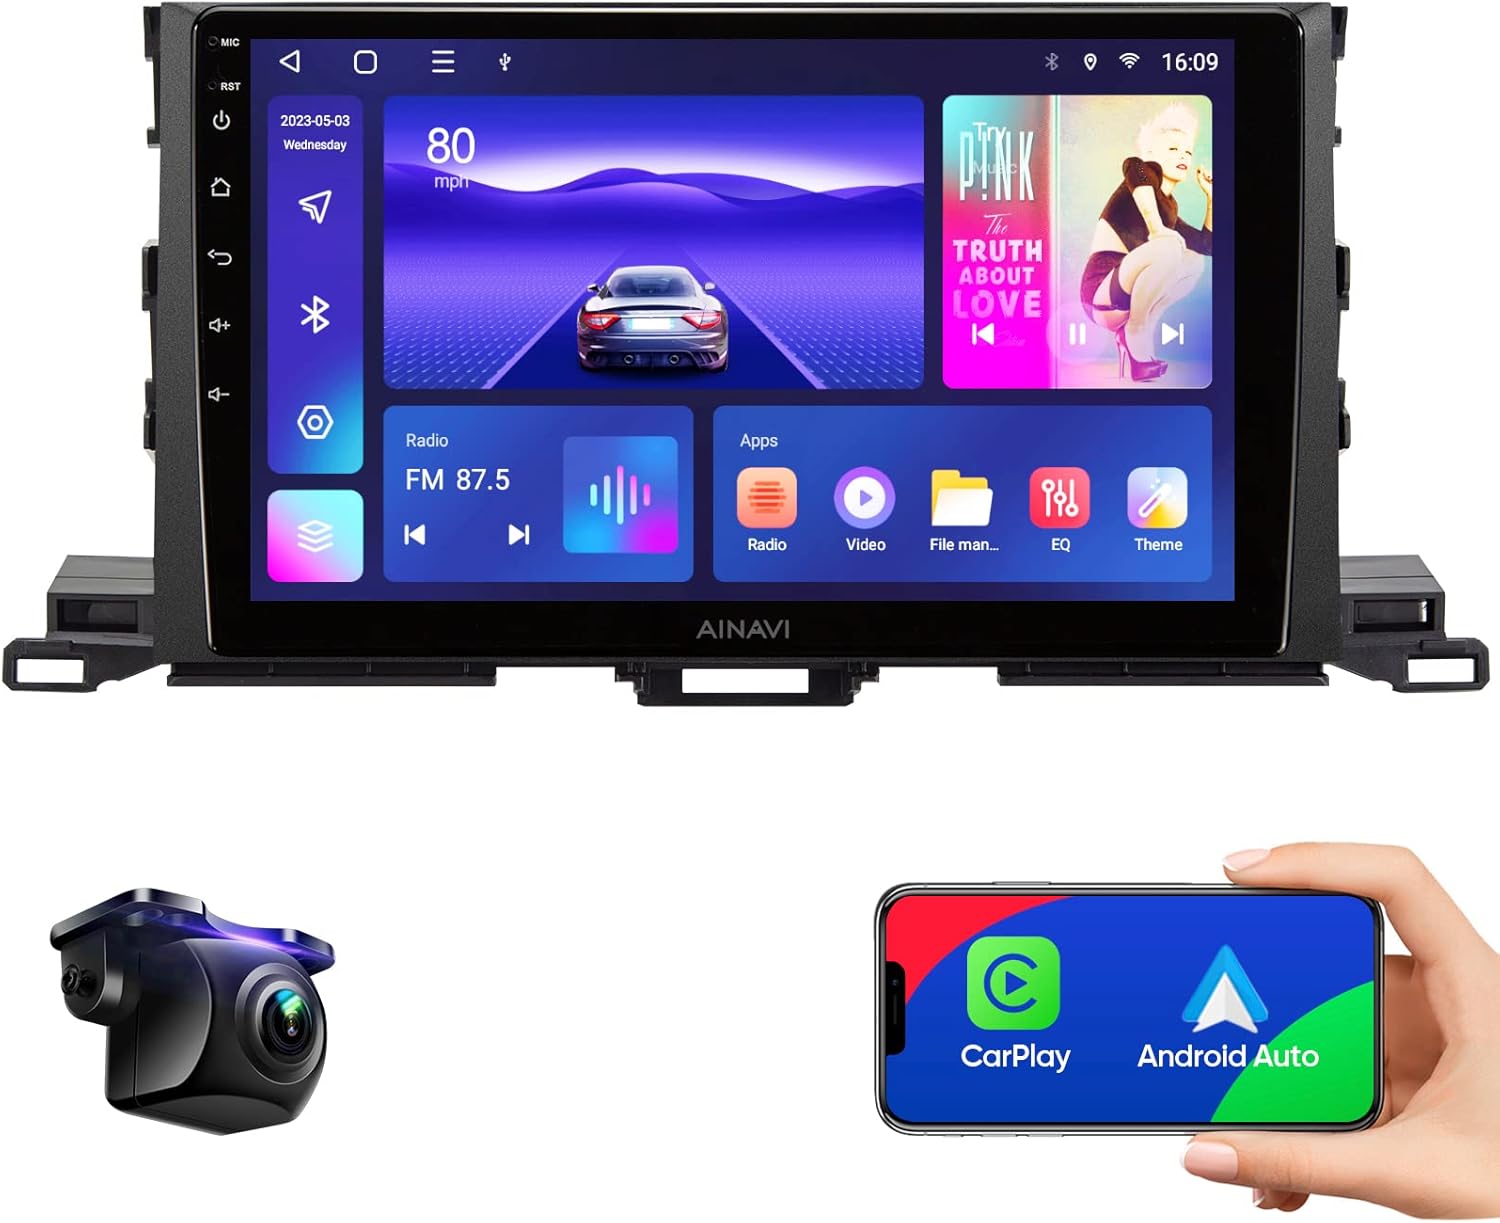
Figure 1.1: AINAVI 10.2-inch Android 12 Car Stereo Head Unit
This image displays the AINAVI 10.2-inch Android 12 Car Stereo Head Unit, showcasing its large touchscreen display and physical control buttons, integrated seamlessly into a vehicle's dashboard.
2. Safety Information
Always prioritize safety when operating your vehicle. Distracted driving can lead to accidents. Ensure all connections are secure and properly insulated to prevent electrical hazards. Do not attempt to disassemble or modify the unit. Consult a professional for installation if you are unsure about any steps.
3. Setup
3.1 What's Included
Verify that all components are present in the package:

Figure 3.1: Package Contents
This diagram illustrates the complete set of items included with your car stereo, such as the main head unit, frame, various cables (USB, RCA, power), a car microphone, GPS module, reversing control cable, HD rearview camera, and a frame removal tool.
- Head Unit (10.2-inch)
- Frame + Head Unit Assembly
- Car Microphone
- GPS Module
- Reversing Control Cable
- USB Cable (x2)
- HD Rearview Camera (Gift)
- Frame Removal Tool (Gift)
- RCA Cable
- Power Cable (Some models with CANBus)
3.2 Installation Guide
This head unit is designed for Toyota Highlander models from 2014-2019. Professional installation is highly recommended. Ensure the vehicle's power is disconnected before beginning installation.
- Carefully remove the original car stereo and trim panels.
- Connect the provided power cable and RCA cables to the corresponding ports on the new head unit and the vehicle's wiring harness.
- Connect the GPS module and car microphone. Position the microphone in an optimal location for clear audio.
- If installing the rearview camera, route its cable to the rear of the vehicle and connect it to the head unit's reversing control cable.
- Securely mount the new head unit into the dashboard opening.
- Reconnect the vehicle's power and test all functions before reassembling the trim panels.
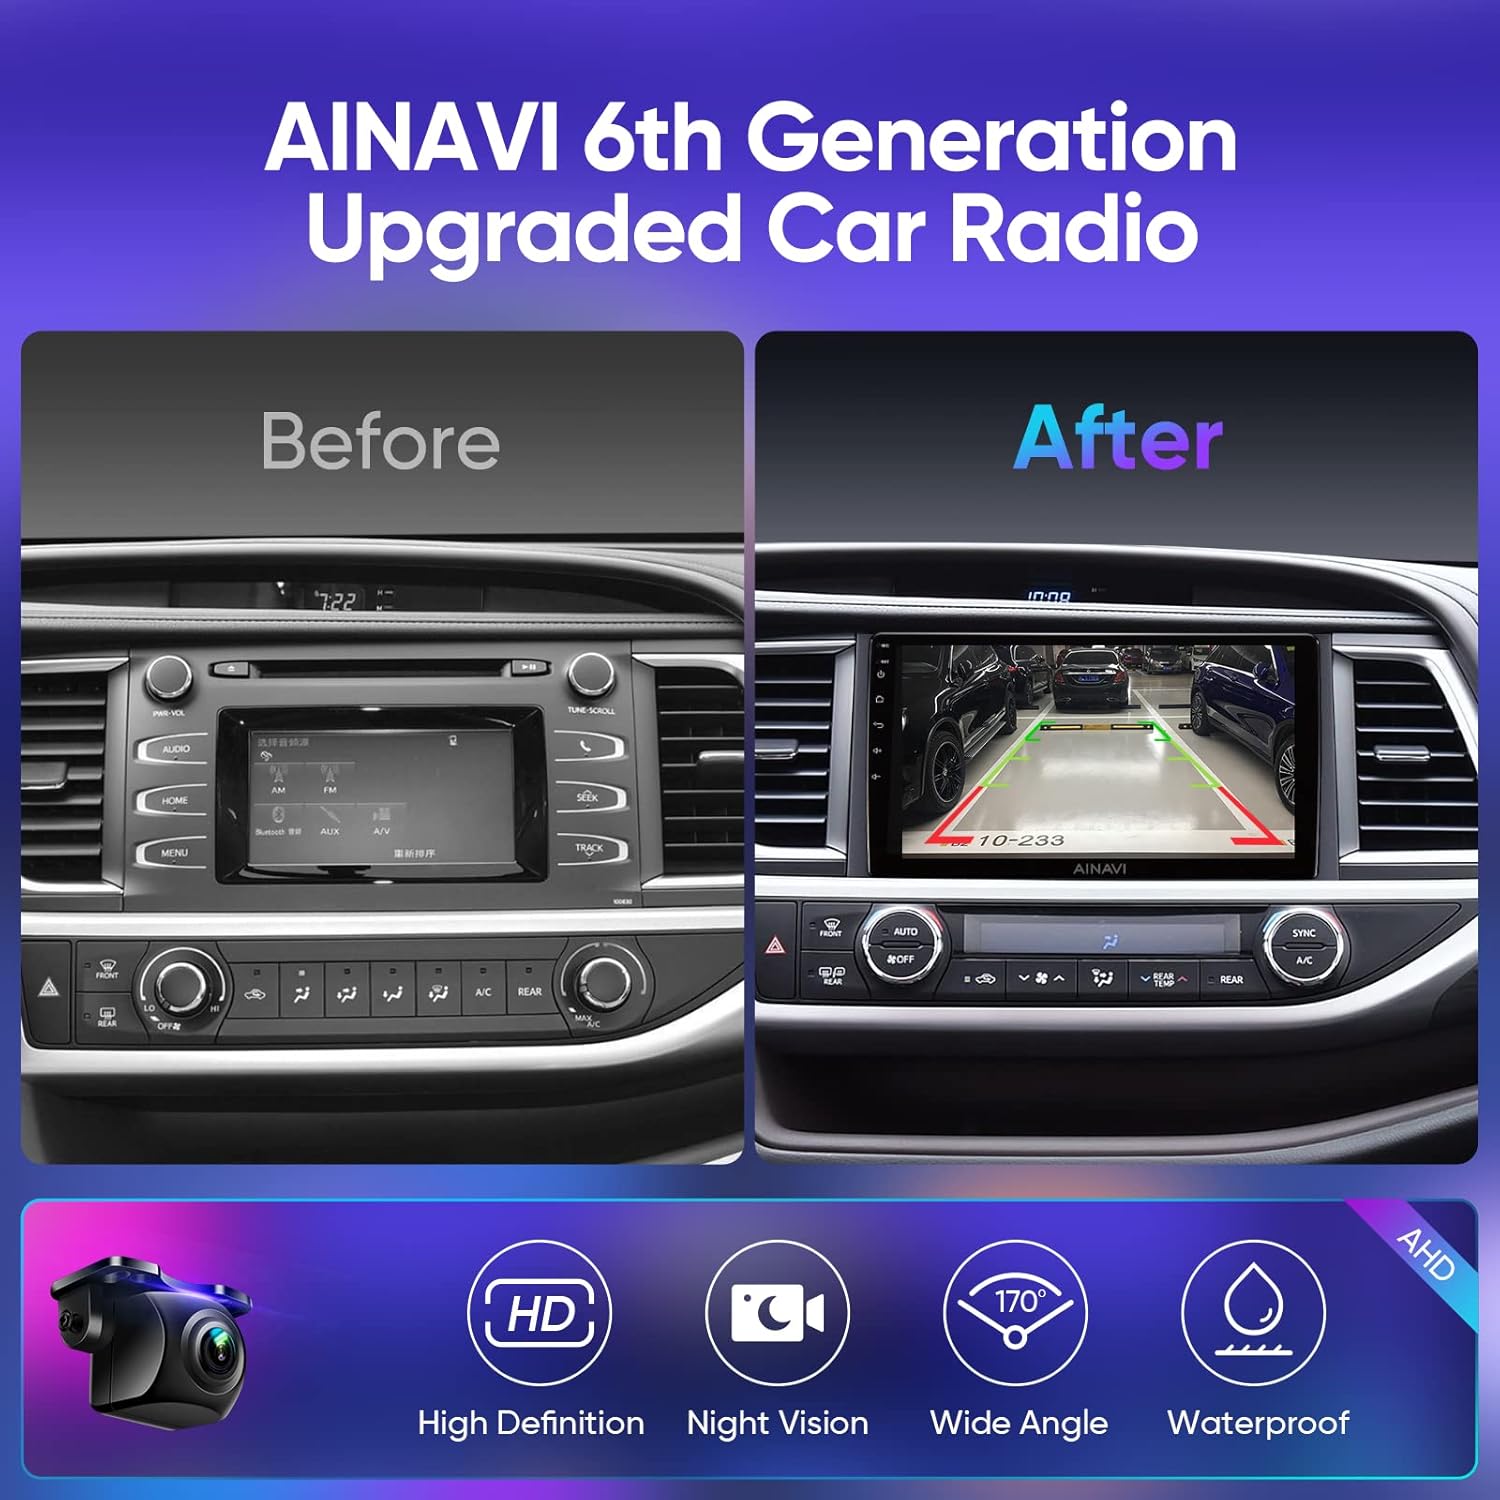
Figure 3.2: Before and After Installation
This image visually demonstrates the transformation of the car's interior, showing the original stereo system on the left and the newly installed AINAVI head unit on the right, highlighting the modern upgrade. It also features icons indicating the capabilities of the included HD rearview camera, such as night vision, wide-angle view, and waterproof design.
3.3 Initial Power On
After installation, turn on your vehicle's ignition. The head unit should power on automatically. Follow any on-screen prompts for initial setup, such as language selection and time zone.
4. Operating Instructions
4.1 Android 12 System
The head unit runs on Android 12, allowing you to download and install various applications from the Google Play Store. It features an 8-core processor, 3GB RAM, and 32GB ROM for smooth performance.

Figure 4.1: Android 12 System Overview
This image provides a comprehensive overview of the Android 12 system, highlighting its app compatibility, powerful 8-core processor, dual-band WiFi (2.4GHz + 5GHz), vibrant QLED screen, customizable themes, and Bluetooth 5.0 connectivity.
4.2 Connectivity
4.2.1 Wired & Wireless CarPlay / Android Auto / MirrorLink / AirPlay
Connect your smartphone for seamless integration. For iPhones, both wired and wireless CarPlay are supported. Android smartphones can utilize wired Android Auto. MirrorLink and AirPlay functionalities are also available for screen mirroring.

Figure 4.2: CarPlay and Android Auto Interface
This image illustrates the car stereo's interface when connected to a smartphone via Wired & Wireless CarPlay or Wired Android Auto, displaying common navigation and media apps.
Video 4.1: CarPlay, Android Auto, and MirrorLink Demonstration
This video demonstrates the seamless integration of CarPlay, Android Auto, and MirrorLink features on the AINAVI car stereo, showcasing how mobile phone interfaces are displayed and controlled on the head unit's screen.
4.2.2 5G WiFi & USB Network Connection
The unit supports 5G WiFi for fast internet access and accurate navigation. You can also establish a USB network connection for data transfer and internet sharing from your phone.
Video 4.2: Mirror Projection and USB Network Connection
This video illustrates the mirror projection function, allowing your phone's screen to be displayed on the car stereo. It also demonstrates how to set up a USB network connection for internet access.
4.2.3 Bluetooth 5.0
Enjoy stable and high-quality audio streaming and hands-free calling with Bluetooth 5.0 connectivity.
4.3 Navigation (GPS Map)
The head unit supports GPS navigation with pre-installed map applications like Google Maps and Google Earth, ensuring accurate and reliable directions.

Figure 4.3: Navigation and Google Assistant
This image highlights the 5G WiFi and 8-core processor, demonstrating the seamless operation of GPS maps and the convenience of Google Assistant for voice commands like searching for songs or checking the weather.
Video 4.3: Google Earth and Google Maps Navigation
This video showcases the navigation capabilities of the head unit, demonstrating the use of Google Earth for detailed global views and Google Maps for turn-by-turn directions and route planning.
4.4 Audio Features (Built-in DSP & 48 EQ)
The integrated Digital Sound Processor (DSP) and 48-band Equalizer (EQ) allow for precise sound customization. Adjust the sound field, effects, and surround sound to achieve richer bass, smoother treble, and a fuller midrange.

Figure 4.4: DSP and EQ Settings
This image displays the user interface for the built-in DSP and 48-band equalizer, allowing users to fine-tune audio settings, including bass, treble, midrange, and surround sound effects for an optimized listening experience.
Video 4.4: Pro DSP and Split Screen Stereo Upgrade
This video demonstrates the advanced Pro DSP features for enhanced audio quality and the split-screen functionality, allowing two applications to run simultaneously on the car stereo display.
4.5 Display Features
4.5.1 High Grade QLED Quantum Screen
The 10.2-inch QLED screen offers a high-resolution visual experience with a wide color gamut, ensuring vibrant and clear images for navigation, video playback, and app usage.

Figure 4.5: QLED Screen Technology
This image illustrates the advanced layers of the High Grade QLED Quantum Screen, including the silica protective layer, touch screen capacitor layer, and filter image layer, contributing to its superior visual performance and touch sensitivity.
4.5.2 Color Key Panel Light
Customize the color of the panel lights to match your vehicle's interior or your personal preference.

Figure 4.6: Mobile Phone Mirroring and Color Keylight
This image demonstrates the mobile phone mirroring capability (Tlink) for both iPhone Airplay and Android devices. It also highlights the customizable color key panel lights and the unit's 720P Ultra High Definition display with a resolution of 1280x720.
Video 4.5: Color Key Panel Light and 1080P Video Playback
This video demonstrates the customizable color key panel lights of the car stereo. It also showcases the unit's ability to play 1080P videos and supports steering wheel controls (SWC).
4.5.3 Split Screen Function
The powerful 8-core processor supports split-screen functionality, allowing you to run and view two applications simultaneously, such as navigation and a media player.

Figure 4.7: Split Screen Functionality
This image demonstrates the split-screen function, allowing users to operate any two applications concurrently, such as watching a video on YouTube while navigating with Google Maps.
4.6 Rearview Camera
The included HD rearview camera provides a clear view of the area behind your vehicle, enhancing safety during parking and reversing maneuvers.
4.7 Google Assistant
Utilize Google Assistant for voice commands, allowing you to control various functions, search for information, and manage tasks hands-free.
4.8 Steering Wheel Control (SWC)
The unit supports steering wheel controls, allowing you to manage audio playback, volume, and other functions directly from your steering wheel buttons for convenience and safety.
5. Maintenance
To ensure the longevity and optimal performance of your AINAVI car stereo, follow these maintenance guidelines:
- Cleaning: Use a soft, dry cloth to clean the screen and unit surface. For stubborn smudges, slightly dampen the cloth with water or a screen-safe cleaner. Avoid abrasive materials or harsh chemicals.
- Software Updates: Periodically check for software updates to ensure your system has the latest features and bug fixes. Updates can typically be performed via the unit's settings menu when connected to Wi-Fi.
- Environmental Conditions: Avoid exposing the unit to extreme temperatures, direct sunlight for prolonged periods, or excessive moisture.
6. Troubleshooting
If you encounter issues with your head unit, refer to the following common problems and solutions:
| Problem | Possible Cause | Solution |
|---|---|---|
| Unit does not power on | Loose power connection, blown fuse, vehicle battery issue. | Check all power connections. Inspect vehicle fuses. Verify vehicle battery health. |
| No sound output | Volume too low, incorrect audio source, loose speaker wires, DSP settings. | Increase volume. Select correct audio source. Check speaker wire connections. Adjust DSP settings. |
| CarPlay/Android Auto not connecting or glitchy | Incorrect USB cable, software glitch, phone compatibility. | Use original or certified USB cable. Restart phone and head unit. Ensure phone OS is updated. Check head unit settings for CarPlay/Android Auto. |
| Steering wheel buttons not working | Incorrect wiring, SWC settings not configured. | Verify SWC wiring connections. Access SWC learning/configuration menu in settings and program buttons. |
| GPS signal weak or inaccurate | GPS antenna obstruction or poor placement. | Ensure GPS antenna has a clear view of the sky and is securely mounted. |
If the problem persists after trying these solutions, please contact customer support.
7. Specifications
- Display Size: 10.2 Inches
- Resolution: 720 x 1280
- Operating System: Android 12
- Processor: 8-Core CPU
- Memory: 3GB RAM + 32GB ROM
- Connectivity: Wi-Fi (2.4 GHz + 5 GHz), Bluetooth 5.0
- Human Interface Input: Touchscreen, Buttons
- Mounting Type: Dashboard Mount
- Vehicle Service Type: Car (Toyota Highlander 2014-2019)
- Manufacturer: AINAVI
- Package Dimensions: 13.98 x 9.76 x 5.2 inches
8. Warranty and Support
For installation assistance, technical support, or warranty inquiries, please contact us through the following methods:

Figure 8.1: How to Reach Us for Support
This image provides clear instructions on how to contact the seller, HomeCar, for installation and technical support directly through the Amazon platform. It advises users to click on 'HomeCar' and then 'Ask a question' to submit their inquiries, including pictures or videos if necessary.
- Via Amazon: Navigate to your order details and click on the seller's name (HomeCar), then select 'Ask a question'. Provide details, including pictures or videos if relevant.
- Hotline: +1 (833) 858-5016 (Working hours: 3:00 PM to 12:00 PM PST)
- Email: info@ainavi.com
Ask a question about this manual
Ask about setup, troubleshooting, compatibility, parts, safety, or missing instructions. Manuals+ will review the question and use this page’s manual context to help answer it.