1. Introduction
The Andonstar AD409 Max Digital Microscope is a versatile tool designed for detailed observation and precision work, particularly in professional PCB soldering and maintenance. It features a 10.1-inch LCD screen, 300X magnification, and multiple output options including HDMI, PC, and WiFi. This manual provides essential information for setting up, operating, maintaining, and troubleshooting your device.
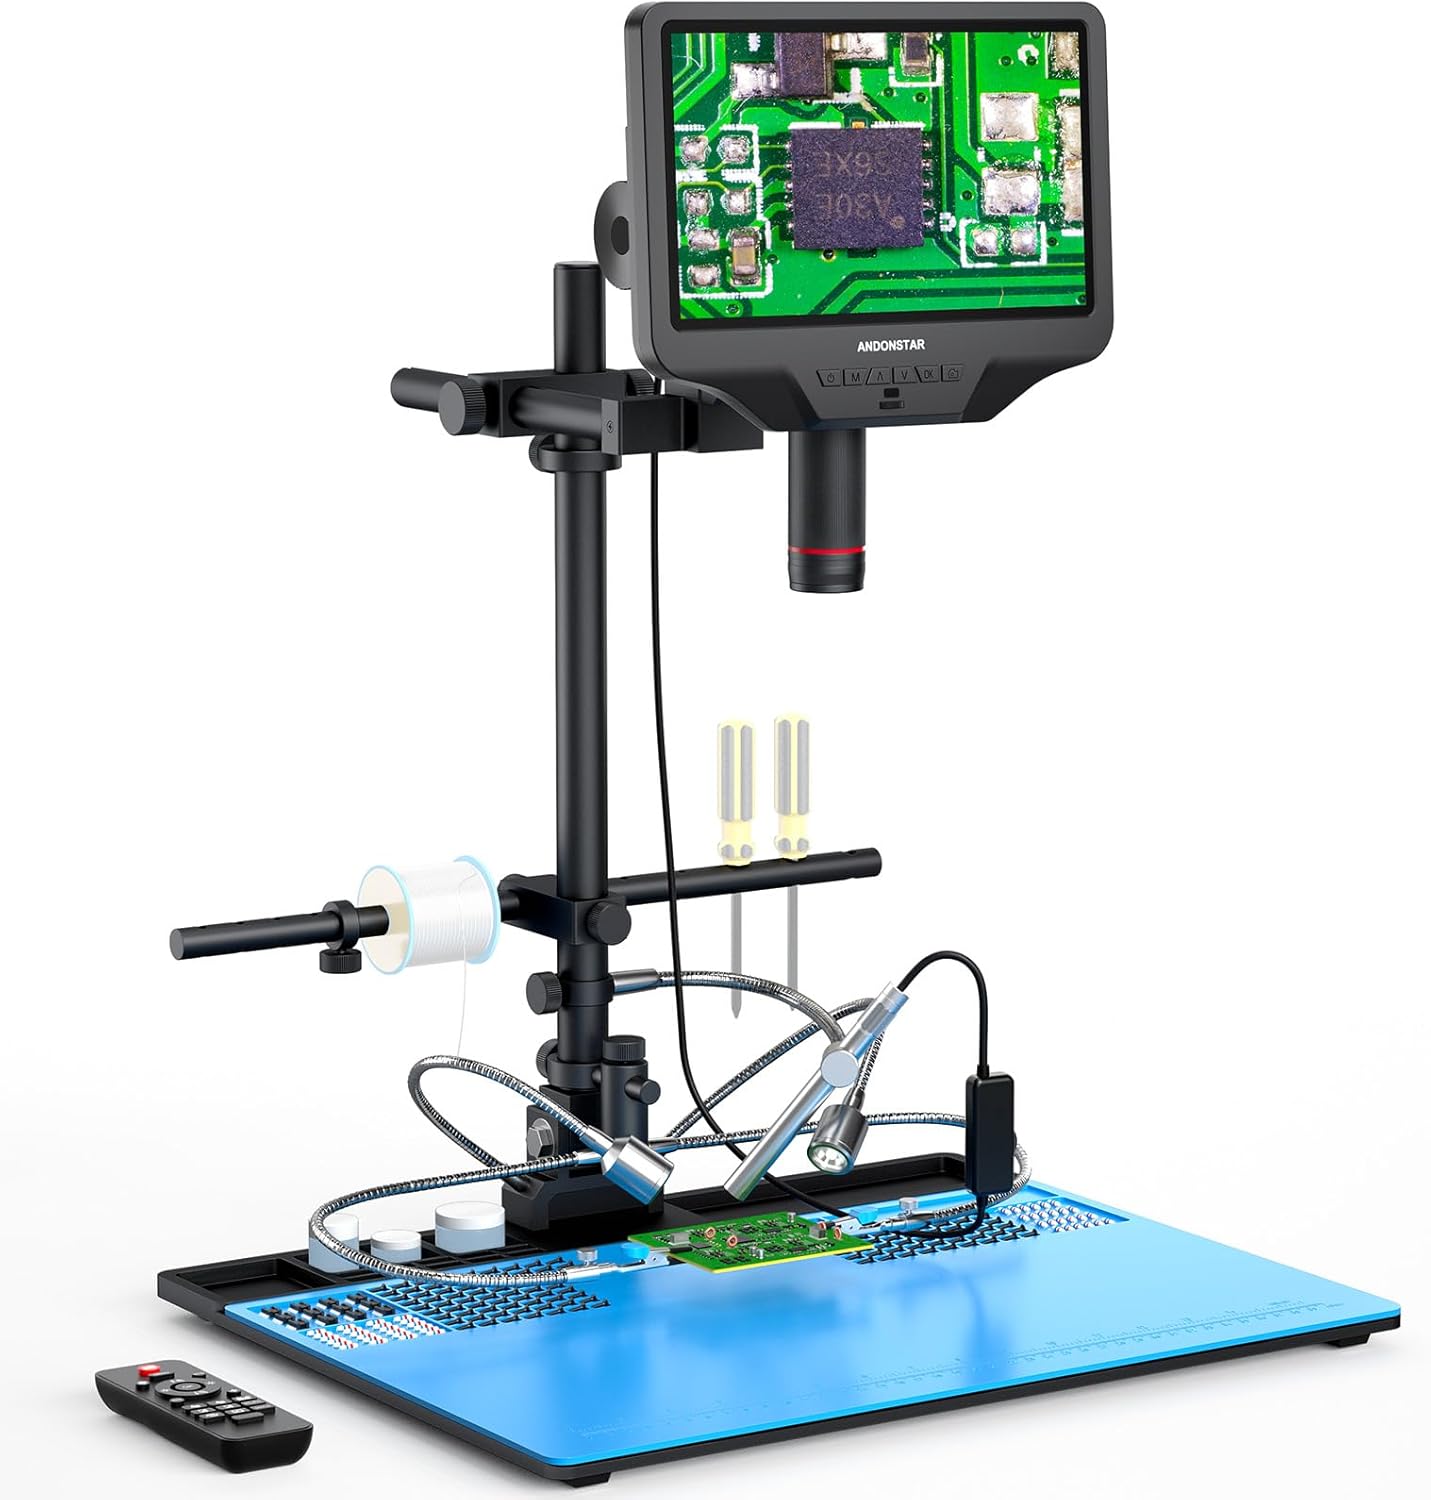
Figure 1.1: Andonstar AD409 Max Digital Microscope with its comprehensive soldering station setup.
2. Package Contents
Verify that all items listed below are present in your package:
- Microscope Monitor (10.1'' LCD display)
- UV Filter (pre-assembled)
- Beam
- Column
- Base (with integrated light)
- Repair Mat
- Wireless Remote Control
- Power Adapter
- Power Cable
- HDMI Cable
- USB Cable
- Tool Holder
- Soldering Helping Hands
- Endoscope
- Adjustable Arm
- Endoscope Accessories
- User Manual
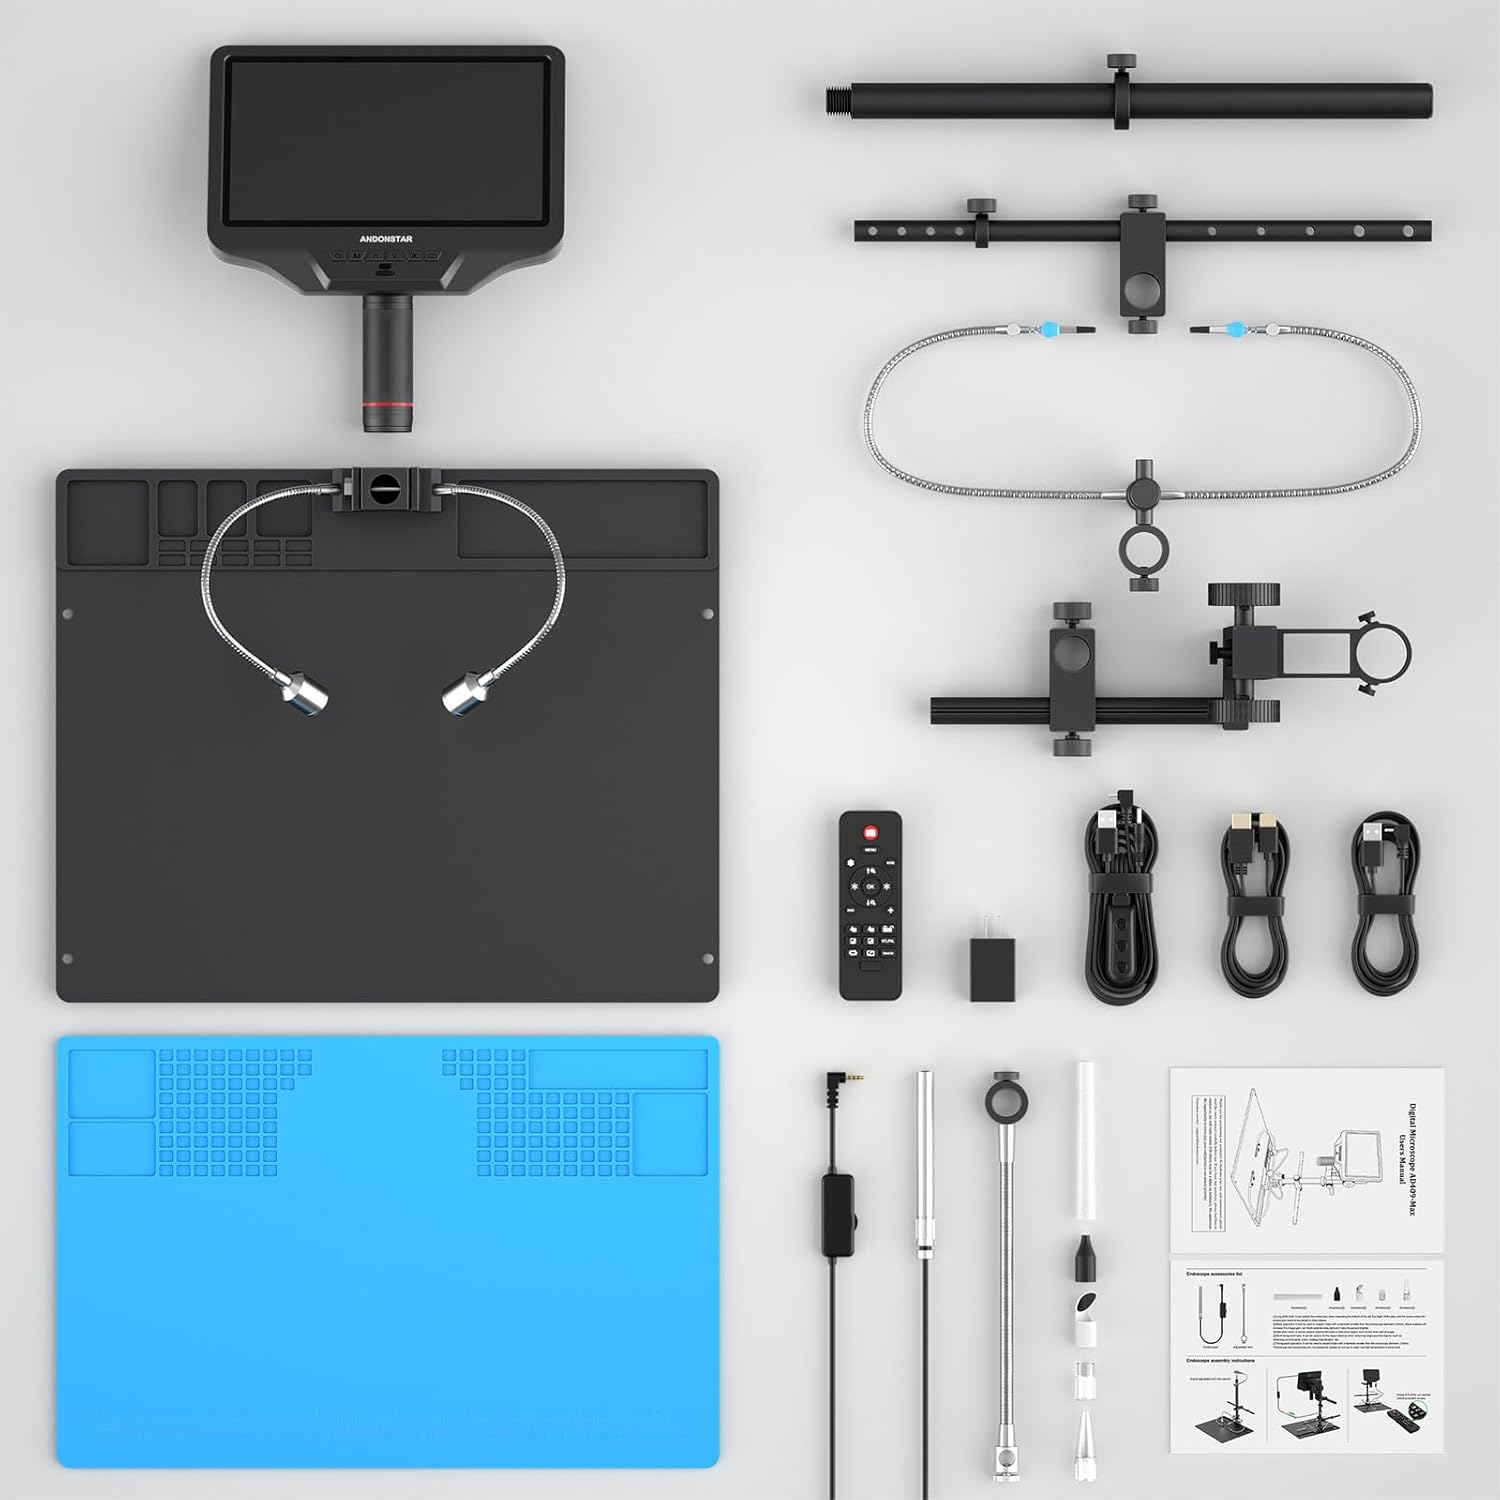
Figure 2.1: Overview of all included components for the AD409 Max Digital Microscope.
3. Setup Instructions
3.1 Assembly
- Attach the column to the base plate.
- Secure the microscope monitor to the column using the provided bracket and thumb screws.
- Install the beam and adjustable arm for the tool holder and soldering helping hands.
- Place the repair mat on the base plate.
- Connect the LED lights and endoscope to their respective ports.

Figure 3.1: Visual guide for assembling the microscope stand and attaching accessories.
3.2 Initial Power On
Connect the power adapter to the microscope and a power outlet. Press the power button on the monitor to turn on the device. The 10.1-inch IPS screen will display the live microscopic view.
3.3 PC Software Installation
To utilize the professional measurement software and PC output features, install the dedicated software on your Windows PC. Ensure the software is installed before connecting the microscope via the separate USB cable (not the one with the dimmer). Select 'PC Camera' mode on the microscope and then 'USB Camera' in the software.

Figure 3.2: Illustrated guide for connecting the microscope to a PC and using the measurement software.
4. Operating Instructions
4.1 Basic Operation
- Focus Adjustment: Rotate the metal focusing wheel on the microscope body to achieve a clear image.
- Working Distance: Use the bracket knob to fine-tune the working distance between the lens and the object.
- LED Lights: The 2 side lights on the metal base plate have 8 intensity levels. Adjust brightness and angle for optimal illumination.

Figure 4.1: Controls for focus, object distance adjustment, and remote control functions.
4.2 Output Methods
The microscope supports multiple output methods:
- HDMI Output: Connect an HDMI cable for ultra-high definition 2160P video recording on an external display.
- PC Output: Connect to a Windows PC via USB for viewing, measurement, photo, and video capture (endoscope not supported in PC mode).
- WiFi: Connect wirelessly for viewing on compatible devices.

Figure 4.2: The microscope supports HDMI, PC, and WiFi connectivity for various display and recording needs.
4.3 Using the Endoscope
The included endoscope provides a 360° all-around view, allowing observation of component sides and inside pipes, eliminating blind spots. Connect the endoscope to its dedicated interface on the monitor. Use the 'NTL/PAL' button on the remote or monitor to switch between microscope and endoscope views.

Figure 4.3: The endoscope offers a comprehensive 360-degree view for detailed inspection.

Figure 4.4: Switching between the main microscope view and the endoscope view on the display.
4.4 Wireless Remote Control
The wireless remote control allows for convenient operation from a distance. Functions include image adjustment, digital zoom, and switching between microscope and endoscope views.
4.5 Image and Video Capture
Capture and store images or videos of the microscopic world directly to a Micro SD card (Class 10 high-speed memory card recommended, up to 64G). Use the dedicated buttons on the monitor or remote for capture.
Video 4.1: An official product video demonstrating the Andonstar AD409-Max Super Soldering Digital Microscope in use, highlighting its features and capabilities.
5. Maintenance
5.1 Lens Care
The AD409 Max features a high-quality metal lens with a unique UV filter. This filter protects the lens from soldering heat, smoke, and dust. Regularly clean the UV filter and lens with a soft, lint-free cloth and appropriate lens cleaning solution to maintain optimal image clarity.

Figure 5.1: The industrial metal lens and UV filter are designed for durability and protection against environmental factors.
5.2 General Cleaning
Wipe the microscope body and stand with a dry or slightly damp cloth. Avoid using harsh chemicals or abrasive materials that could damage the finish.
6. Troubleshooting
- Display Resets/Power Issues: If the display resets when changing views or adjusting LED lights, ensure the power supply is adequate and all connections are secure. If issues persist, contact customer support.
- Soldering Mat Not Lying Flat: The repair mat is designed to fit securely. If it does not lay flat, ensure it is correctly aligned with the base plate's mounting holes.
- No Image on PC: Verify that the PC software is installed, the correct USB cable is used, and 'PC Camera' mode is selected on the microscope and 'USB Camera' in the software.
- Unclear Image: Adjust the focus wheel and working distance. Ensure the lens and UV filter are clean. Adjust LED light brightness and angle for optimal illumination.
7. Specifications
| Model Name | AD409-Max |
| Product Dimensions | 18.1 x 14.6 x 18.7 inches |
| Item Weight | 13.47 pounds |
| Display | 10.1-inch IPS LCD Screen |
| Magnification Maximum | 300x |
| Video Recording | 2160P Ultra-High Definition |
| Output Methods | HDMI, PC (Windows), WiFi |
| Light Source Type | LED (8 levels adjustable) |
| Material | Metal |
| Color | Black |
| Compatible Devices | Laptop, Personal Computer (Windows), Television |
8. Warranty and Support
Andonstar provides professional after-sales service. For any inquiries, technical assistance, or support needs, please contact our customer service team. We offer 24-hour support to ensure your satisfaction with the product.


