
GIGABYTE A520M S2H
Contents
User Manual
Gigabyte A520M S2H Motherboard & Thermaltake Smart 500W PSU
Model: A520M S2H, PS-SPD-0500NPCWUS-W
1. Introduction
This manual provides comprehensive instructions for the installation, operation, maintenance, and troubleshooting of your Gigabyte A520M S2H Motherboard and Thermaltake Smart 500W 80+ White Certified Power Supply Unit (PSU). These components are designed to work together to form the core of a reliable personal computer system. Please read this manual thoroughly before proceeding with installation to ensure proper setup and safe operation.
2. Product Overview

Figure 2.1: Gigabyte A520M S2H Motherboard and Thermaltake Smart 500W PSU.
2.1. GIGABYTE A520M S2H Motherboard
The GIGABYTE A520M S2H is a Micro-ATX motherboard designed for AMD Ryzen AM4 processors. It features a 4+3 Phases Digital PWM design for stable power delivery, supports Dual Channel DDR4 memory across 2 DIMM slots, and includes a PCIe 3.0 x16 slot for graphics cards. For storage, it offers one NVMe PCIe 3.0 x4 M.2 slot. Connectivity includes Gigabyte Gaming GbE LAN and multiple display interfaces (D-Sub, DVI, HDMI). The motherboard also supports Q-Flash Plus for easy BIOS updates and RGB Fusion 2.0 for customizable lighting.

Figure 2.2: GIGABYTE A520M S2H Motherboard with packaging.

Figure 2.3: Top view of the GIGABYTE A520M S2H Motherboard.
2.2. Thermaltake Smart 500W 80+ White Certified PSU
The Thermaltake Smart 500W 80+ White Certified PSU provides continuous power with a 120mm ultra-quiet cooling fan. It complies with ATX 12V V2.3/EPS 12V standards and features Active PFC (Power Factor Correction). This PSU is 80 PLUS certified, ensuring up to 86% energy efficiency under typical load. It incorporates high-quality components for stable and reliable performance, and its single +12V rail design supports demanding system requirements. Industry-grade protections like OPP, OVP, and SCP are included for safety.
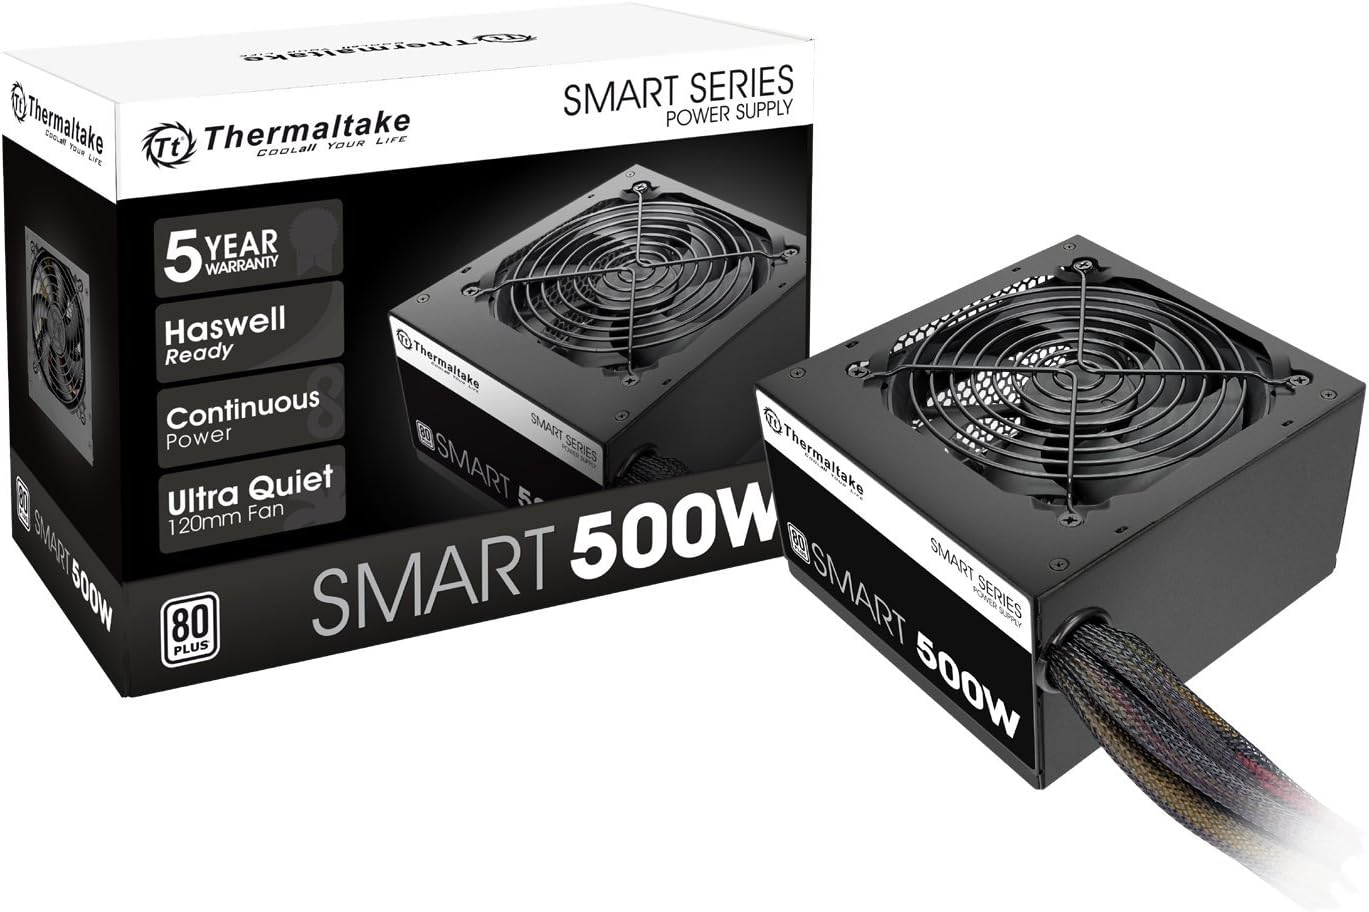
Figure 2.4: Thermaltake Smart 500W PSU with packaging.

Figure 2.5: Angled view of the Thermaltake Smart 500W PSU.
3. Setup Instructions
Before beginning installation, ensure your workspace is clean, well-lit, and free of static electricity. Use an anti-static wrist strap if available. Refer to your PC case manual for specific mounting instructions.
3.1. GIGABYTE A520M S2H Motherboard Installation
- Prepare the Case: Install the I/O shield into the rear opening of your PC case. Ensure standoffs are correctly aligned and installed for the Micro-ATX form factor.
- Install CPU: Open the CPU socket lever. Carefully align the triangular mark on your AMD Ryzen processor with the mark on the socket. Gently place the CPU into the socket without force. Close the lever to secure the CPU.
- Install CPU Cooler: Follow the instructions provided with your CPU cooler to install it onto the motherboard. Ensure proper thermal paste application and secure mounting.
- Install RAM: Open the clips on both ends of the DDR4 DIMM slots. Align the notch on your RAM module with the key in the slot. Press firmly on both ends until the clips snap into place. For dual-channel operation, refer to the motherboard manual for recommended slot configurations (typically slots 2 and 4).
- Install M.2 SSD (Optional): If installing an M.2 SSD, insert it into the M.2 slot at a slight angle, then gently push it down and secure it with the provided screw.
- Mount Motherboard: Carefully place the motherboard into the PC case, aligning the screw holes with the standoffs. Secure the motherboard with screws.
3.2. Thermaltake Smart 500W PSU Installation
- Mount PSU: Locate the PSU mounting area in your PC case (usually at the bottom or top rear). Slide the PSU into position and secure it with screws from the outside of the case. Ensure the fan is oriented correctly for optimal airflow (typically facing down if there's a bottom vent, or up if not).
- Connect Main Power (24-pin): Connect the large 24-pin ATX power connector from the PSU to the corresponding port on the motherboard. Ensure it clicks into place.
- Connect CPU Power (EPS 8-pin): Connect the 8-pin (or 4+4 pin) EPS power connector from the PSU to the CPU power port on the motherboard (usually near the CPU socket).
- Connect PCIe Power (6+2-pin): If installing a dedicated graphics card, connect the 6+2-pin PCIe power connectors from the PSU to your graphics card. The Thermaltake Smart 500W PSU provides two such connectors.
- Connect SATA Power: Connect SATA power cables to your storage drives (SSDs, HDDs) and optical drives.
- Connect Peripheral Power (Molex): Connect Molex connectors to any other peripherals that require them (e.g., case fans, fan controllers).
3.3. System Assembly and Cable Management
- Install Graphics Card (Optional): Insert your graphics card into the PCIe 3.0 x16 slot on the motherboard. Secure it with the case latch or screw.
- Connect Front Panel Cables: Connect the small cables from your PC case (Power LED, HDD LED, Power Switch, Reset Switch, USB 2.0/3.0, Audio) to the corresponding headers on the motherboard. Refer to the motherboard manual for exact pin layouts.
- Cable Management: Route cables neatly behind the motherboard tray or along the case frame to improve airflow and aesthetics. Use zip ties or Velcro straps.
- Final Checks: Double-check all connections to ensure they are secure and correctly seated. Ensure no loose cables are obstructing fans.
4. Operating Guidelines
Once all components are installed and connected, you can power on your system.
- First Boot: After powering on, the system should display the BIOS/UEFI screen. If not, check all power connections and component seating.
- BIOS/UEFI Setup: Press the designated key (usually DEL or F2) during startup to enter the BIOS/UEFI. Here you can configure boot order, enable XMP for RAM, and adjust other system settings.
- Operating System Installation: Insert your operating system installation media (USB drive or DVD) and follow the on-screen prompts to install the OS on your storage drive.
- Driver Installation: After OS installation, install the latest drivers for your motherboard (chipset, LAN, audio, etc.) from the GIGABYTE website and for your graphics card (if applicable) from its manufacturer's website.
- System Stability: Ensure adequate cooling and proper ventilation within your PC case to maintain system stability and component longevity.
5. Maintenance
Regular maintenance helps ensure the longevity and optimal performance of your components.
- Dust Removal: Periodically clean dust from inside your PC case, especially from fans (CPU cooler, case fans, PSU fan) and heatsinks. Use compressed air. Ensure the system is powered off and unplugged before cleaning.
- BIOS/UEFI Updates: Check the GIGABYTE website for the latest BIOS/UEFI updates for your motherboard. Updates can improve compatibility, stability, and performance. Follow the update instructions carefully.
- Driver Updates: Keep your system drivers updated. Regularly check the GIGABYTE website for motherboard drivers and other component manufacturers' websites for their respective drivers.
- Cable Management: Ensure cables remain neatly organized to prevent obstruction of airflow.
- Environmental Conditions: Operate your system in a cool, dry, and well-ventilated environment. Avoid extreme temperatures and humidity.
6. Troubleshooting
This section addresses common issues you might encounter.
| Symptom | Possible Cause | Solution |
|---|---|---|
| System does not power on. | PSU not connected, power switch off, faulty PSU/motherboard. | Ensure PSU is plugged in and switch is ON. Check 24-pin and 8-pin CPU power connections. Test PSU with a paperclip test (refer to PSU manual). |
| No display on monitor. | Monitor cable loose, incorrect input, faulty GPU/RAM/CPU. | Check monitor cable connection and input source. Reseat RAM modules. Ensure graphics card is fully seated and powered. Test with integrated graphics if available. |
| System powers on but shuts down immediately. | Overheating (CPU cooler not installed correctly), short circuit, faulty PSU. | Verify CPU cooler installation and thermal paste. Check for loose screws or components touching the case. Test PSU. |
| Operating system not detected. | Incorrect boot order, loose SATA/M.2 connection, corrupted OS. | Check BIOS/UEFI boot order. Reseat SATA/M.2 cables. Reinstall OS if necessary. |
| System instability or crashes. | Overheating, faulty RAM, outdated drivers, insufficient PSU power. | Monitor temperatures. Run memory diagnostic tests. Update all drivers. Ensure PSU wattage is sufficient for all components. |
7. Specifications
7.1. GIGABYTE A520M S2H Motherboard Specifications
| Feature | Detail |
|---|---|
| CPU Socket | AMD AM4 Socket |
| Compatible Processors | AMD Ryzen 3000, 4000, 5000, 6000 Series |
| Chipset | AMD A520 |
| RAM Memory Technology | DDR4 Dual Channel |
| RAM Slots | 2 DIMMs |
| Max RAM Size | 64 GB |
| PCIe Slot | 1x PCIe 3.0 x16 |
| M.2 Slot | 1x NVMe PCIe 3.0 x4 M.2 |
| LAN | Gigabyte Gaming GbE LAN |
| Audio Codec | ALC887 |
| Display Interfaces | D-Sub, DVI, HDMI |
| Form Factor | Micro-ATX |
7.2. Thermaltake Smart 500W PSU Specifications
| Feature | Detail |
|---|---|
| Model | PS-SPD-0500NPCWUS-W (Smart Series) |
| Max. Output Capacity | 500W |
| Efficiency | 80 PLUS White Certified (82-86% efficiency @ 20-100% load) |
| PFC | Active PFC |
| Cooling System | 120mm Fan (1800 R.P.M. ± 10%) |
| Input Voltage | 100Vac – 240Vac |
| Input Frequency Range | 50 Hz - 60 Hz |
| MTBF | 100,000 hrs minimum |
| PCI-E Connector | 2x (6+2pin) |
| Protections | OPP, OVP, SCP |
| Dimensions (H x W x D) | 86mm x 150mm x 140mm |
8. Warranty and Support
Both GIGABYTE and Thermaltake products come with manufacturer warranties. Please retain your proof of purchase for warranty claims.
- GIGABYTE Warranty: For detailed warranty information and support for your GIGABYTE motherboard, please visit the official GIGABYTE website: www.gigabyte.com
- Thermaltake Warranty: For detailed warranty information and support for your Thermaltake PSU, please visit the official Thermaltake website: www.thermaltake.com
- Technical Support: If you encounter issues not covered in this manual, please contact the respective manufacturer's technical support.
Ask a question about this manual
Ask about setup, troubleshooting, compatibility, parts, safety, or missing instructions. Manuals+ will review the question and use this page’s manual context to help answer it.