
Jasic SmartArc300D
Jasic SmartArc300D Inverter Welding Machine User Manual
Model: SmartArc300D
Brand: Jasic
1. Introduction
Thank you for choosing the Jasic SmartArc300D Inverter Welding Machine. This manual provides essential information for the safe and efficient operation, maintenance, and troubleshooting of your new welding equipment. Please read this manual thoroughly before operating the machine to ensure proper use and to prevent injury or damage.
2. Safety Information
Welding can be dangerous. It is crucial to follow all safety precautions to prevent electric shock, burns, fire, and other serious injuries. Always wear appropriate personal protective equipment (PPE) including welding helmet, gloves, protective clothing, and safety shoes.
2.1 General Safety Precautions
- Ensure the work area is well-ventilated to avoid inhaling welding fumes.
- Keep flammable materials away from the welding area.
- Always disconnect power before performing any maintenance or adjustments.
- Do not operate the machine in damp or wet conditions.
- Ensure proper grounding of the welding machine.
2.2 Electric Shock Prevention
- Never touch live electrical parts.
- Inspect cables and connections for damage before each use.
- Use dry, insulated gloves and clothing.
2.3 Arc Ray Protection
- Always use a welding helmet with appropriate shade filter to protect eyes and face from arc rays.
- Protect bystanders from arc flash with welding screens or barriers.
3. Product Overview
The Jasic SmartArc300D is a high-performance inverter welding machine designed for various arc welding applications. It supports both single-phase (AC 230V) and double-phase (AC 415V) power inputs, offering versatility for different work environments. Its compact design and advanced inverter technology ensure stable arc performance and efficient welding.
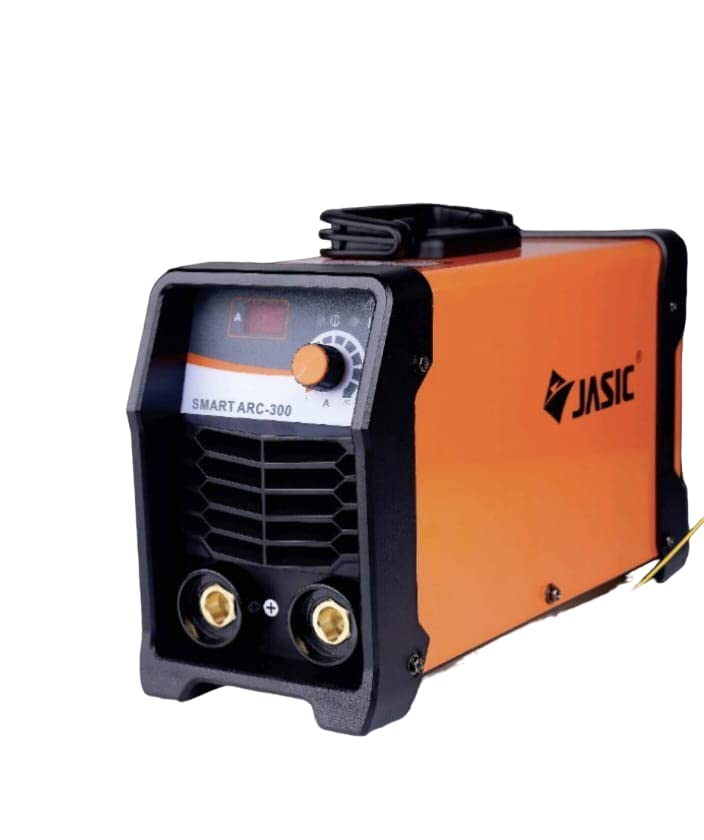
Figure 3.1: Front view of the Jasic SmartArc300D Inverter Welding Machine, showing the control panel, output terminals, and ventilation grilles.

Figure 3.2: The Jasic SmartArc300D Inverter Welding Machine shown with its included welding cables, electrode holder, and earth clamp.
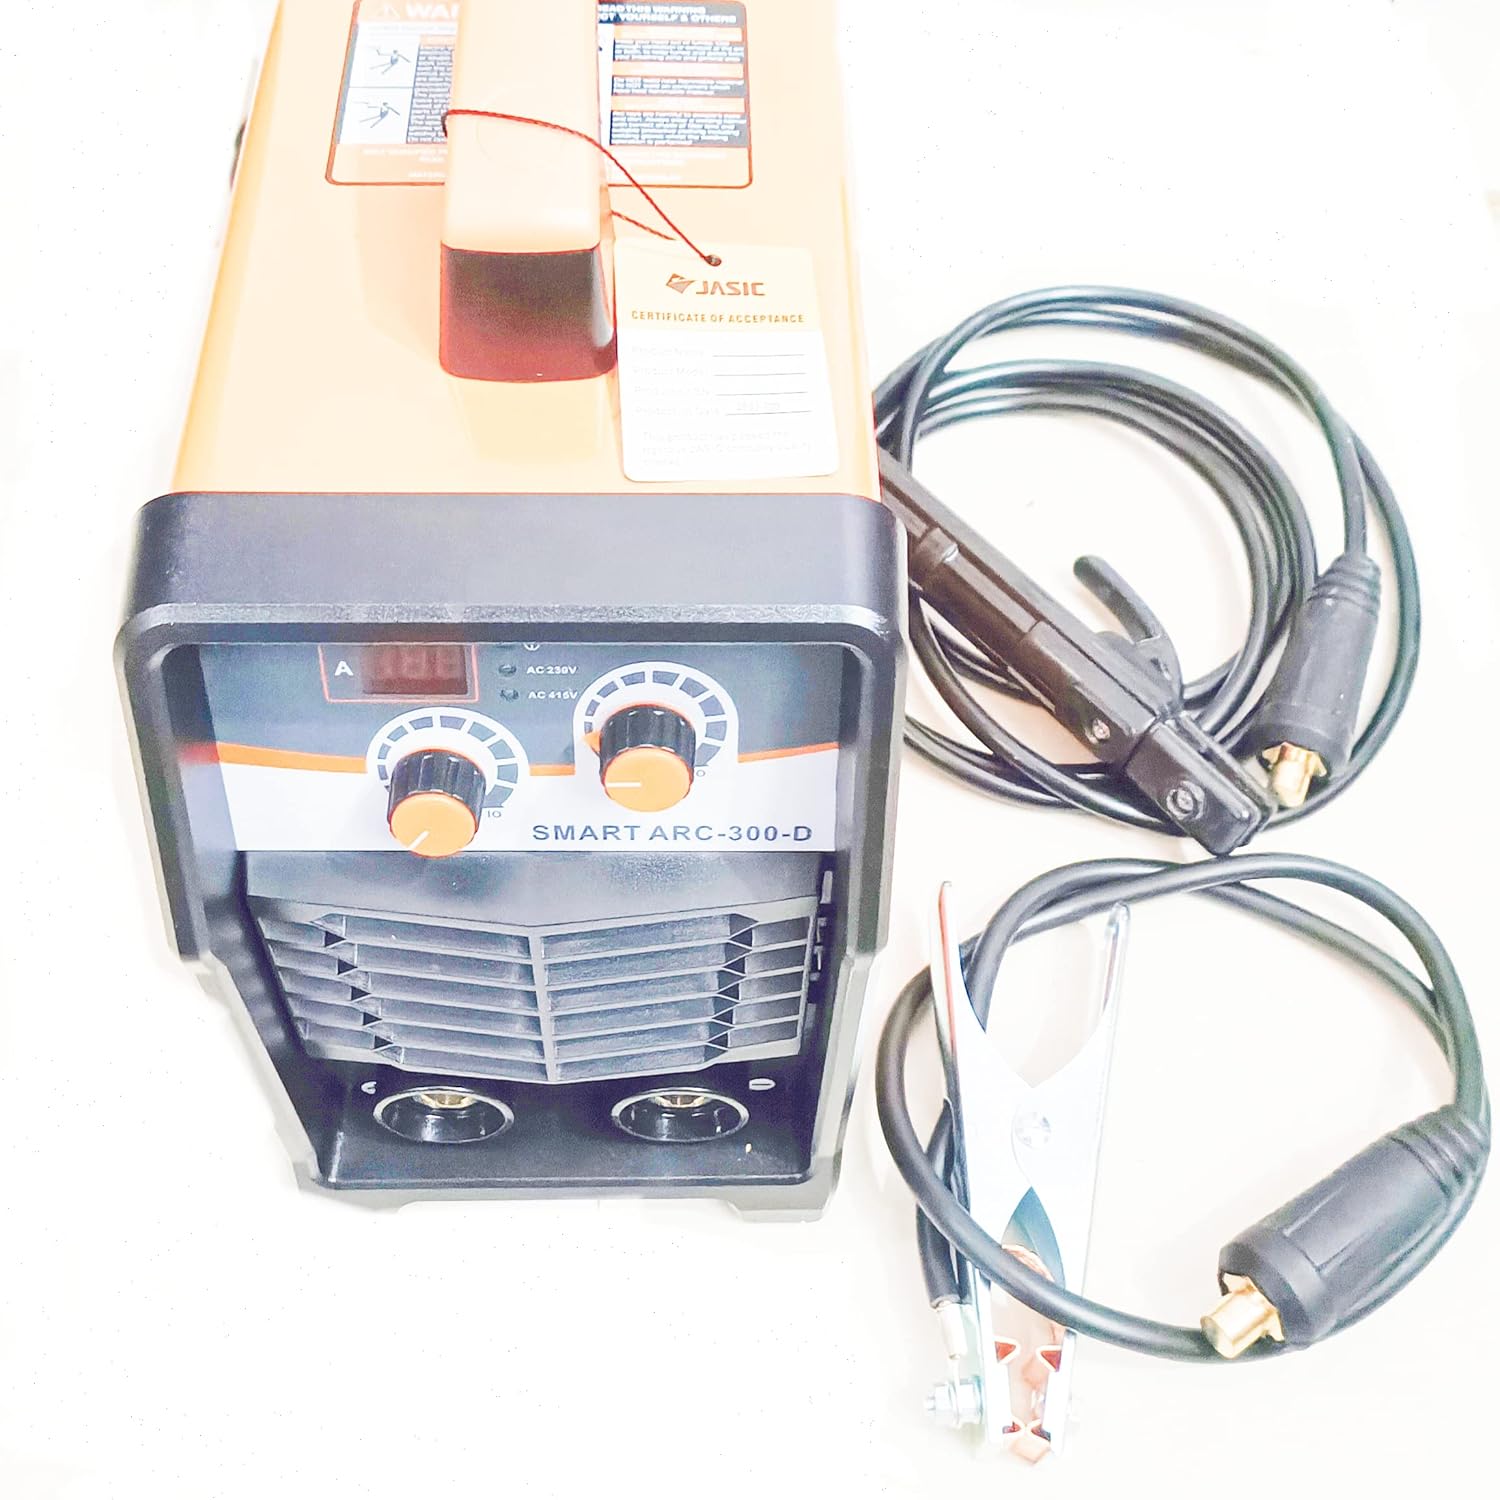
Figure 3.3: Top-down view of the Jasic SmartArc300D, highlighting the control panel with digital display and adjustment knobs, along with the welding cables.

Figure 3.4: Detailed view of the SmartArc300D's front control panel, showing the digital current display, current adjustment knob, and input voltage selection indicators (AC 230V / AC 415V).
3.1 Main Components
- Control Panel: Digital display for current, current adjustment knob, and power indicators.
- Output Terminals: Positive (+) and Negative (-) terminals for connecting welding cables.
- Power Switch: Located at the rear of the machine.
- Cooling Fan: Ensures proper ventilation and prevents overheating.
- Carry Handle: For easy portability.
4. Setup
4.1 Unpacking and Inspection
- Carefully remove the welding machine and all accessories from the packaging.
- Inspect the machine for any visible damage that may have occurred during transit. If damage is found, contact your supplier immediately.
- Verify that all components listed in the packing list are present.
4.2 Power Connection
- The SmartArc300D supports AC 230V (single phase) and AC 415V (double phase) input. Ensure your power supply matches the machine's requirements.
- Connect the power cord to a suitable, grounded power outlet. Ensure the circuit breaker or fuse rating is sufficient for the welding machine's maximum current draw.
4.3 Welding Cable Connection
- Connect the electrode holder cable to the positive (+) output terminal.
- Connect the earth clamp cable to the negative (-) output terminal.
- Ensure all connections are tight and secure to prevent arcing and overheating.
5. Operating Instructions
5.1 Basic Operation Steps
- Ensure all safety precautions are observed and PPE is worn.
- Connect the earth clamp securely to the workpiece or welding table.
- Insert the appropriate electrode into the electrode holder.
- Turn on the power switch located at the rear of the machine. The digital display will illuminate.
- Adjust the welding current using the control knob on the front panel. The digital display will show the set current. Refer to electrode manufacturer's recommendations for optimal current settings.
- Begin welding. Maintain a consistent arc length and travel speed for best results.
- After welding, turn off the power switch and allow the machine to cool down.
5.2 Welding Tips
- Practice on scrap material before welding critical components.
- Clean the workpiece thoroughly before welding to remove rust, paint, or grease.
- Maintain a short arc length for better arc stability and penetration.
- Adjust current based on electrode type, material thickness, and desired penetration.
6. Maintenance
Regular maintenance ensures the longevity and optimal performance of your welding machine. Always disconnect the power supply before performing any maintenance.
6.1 Daily Maintenance
- Inspect welding cables and connections for cuts, cracks, or loose fittings. Replace damaged cables immediately.
- Clean the electrode holder and earth clamp to ensure good electrical contact.
6.2 Monthly Maintenance
- Use compressed air to blow dust and debris from inside the machine, especially from the cooling fan and heat sinks. Do this in a well-ventilated area.
- Check all external screws and fasteners for tightness.
6.3 Storage
Store the welding machine in a clean, dry, and dust-free environment when not in use. Protect it from extreme temperatures and humidity.
7. Troubleshooting
This section provides solutions to common issues you might encounter. For problems not listed here, or if solutions do not resolve the issue, contact qualified service personnel.
| Problem | Possible Cause | Solution |
|---|---|---|
| Machine does not power on. | No power supply; Power switch off; Internal fuse blown. | Check power cord and outlet; Turn on power switch; Contact service for fuse replacement. |
| No arc or weak arc. | Poor earth connection; Incorrect current setting; Damaged electrode holder/cable. | Ensure good earth contact; Adjust current; Inspect and replace damaged parts. |
| Overheating indicator on. | Exceeded duty cycle; Poor ventilation; Fan malfunction. | Allow machine to cool down; Ensure clear airflow; Contact service if fan is faulty. |
| Unstable arc. | Improper electrode; Contaminated workpiece; Incorrect arc length. | Use correct electrode; Clean workpiece; Adjust arc length. |
8. Specifications
The following are the technical specifications for the Jasic SmartArc300D Inverter Welding Machine:
| Feature | Specification |
|---|---|
| Model | SmartArc300D |
| Brand | Jasic |
| Input Voltage | AC 230V (Single Phase) / AC 415V (Double Phase) |
| Rated Input Current | (Specific value not provided, typical for 350A machine) |
| Output Current Range | Up to 350 Ampere |
| Technology | Inverter IGBT |
| Cooling | Forced Air Cooling |
| Dimensions (Approx.) | (Not provided in input, typical compact size) |
| Weight (Approx.) | (Not provided in input, typical for portable inverter) |
9. Warranty and Support
For warranty information, please refer to the warranty card included with your product or contact your local Jasic distributor. Keep your purchase receipt as proof of purchase.
For technical support, service, or spare parts, please contact the authorized Jasic service center in your region. Provide your product model number (SmartArc300D) and serial number when contacting support.
Ask a question about this manual
Ask about setup, troubleshooting, compatibility, parts, safety, or missing instructions. Manuals+ will review the question and use this page’s manual context to help answer it.