1. Introduction
Thank you for choosing the TAB Cordless Spot Cleaner H6-1. This powerful and portable device is designed for efficient spot cleaning on various surfaces, including carpets, upholstery, and car interiors. Its cordless design offers unparalleled convenience, allowing you to tackle spills and stains quickly and effectively. Please read this manual thoroughly before first use to ensure proper operation and maintenance.

Image: The TAB Cordless Spot Cleaner H6-1, showcasing its compact and ergonomic design.
2. What's in the Box
Please check the contents of your package to ensure all items are present:
- TAB Cordless Spot Cleaner H6-1 Main Unit
- Extended Hose Attachment
- Charging Cable/Adapter
- User Manual
3. Setup and Assembly
Follow these steps to prepare your spot cleaner for first use:
- Charge the Battery: Before initial use, fully charge the device. Connect the charging cable to the cleaner and plug it into a power outlet. The LED display will indicate charging status. A full charge provides approximately 20 minutes of runtime.
- Fill the Clean Water Tank: Locate the clean water tank (350ml capacity). Remove it from the main unit and fill it with clean water and a suitable cleaning solution (if desired, follow solution manufacturer's instructions). Do not overfill. Reattach the tank securely.
- Attach the Extended Hose (Optional): For hard-to-reach areas or specific cleaning tasks, attach the extended hose to the designated port on the main unit. Ensure it clicks into place firmly.
- Understand the LED Display: Familiarize yourself with the LED display, which shows battery level and other indicators.

Image: The cordless spot cleaner being used, highlighting its rechargeable nature and 20-minute run time.
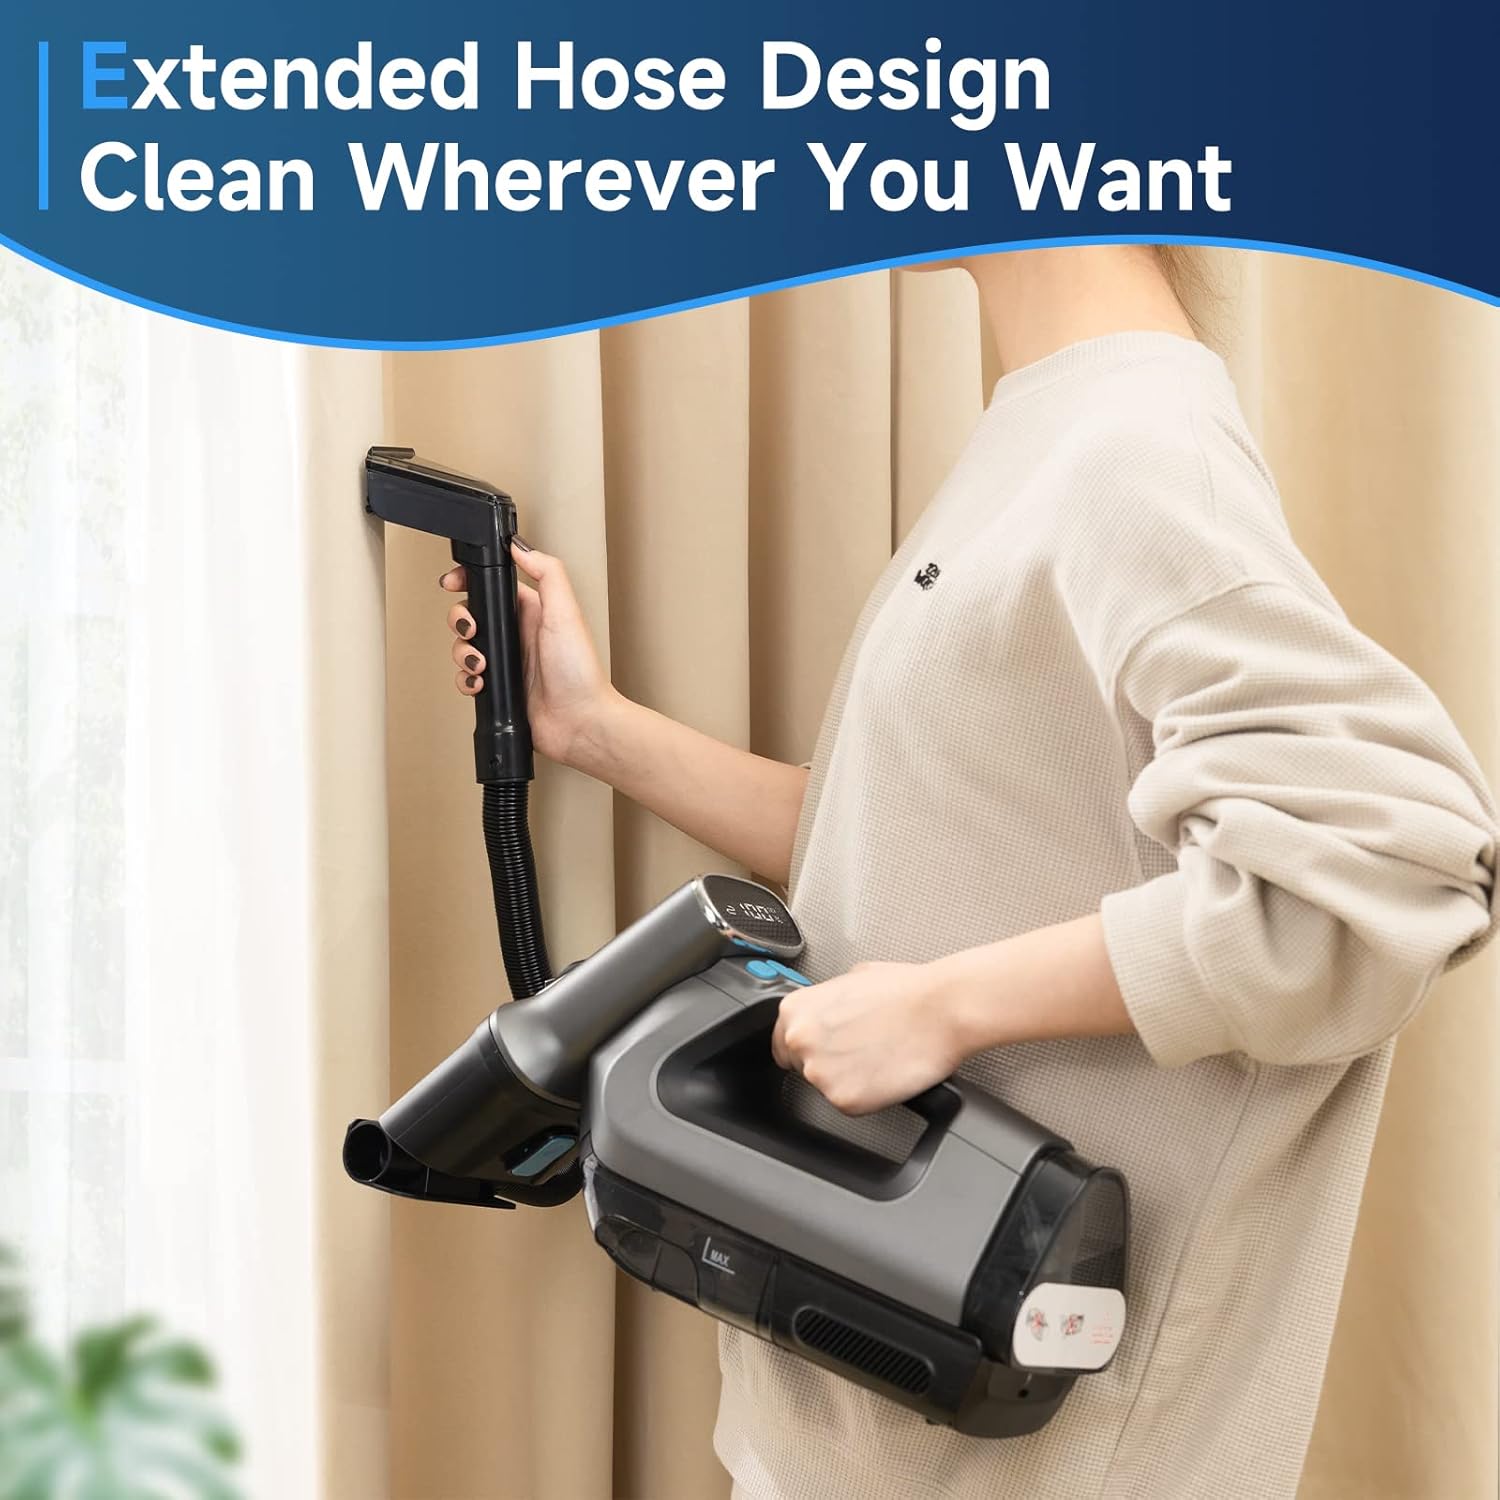
Image: A user demonstrating the extended hose design, allowing for cleaning in various locations like curtains.

Image: Close-up of the LED display on the cleaner, indicating battery percentage and controls like spray and power brush.
4. Operating Instructions
Before cleaning, always test the cleaning solution on an inconspicuous area of the surface to be cleaned to ensure colorfastness.
- Power On: Press the power button to turn on the cleaner. The LED display will illuminate.
- Pre-treat (Optional): For tough stains, you may pre-treat the area with a suitable cleaning solution according to the solution's instructions.
- Spray Solution: Press the spray button to dispense cleaning solution onto the stained area. Allow the solution to penetrate for a few moments.
- Scrub and Suction: Move the cleaning head over the stained area, applying gentle pressure. The integrated power brush will agitate the stain, while the strong suction power will lift the dirty solution and debris into the dirty water tank.
- Repeat if Necessary: For stubborn stains, repeat the spray, scrub, and suction process until the stain is removed.
- Power Off: Once cleaning is complete, press the power button to turn off the device.

Image: The spot cleaner in action on a carpet, demonstrating its strong suction power to remove liquid and debris.

Image: An illustration of the automatic power brush mechanism, designed for high-speed washing and improved cleaning.

Image: The spot cleaner effectively removing a pet stain from a carpet, illustrating its quick and efficient cleaning capability.
5. Maintenance and Cleaning
Regular maintenance ensures optimal performance and extends the life of your spot cleaner.
- Empty and Clean Dirty Water Tank: After each use, or when the dirty water tank (260ml capacity) reaches its maximum fill line, remove it from the unit and empty the contents. Rinse the tank thoroughly with clean water.
- Clean Clean Water Tank: Periodically rinse the clean water tank to prevent residue buildup.
- Clean the Cleaning Head/Brush: Remove any hair, fibers, or debris from the power brush and suction nozzle. You may use a damp cloth to wipe down the exterior of the unit.
- Store Properly: Store the cleaner in a cool, dry place away from direct sunlight and extreme temperatures. Ensure both tanks are empty and dry before storage.

Image: Diagram showing the removable dual water tank system, with separate tanks for clean water (350ml) and dirty water (260ml).
6. Troubleshooting
If you encounter issues with your TAB Cordless Spot Cleaner, refer to the following common problems and solutions:
| Problem | Possible Cause | Solution |
|---|---|---|
| Unit does not turn on | Battery is depleted | Charge the unit fully. |
| No spray/low spray | Clean water tank is empty or improperly seated | Refill clean water tank; ensure it is securely attached. |
| Low suction power | Dirty water tank is full; Suction nozzle is clogged | Empty dirty water tank; Clear any blockages from the nozzle. |
| Cleaner leaves streaks | Dirty water tank is full; Cleaning head is dirty | Empty dirty water tank; Clean the cleaning head and brush. |
If the problem persists after trying these solutions, please contact customer support.
7. Specifications
| Feature | Detail |
|---|---|
| Brand | TAB |
| Model Name | RTB-H6 (H6-1) |
| Special Feature | Power brush |
| Voltage | 120 Volts |
| Clean Water Tank Capacity | 350 Milliliters |
| Dirty Water Tank Capacity | 260 Milliliters |
| Runtime | 20 minutes |
| Item Weight | 2 kg |
| Item Dimensions (LxWxH) | 13 x 41.7 x 21.4 Centimeters |
| Included Components | Extended hose |
8. Warranty and Support
For warranty information and customer support, please refer to the warranty card included with your product or visit the official TAB website. Keep your purchase receipt as proof of purchase for any warranty claims.
For further assistance, you may also contact the retailer where you purchased the product.


