1. Introduction
The SKYSHL SS415F is a core alignment trunk fiber fusion splicer designed for high-precision optical fiber splicing. It incorporates advanced image processing technology, a high-precision CMOS camera, optical system, and servo system to ensure accurate fiber core-to-fiber core alignment. This device is suitable for various fiber types including SM, MM, DS, and NZDS, making it ideal for communication, CATV, CCTV, Fiber Optic Trunk Cable, and FTTx fiber projects.
2. Product Overview
Key Features:
- Core Alignment: Utilizes advanced image processing for precise fiber alignment.
- Fast Splicing & Heating: Achieves 6-second splicing and 13-second heating (fast mode) for improved efficiency.
- 5-inch TFT Touch Screen: Provides simple and intuitive operation.
- Durable Design: Lightweight aluminum alloy shell and integrated silicone protective cover offer impact, wind, water, and dust resistance.
- Automatic Functions: Features automatic arc compensation, focusing, welding, heating, and correction.
- Splicing Evaluation: Performs splicing loss evaluation and tensile tests (configurable in settings).
- Long Battery Life: 11.1V 5200mAh lithium battery supports up to 300 splicing or heat shrink operations.
What's in the Box:
- 1 x SS415F Fusion Splicer
- 10 x Electrodes (5 pairs)
- 1 x Fiber Cleaver
- 1 x 11.1V 5200mAh Battery
- Fiber tool set (various tools for fiber preparation)

Image: The complete SKYSHL SS415F Fusion Splicer kit, including the splicer unit, fiber cleaver, electrodes, battery, and various fiber optic tools.
3. Safety Information
Always observe the following safety precautions to prevent injury and damage to the device:
- Eye Protection: Always wear appropriate eye protection when working with optical fibers and the splicer. Invisible laser light may be present.
- Fiber Shards: Handle cleaved fibers with extreme care. Fiber shards are very sharp and can cause serious injury. Dispose of all fiber scraps in a designated container.
- Electrical Safety: Do not operate the splicer in wet conditions. Ensure the power adapter and battery are in good condition.
- High Voltage: The fusion splicer uses high voltage for arc discharge. Do not touch the electrodes or the splicing area during operation.
- Ventilation: Ensure adequate ventilation when operating the splicer, especially during the heating process.
- Cleaning: Use only recommended cleaning solutions and tools. Avoid abrasive materials.
4. Setup
4.1 Unpacking and Inspection
- Carefully unpack all components from the carrying case.
- Verify that all items listed in the 'What's in the Box' section are present and undamaged.
- Report any missing or damaged items to your supplier immediately.
4.2 Charging the Battery
- Connect the power adapter to the splicer and a suitable power outlet.
- Allow the battery to fully charge before initial use. The charging indicator will show the status.
4.3 Powering On/Off
- To power on, press and hold the power button until the screen illuminates.
- To power off, press and hold the power button until the shutdown prompt appears, then confirm.
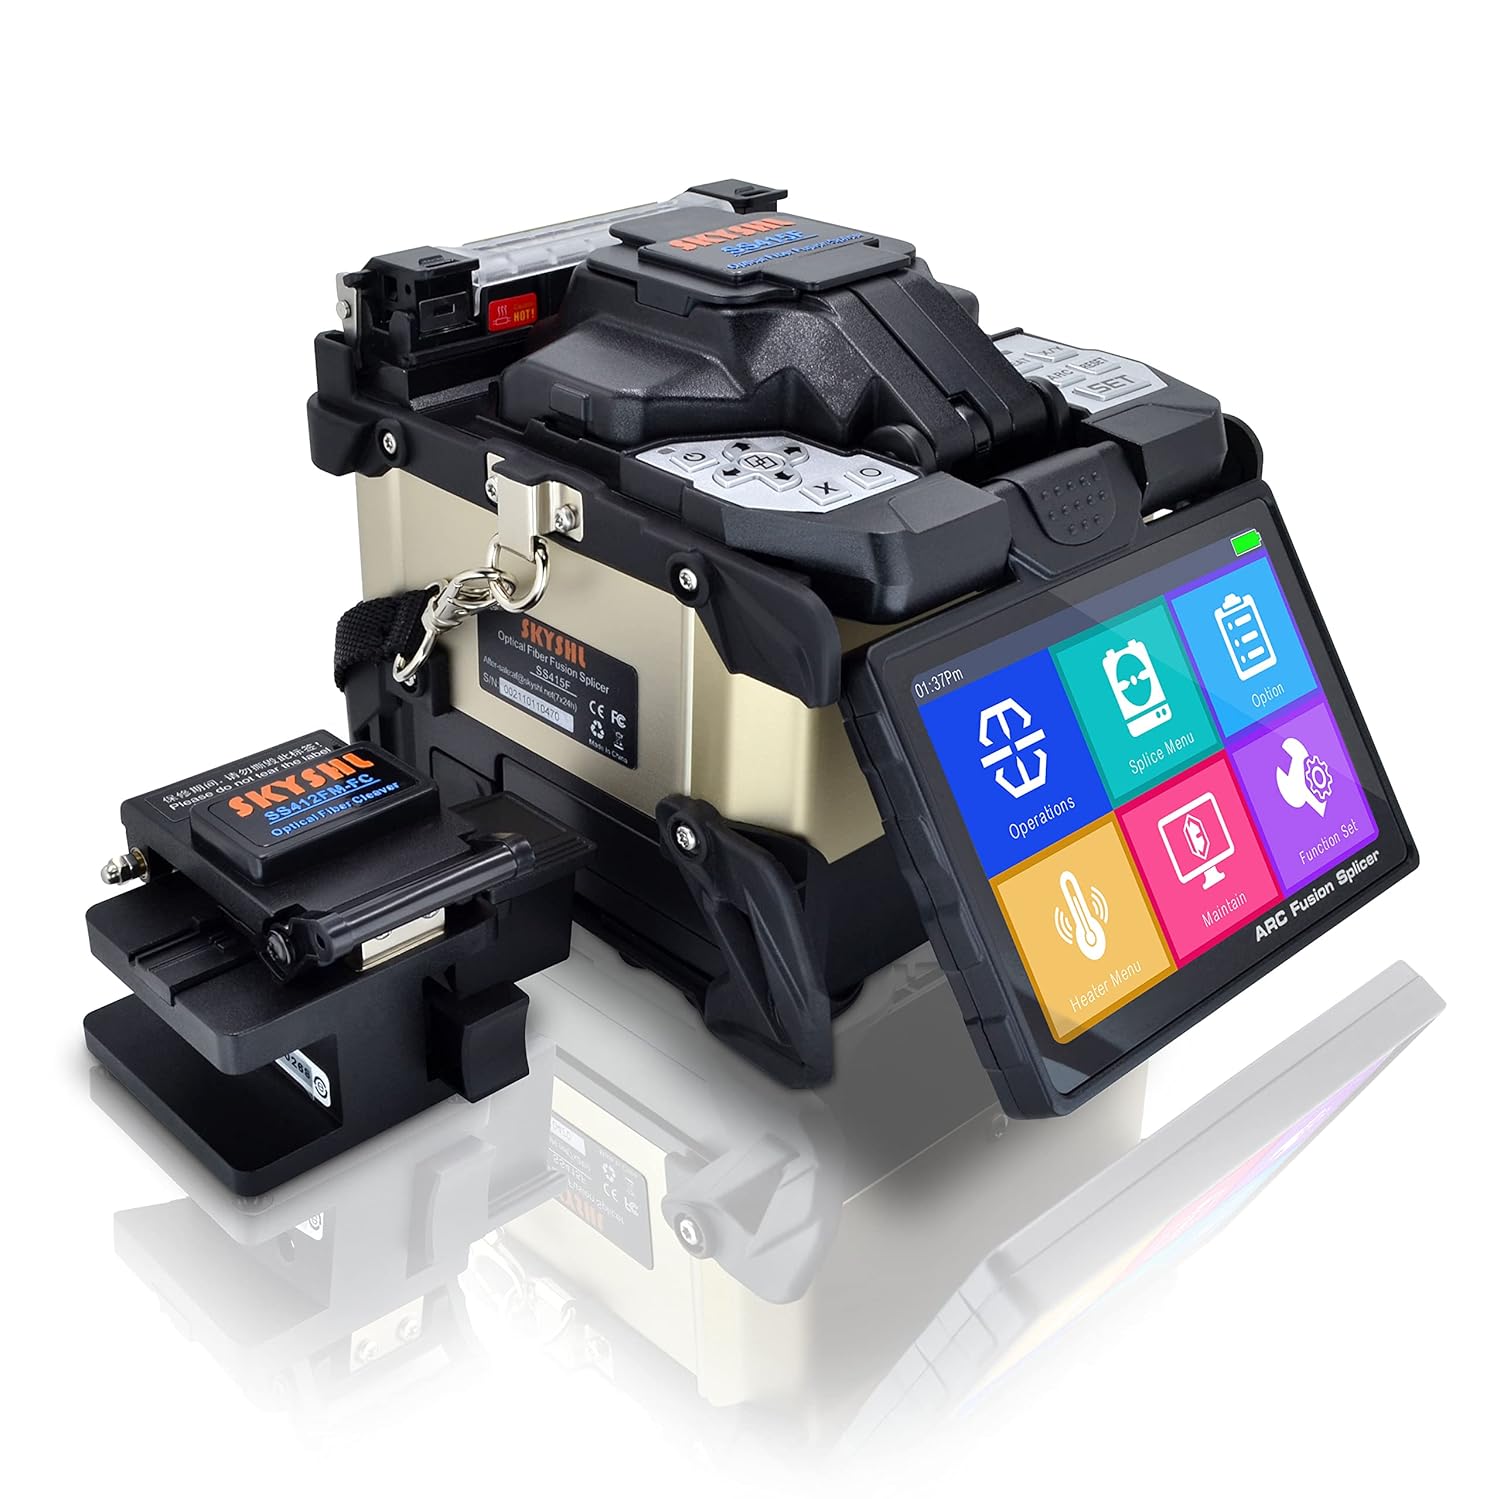
Image: The SKYSHL SS415F Fusion Splicer with its touch screen displaying the main operational menu.
5. Operating Instructions
5.1 Fiber Preparation
- Strip the Fiber: Use a fiber stripper to remove the protective coating from the fiber, exposing the bare fiber.
- Clean the Fiber: Clean the bare fiber with an alcohol wipe to remove any residue.
- Cleave the Fiber: Use the provided fiber cleaver to make a precise, clean cut on the fiber end. Ensure the cleave angle is optimal for splicing.
5.2 Splicing Process
- Open the Wind Protector: Lift the wind protector cover of the splicer.
- Place Fibers: Carefully place the prepared fibers into the V-grooves on the splicer, ensuring the fiber ends are positioned correctly.
- Close the Wind Protector: Gently close the wind protector. The splicer will automatically begin the alignment and splicing process.
- Review Splice: After the splice is completed (approximately 6 seconds), the screen will display the splice loss.
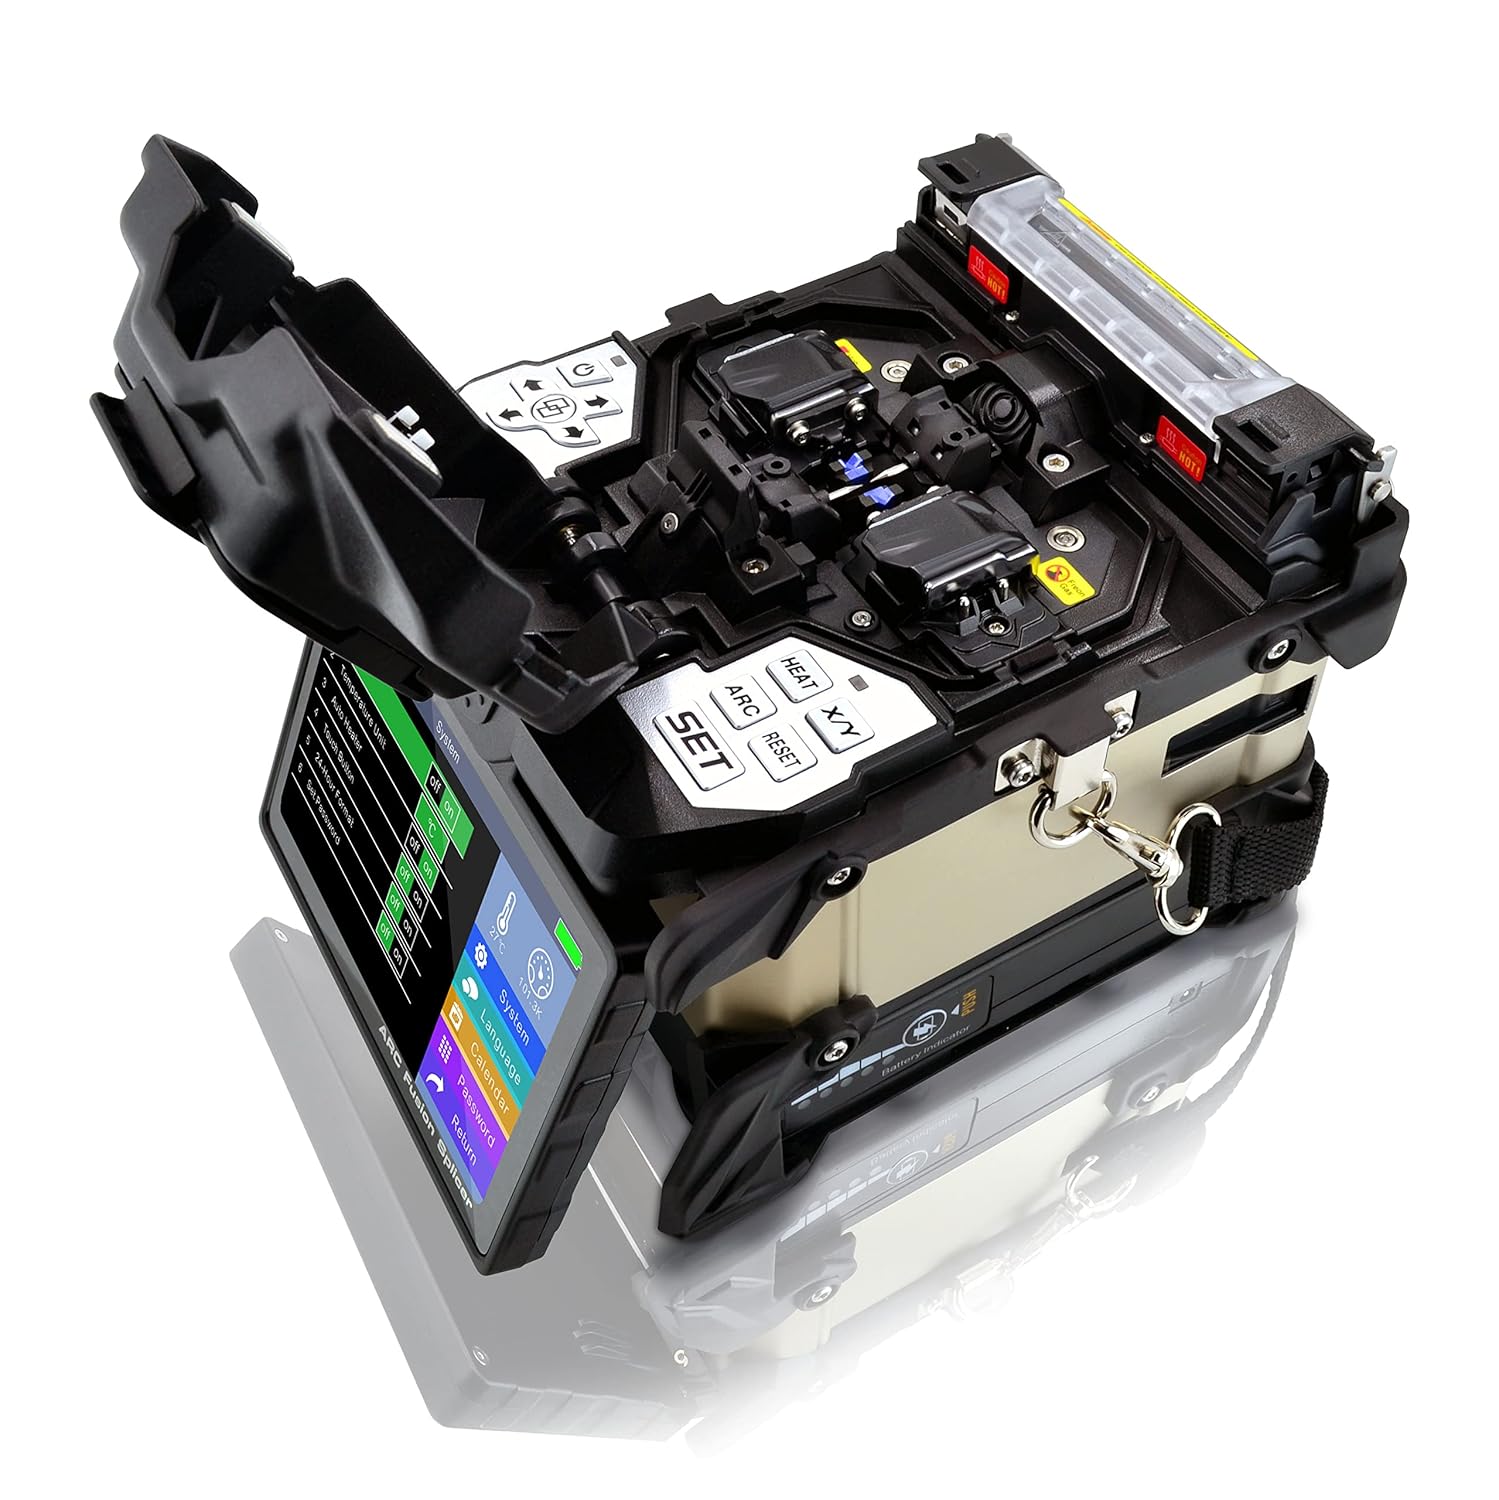
Image: The open splicing area of the SS415F, revealing the V-grooves where fibers are placed for alignment and fusion.
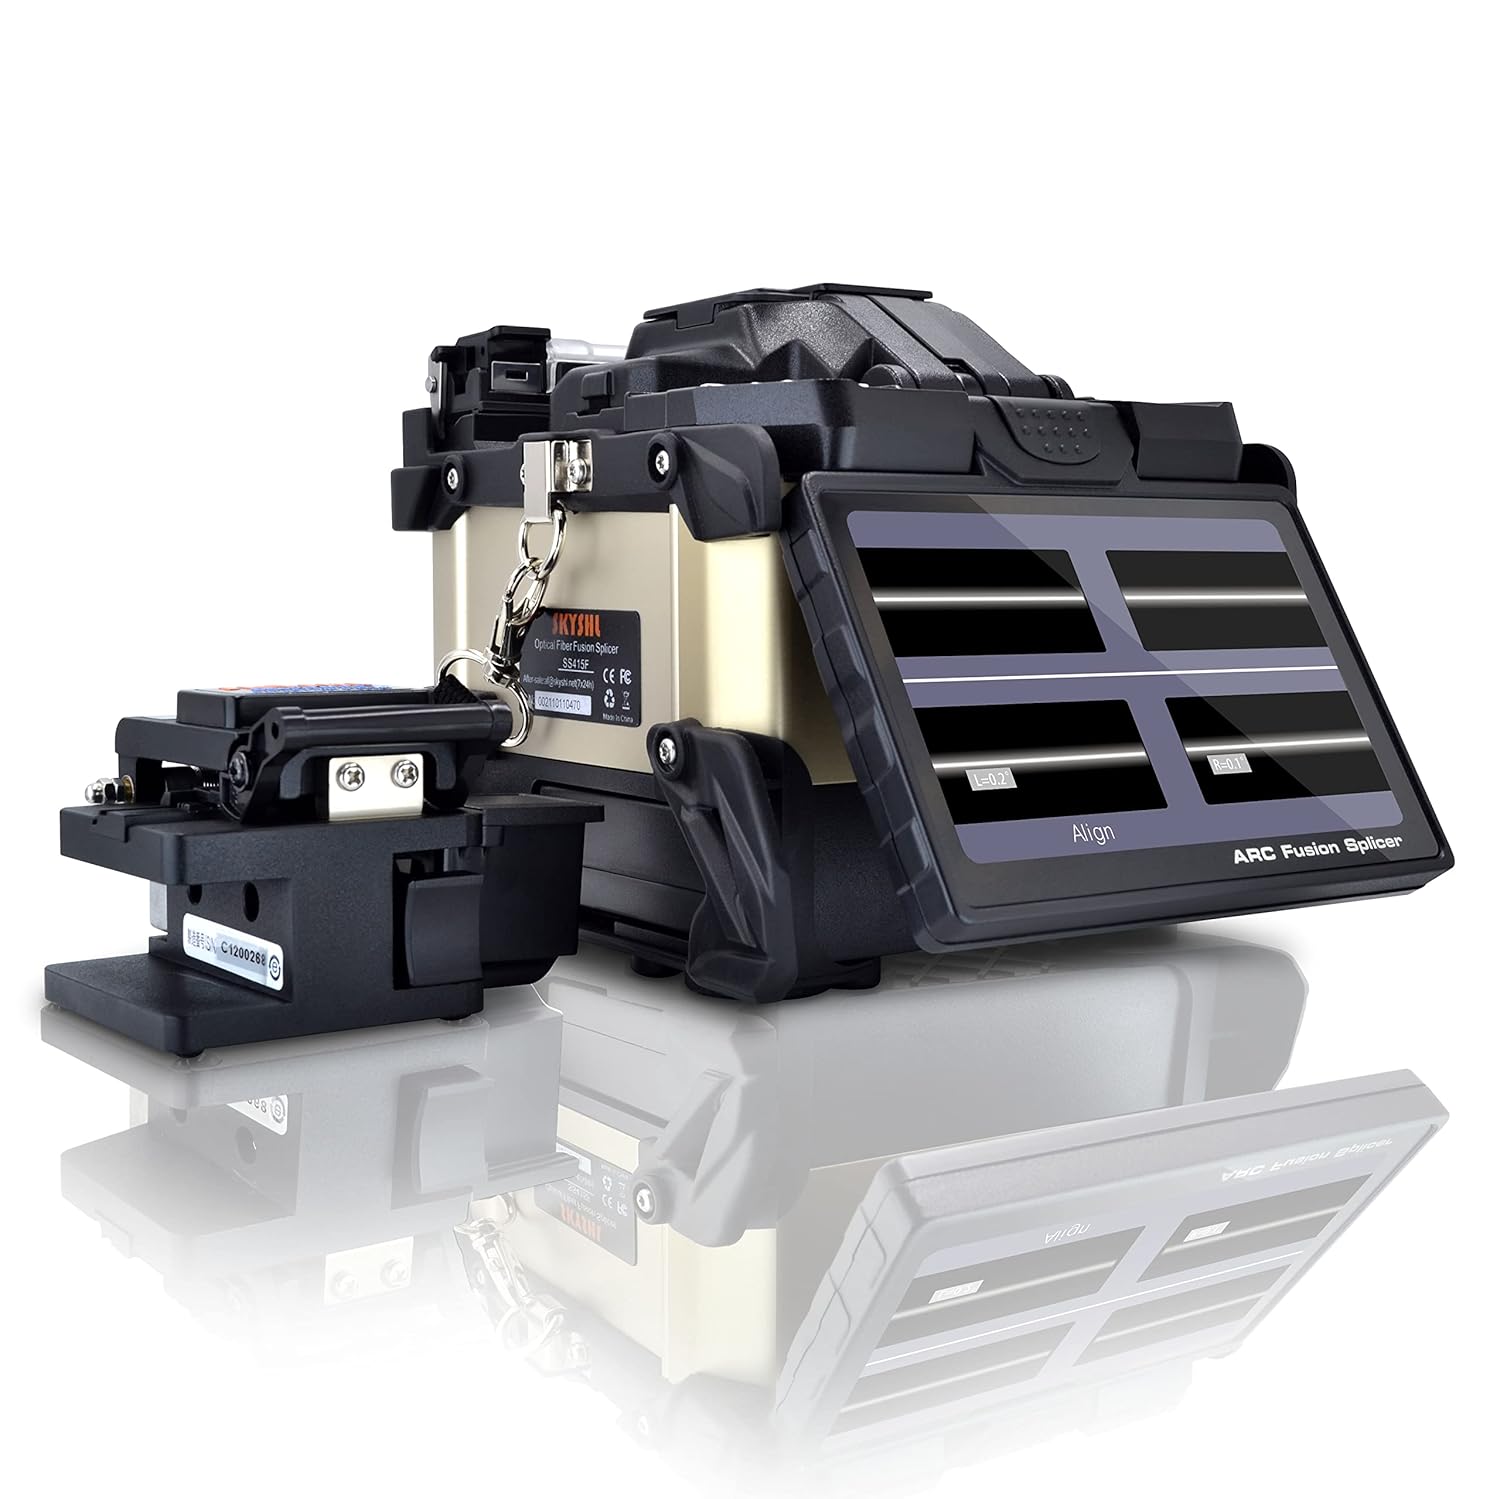
Image: The splicer's screen showing the real-time fiber alignment during the splicing process.
5.3 Heating Process
- Transfer Fiber: Carefully move the spliced fiber to the heating oven.
- Place Protection Sleeve: Position a heat-shrink protection sleeve over the splice point.
- Close Heater Cover: Close the heater cover. The heating process will start automatically (approximately 13 seconds in fast mode).
- Remove Heated Fiber: Once heating is complete, carefully remove the fiber.

Image: The splicer's screen indicating that the splice is completed, along with the measured splice loss.
5.4 Calibration
Regular calibration ensures optimal splicing performance.
5.4.1 Motor Calibration
Motor calibration adjusts the fiber feeding mechanism for precise movement.
Video: Demonstrates the motor calibration process for the SS415F fusion splicer, ensuring accurate fiber positioning.
5.4.2 Arc Adjust
Arc adjustment optimizes the arc discharge intensity for consistent splice quality.
Video: Illustrates how to perform arc adjustment on the SS415F fusion splicer to maintain optimal arc discharge for splicing.
6. Maintenance
6.1 Electrode Replacement
Electrodes should be replaced after approximately 8,000 splices or if splice quality degrades. Refer to the splicer's menu for electrode stability checks.
6.2 Cleaning
- V-Grooves: Regularly clean the V-grooves with a cotton swab and alcohol to prevent fiber contamination.
- Lenses: Clean the observation camera lenses with a lens cleaning solution and a soft cloth.
- Screen: Wipe the touch screen with a soft, lint-free cloth.
7. Troubleshooting
If you encounter issues, consider the following common solutions:
- High Splice Loss: Check fiber cleave quality, clean V-grooves and electrodes, perform arc adjustment, or replace electrodes.
- Fiber Not Aligning: Ensure fibers are correctly placed in V-grooves, clean V-grooves, or perform motor calibration.
- Heating Issues: Check heater settings, ensure the protection sleeve is correctly positioned, or inspect the heater element.
- Screen Unresponsive: Restart the device. If the issue persists, contact support.
8. Environmental Durability Tests
The SKYSHL SS415F Fusion Splicer undergoes rigorous testing to ensure reliability in various environmental conditions.
8.1 Drop Test
Video: Shows the SKYSHL SS415F Fusion Splicer undergoing a drop test, demonstrating its robust construction and resistance to impact.
8.2 High Temperature Test
Video: Displays the SS415F Fusion Splicer operating successfully during a high-temperature test, confirming its performance in elevated heat conditions.
8.3 Vibration Test
Video: Shows the SS415F Fusion Splicer maintaining stable operation during a vibration test, highlighting its durability against mechanical stress.
8.4 Low Temperature Test
Video: Demonstrates the SS415F Fusion Splicer's functionality in low-temperature conditions, ensuring reliable performance in cold environments.
9. Specifications
| Feature | Specification |
|---|---|
| Brand | SKYSHL |
| Model Name | SS415F |
| Connector Type | Optical |
| Cable Type | Fiber Optic |
| Compatible Devices | Monitor |
| Recommended Uses | Optical fiber cable installation, repair, and maintenance |
| Connector Gender | Male-to-Female |
| Shape | Round |
| Unit Count | 1.0 Count |
| Item Weight | 2.1 Kilograms (4.62 pounds) |
| Number of Items | 1 |
| Wattage | 57.72 Watt-hours |
| Maximum Voltage | 240 Volts (AC) |
| Product Dimensions | 6.5 x 5.83 x 5.51 inches |
| Batteries | 1 Lithium Polymer battery required (included) |
10. Warranty and Support
For warranty information, technical support, or service inquiries, please refer to the documentation included with your product or contact SKYSHL customer service through the official website or your point of purchase. Ensure you have your product model number and purchase date available when contacting support.
