1. Introduction
This manual provides detailed instructions for the installation, operation, and maintenance of your DAYTECH WiFi Smart Home Alarm Security System. Please read this manual thoroughly before using the product to ensure proper function and safety. This system is designed to provide reliable security monitoring for your home or apartment, utilizing 2.4GHz Wi-Fi connectivity for smartphone alerts and control.
2. Package Contents
Upon unpacking, verify that all the following components are included in your kit:
- 1 x Alarm Base Station
- 3 x Door/Window Sensors
- 1 x Key Fob Remote Control
- 1 x Siren
- 1 x Power Adapter (Charger)
- 1 x USB Data Cable
- Mounting Screws and Anchors
- Instruction Manual

Video: Unboxing and overview of the DAYTECH WiFi Smart Home Alarm Security System components, including the alarm base station, door/window sensors, key fob, and siren.

Image: Detailed view of the DAYTECH DIY Security System components: alarm base station, contact sensor, key fob, and siren.
3. Components Overview
- Alarm Base Station: The central hub of your security system. It connects to your home Wi-Fi network (2.4GHz only) and communicates with all sensors and accessories. Features an SOS display and integrated speaker.
- Door/Window Sensors: Two-piece magnetic sensors that detect when a door or window is opened. They send alerts to the base station and your smartphone.
- Key Fob Remote Control: Allows for convenient arming, disarming, and SOS activation of the system.
- Siren: An external siren that provides an audible alarm when triggered, enhancing deterrence.

Image: Diagram illustrating the connections and functions of the DAYTECH Alarm Security System, showing the alarm base station, sensor, siren, and key fob.
4. Setup Guide
4.1. App Installation
- Download the Tuya Smart or Smart Life app from your smartphone's app store (iOS or Android).
- Register for an account or log in if you already have one.
4.2. Connecting the Alarm Base Station
- Plug the Alarm Base Station into a power outlet using the provided power adapter.
- Ensure your smartphone is connected to a 2.4GHz Wi-Fi network. (5GHz networks are not supported).
- Open the Tuya Smart/Smart Life app.
- Long press the key on the back of the receiver for 6 seconds to enter distribution network mode. The indicator light will flash.
- In the app, tap "Add Device" or the "+" icon. The app should automatically discover the device. If not, manually select "Security & Sensor" > "Alarm (Wi-Fi)".
- Follow the on-screen prompts to connect the base station to your Wi-Fi network. Enter your Wi-Fi password when requested.
- Once connected, the base station will appear in your device list.
4.3. Pairing Sensors and Key Fobs
The sensors and key fobs are typically pre-paired with the base station. If you need to add new accessories or re-pair existing ones:
- In the app, select your Alarm Base Station.
- Navigate to the "Accessories" section.
- Follow the app's instructions to add new sensors or key fobs. This usually involves triggering the sensor (e.g., separating the magnetic pieces for a door sensor) or pressing a button on the key fob while the base station is in pairing mode.
Video: This video demonstrates the setup and operation of the DAYTECH WiFi Smart Home Alarm Security System using the mobile application. It covers connecting the base station, managing accessories, and configuring alarm settings.
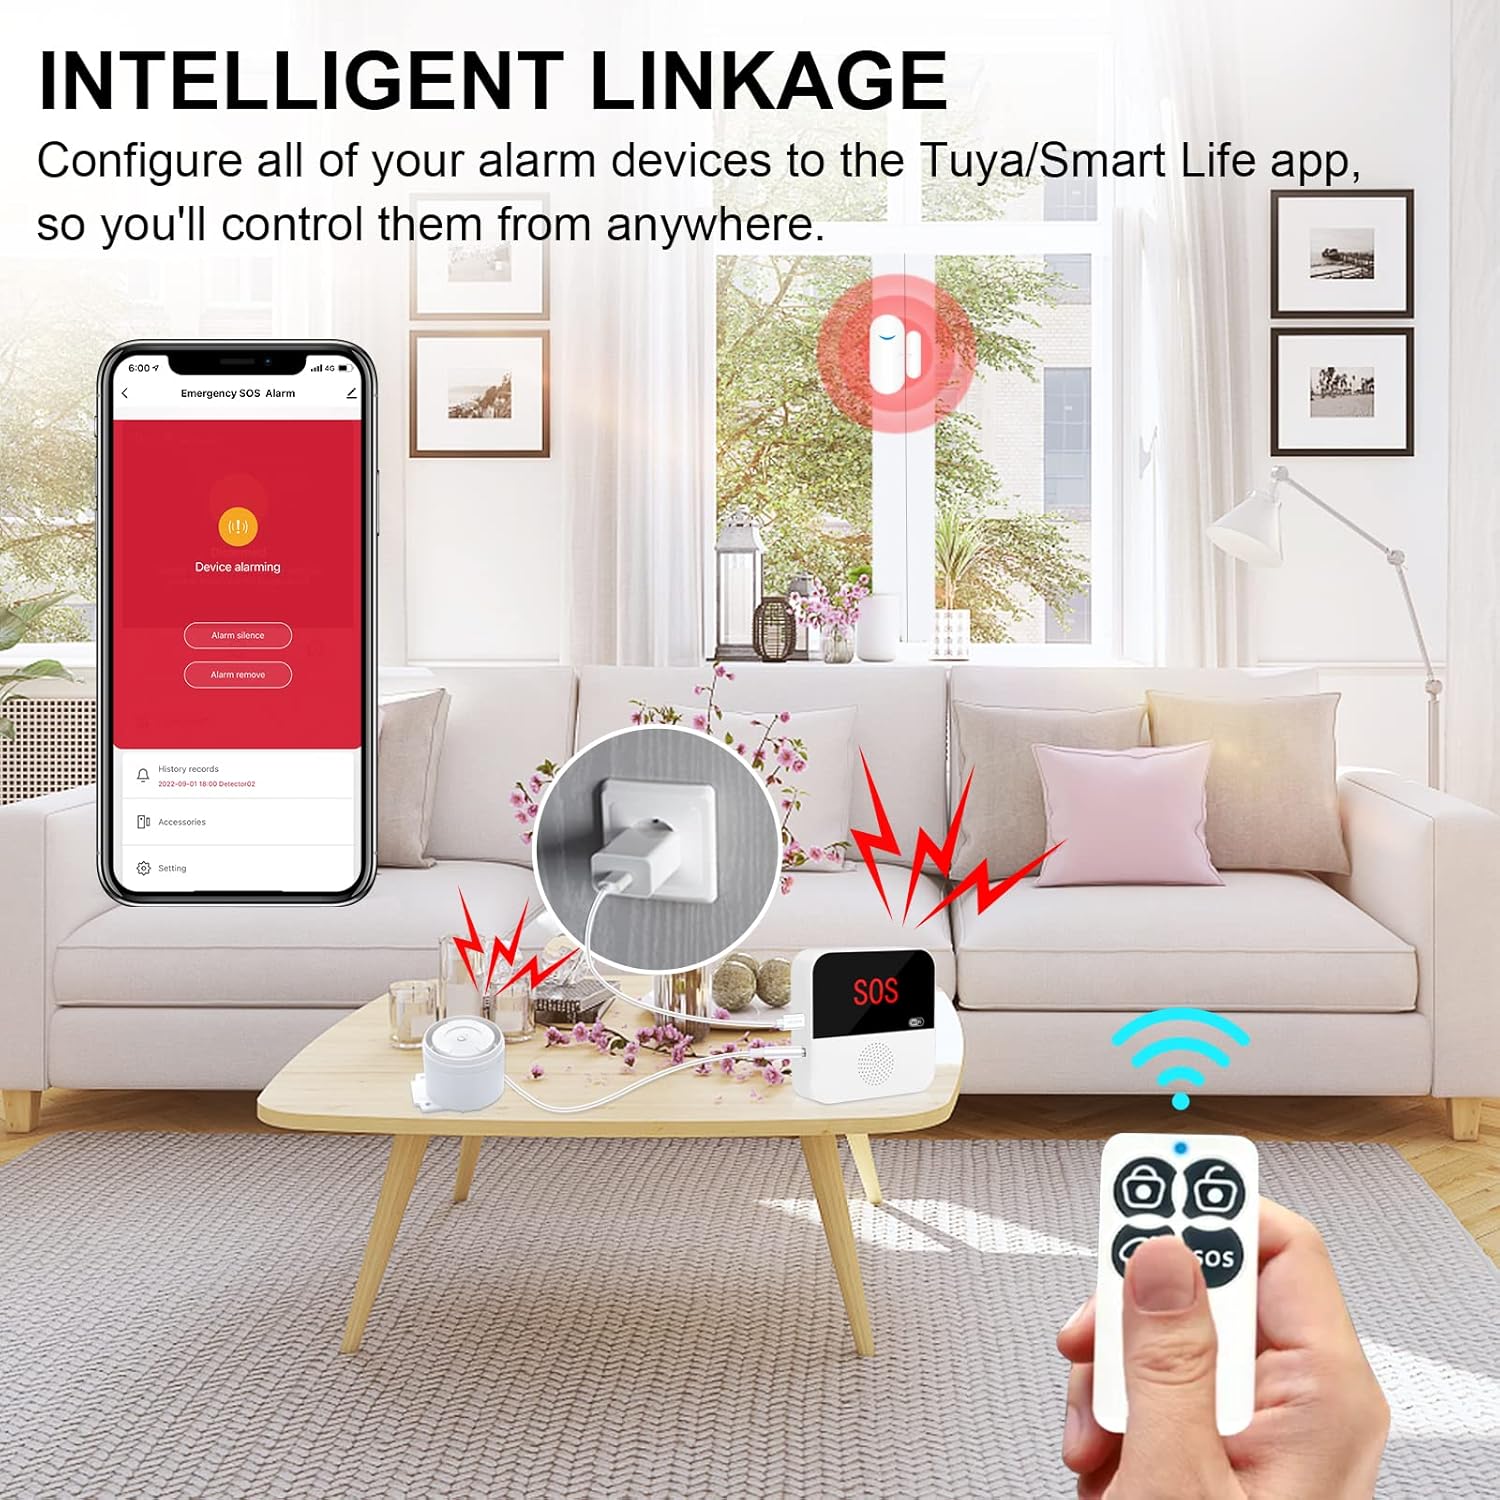
Image: Smartphone displaying the alarm system app interface, with the DAYTECH alarm base station, remote, and a wall plug in a living room setting.
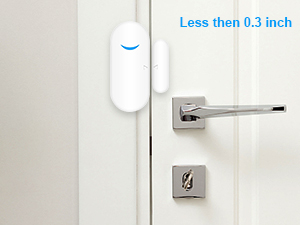
Image: A DAYTECH door/window sensor installed on a door frame.
5. Operating the System
5.1. Alarm Modes
The system supports various alarm modes, controllable via the app or key fob:
- Arming Mode (Away): All sensors are armed. Ideal when no one is home.
- Stay Armed Mode (Home): Typically, only perimeter sensors (doors/windows) are armed, allowing movement inside the home.
- Disarming Mode: All sensors are disarmed.
- SOS Mode: Triggers an immediate alarm and sends alerts in case of an emergency.
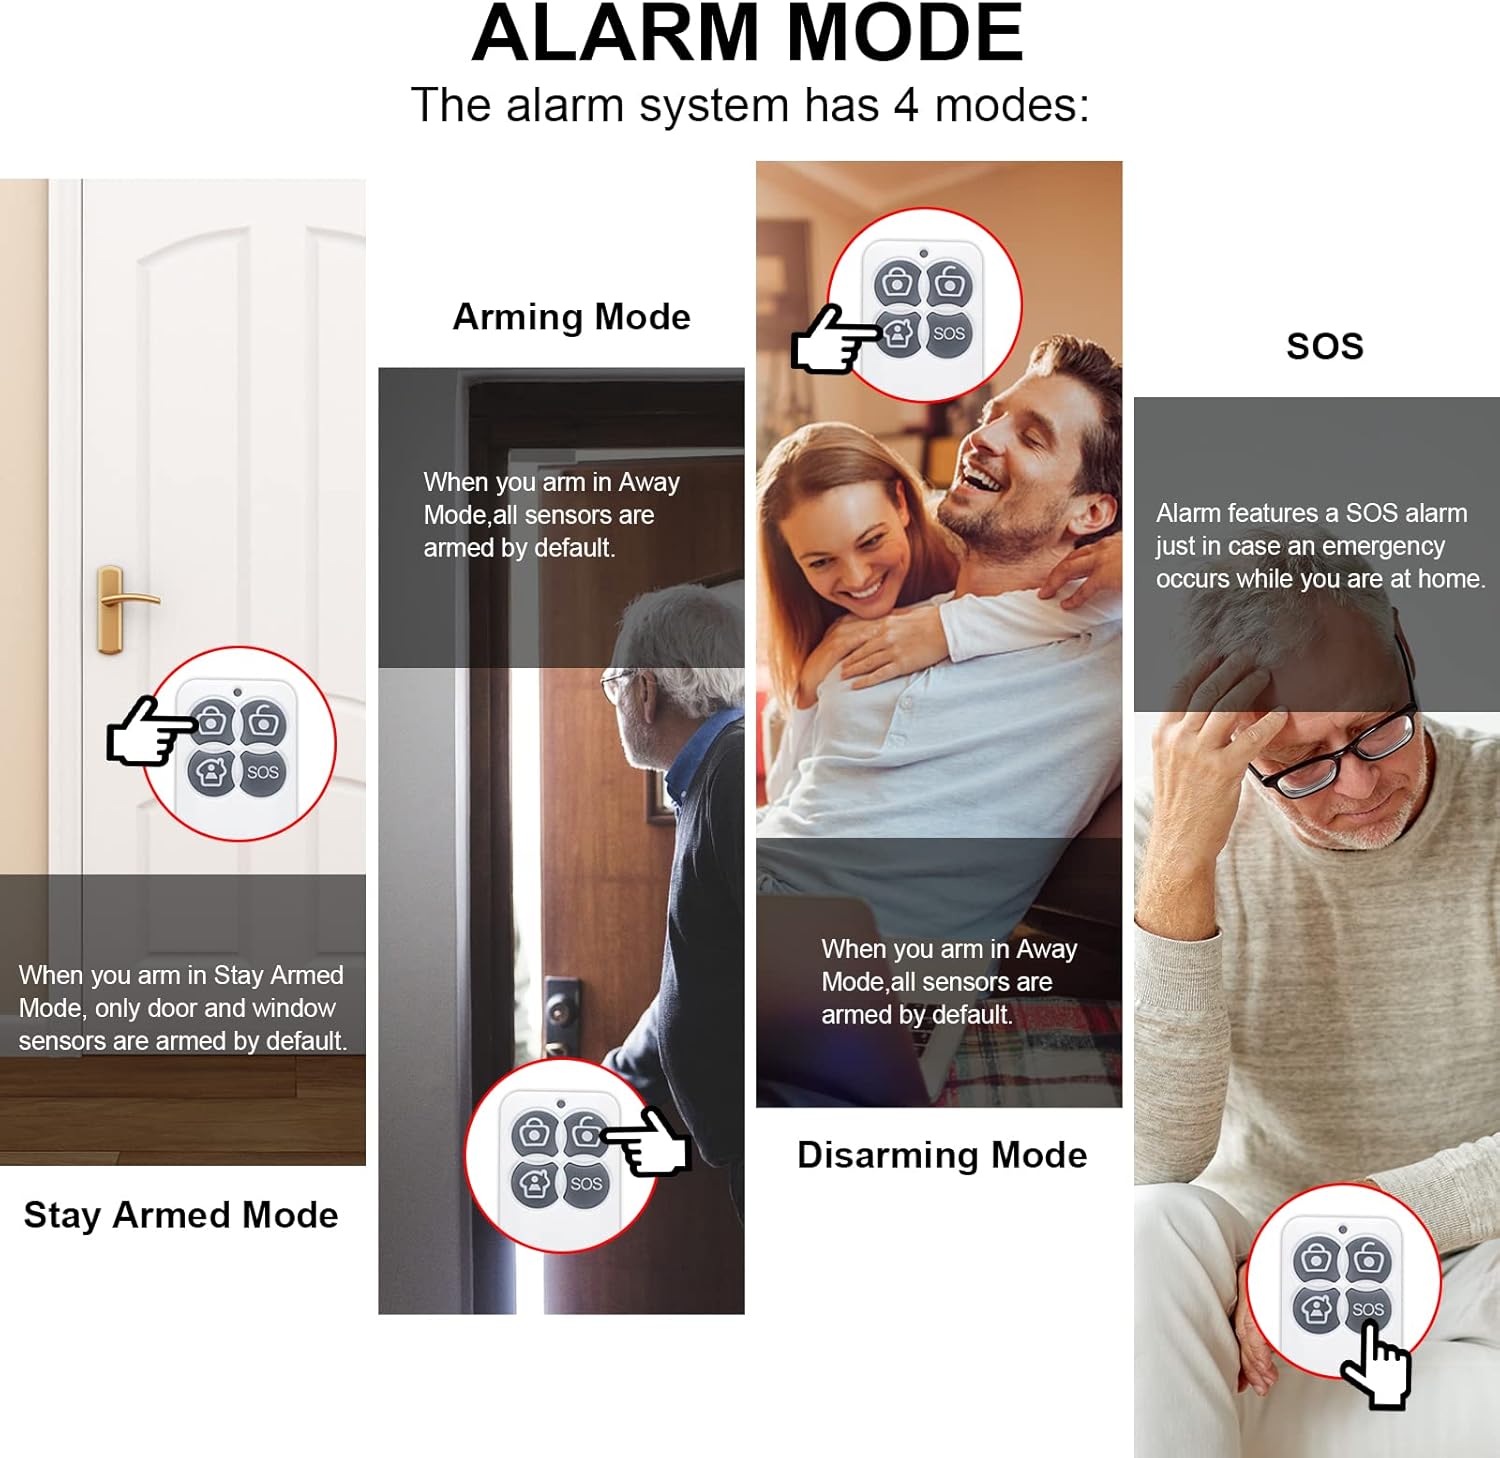
Image: Diagram illustrating the four alarm modes: Arming, Stay Armed, Disarming, and SOS, with corresponding actions.
5.2. App Operation and Customization
The mobile app provides comprehensive control and customization options:
- Deleting Accessories: If you wish to remove a key fob or contact sensor, navigate to the "Accessories" section in the app, select the device, and choose the delete option.
- Modifying Accessory Name: Personalize the names of your sensors (e.g., "Front Door," "Living Room Window") for easier identification. This is done in the "Accessories" section by selecting the device and editing its name.
- Modifying Accessory Ringtone: Customize the alert sound for specific accessories. Access this setting within the individual accessory's details in the app.
- Setting Alarm Time: Adjust the duration of the alarm sound when triggered. This can be found in the main device settings under "Alarm Time."
- Setting Alarm Volume: Control the loudness of the alarm. Options typically include Low, Middle, High, or Mute. Adjust this in the main device settings under "Alarm Volume."
- Setting Alarm Brightness: Adjust the brightness of the indicator light on the base station during an alarm. This setting is available in the main device settings under "Alarm Light Brightness."
- Clearing All Accessories: To perform a factory reset or clear all paired accessories, navigate to the main device settings and select "Clear All Devices." Confirm your action.
- Unbinding Mobile App: To unbind your mobile app from the device, go to the device's settings page in the app and select "Remove Device."

Image: A smartphone displaying the DAYTECH alarm system application interface.
6. Maintenance
- Battery Replacement: Door/window sensors and key fobs are battery-powered. Replace batteries promptly when the app indicates a low battery status to ensure continuous protection.
- Cleaning: Use a soft, dry cloth to clean the alarm base station and sensors. Avoid using abrasive cleaners or solvents.
- Firmware Updates: Periodically check the app for available firmware updates for the base station. Updates can improve performance and add new features.
- Wi-Fi Connection: Ensure your Wi-Fi router is functioning correctly and the base station has a stable 2.4GHz connection.
7. Troubleshooting
- System Not Connecting to Wi-Fi:
- Ensure your Wi-Fi network is 2.4GHz. The system does not support 5GHz Wi-Fi.
- Check your Wi-Fi password for accuracy.
- Move the base station closer to your Wi-Fi router.
- Restart your Wi-Fi router and the alarm base station.
- Sensors Not Triggering Alarm:
- Verify that the system is in an armed mode (Away or Stay Armed).
- Check the battery status of the sensor in the app. Replace if low.
- Ensure the sensor and its magnetic component are properly aligned and within the specified gap (typically less than 0.3 inches).
- Re-pair the sensor with the base station if necessary.
- No Notifications on Phone:
- Check your phone's notification settings for the Tuya Smart/Smart Life app to ensure notifications are enabled.
- Verify that the app is running in the background or has appropriate permissions.
- Ensure your phone has an active internet connection.
- Siren Not Sounding:
- Check if the siren is properly connected to the base station.
- Verify the alarm volume setting in the app is not set to Mute or too low.
8. Specifications
| Brand | Daytech |
| Model Number | TY07-1-US |
| Power Source | Base Station: Plug-in (AC powered); Sensors/Key Fob: Battery Powered |
| Compatible Devices | Smartphone (iOS/Android) |
| Connectivity Technology | Wireless (2.4GHz Wi-Fi only) |
| Installation Type | Plug In (Base Station) |
| Alert Type | Contact/Entry Detection |
| Base Station Dimensions (L x W x H) | 5.12 x 4.25 x 3.35 inches |
| Item Weight | 12.8 ounces |
9. Warranty and Support
For warranty information and technical support, please refer to the contact details provided on the product packaging or visit the official Daytech website. Keep your purchase receipt as proof of purchase for warranty claims.


