1. Product Overview
The BOBLOV M7 Pro is a 4K GPS body worn camera designed for various recording needs, featuring a 180° rotatable lens, 256GB internal storage, and a long-lasting battery. This manual provides instructions for its proper use and maintenance.
1.1 Package Contents
Verify that all items listed below are included in your package. If any items are missing or damaged, please contact customer support.
- 1x M7 Pro Body Worn Camera
- 1x USB-C Cable
- 1x Fast Charger Plug
- 1x Short Rotate 360° Clip
- 1x Long Rotate 360° Clip
- 1x User Manual

Figure 1: Packaging List of BOBLOV M7 Pro
2. Setup
2.1 Charging the Camera
Before first use, fully charge the camera. The 4000mAh battery provides up to 14 hours of video recording and takes approximately 4-5 hours to fully charge using the provided fast charger.
- Connect the USB-C cable to the camera's charging port.
- Plug the other end of the USB-C cable into the fast charger plug.
- Insert the charger plug into a power outlet.
- The charging indicator light will show the charging status. It will typically turn off or change color when fully charged.

Figure 2: Charging the M7 Pro Body Camera
2.2 Attaching the Clips
The M7 Pro comes with two types of rotatable clips for flexible mounting options: a short back clip and a long shoulder clip. Both support 360° rotation.
- Align the clip with the slot on the back of the camera.
- Slide the clip firmly into place until it clicks.
- To remove, press the release tab (if present) and slide the clip off.
- Attach the camera to your uniform, belt, or shoulder strap using the desired clip.
Video 1: Demonstrates how to attach and rotate the shoulder and back clips on the M7 Pro body camera.
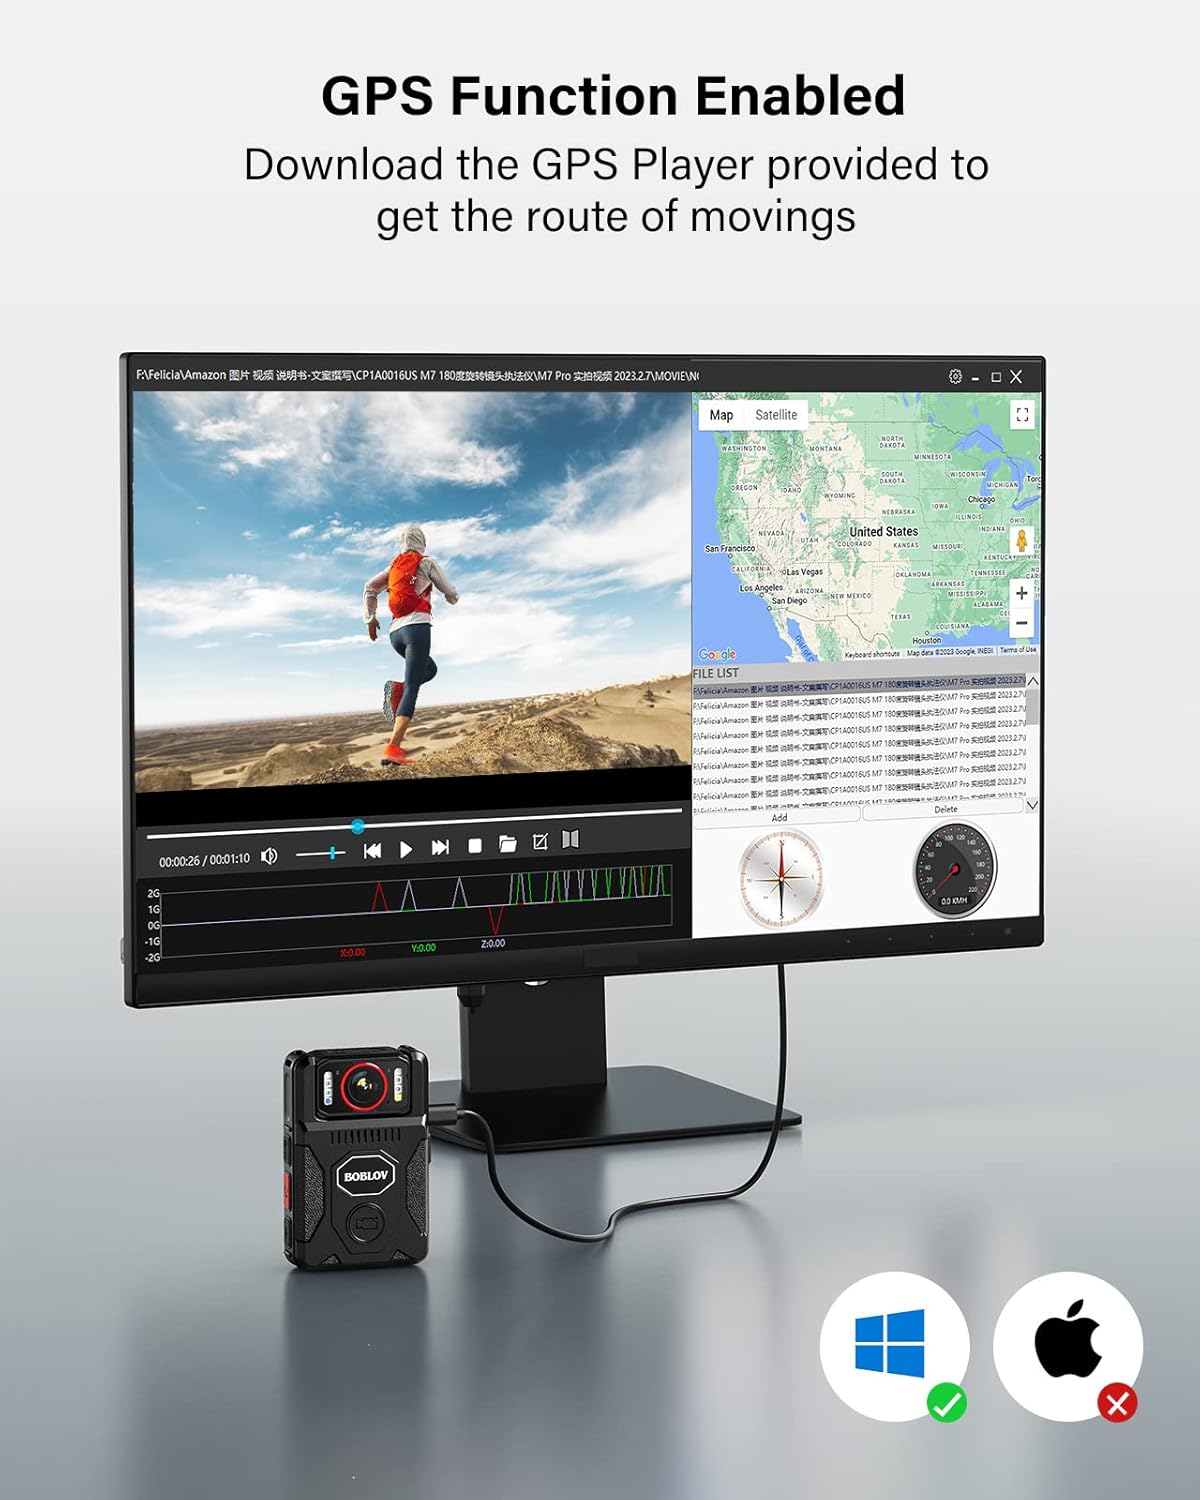
Figure 3: M7 Pro with Long Shoulder Clip

Figure 4: M7 Pro with Short Back Clip
2.3 Setting Time and Date
Ensure the camera's time and date are correctly set for accurate record-keeping.
2.3.1 Without GPS (Manual Setting)
- Enter the camera's menu.
- Navigate to the 'Date&Time' setting option.
- Edit the date and time to your local settings.
- Exit the menu and verify the display.
2.3.2 With GPS (Automatic Synchronization)
For automatic time synchronization, ensure GPS is enabled and the camera can acquire a signal in an open area.
- In the camera's menu, set your local 'Time Zone'. For example, in the US, this is typically GMT -8:00. Adjust according to your specific location.
- Turn on the 'GPS' option in the menu.
- Take the M7 Pro to an open area to allow it to acquire a GPS signal.
- Once GPS is successfully located, the GPS icon on the display will change (e.g., from grey to green), and the time and date will automatically sync to the local time zone.
Video 2: Instructions on how to set the correct time for the M7 Pro body worn camera, both manually and using GPS synchronization.
3. Operating Instructions
3.1 Power On/Off and Recording
The M7 Pro is designed for quick activation and recording.
- Power On: Press and hold the power button until the camera powers on.
- Start Recording: Press the dedicated video recording button (often red or clearly marked) to begin recording. The camera will typically provide an audio or visual cue (e.g., red light) to indicate recording has started.
- Stop Recording: Press the video recording button again to stop recording.
- Power Off: Press and hold the power button until the camera powers off.
Video 3: Overview of BOBLOV M7 Pro 4K GPS Body Worn Camera features, including power on, recording, and lens rotation.
3.2 180° Rotating Lens
The unique 180° rotatable lens allows for flexible shooting angles and auto-adjustment of image direction during standby or video recording.
- Manually rotate the lens to your desired angle.
- The camera will automatically adjust the image orientation on the display to ensure correct viewing, even if the camera body is inverted.
- Allow a few seconds for the camera to adjust the image direction after rotation.
Video 4: Guide on how to rotate the BOBLOV M7 Pro camera's lens and record videos, demonstrating the auto-orientation feature.

Figure 5: 180° Rotatable Lens
3.3 Night Vision (IR Lights)
The M7 Pro is equipped with 4 IR lights for clear recording in low-light or nighttime conditions.
- After powering on, long press the dedicated night vision button (often marked with a moon or IR symbol) to turn on/off the four IR lights.
- The camera can operate in auto or manual night vision mode.

Figure 6: M7 Pro with IR Night Vision
3.4 White Light and Alarm Function
The camera includes a white light and an alarm function with red-blue flash lights for warning purposes.
- White Light: After powering on, short press the night vision button (often marked with a moon or IR symbol) to turn on/off the white light.
- Alarm Sound & Red-Blue Flash Lights: In standby mode, long press the photo button (often marked with a camera icon) to activate the alarm sound and red-blue flash lights.
- To deactivate the alarm sound, long press the photo button a second time.
- To turn off the lights (white and red-blue flash), long press the photo button a third time.
Video 5: Instructions on how to activate and deactivate the warning lights and alarm sound on the M7 Pro body camera.
3.5 GPS Functionality
The integrated GPS allows for tracking driving routes via the provided GPS Player software.
- Ensure GPS is enabled in the camera's settings (refer to Section 2.3.2).
- Record video as usual. The GPS data will be embedded in the video files.
- Transfer the video files to a computer.
- Use the dedicated GPS Player software (provided by BOBLOV, typically available for download) to view the video and its corresponding route on a map.

Figure 7: GPS Functionality with GPS Player
3.6 Loop Recording
The M7 Pro supports loop recording, which automatically overwrites the oldest files when the memory card is full.
- Loop Recording is enabled by default.
- You can set the 'Video Duration' in the camera's menu to 5, 10, or 15 minutes per segment.
3.7 Expanded Use as Dash Camera
The M7 Pro can also be used as a dash camera for vehicle recording. An optional suction mount (not included) is required for this application.

Figure 8: M7 Pro Used as a Dash Camera
4. Maintenance
4.1 Cleaning
- Use a soft, dry cloth to clean the camera body.
- For the lens, use a specialized lens cleaning cloth and solution to avoid scratches.
- Do not use harsh chemicals or abrasive materials.
4.2 Storage
- Store the camera in a cool, dry place away from direct sunlight and extreme temperatures.
- Avoid storing the camera in dusty or humid environments.
- If storing for extended periods, ensure the battery is partially charged (around 50%) to prolong its lifespan.
5. Troubleshooting
If you encounter issues with your BOBLOV M7 Pro camera, refer to the following common problems and solutions:
| Problem | Possible Cause | Solution |
|---|---|---|
| Camera does not power on. | Low battery; camera frozen. | Charge the camera fully. If frozen, try pressing the reset button (if available) or holding the power button for an extended period. |
| Poor video/image quality. | Dirty lens; incorrect settings; low light conditions. | Clean the lens. Check video resolution settings (ensure 4K is selected). Activate IR night vision in low light. |
| GPS not locating or inaccurate. | GPS disabled; obstructed signal; incorrect time zone. | Ensure GPS is enabled in settings. Move to an open area with clear sky view. Verify time zone settings. |
| Camera locks up or freezes. | Software glitch; internal memory issue. | Press the reset button (if available). Power off and restart. If persistent, contact customer support. |
| Cannot access recorded videos. | Connection issue; corrupted files. | Ensure proper USB connection to computer. Try a different USB port or cable. If files are corrupted, formatting the camera (which will erase data) might be necessary. |
If the problem persists after attempting these solutions, please contact BOBLOV customer support for further assistance.
6. Specifications
Key technical specifications for the BOBLOV M7 Pro 4K GPS Body Worn Camera:
| Feature | Detail |
|---|---|
| Brand | BOBLOV |
| Model Name | M7 Pro |
| Video Capture Resolution | 4K |
| Photo Sensor Technology | CMOS |
| Lens Type | Zoom, 180° Rotatable |
| Flash Memory Installed Size | 256 GB |
| Battery Capacity | 4000 mAh (up to 14 hours recording) |
| Charging Time | 4-5 hours (with fast charger) |
| Special Feature | Infrared Night Vision, GPS |
| Screen Size | 2 Inches |
| Connectivity Technology | USB |
| Water Resistance Level | Not Water Resistant |
| Operating System Compatibility | Android, iOS (for GPS Player software) |

Figure 9: M7 Pro Dimensions and Weight
7. Warranty and Support
7.1 Warranty Information
The BOBLOV M7 Pro Body Worn Camera comes with a 2-year warranty from the date of purchase. This warranty covers manufacturing defects and malfunctions under normal use. It does not cover damage caused by misuse, accidents, unauthorized modifications, or natural disasters.
7.2 Customer Support
For any questions, technical assistance, or warranty claims, please contact BOBLOV customer service:
- Email: Refer to the contact information provided in your product packaging or on the official BOBLOV website.
- Online Resources: Visit the official BOBLOV website for FAQs, software downloads (e.g., GPS Player), and additional support materials.