
AddAcc D13
AddAcc D13 40000mAh Battery Powered Camping Fan Instruction Manual
Model: D13 | Brand: AddAcc
Introduction
Thank you for purchasing the AddAcc D13 40000mAh Battery Powered Camping Fan. This manual provides essential information for the safe and efficient operation of your new fan. Please read it thoroughly before use and retain it for future reference.
Important Safety Instructions
- Do not insert fingers or any objects into the fan grille.
- Keep the fan away from water or other liquids to prevent electric shock.
- Do not operate the fan with a damaged cord or plug.
- Ensure the fan is placed on a stable, level surface.
- Keep out of reach of children.
- Do not attempt to disassemble or repair the fan yourself. Contact customer support for assistance.
- Use only the charging cable provided or a compatible 5V/3A Type-C charger.
Package Contents
- 1x AddAcc D13 Rechargeable Fan
- 1x Remote Control
- 1x USB Type-C Charging Cable
- 1x User Manual (this document)
Product Overview
Familiarize yourself with the components of your AddAcc D13 fan.

Figure 1: Front view of the AddAcc D13 fan, showing the fan blades, LED lights, control panel, and included remote control. A smartphone is shown charging from the fan's USB port.
- Fan Grille: Protects the fan blades.
- Fan Blades: 9-inch blades for air circulation.
- LED Lights: Integrated lighting with multiple brightness levels.
- Control Panel: Buttons for power, speed, oscillation, light, and timer.
- Battery Indicator: Displays remaining battery power.
- Remote Control Slot: Located at the base for storing the remote.
- Type-C Input/Output Port: For charging the fan and charging external devices.
- USB-A Output Port: For charging external devices.
- 360° Rotation Hook: For hanging the fan.
- Adjustable Pivot: Allows vertical angle adjustment up to 270°.
- Oscillation Mechanism: Provides automatic horizontal oscillation (45°/90°).
- Hidden Silicone Handle: For easy portability.
Setup
1. Initial Charging
- Before first use, fully charge the fan. Connect the provided USB Type-C charging cable to the fan's Type-C port and a compatible 5V/3A power adapter (not included).
- The battery indicator lights will show the charging status. All lights will be solid when fully charged (approximately 9-10 hours).
2. Remote Control Activation
- Remove the insulating sheet from the remote control's battery compartment.
- Press the power button on the fan's control panel to activate the remote control functionality.
Operating Instructions
Fan Operation
- Power On/Off: Press the power button on the control panel or remote.
- Adjust Fan Speed: Press the fan speed button (usually indicated by fan icon) on the control panel or remote to cycle through 4 speed settings. The highest speed can reach up to 4.9m/s.
- Oscillation: Press the oscillation button (usually indicated by an arrow icon) on the control panel or remote to activate 45° or 90° automatic horizontal oscillation.
- Vertical Angle Adjustment: Manually adjust the fan head vertically up to 270° to direct airflow.

Figure 2: Diagram illustrating the 45°/90° automatic horizontal oscillation and 270° manual vertical pivot capabilities of the fan.
Light Operation
- Turn Lights On/Off: Press the light button (usually indicated by a light bulb icon) on the control panel or remote.
- Adjust Brightness: Press the light button repeatedly to cycle through 5 brightness levels.
- Night Mode: The night mode allows you to turn off indicator lights for undisturbed sleep. Refer to the control panel or remote for the specific night mode button.

Figure 3: The fan's integrated LED lights providing illumination inside a camping tent, demonstrating its use as a lantern.
Timer Function
- Press the timer button (usually indicated by a clock icon) on the control panel or remote to set the fan to operate for 1, 2, 4, or 8 hours. The fan will automatically turn off after the selected duration.
Power Bank Function
- The fan features a 40000mAh battery and can act as a power bank.
- Connect your electronic device (e.g., smartphone, tablet) to the fan's 5V/3A Type-C input/output port or the USB-A output port using a compatible charging cable.
- The fan will begin charging your device.

Figure 4: The fan being used as a portable power source, charging various electronic devices such as a smartphone, camera, laptop, and tablet.
Placement Options
The AddAcc D13 fan is designed for versatile placement to suit various environments.
- Desk/Floor Fan: Place the fan on any stable, flat surface.
- Hanging Fan: Utilize the built-in 360° rotation hook to hang the fan from tent poles, branches, or other suitable structures.
- Wall-Mounted Fan: The fan can be mounted on a wall using appropriate hardware (not included) through designated mounting points on the base.
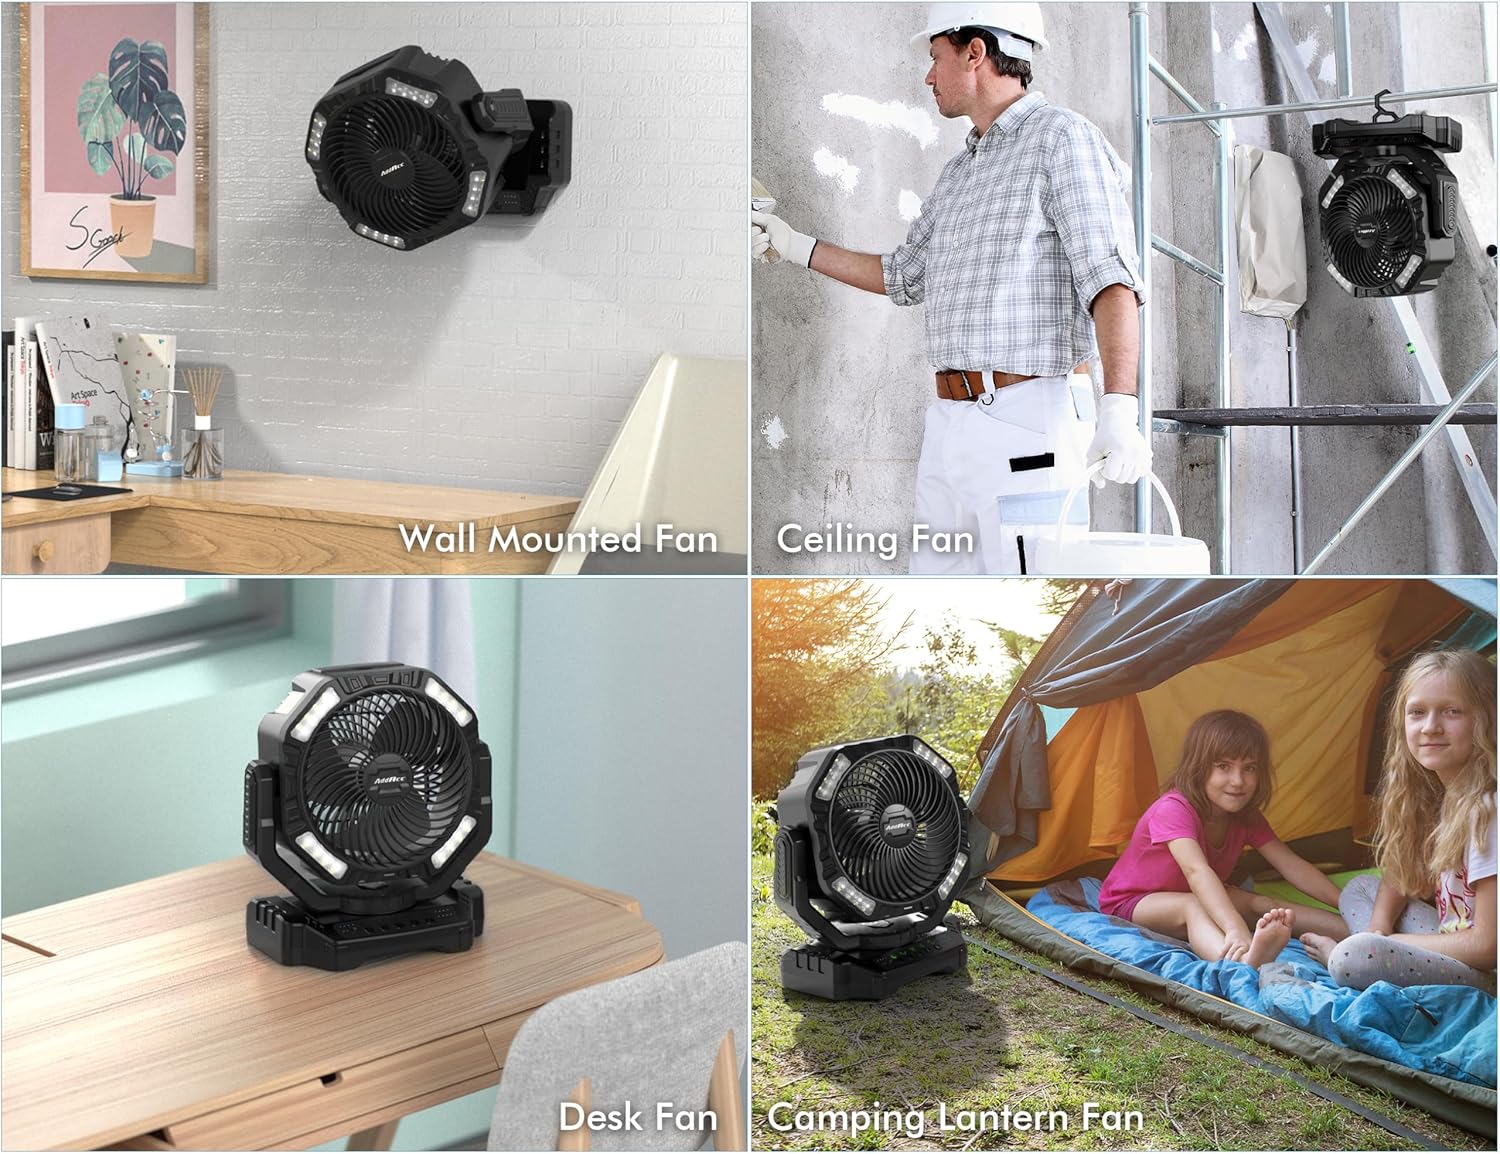
Figure 5: Examples of the fan's versatile placement options, including wall-mounted, ceiling-mounted, desk use, and inside a camping tent.
Maintenance
Cleaning the Fan Blades
- Ensure the fan is powered off and unplugged before cleaning.
- Carefully open the front cover of the fan using a screwdriver (not included).
- Wipe the fan blades and interior surfaces with a soft, dry cloth. Do not use abrasive cleaners or solvents.
- Once clean, securely reattach the front cover.
General Care
- Wipe the exterior of the fan with a soft, damp cloth.
- Keep the rubber cover on the charging ports closed when not in use for extended periods to maintain water-resistance and dust-proof properties.
- Store the fan in a cool, dry place when not in use for extended periods.
Troubleshooting
| Problem | Possible Cause | Solution |
|---|---|---|
| Fan does not turn on. | Battery is depleted. | Charge the fan fully. |
| Fan does not turn on. | Power button not pressed correctly. | Ensure the power button is pressed firmly. |
| Remote control not working. | Insulating sheet still in battery compartment. | Remove the insulating sheet from the remote. |
| Remote control not working. | Fan not activated for remote use. | Press the power button on the fan's control panel to activate remote functionality. |
| Remote control not working. | Remote battery depleted. | Replace the remote control battery (CR2025 or similar). |
| Fan airflow is weak. | Fan speed set too low. | Increase the fan speed setting. |
| Fan airflow is weak. | Fan blades are dirty. | Clean the fan blades as per maintenance instructions. |
| Device not charging from fan. | Fan battery is low or depleted. | Charge the fan. |
| Device not charging from fan. | Incorrect cable or port used. | Ensure a compatible charging cable is connected to the correct output port (Type-C or USB-A). |
Specifications
| Brand | AddAcc |
| Model Number | D13 |
| Color | Black |
| Power Source | Battery Powered (40000mAh Lithium Ion) |
| Electric Fan Design | Floor Fan |
| Product Dimensions (LxWxH) | 7.2"D x 13.15"W x 14.37"H |
| Item Weight | 7 Pounds (approx. 3.17 kg) |
| Number of Blades | 5 |
| Air Flow Capacity | 580 Cubic Feet Per Minute |
| Speed Settings | 4 Levels (Max 4.9m/s) |
| Oscillation | Auto 45°/90° Horizontal |
| Vertical Adjustment | 270° Manual Pivot |
| LED Lights | 5 Brightness Levels |
| Timer Settings | 1, 2, 4, 8 Hours |
| Input/Output Ports | 1x 5V/3A Type-C (Input/Output), 1x USB-A (Output) |
| Control Method | Remote, On-device buttons |
| Indoor/Outdoor Usage | Outdoor |
Warranty and Support
AddAcc offers a 360-day free return policy and 24-hour online service for this product. For any questions, concerns, or technical assistance, please contact AddAcc customer support through the retailer's platform or the official AddAcc website.
You can visit the AddAcc Store on Amazon for more information and support.
Related documentsD13

Ask a question about this manual
Ask about setup, troubleshooting, compatibility, parts, safety, or missing instructions. Manuals+ will review the question and use this page’s manual context to help answer it.