Introduction
This manual provides comprehensive instructions for the installation and use of your Craftersmark 22" x 6" x 1.5" Heavy Duty Floating Shelf Brackets. Please read these instructions carefully before beginning installation to ensure proper setup and safe operation. These brackets are designed to provide robust, invisible support for floating shelves, enhancing the aesthetic of any room.
Safety Information
- Always wear appropriate safety gear, including eye protection, during installation.
- Ensure the wall structure can support the weight of the brackets, the shelf, and any items placed on it.
- Use a stud finder to locate wall studs for secure mounting. If mounting to drywall without studs, concrete, or brick, use appropriate anchors (not included for all wall types).
- Do not overload the installed shelf. The brackets are rated for 50 lbs per stud when installed correctly.
- Keep children and pets away from the work area during installation.
Package Contents
Your Craftersmark Floating Shelf Bracket package includes:
- 2 x Floating Shelf Brackets (22" x 6" x 1.5")
- Screws for mounting
- Anchors for mounting
Note: Router bit, auger bit, and routing jig are NOT included.
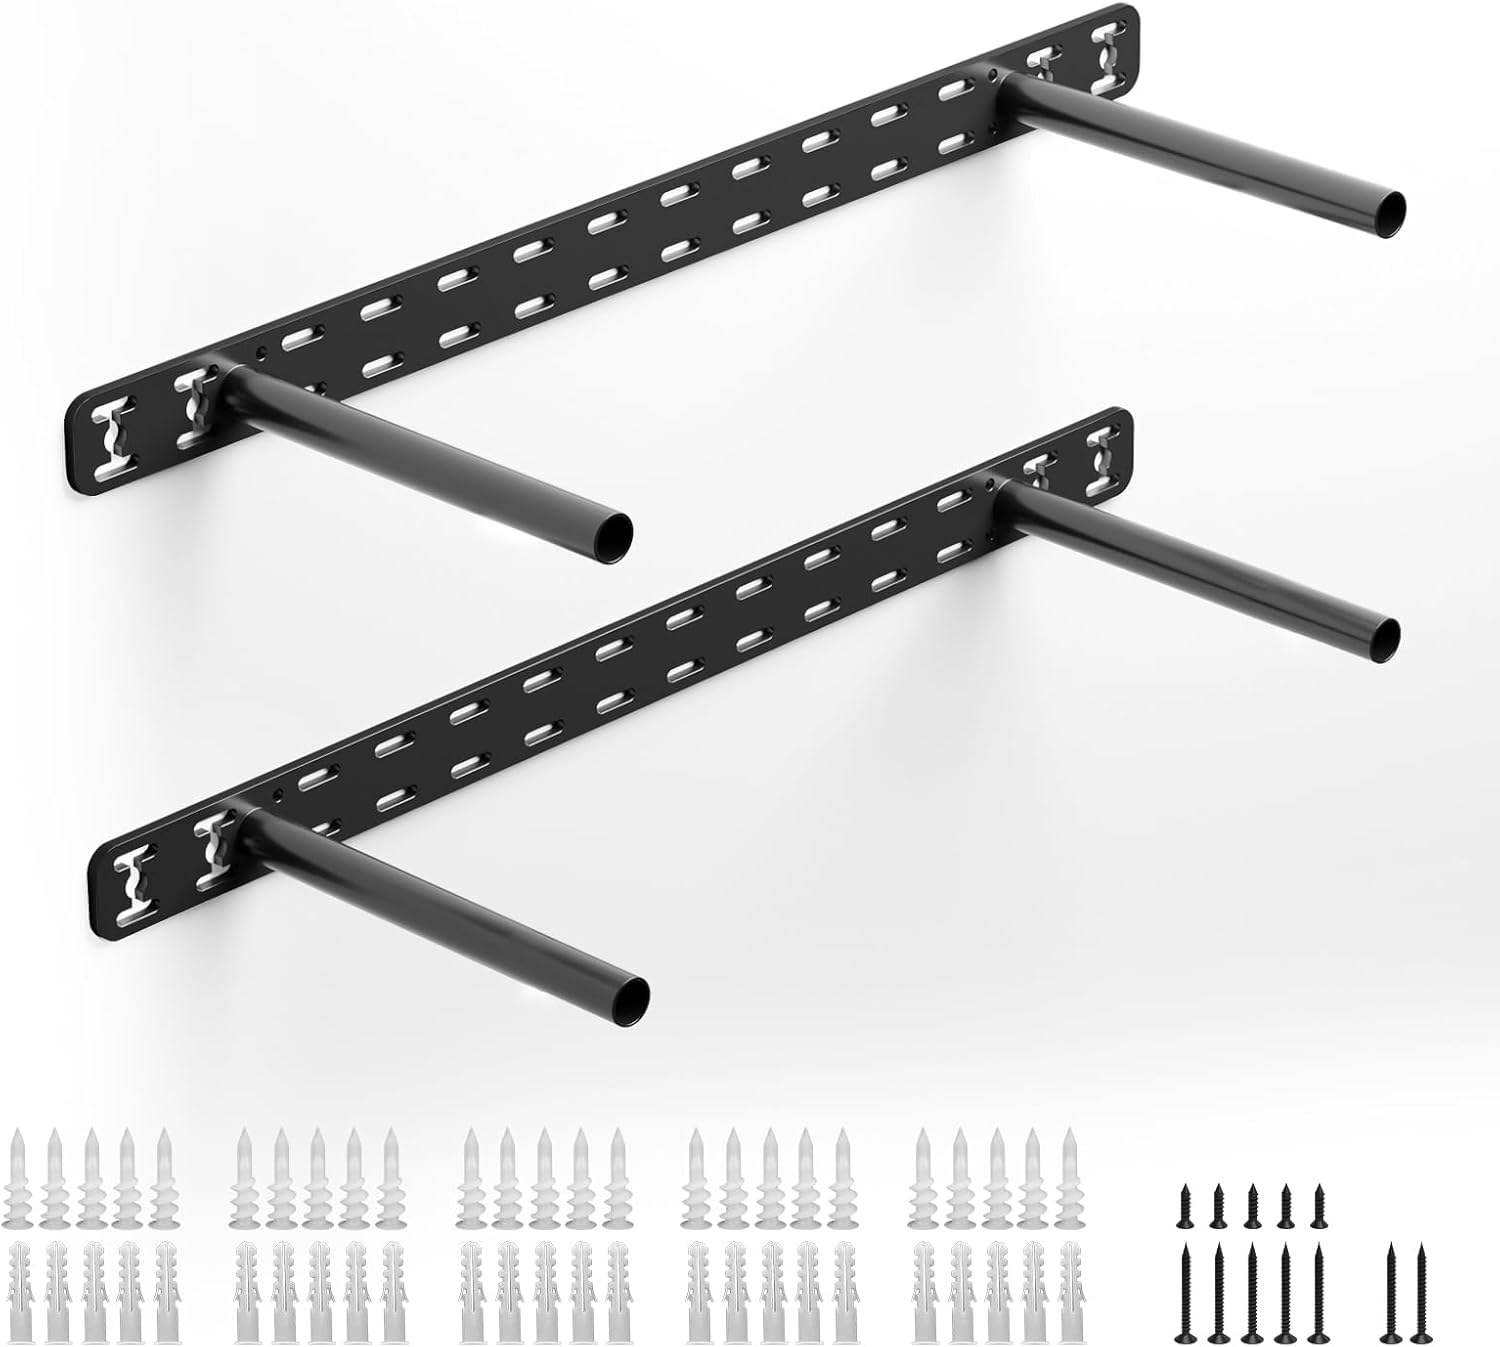
Image: Two Craftersmark 22" x 6" x 1.5" floating shelf brackets shown with accompanying screws and wall anchors.
Specifications
| Feature | Detail |
|---|---|
| Bracket Dimensions | 22" (Length) x 6" (Rod Length) x 1.5" (Backplate Height) |
| Material | High-quality Solid Steel |
| Finish | Black |
| Weight Capacity | Up to 50 lbs per stud (when installed correctly) |
| Compatible Shelf Thickness | 2" to 3.5" |
| Compatible Shelf Depth | 8" to 10" |
| Mounting Type | Wall Mount (suitable for drywall, brick, concrete, timber) |

Image: A detailed size guide illustrating the bracket dimensions and compatible shelf sizes. The backplate is 1.5 inches, suitable for wood boards 2 to 3.5 inches thick and 8 to 10 inches deep.

Image: A close-up view highlighting the 1.5-inch backplate, indicating its suitability for shelves and mantels 2 to 3.5 inches thick.

Image: A diagram illustrating the 1/5 inch thickness of the baseplate, designed for stronger load-bearing capacity and reduced tilting.
Installation Guide
Follow these steps for proper installation of your Craftersmark floating shelf brackets.
Step 1: Prepare Your Shelf
- Measure and mark the desired locations for the bracket rods on the back edge of your wooden shelf. Ensure these marks align with the spacing of the rods on the bracket.
- Using a drill with an appropriate auger bit (not included), drill holes into the back of your shelf at the marked locations. The depth of these holes should accommodate the full length of the bracket rods.
- If necessary, use a router (not included) to create a groove along the back edge of the shelf to recess the bracket's backplate. The groove depth should be at least 2/5" to ensure the bracket is fully concealed.
Video: This video demonstrates the process of drilling holes and routing a groove into a wooden shelf to prepare it for the floating shelf bracket installation.

Image: A diagram illustrating how the floating shelf bracket is concealed within the wooden shelf for an invisible mounting effect.
Step 2: Mount the Bracket to the Wall
- Determine the desired height and location for your shelf. Use a stud finder to locate wall studs. The bracket features pre-drilled holes every inch, allowing flexibility to align with studs.
- Mark the drill points on the wall, ensuring they are level.
- Drill pilot holes into the wall at the marked locations. For drywall, use the provided anchors. For concrete, brick, or timber, use appropriate fasteners for your wall type.
- Secure the bracket to the wall using the provided screws. Ensure the bracket is firmly attached and level before proceeding.
Video: This video highlights the heavy-duty construction of the Craftersmark floating shelf bracket and demonstrates its secure wall mounting, emphasizing its strength compared to other designs.

Image: An illustration demonstrating how the floating shelf bracket can be mounted to wall studs or directly into concrete/brick walls, showcasing its versatility.
Step 3: Install the Shelf
Once the bracket is securely mounted to the wall, carefully slide your prepared wooden shelf onto the bracket rods until it is flush with the wall. The bracket should be completely hidden within the shelf.
Video: This video provides a quick guide on how to choose the correct size of shelf bracket, specifically mentioning the 22x6x1.5 inch model and its compatibility.
Video: A comprehensive video demonstrating the installation of Craftersmark floating shelf brackets for DIY shelves, covering preparation and mounting.
Usage and Applications
Craftersmark floating shelf brackets are versatile and can be used in various settings to create a clean, modern look. They are ideal for:
- Kitchens for open shelving
- Bathrooms for storage and decor
- Living rooms for displaying books and decorative items
- Garages for organized storage
- Fireplace mantels
- Supporting benches, desks, or bars

Image: An example of two floating shelves installed in a living room, showcasing their use for displaying decorative items and books.

Image: Floating shelves integrated into a kitchen design, providing accessible storage above a countertop.

Image: Floating shelves used in a modern bathroom setting, offering minimalist storage for toiletries and decor.

Image: Floating shelves providing organized storage solutions in a garage environment.
Maintenance
To maintain the integrity and appearance of your Craftersmark floating shelf brackets:
- Regularly check the tightness of the mounting screws to ensure the bracket remains securely fastened to the wall.
- Clean the metal brackets with a soft, dry cloth. Avoid abrasive cleaners or harsh chemicals that could damage the finish.
- Ensure the shelf is not exposed to excessive moisture or extreme temperature fluctuations, which could affect the wood or the bracket's performance.
Troubleshooting
Shelf is not level:
- Ensure the bracket itself was installed perfectly level on the wall. Re-adjust if necessary.
- Verify that the holes drilled into the shelf are straight and of consistent depth. Uneven holes can cause the shelf to tilt.
Shelf sags or feels unstable:
- Confirm that the bracket is securely mounted into wall studs. Mounting into drywall without proper stud support or heavy-duty anchors will reduce weight capacity.
- Check if the shelf is overloaded. Adhere to the recommended weight capacity of 50 lbs per stud.
- Ensure the shelf material is robust enough for floating installation and the intended load.
Bracket is visible after installation:
- Ensure the groove routed into the back of the shelf is deep enough (at least 2/5") to fully recess the bracket's backplate.
- Verify that the shelf thickness is within the recommended range of 2" to 3.5" for this 1.5" backplate bracket.
Warranty and Support
For information regarding product warranty or customer support, please refer to the product listing on Amazon or contact Craftersmark directly through their official channels. Keep your purchase receipt for any warranty claims.


