1. Introduction
The Micfuns Microphone Pop Filter is designed to enhance audio recording quality by effectively reducing plosive sounds, breath noise, and other unwanted vocal artifacts. This manual provides detailed instructions for the proper setup, operation, and maintenance of your pop filter.
2. Product Overview
This microphone pop filter features a robust three-layer design to optimize sound clarity. It includes a foam layer, a metal mesh layer, and a base etamine layer, working in conjunction to filter out harsh 'p' and 'b' sounds, crackles, and wind interference during vocal recordings. The metal grille is integrated with a plastic frame, providing both functional saliva prevention and microphone protection.
Compatibility Note: This pop filter is suitable for microphones with a diameter ranging from 45 mm to 63 mm. It is not suitable for Blue Snowball microphones.

Image 2.1: Diagram illustrating the unique three-layer construction of the pop filter, including the metal mesh, noise reflector, and sponge sound filter layer.
3. Package Contents
- Micfuns Microphone Pop Filter (1 unit)
- Elastic Bands for attachment (2 units)
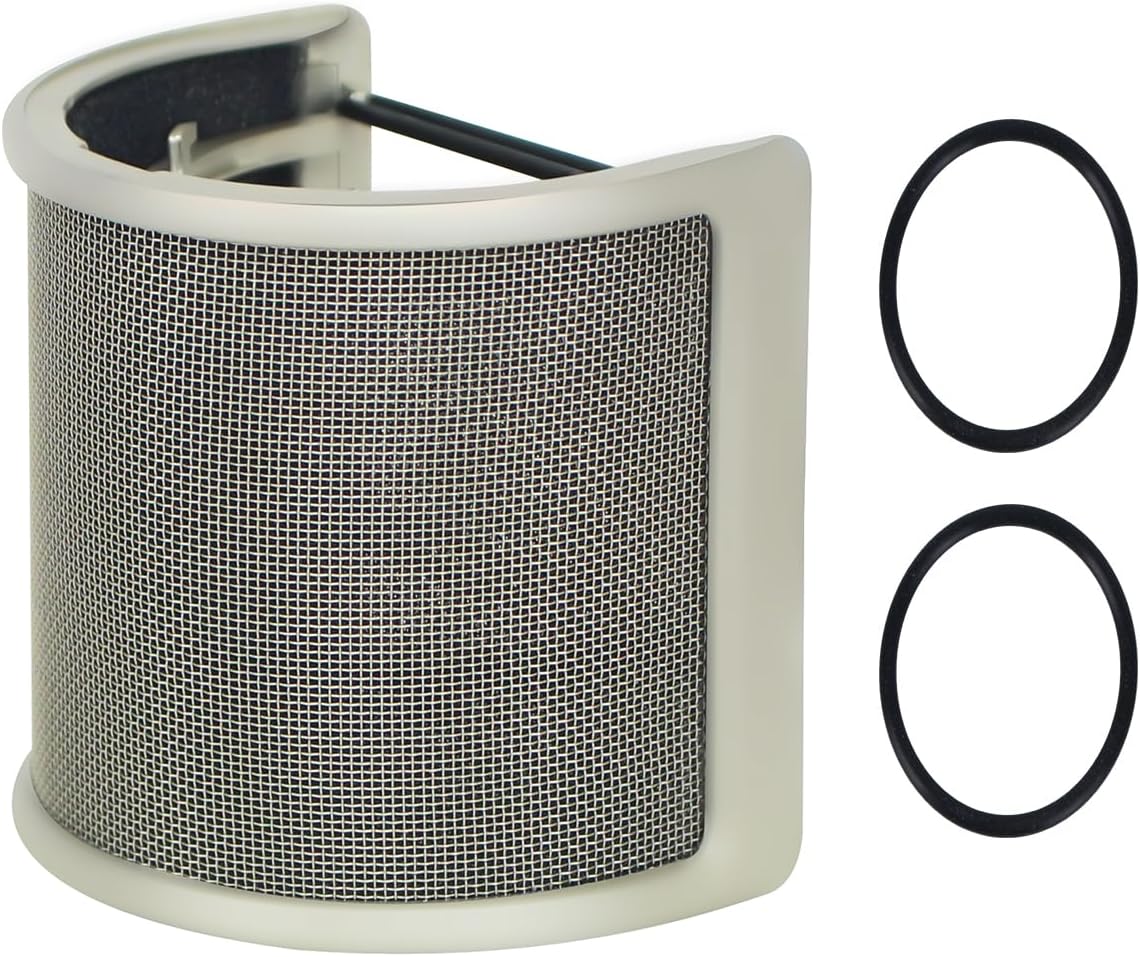
Image 3.1: The Micfuns Pop Filter shown alongside the two elastic bands used for secure attachment to a microphone.
4. Setup Instructions
Follow these steps to properly attach the pop filter to your microphone:
- Ensure your microphone's diameter is between 45 mm and 63 mm.
- Take one of the provided elastic bands.
- Carefully stretch the elastic band and hook it onto the small metal tabs located on the inner frame of the pop filter. There are two sets of tabs, one on each side.
- Repeat with the second elastic band, ensuring both bands are securely attached to the tabs.
- Position the pop filter around your microphone, ensuring the mesh side faces the sound source (your mouth).
- Gently stretch the elastic bands over your microphone, securing the pop filter in place. Adjust its position for optimal coverage and stability.
Video 4.1: Demonstration of attaching the elastic bands to the pop filter and securing it around a microphone. This video illustrates the installation process.

Image 4.2: The pop filter correctly installed on a USB microphone, ready for use with a computer.
5. Operating Instructions
Once the pop filter is securely attached to your microphone, its operation is passive. Ensure the pop filter is positioned directly between your mouth and the microphone capsule. Maintain a comfortable speaking distance from the pop filter, typically a few inches, to allow it to effectively disperse air from plosive sounds before they reach the microphone. No further adjustments are typically required during recording sessions.

Image 5.1: The pop filter in use on a studio microphone, demonstrating a typical recording setup.
6. Maintenance
To ensure the longevity and effectiveness of your Micfuns Microphone Pop Filter, follow these maintenance guidelines:
- Cleaning: Periodically wipe the metal mesh and plastic frame with a soft, dry cloth to remove dust or saliva residue. For more stubborn marks, a slightly damp cloth can be used, followed by immediate drying. Do not immerse the pop filter in water.
- Storage: When not in use, store the pop filter in a clean, dry environment to prevent dust accumulation and potential damage.
- Elastic Bands: The elastic bands may wear out over time. If they lose their elasticity or break, replace them with similar-sized bands to ensure a secure fit.
7. Troubleshooting
- Pop Filter does not fit my microphone: Verify that your microphone's diameter is within the specified range of 45 mm to 63 mm. If it falls outside this range, the pop filter may not be compatible.
- Pop Filter feels loose or unstable: Ensure both elastic bands are correctly attached to the internal tabs and stretched firmly around the microphone. If the bands are old or stretched, replace them.
- Audio quality issues persist (plosives/breaths): Check the positioning of the pop filter. It should be directly between your mouth and the microphone. Experiment with slight adjustments to the distance between yourself, the pop filter, and the microphone.
- Pop Filter appears damaged or broken: Inspect the frame and mesh for any physical damage. If the product is significantly damaged, it may need replacement.
8. Specifications
| Feature | Specification |
|---|---|
| Model Number | B0C13ZTXGD |
| Item Weight | 1.76 ounces |
| Product Dimensions | 4 x 3 x 4 inches |
| Compatible Microphone Diameter | 45 mm to 63 mm |
| Color | Gold |
| First Available Date | March 31, 2023 |

Image 8.1: Diagram illustrating the product dimensions of the pop filter, including its height and width.

Image 8.2: Visual guide showing the pop filter's suitability for microphones within the 45mm-63mm size range, including USB, condenser, handheld, wireless, hanging, and directly connected microphones.
9. Safety Information
Please observe the following safety precautions:
- Keep out of reach of children.
- Do not attempt to modify or disassemble the pop filter.
- Avoid exposing the product to extreme temperatures or direct sunlight for prolonged periods.
- Handle with care to prevent bending or damaging the mesh screen.
