1. Introduction
This manual provides comprehensive instructions for the setup, operation, maintenance, and troubleshooting of your AGJ Wireless Tour Guide System, Model 813. This system is designed for clear, one-way audio communication in various settings such as tour groups, factory tours, training sessions, conferences, events, simultaneous interpretation, and trade shows. Please read this manual thoroughly before using the system to ensure optimal performance and longevity.

Image: The AGJ Wireless Tour Guide System in a museum environment, illustrating its application for guided tours.
2. Product Overview
2.1 System Components
The AGJ Wireless Tour Guide System typically includes:
- One Transmitter unit with a microphone (headset or plug-in).
- Multiple Receiver units with earphones.
- A multi-slot charging base.
- USB Type-C charging cables (for individual unit charging).

Image: A complete set of the AGJ Wireless Tour Guide System, showing one transmitter, fifteen receivers, a headset microphone, and the multi-slot charging base.
2.2 Key Features
- Durable Design: Devices are constructed from ABS plastic, providing a strong and compact build. Each unit weighs approximately 50 grams.
- Wide Application: Suitable for tour groups, factory tours, training, conferences, events, simultaneous interpretation, and trade shows. Beneficial for individuals with hearing aids.
- Extended Working Range: Operates effectively within 150-180 meters (165-200 yards) line of sight between the transmitter and receivers.
- Multiple Channels: Features 26 available channels to prevent interference between different groups in the same area.
- UHF Frequency: Utilizes UHF 902-928 MHz, optimized for use in North America.
- Long Battery Life:
- Transmitter: Up to 8 hours of continuous operation on a full charge.
- Receiver: Up to 15 hours of continuous operation on a full charge.
- Efficient Charging: Includes a 15-slot charging base for simultaneous charging. Full charge takes approximately 3 hours. Individual units can also be charged via USB Type-C.
- User-Friendly Operation: Simple channel changing and volume control.

Image: Illustration of the system's effective working range of 180 yards between the transmitter and receiver.

Image: Diagram showing various audio input/output options for the system, including connection to an audio transmitter, laptop, computer, and cell phone.
3. Setup Instructions
3.1 Initial Charging
Before first use, fully charge all transmitter and receiver units.
- Connect the multi-slot charging base to a power source.
- Place the transmitter and receiver units into the designated slots on the charging base.
- The charging indicator light will turn red during charging and blue when fully charged.
- A full charge typically takes 3 hours.
Alternatively, individual units can be charged using a USB Type-C cable connected to a compatible power adapter (not included).
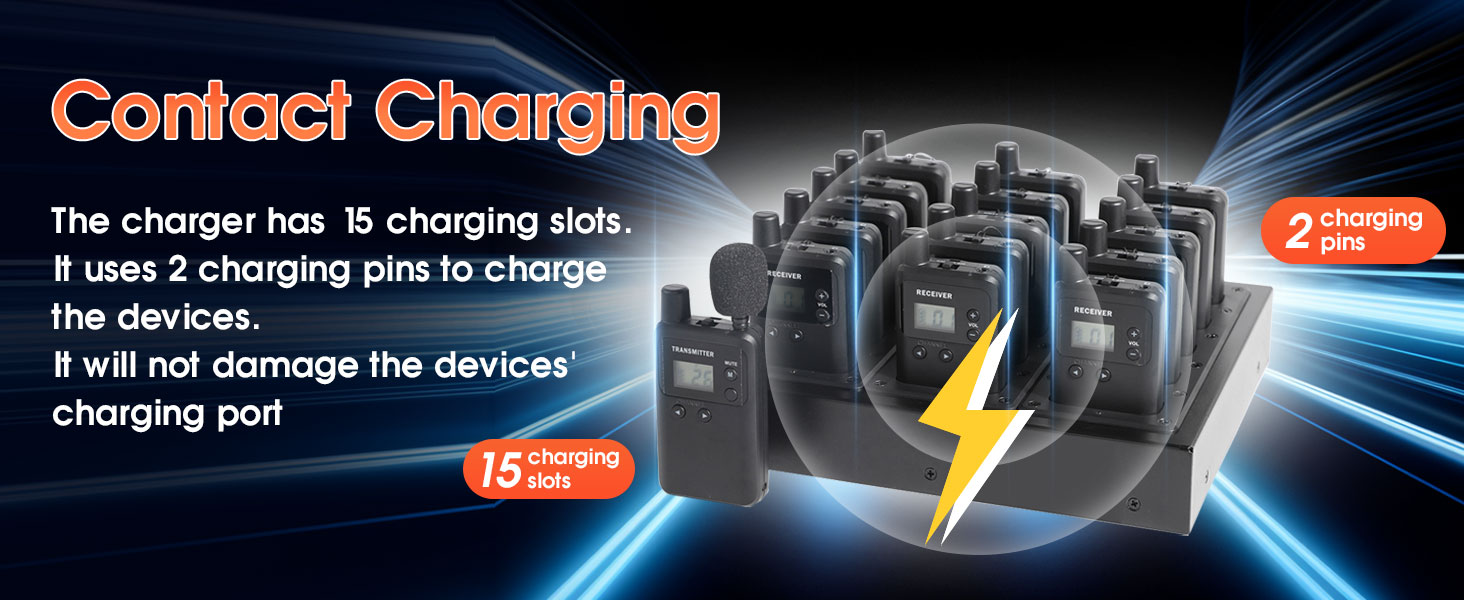
Image: The multi-slot charging base with transmitter and receiver units inserted, illustrating the contact charging mechanism.

Image: A close-up of a system unit, highlighting its USB Type-C charging port for individual charging.
3.2 Connecting Microphones and Earphones
- Transmitter: Connect the desired microphone (headset or plug-in small microphone) to the microphone jack on the transmitter.
- Receivers: Connect the provided earphones or any standard 3.5mm headphones to the headphone jack on each receiver unit.

Image: A receiver unit demonstrating the 3.5mm headphone jack for audio output.
4. Operating Instructions
4.1 Powering On/Off
- To power on, press and hold the power button until the display illuminates.
- To power off, press and hold the power button until the display turns off.
4.2 Channel Selection and Pairing
For the system to function, all receiver units must be set to the same channel as the transmitter unit.
- Transmitter:
- Turn on the transmitter.
- Press the LEFT or RIGHT channel buttons to select the desired channel. The channel number will be displayed on the screen.
- Once the channel is set, you can move the power button to the "LOCK" position to prevent accidental channel changes during operation.
- Receivers:
- Turn on each receiver unit.
- Press the LEFT or RIGHT channel buttons on each receiver to match the channel selected on the transmitter.
- Once matched, receivers will begin to receive audio from the transmitter.
- Receivers can also be locked to prevent channel changes.
The system supports one-way communication, meaning there can only be one transmitter broadcasting to multiple receivers on the same channel.

Image: Illustration demonstrating the simple two-button process to change channels on both the transmitter and receiver units.

Image: A visual guide emphasizing the ease of pairing by pressing two buttons to change channels and avoid signal interference.
4.3 Volume Adjustment
On each receiver unit, use the "+" and "-" buttons to adjust the listening volume to a comfortable level.
4.4 Mute Function (Transmitter)
The transmitter unit features a mute button. Press it to temporarily stop audio transmission without turning off the unit. Press again to unmute.
5. Maintenance
- Cleaning: Use a soft, dry cloth to clean the exterior of the units and charging base. Avoid using harsh chemicals or abrasive materials.
- Storage: When not in use for extended periods, store the system in a cool, dry place. Ensure all units are fully charged before storage to preserve battery health.
- Battery Care: Recharge units regularly, even if not fully depleted, to maintain battery performance. Avoid over-discharging or over-charging.
- Microphone Hygiene: For shared microphones, consider using disposable microphone covers for hygiene.
6. Troubleshooting
6.1 Common Issues and Solutions
| Problem | Possible Cause | Solution |
|---|---|---|
| No audio from receiver. |
|
|
| Poor audio quality or interference. |
|
|
| Units not charging. |
|
|
6.2 Frequently Asked Questions (FAQ)
- Q: Can I add extra receivers to an existing system?
- A: Yes, additional receivers can be paired with your existing system by setting them to the same channel as the transmitter.
- Q: Can all types of headphones be used with the receivers?
- A: Mostly yes. Receivers feature a standard 3.5mm headphone jack, compatible with almost all standard 3.5mm headphones. For optimal performance, it is recommended to use the microphones provided in the package with the transmitter.
- Q: Is there a limit to how many receivers can be in one channel/group?
- A: These products operate using radio frequency, which means there is virtually no limit to the number of receivers that can be used in a single channel or group.
7. Specifications
| Model Number | 813 |
| Product Dimensions | 2 x 0.8 x 3.42 inches (per unit) |
| Item Weight | Approximately 50 grams (per unit), 6.15 pounds (total package) |
| Manufacturer | WirelessLinkx |
| Battery Type | Lithium Ion (1000 mAh capacity) |
| Transmitter Working Time | Up to 8 hours (continuous) |
| Receiver Working Time | Up to 15 hours (continuous) |
| Charging Time | Approximately 3 hours (full charge) |
| Working Range | 150-180 meters / 165-200 yards (line of sight) |
| Channels | 26 channels |
| Frequency | UHF 902-928 MHz |
| Connectivity | 3.5mm headphone jack, 3.5mm microphone jack, USB Type-C charging port |
8. Warranty and Support
For warranty information or technical support, please refer to the documentation included with your purchase or contact AGJ customer service directly.
AGJ is a wireless communication product manufacturer, integrating production and sales. Wireless tour guide systems and wireless calling systems have been their main business since the beginning.
You can visit the AGJ Store on Amazon for more information or to contact support.


