Introduction
This manual provides detailed instructions for the installation, operation, and maintenance of your Yuwei Wireless Backup Camera System. This system features a 5-inch split-screen monitor and a wireless camera designed for standard US license plate mounting, suitable for various vehicles including cars, trucks, pickups, campers, SUVs, trailers, and minivans.
Package Contents
Verify that all components listed below are included in your package:
- 5-inch Wireless Monitor
- Wireless Backup Camera (License Plate Mount)
- Power Cable for Monitor (12V cigarette lighter adapter with USB port)
- USB Charging Cable for Camera
- Mounting Bracket for Camera
- Hex Key and Replacement Bolts
- Adhesive Pad for Monitor Mount
- Instruction Manual
Setup
1. Charging the Camera
Before initial use, ensure the wireless camera is fully charged. Connect the provided USB charging cable to the camera's micro-USB port. The camera's integrated solar panel will maintain the battery charge during daylight exposure, reducing the need for frequent manual charging.

The camera features a micro-USB port for initial charging. Ensure the camera is fully charged before first use. The solar panel on the camera will maintain the charge during daylight exposure.
2. Installing the Camera
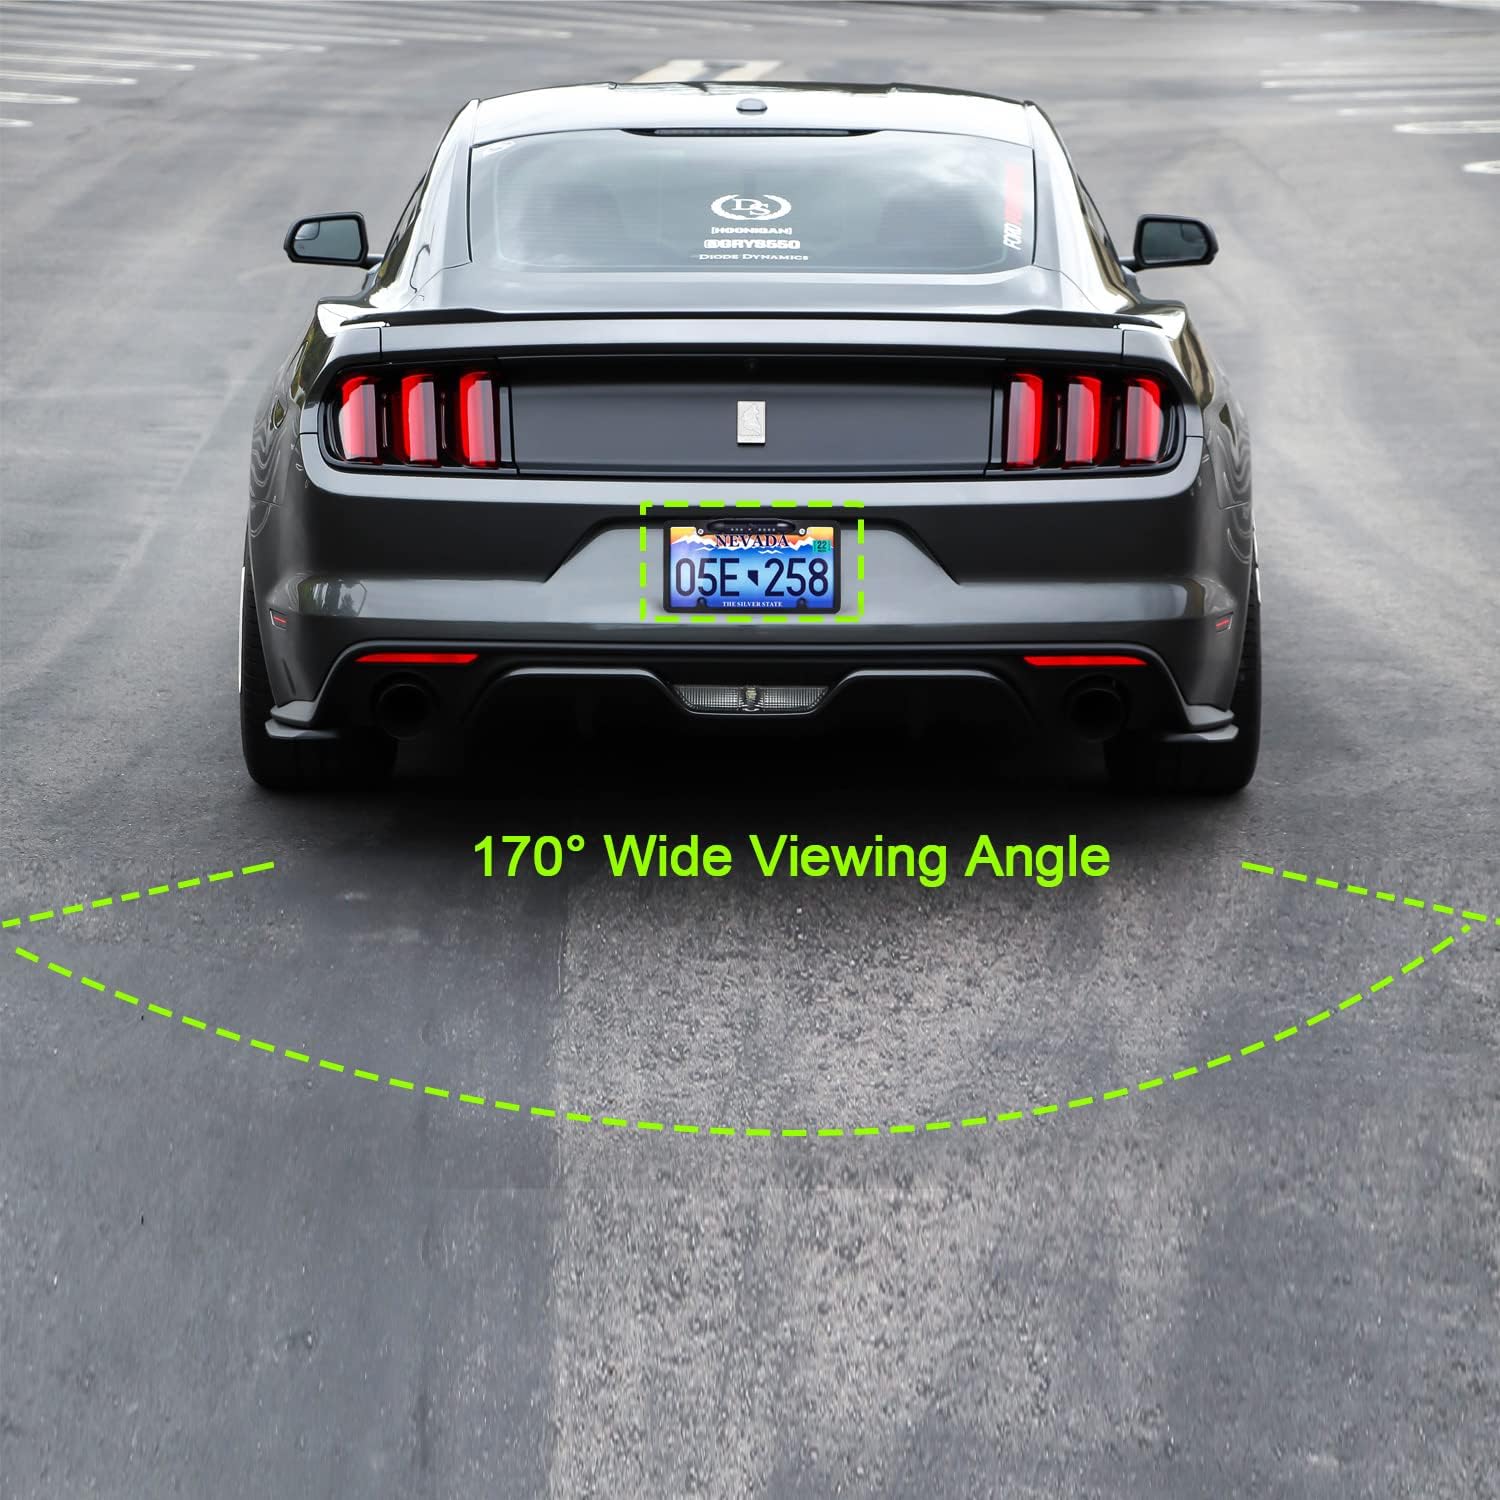
The wireless backup camera is designed for standard US license plate mounting. Secure the camera bracket behind your vehicle's license plate using existing bolts. The camera lens can be pivoted approximately 45 degrees by loosening a screw, allowing for precise angle adjustment after installation.

Yuwei Wireless Backup Camera System with 5-inch monitor and license plate camera.

The camera lens can be pivoted approximately 45 degrees by loosening a screw, allowing for precise angle adjustment after installation.
Demonstration of the A4031 license plate backup camera installation and functionality.
3. Installing the Monitor
Mount the 5-inch wireless monitor on your dashboard or windshield using the provided suction cup mount. The mount features an adhesive base for secure placement. Connect the monitor to your vehicle's 12V power outlet using the cigarette lighter adapter. The adapter includes a USB port for charging other devices and an activation button for the monitor.

5-inch wireless monitor mounted on a car dashboard, displaying a rear view.
12V cigarette lighter power adapter for the monitor, featuring a USB charging port and activation button.
Operating
1. Powering On/Off
Press the activation button on the 12V cigarette lighter adapter to power the monitor on or off. The camera will automatically activate when the vehicle is in reverse or when the monitor is manually turned on.
2. Basic Functions
Use the menu buttons (Mode, Up, Down) on the side of the monitor to access and adjust settings:
- Brightness/Contrast: Adjust the display's visual quality.
- Image Flip/Mirror: Change the image orientation (M/U Control).
- Reversing Time: Set how long the monitor stays active after disengaging reverse (60s, 90s, 120s).
- Guide Lines: Toggle parking guide lines on or off.
- Reset: Restore factory default settings.
3. Split Screen Mode (with optional second camera)
This system supports up to two cameras. If a second wireless camera (model YW-0629, sold separately) is installed, the monitor can display feeds from both cameras simultaneously in a split-screen view.

Yuwei Wireless Backup Camera System showing split-screen view from two cameras, one on a car and one on a trailer.
4. Driving Mode
The camera can function as a continuous monitoring camera while driving forward, providing a constant rear view. This feature is useful for observing trailers or blind spots, offering more flexibility than traditional backup cameras that only activate in reverse.
Maintenance
1. Cleaning
Regularly clean the camera lens and monitor screen using a soft, damp cloth. Avoid using abrasive cleaners or harsh chemicals that could damage the surfaces.
2. Battery Care
Ensure the camera's solar panel is exposed to sufficient sunlight to maintain its charge. If the vehicle is stored in a garage or shaded area for extended periods, manually charge the camera via the micro-USB port to prevent battery depletion.
Troubleshooting
- No Signal: Ensure both the camera and monitor are powered on and within effective transmission range. Check for any physical obstructions that might interfere with the wireless signal.
- Poor Image Quality: Clean the camera lens thoroughly. Adjust the brightness and contrast settings on the monitor. Verify that the camera's solar panel is clean and receiving adequate light.
- Monitor Not Powering On: Check the 12V power connection to ensure it is securely plugged into the vehicle's accessory outlet. Press the activation button on the cigarette lighter adapter.
- Battery Drains Quickly: Confirm that the solar panel is regularly exposed to sunlight. If the vehicle is frequently parked in shaded areas, manually charge the camera via the USB port.
Specifications
- Screen Size: 5 Inches
- Transmission Range: Up to 300ft (open area), suitable for ≤50ft vehicle installation.
- Waterproof Rating: IP69K
- Viewing Angle: 150 Degrees
- Power Input: 12V-24V
- Camera Type: HD camera with IR LEDs (for night vision)
- Display Features: Wireless, Split Screen Option (supports 2 cameras)
- Installation Type: Dashboard Mount, Plug In, Surface Mount (for monitor); License Plate Mount (for camera)
- Product Dimensions: 13.7 x 7.5 x 3.1 inches
- Item Weight: 2.24 pounds
Warranty and Support
For specific warranty details and terms, please refer to the documentation included with your product packaging. For technical support or further assistance, please use the contact information provided in your product's user manual or packaging.


