1. Introduction
This manual provides comprehensive instructions for the safe and effective use of your LIEMKE Keiler-2 Thermal Monocular. The Keiler-2 is designed for advanced thermal observation, featuring a high-resolution 12µm VOx sensor and a 50mm f/1.1 lens, enabling clear thermal detection up to 2,500 meters. Please read this manual thoroughly before operating the device to ensure optimal performance and longevity.
Key features include a 640x512 pixel sensor, 2.7X optical zoom with up to 14x digital zoom, five selectable color modes, and a 9-hour battery life with USB-C charging.
2. Package Contents
Upon opening the package, please verify that all components are present and undamaged. The standard package typically includes:
- LIEMKE Keiler-2 Thermal Monocular
- USB-C Charging Cable
- Protective Pouch/Case
- Lens Cleaning Cloth
- Quick Start Guide (if applicable)
If any items are missing or damaged, please contact your retailer or LIEMKE customer support immediately.
3. Setup
3.1. Charging the Battery
Before first use, fully charge the internal battery. The Keiler-2 features a robust 9-hour battery life and quick USB-C charging.
- Locate the USB-C port on the device.
- Connect the provided USB-C cable to the monocular and a compatible USB power adapter (not included) or a computer USB port.
- The charging indicator (if present) will show the charging status. Refer to the device's display for battery level.
- Once fully charged, disconnect the cable.
3.2. Initial Power On
To power on the device:
- Press and hold the Power button (typically located on the top panel) for a few seconds until the display illuminates.
- The device will perform a self-test and then display the thermal image.
3.3. Focus Adjustment
Adjust the focus to achieve a clear image of your target.
- Rotate the objective lens focus ring (at the front of the device) until the image appears sharp.
- Adjust the diopter on the eyepiece (at the rear) for individual eye comfort and clarity.
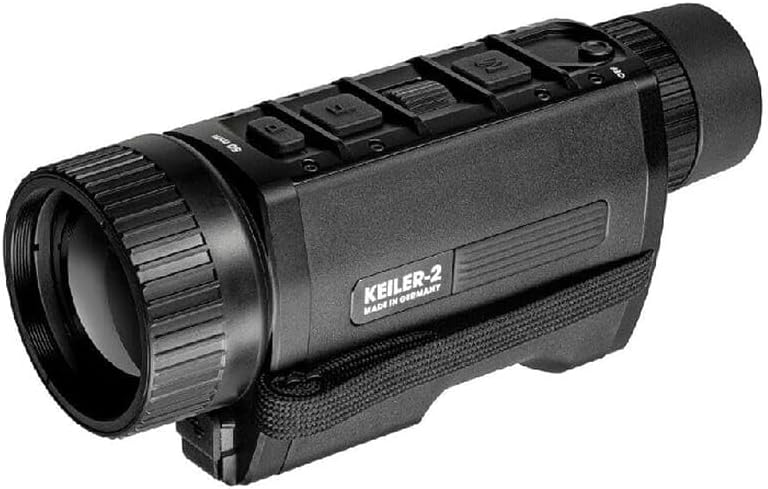
Figure 1: LIEMKE Keiler-2 Thermal Monocular. This image shows the monocular from an angled perspective, highlighting its compact design and control buttons on the top surface.
4. Operating the Monocular
4.1. Controls Overview
The Keiler-2 features intuitive controls, including a centralized scroll wheel and dedicated buttons for various functions. Familiarize yourself with the button layout for efficient operation, especially in low-light conditions.

Figure 2: Side view of the LIEMKE Keiler-2. This image displays the side of the monocular, featuring the "LIEMKE THERMAL OPTICS" branding and the strap attachment point.
4.2. Power On/Off
- To Power On: Press and hold the Power button until the display activates.
- To Power Off: Press and hold the Power button until the device shuts down. A brief press may put the device into standby mode.
4.3. Color Modes
The Keiler-2 offers five selectable color modes to adapt to different viewing preferences and environmental conditions:
- White Hot: Hot objects appear white.
- Black Hot: Hot objects appear black.
- Extra Dark: Optimized for specific low-light scenarios.
- Red Hot: Highlights hottest areas in red.
- Rainbow: Displays a spectrum of colors for temperature differentiation.
Use the designated button or navigate through the menu to cycle between these modes.
4.4. Zoom Functionality
The monocular features 2.7X optical magnification and up to 14x digital zoom.
- Press the zoom button (or use the scroll wheel in zoom mode) to increase or decrease the digital magnification.
- Note that higher digital zoom levels may reduce image clarity.
4.5. Menu Navigation and Customization
Access the device's menu to adjust settings and customize functions.
- Press the Menu button to enter the main menu.
- Use the scroll wheel to navigate through menu options.
- Press the selection button (often the scroll wheel itself) to confirm a selection.
- The menu can be customized to place frequently used functions at the forefront for quick access. Refer to the on-screen prompts for customization options.
4.6. Multimedia Connectivity (LIEMKE App)
The Keiler-2 supports multimedia connectivity via the LIEMKE App, allowing for real-time sharing and potentially remote control or firmware updates.
- Download the official LIEMKE App from your device's app store.
- Follow the app's instructions to connect your Keiler-2 monocular via Wi-Fi or Bluetooth (refer to device specifications for supported connection types).
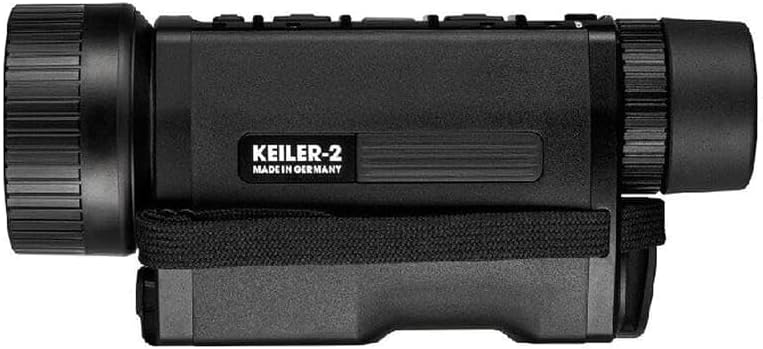
Figure 3: Side view of the LIEMKE Keiler-2. This image shows the opposite side of the monocular, featuring the "KEILER-2 MADE IN GERMANY" inscription.
5. Maintenance
5.1. Cleaning
- Lenses: Use the provided lens cleaning cloth or a soft, lint-free cloth specifically designed for optics. Gently wipe the lens surfaces. For stubborn smudges, use a small amount of lens cleaning fluid. Avoid abrasive materials.
- Body: Wipe the monocular's body with a soft, damp cloth. Do not use harsh chemicals or solvents.
- Ensure all caps and covers are in place when not in use to protect lenses and ports from dust and moisture.
5.2. Storage
- Store the monocular in a cool, dry place, away from direct sunlight and extreme temperatures.
- If storing for extended periods, ensure the battery is partially charged (around 50%) to prolong its lifespan. Avoid storing with a completely depleted or fully charged battery.
- Use the protective pouch or case to prevent scratches and impacts.
5.3. Battery Care
- Avoid fully discharging the battery frequently.
- Charge the battery using only the provided USB-C cable and a compatible power source.
- If the device will not be used for several months, charge it to approximately 50% every 3-6 months.
6. Troubleshooting
If you encounter issues with your Keiler-2 monocular, refer to the following common problems and solutions:
| Problem | Possible Cause | Solution |
|---|---|---|
| Device does not power on. | Battery is depleted or low. | Charge the battery using the USB-C cable. Ensure the power button is held long enough. |
| Image is blurry or out of focus. | Focus rings not adjusted correctly. | Adjust the objective lens focus ring and the eyepiece diopter until the image is sharp. |
| No thermal image displayed. | Lens cap still on; device in standby mode; sensor issue. | Remove lens cap. Press power button briefly to exit standby. If problem persists, contact support. |
| Battery not charging. | Faulty cable or power adapter; dirty USB-C port. | Try a different USB-C cable and power adapter. Clean the USB-C port gently. |
| Controls are unresponsive. | Temporary software glitch. | Perform a soft reset by holding the power button until the device restarts (if supported), or allow the battery to fully deplete and then recharge. |
If the issue is not resolved by the above steps, please contact LIEMKE customer support for further assistance.
7. Specifications
| Feature | Detail |
|---|---|
| Model | Keiler-2 |
| Sensor Type | 12µm VOx |
| Sensor Resolution | 640x512 pixels |
| Lens | 50mm f/1.1 |
| Detection Range | Up to 2,500 meters (2734 yards) |
| Optical Magnification | 2.7X |
| Digital Zoom | Up to 14x |
| Color Modes | White Hot, Black Hot, Extra Dark, Red Hot, Rainbow |
| Battery Life | Approximately 9 hours |
| Charging Interface | USB-C |
| Connectivity | LIEMKE App (via Wi-Fi/Bluetooth, specific type not detailed) |
8. Warranty and Support
Warranty information for the LIEMKE Keiler-2 Thermal Monocular is typically provided with the product at the time of purchase. Please refer to the warranty card or documentation included in your product packaging for details regarding coverage, terms, and conditions.
For technical support, service, or any questions not covered in this manual, please contact LIEMKE customer support or your authorized dealer. Contact information can usually be found on the LIEMKE official website or in your product documentation.


