Introduction
This user manual provides essential information for the safe and effective operation of your WANTHER 3D Hologram Fan. Please read this manual thoroughly before installation and use, and retain it for future reference.
The WANTHER 3D Hologram Fan is a cutting-edge holographic display device designed to project vivid 3D visuals. It features Wi-Fi connectivity, app control for content management, and detachable blades for portability. Ideal for business displays, events, and seasonal decor.
Safety Information
- Rotating Blades: The fan blades rotate at high speed. Keep hands, hair, and loose clothing clear of the device during operation. Ensure the device is mounted securely and out of reach of unauthorized personnel or children.
- Power Supply: Use only the provided power adapter. Do not expose the device to water or excessive humidity.
- Ventilation: Ensure adequate ventilation around the device to prevent overheating.
- Installation: Mount the device on a sturdy surface or wall. Improper installation can lead to injury or damage.
- Maintenance: Disconnect power before cleaning or performing any maintenance.
Package Contents
Verify that all items are present in the package:
- WANTHER 3D Hologram Fan Device
- Detachable Fan Blades
- Power Adapter
- Power Cord
- Remote Control
- User Manual (this document)
- Warranty Card
- TF Card (Micro SD card)
- Card Reader
- Mounting Screws (long and short)
- Bolt Driver (screwdriver)
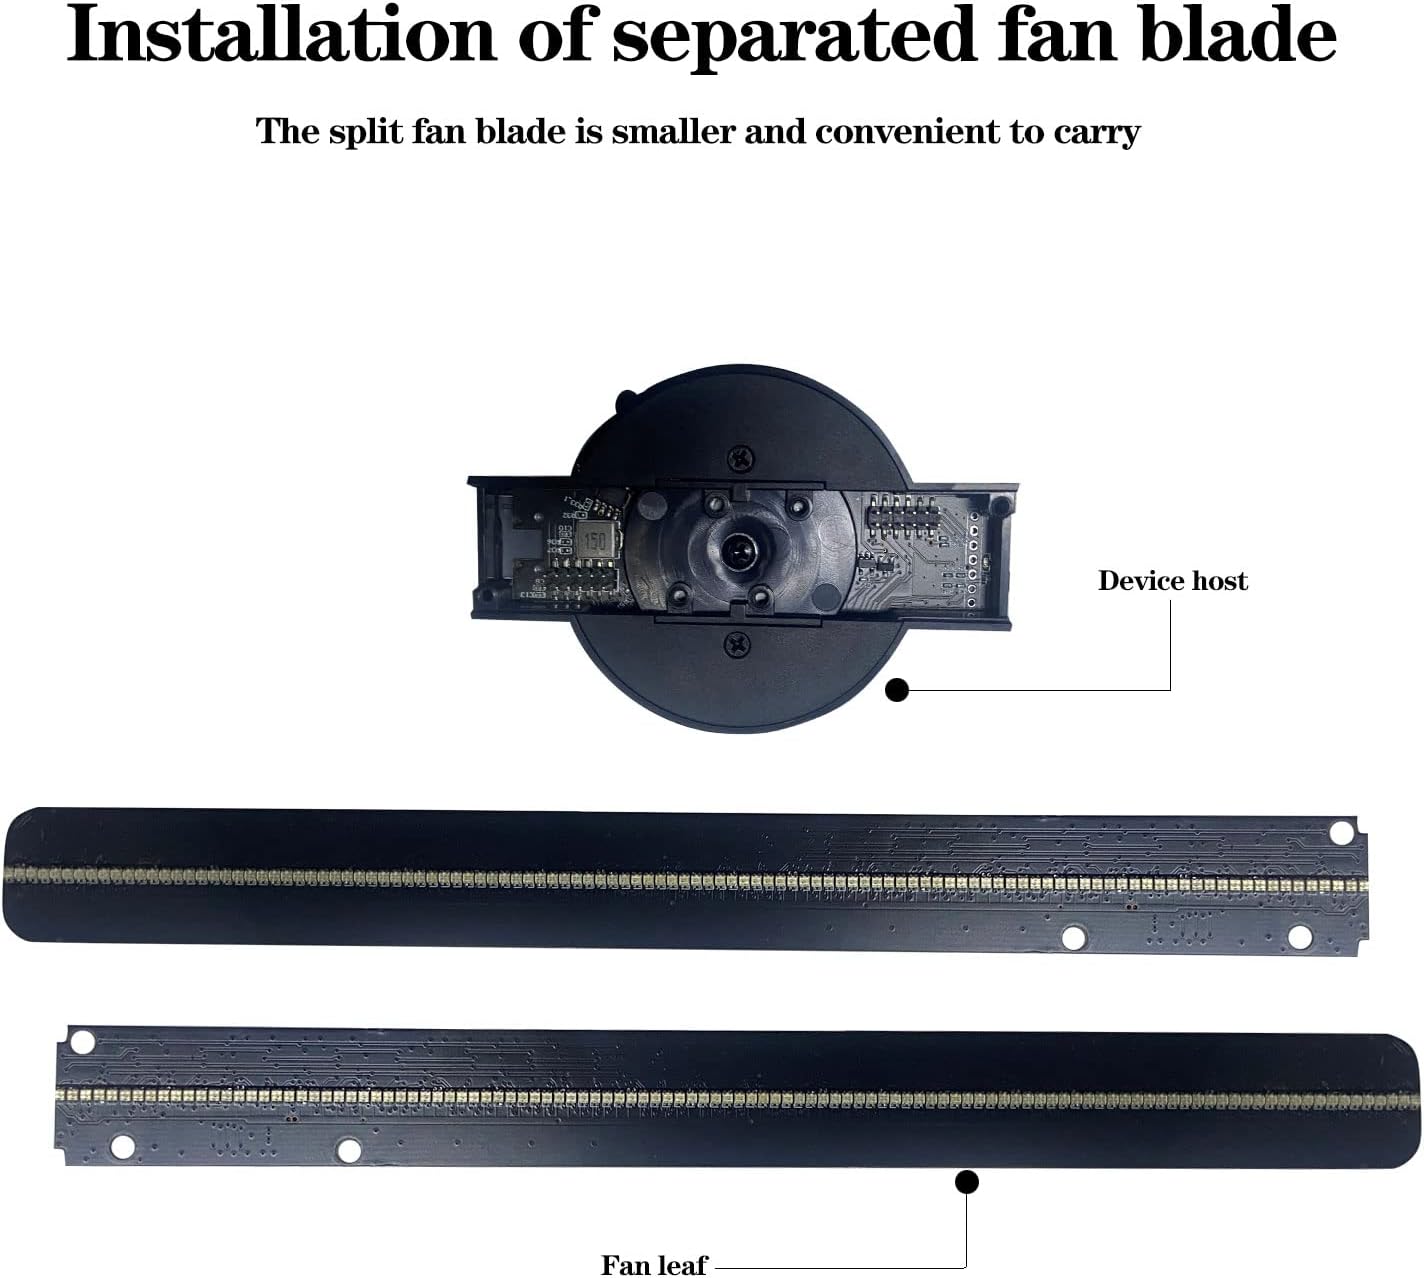
Image: Components included in the WANTHER 3D Hologram Fan package.
Setup and Installation
1. Assembling the Fan Blades
The WANTHER 3D Hologram Fan features detachable fan blades for compact storage and transport. To assemble:
- Carefully align the fan blade sections with the main device host.
- Slide the blades into the designated slots until you hear a click, indicating they are securely locked in place.

Image: Illustration of fan blade assembly.
2. Mounting the Device
Choose a sturdy location for mounting, such as a wall or a robust stand, ensuring it is out of reach to prevent accidental contact with the rotating blades.
- Mark the desired mounting points on the surface using the device's mounting holes as a template.
- Drill pilot holes if necessary.
- Secure the device using the provided mounting screws and bolt driver. Ensure it is firmly attached and stable.
3. Power Connection
- Connect the power cord to the power adapter.
- Plug the power adapter into the power input port on the WANTHER 3D Hologram Fan.
- Plug the power adapter into a standard electrical outlet. The fan will typically begin spinning immediately upon receiving power.
Operating Instructions
1. Initial Power On
Once connected to power, the fan blades will start rotating, and the LED lights will illuminate, initiating the holographic display. Allow a few moments for the image to stabilize.
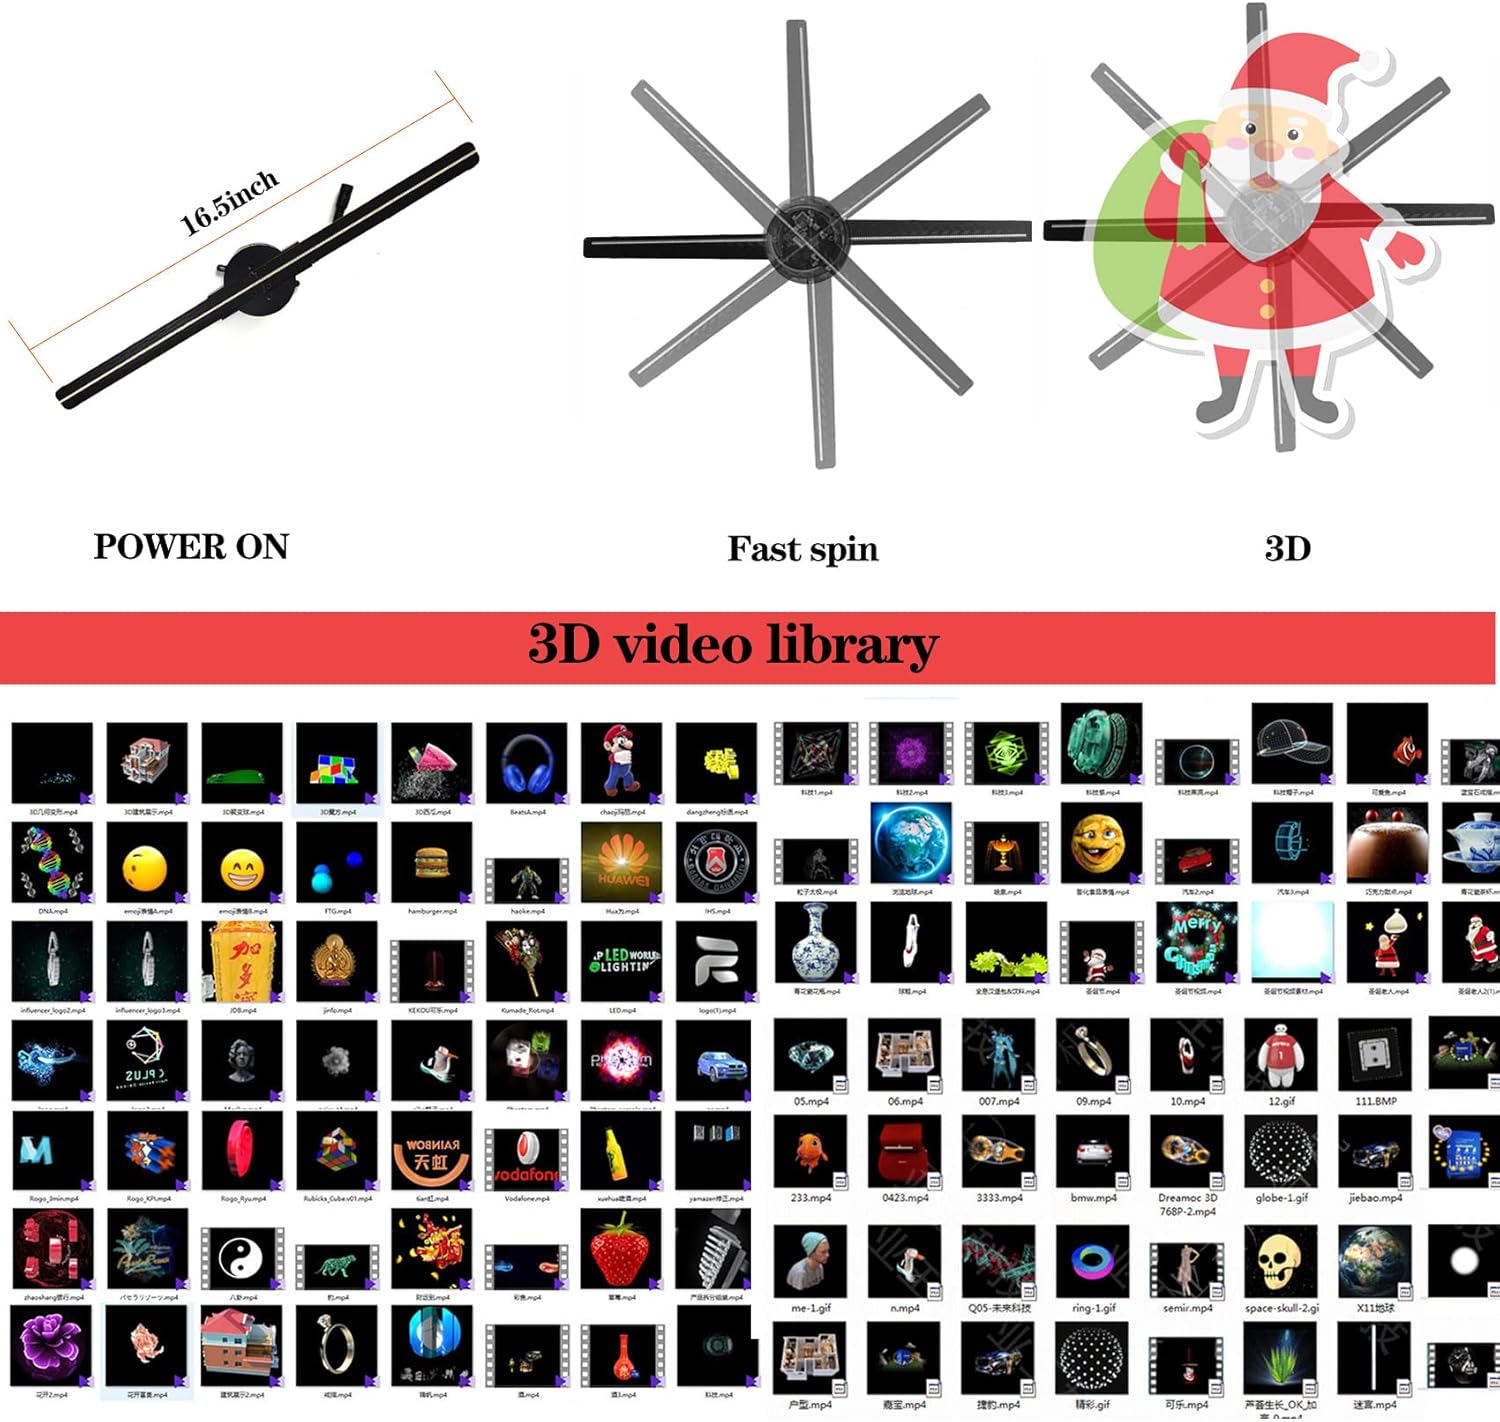
Image: Operational states of the 3D Hologram Fan.
2. Content Management via App (Wi-Fi)
The WANTHER 3D Hologram Fan supports content management through a dedicated mobile application, compatible with both Android and iOS devices.
- Download the App: Refer to the QR code or link provided in the quick start guide (or on the product packaging) to download the official WANTHER app.
- Connect to Wi-Fi: On your smartphone, go to Wi-Fi settings and connect to the Wi-Fi network broadcast by the hologram fan. The network name typically starts with "WANTHER" or a similar identifier.
- Launch the App: Open the WANTHER app. It should automatically detect and connect to the fan.
- Upload Content: Use the app interface to browse and select videos from your device or the fan's internal library. You can upload new content (ensure it's in a compatible format, typically .bin or specific video formats as per app instructions) to the fan's TF card.
- Select and Play: Choose the desired content from the app's library to display on the hologram fan.

Image: App control interface for content selection.
3. Using the Remote Control
The included remote control allows for basic operation without needing the app:
- Power On/Off: Press the power button to turn the fan on or off.
- Next/Previous Content: Use the arrow buttons to cycle through the pre-loaded content on the TF card.
- Play/Pause: Control content playback.
4. Inserting/Removing TF Card
The TF (Micro SD) card stores the display content. To manage content directly via a computer:
- Power Off: Ensure the device is powered off and unplugged before handling the TF card.
- Locate Slot: The TF card slot is typically located on the main device host.
- Remove Card: Gently push the TF card inward until it clicks, then release to eject it.
- Insert Card: Insert the TF card into the slot until it clicks into place. Ensure it is oriented correctly.
- Transfer Content: Use the provided card reader to connect the TF card to your computer and transfer compatible video files.

Image: Location of the TF card slot and LED lamp beads.
Maintenance
- Cleaning: Disconnect power before cleaning. Use a soft, dry cloth to wipe the device. Do not use liquid cleaners or abrasive materials.
- Storage: If storing for an extended period, detach the fan blades and store the device in its original packaging in a cool, dry place.
- Firmware Updates: Check the WANTHER official website or app for any available firmware updates to ensure optimal performance and compatibility.
Troubleshooting
| Problem | Possible Cause | Solution |
|---|---|---|
| Fan does not power on. | No power connection; faulty adapter/cord. | Ensure power cord is securely plugged into the device and outlet. Test outlet with another device. Check adapter for damage. |
| Holographic image is distorted or flickering. | Incorrect content format; fan blades not spinning correctly; environmental interference. | Ensure content is in the correct format (.bin recommended). Check for obstructions around blades. Ensure blades are securely attached. Avoid strong light sources directly on the fan. |
| Cannot connect to fan's Wi-Fi. | Incorrect Wi-Fi password; fan not broadcasting; too far from device. | Verify Wi-Fi password. Restart the fan. Move closer to the fan. Ensure no other devices are interfering with the Wi-Fi signal. |
| App not recognizing the fan. | Not connected to fan's Wi-Fi; app version outdated. | Confirm your phone is connected to the fan's Wi-Fi network. Update the app to the latest version. |
| Content upload fails or content does not display. | Incompatible file format; insufficient TF card space; corrupted file. | Convert content to the recommended format (e.g., .bin). Check TF card storage. Try a different file or re-download the content. |
Specifications
- Model: ms4-22
- Brand: WANTHER
- Display Size: 16.5 inches (42 cm visible screen diagonal)
- Connectivity: Wi-Fi, Bluetooth
- Display Resolution: 1600x1200
- Special Features: 3D-Ready, Detachable Blades
- Item Weight: 1.1 pounds
- Product Dimensions: 16.5 x 16.5 x 2.1 inches
- Color: Black
- Recommended Use: Business

Image: Dimensions of the WANTHER 3D Hologram Fan.
Warranty and Support
The WANTHER 3D Hologram Fan comes with a one-year warranty from the date of purchase, covering manufacturing defects. Please retain your proof of purchase for warranty claims.
For technical support, troubleshooting assistance, or warranty inquiries, please contact WANTHER customer service through the contact information provided on the warranty card or the official WANTHER website.
Online Resources:
- Visit the WANTHER Store on Amazon for product updates and additional information.


