
KEYESTUDIO 42756
KEYESTUDIO BBC Micro:bit 4-DOF Robot Arm Kit Instruction Manual
Brand: KEYESTUDIO | Model: 42756
1. Introduction
This manual provides detailed instructions for the assembly, programming, and operation of the KEYESTUDIO BBC Micro:bit 4-DOF Robot Arm Kit. This kit is designed for STEM education, offering an engaging platform for learning robotics, programming, and electronics. It is suitable for users aged 14 and above.
The kit includes a BBC Micro:bit V2 control board and supports programming with MakeCode Blocks and MicroPython, enabling a wide range of projects from basic Micro:bit functions to complex robot arm controls.
2. Package Contents
Verify that all components listed below are present in your kit. Refer to the image for visual confirmation of parts.
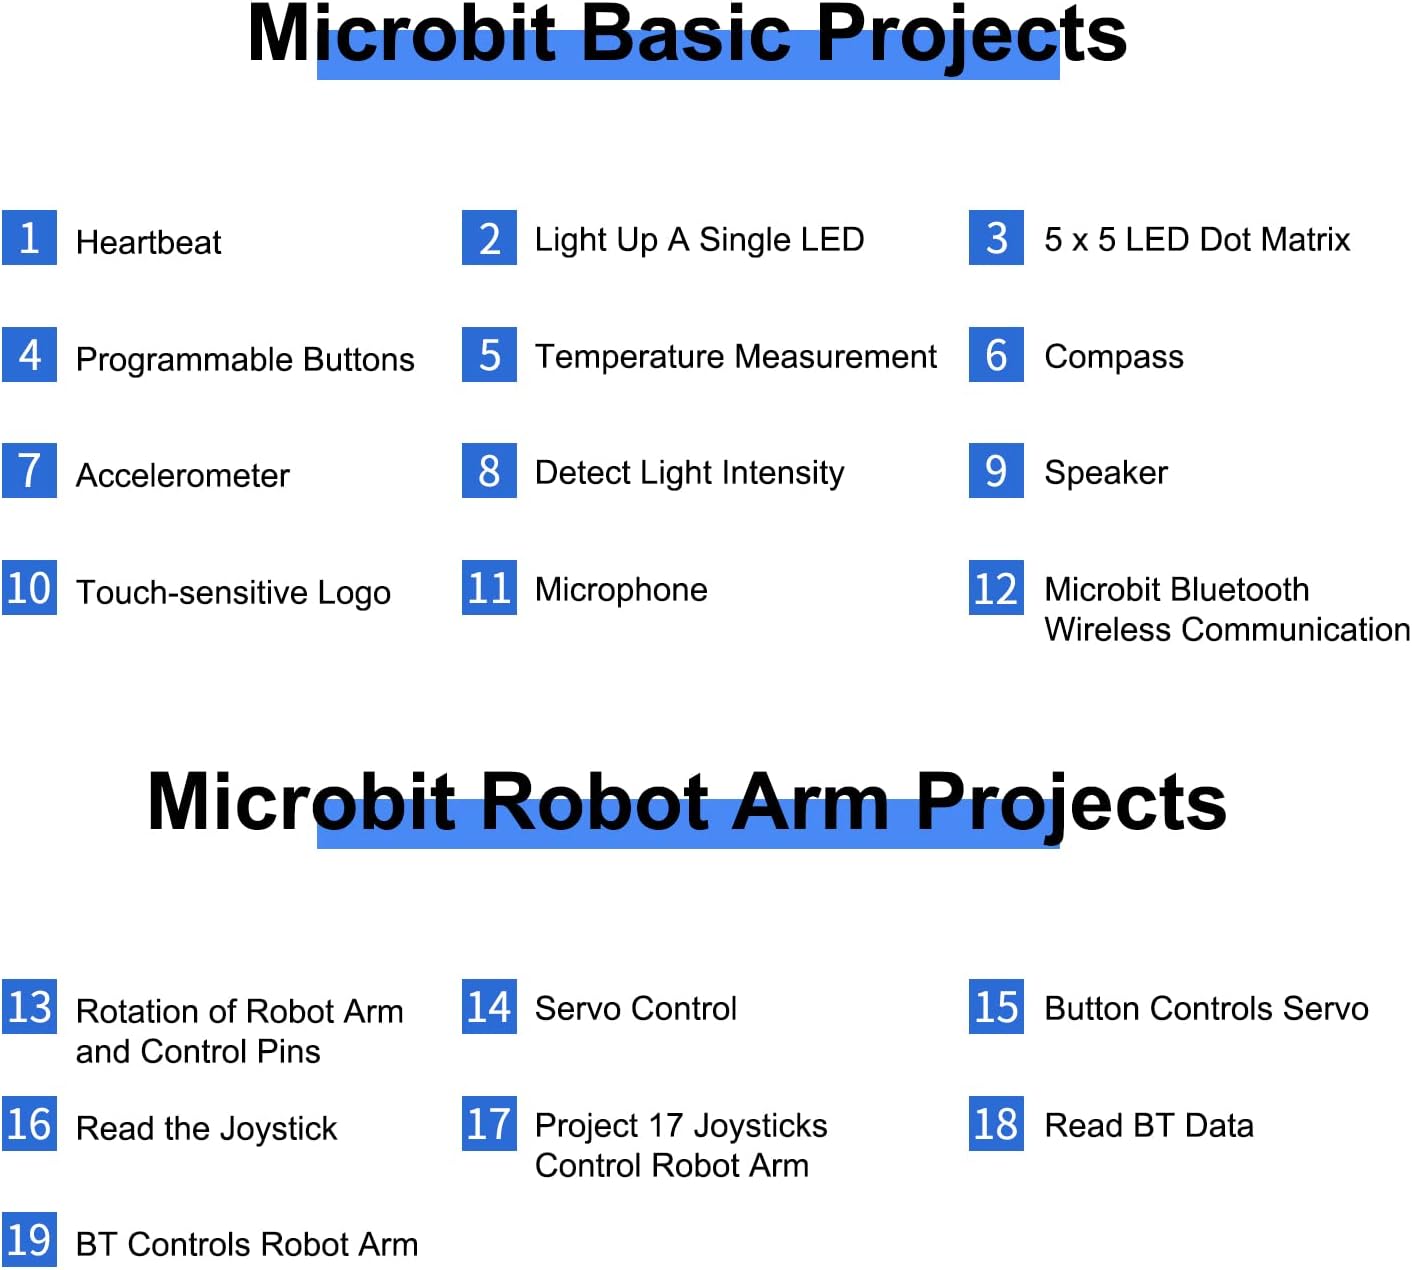
Image: All components included in the KEYESTUDIO BBC Micro:bit 4-DOF Robot Arm Kit, laid out for inspection.
- Micro:bit V2 Mainboard x1
- 16-channel SERVO Expansion Board x1
- Joystick Module x2
- Acrylic Sheet x1 (various pieces for the arm structure)
- Acrylic Handle x1
- Servo x3
- Servo (metal gear) x1
- Battery pack x1 (requires 6 AA batteries, not included)
- USB Cable x1
- Alligator Clip x1
- M-F Dupont Wires x1 (set)
- Cable Tie x7
- Small Wrench x1
- Slotted Screwdriver x1
- Phillips Screwdriver x1
- M3 Nickel-plated Nut x22
- M3*24+6MM Single-pass Copper Pillars x4
- M3*6+6MM Single-pass Copper Pillars x10
- M3*12MM Round-head Screw x12
- M3*10MM Round-head Screw x22
- M3*6MM Round-head Screw x12
- M3*16MM Flat Head Screw x2
- M3*14MM Flat Head Screw x2
- M2*8MM Self-tapping Screws x2
- M2*5MM Self-tapping Screws x10
- M1.2*5MM Self-tapping Screws x8
- Cylindrical Support Table x1
- Gasket x10
Note: 6 AA batteries are required and are not included in the kit.
Important: The acrylic parts have a protective film to prevent scratches. Please remove this film before assembly.
3. Assembly Instructions
Detailed assembly instructions are provided through an online tutorial. Please follow the step-by-step guide carefully to ensure correct construction of the robot arm.
Access the online tutorial here: KEYESTUDIO Robot Arm Kit Tutorial
The assembly process involves attaching the acrylic parts, servos, and wiring the components to the Micro:bit and servo expansion board. Pay close attention to the orientation of parts and connections.
4. Micro:bit Mainboard Pin Introduction
Understanding the Micro:bit mainboard pins is crucial for programming and connecting external components. The diagram below illustrates the pin layout and their functions.

Image: Diagram showing the pin assignments and functions on the BBC Micro:bit V2 mainboard, including GND, 3V, analog, and digital pins.
- GND: Ground connection.
- 3V: 3-volt power supply.
- P0, P1, P2: General purpose input/output pins, also used for analog input.
- P5, P6, P7, P8, P9, P10, P11, P12, P13, P14, P15, P16, P19, P20: Additional I/O pins.
- SDA, SCL: I2C communication pins.
- MOSI, MISO, SCK: SPI communication pins.
- Buttons A and B: User-programmable buttons.
- LED Columns: Pins controlling the 5x5 LED matrix.
5. Programming the Robot Arm
The KEYESTUDIO Robot Arm Kit supports programming using MakeCode Blocks and MicroPython, offering flexibility for different skill levels.
5.1. MakeCode Blocks Programming
MakeCode provides a visual block-based programming environment, ideal for beginners. You can drag and drop code blocks to create programs for the Micro:bit and control the robot arm.
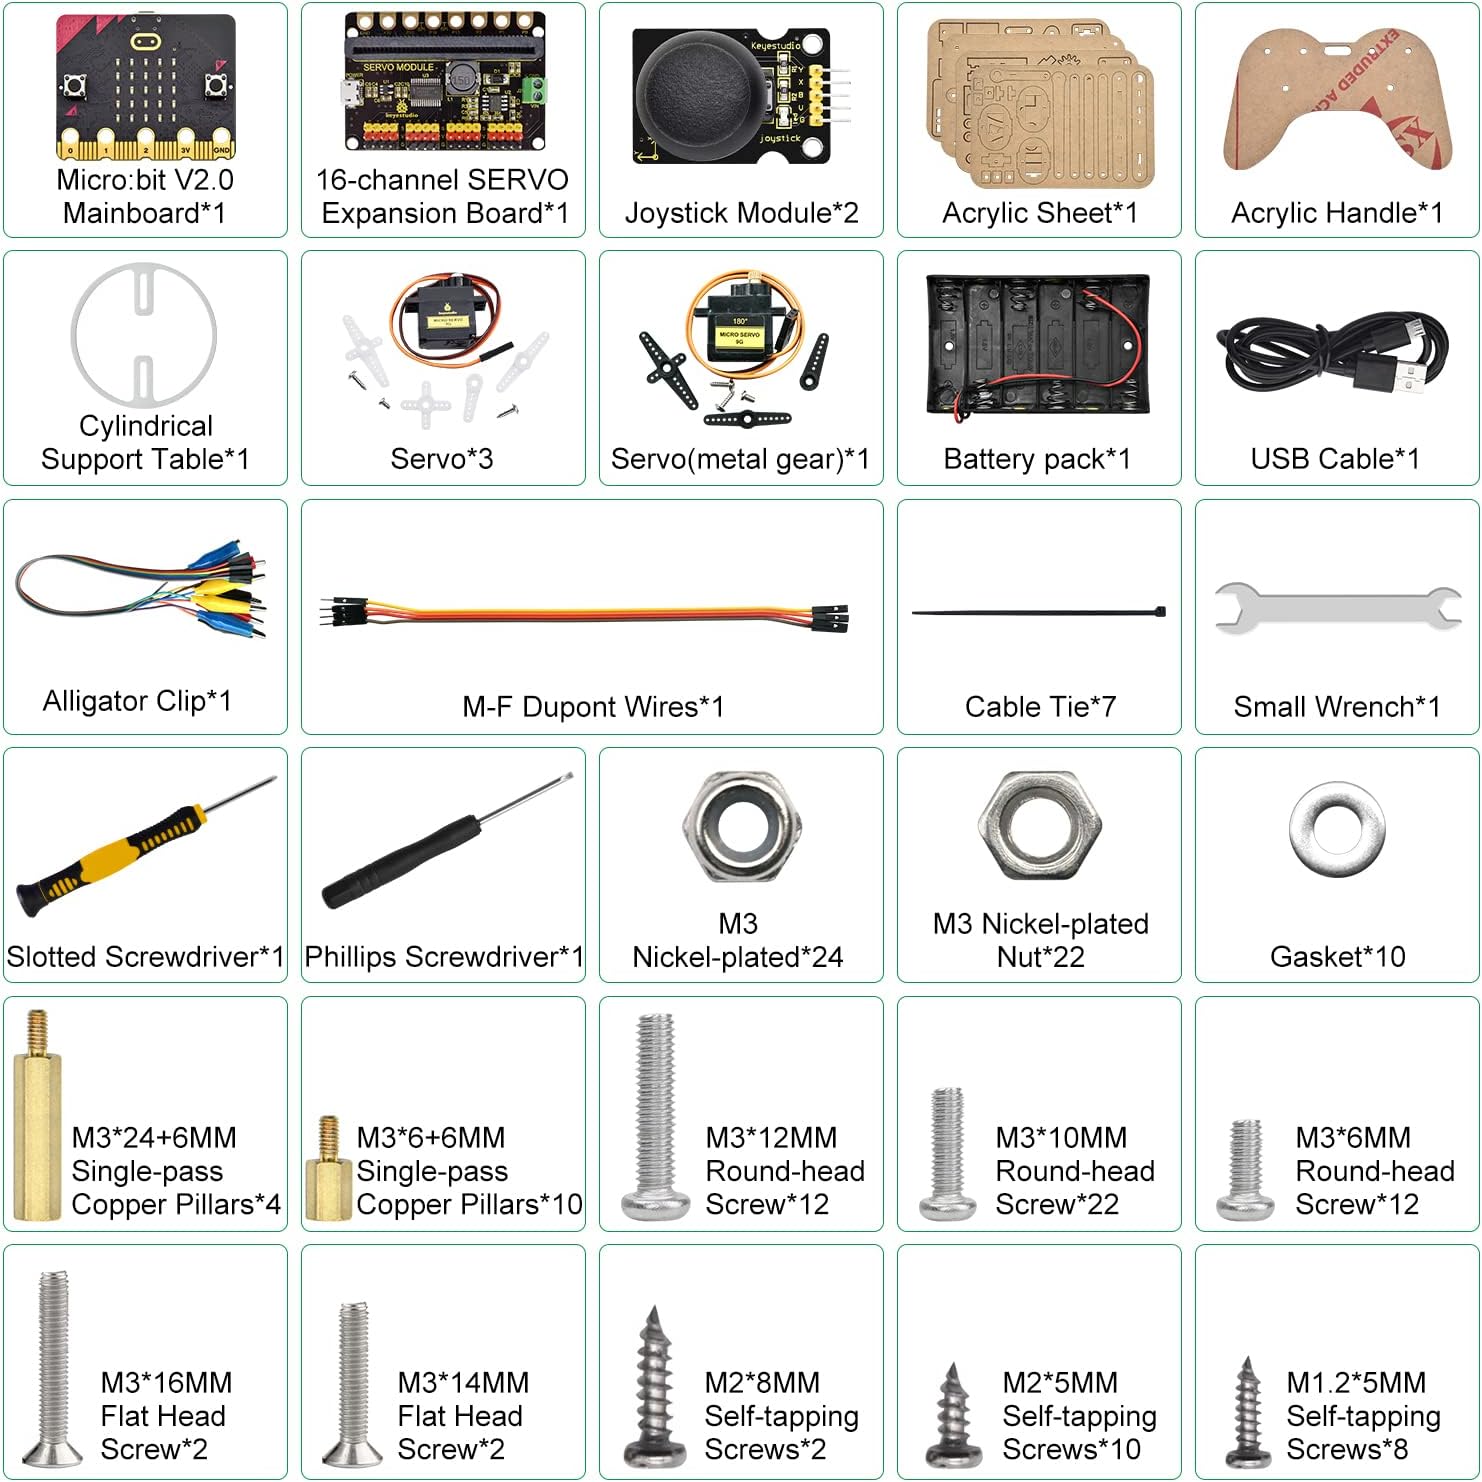
Image: Screenshot of the Microsoft MakeCode editor, showing block-based programming for controlling servos.
The online tutorial includes up to 19 lessons to guide you through using MakeCode to program various features for your robot kit.
5.2. MicroPython Programming
For more advanced users, MicroPython offers a text-based programming experience. You can write Python code to interact with the Micro:bit's hardware and control the robot arm's movements.

Image: Example of MicroPython code for controlling the robot arm, demonstrating text-based programming.
The online tutorial also provides resources for learning how to use MicroPython to program the robot arm.
5.3. Project Examples
The kit supports a variety of projects, including:

Image: List of basic Micro:bit projects and specific robot arm projects that can be implemented with the kit.
- Micro:bit Basic Projects: Heartbeat, Light Up a Single LED, 5x5 LED Dot Matrix, Programmable Buttons, Temperature Measurement, Compass, Accelerometer, Detect Light Intensity, Speaker, Microphone, Touch-sensitive Logo, Micro:bit Bluetooth Wireless Communication.
- Micro:bit Robot Arm Projects: Rotation of Robot Arm and Control Pins, Servo Control, Button Controls Servo, Read the Joystick, Joysticks Control Robot Arm, Read BT Data, BT Controls Robot Arm.
6. Operating the Robot Arm
The robot arm can be controlled using physical joysticks or a mobile application via Bluetooth.
6.1. Joystick Control
Connect the provided joystick modules to the servo expansion board as per the assembly instructions. Program the Micro:bit to interpret joystick inputs for controlling the robot arm's movements.

Image: The KEYESTUDIO robot arm kit shown with two joystick controllers connected, demonstrating physical control.
6.2. Mobile App Control
Android and iOS mobile applications are available to control the robot arm wirelessly via Bluetooth. Download the appropriate app and follow the in-app instructions for pairing and control.

Image: A smartphone screen displaying the mobile application interface for controlling the robot arm via Bluetooth.
6.3. Demonstration Video
Watch this video for a demonstration of the robot arm's capabilities and control methods.
Video: A demonstration of the KEYESTUDIO BBC Micro:bit Robot Arm Kit in operation, showcasing both joystick and mobile app control, and its ability to pick up and move small objects.
7. Maintenance
- Battery Installation: Ensure 6 AA batteries are correctly installed in the battery pack. Replace batteries when performance degrades.
- Protective Film: Remember to remove the protective film from all acrylic parts before assembly to ensure clear visibility and proper fit.
- Cleaning: Use a soft, dry cloth to clean the robot arm and components. Avoid using liquids or abrasive cleaners.
- Storage: Store the kit in a dry, cool place away from direct sunlight and extreme temperatures.
- Component Check: Periodically check all screws and connections to ensure they are secure.
8. Troubleshooting
- Robot Arm Not Responding:
- Check battery connections and ensure batteries have sufficient charge.
- Verify all wiring connections between the Micro:bit, servo expansion board, and servos are correct and secure.
- Ensure the Micro:bit is properly programmed and the code is uploaded.
- Mobile App Connection Issues:
- Ensure Bluetooth is enabled on your mobile device.
- Grant necessary Bluetooth access permissions to the app in your device settings.
- Restart the app and the Micro:bit.
- Servo Malfunction:
- Check the servo connections to the expansion board.
- Ensure the servo is receiving power.
- Verify the programming code for servo control is correct.
- General Issues: If you encounter persistent issues, refer to the online tutorial for further guidance or contact KEYESTUDIO customer support.
9. Specifications
| Feature | Detail |
|---|---|
| Brand | KEYESTUDIO |
| Model Number | 42756 |
| ASIN | B0BZR6B3DY |
| Package Dimensions | 18 x 11.5 x 7.5 cm |
| Item Weight | 660 grams |
| Recommended Age | 14+ adolescents |
| Educational Objectives | Concept development skills, Programming skills |
| Assembly Required | Yes |
| Batteries Required | Yes (6 AA batteries) |
| Batteries Included | No |
| Battery Type | Alkaline |
10. Warranty and Support
For any product-related inquiries, technical support, or warranty information, please contact KEYESTUDIO customer service. Refer to the official KEYESTUDIO website or your purchase documentation for specific contact details.
You can also visit the KEYESTUDIO store on Amazon for additional resources and support: KEYESTUDIO Amazon Store
Related documents42756


Ask a question about this manual
Ask about setup, troubleshooting, compatibility, parts, safety, or missing instructions. Manuals+ will review the question and use this page’s manual context to help answer it.