
NEOECO NCT-SJ81S3-B
NEOECO Multipurpose Dual-Action Gravity Feed Airbrush Kit User Manual
Model: NCT-SJ81S3-B
Introduction
This manual provides detailed instructions for the setup, operation, maintenance, and troubleshooting of your NEOECO Multipurpose Dual-Action Gravity Feed Airbrush Kit. Designed for versatility, this kit is suitable for a wide range of applications, from fine art and model painting to nail art and cake decorating.
Package Contents
Before beginning, please verify that all components listed below are present in your kit.

Image: Detailed view of the NEOECO airbrush kit components, including the airbrush, cups, needles, hose, and cleaning tools.
- High-performance Dual-Action Airbrush
- 3 Detachable Fluid Cups: 9cc, 20cc, 40cc
- 3 Nozzle Sets: 0.2mm, 0.3mm, 0.5mm needles, fluid tips, and air caps
- 2 Nozzle Caps: Crown Cap and Round Cap
- Moisture Trap
- 6-foot Braided Air Hose
- Cleaning Brushes and Needles (5 cleaning needles, 5 cleaning brushes, 1 golden reamer)
- Quick Disconnect Coupler
- O-ring Set
- Small Wrench
- User Manual and Instruction Link Card
Setup Guide
Follow these steps to prepare your airbrush for first use.
- Unpacking: Carefully remove all components from the sturdy packaging. Inspect for any damage.
- Attach Moisture Trap: Connect the moisture trap to your air compressor's air outlet. This prevents moisture from entering your airbrush.
- Connect Air Hose: Attach one end of the braided air hose to the moisture trap and the other end to the quick disconnect coupler. Then, connect the quick disconnect coupler to the airbrush's air inlet.
- Select Nozzle Set: Choose the appropriate needle, fluid tip, and air cap size (0.2mm, 0.3mm, or 0.5mm) for your project. Ensure they are securely installed.
- Attach Fluid Cup: Screw the desired fluid cup (9cc, 20cc, or 40cc) onto the top of the airbrush.
- Initial Cleaning: Before adding paint, run some airbrush cleaner or distilled water through the airbrush to flush out any manufacturing residues.

Image: The complete NEOECO airbrush kit, illustrating the various parts and their arrangement.
Operating Instructions
Dual-Action Control
The NEOECO airbrush features dual-action control, allowing independent regulation of both air and paint flow for precise results.

Image: Illustration of the airbrush's control points: pressure adjust knob, trigger tightness adjust knob, and air output adjust knob.
- Air Control: Pressing down on the trigger releases air.
- Paint Control: Pulling back on the trigger releases paint. The further back you pull, the more paint is released.
- Pressure Adjust Knob: Located under the airbrush, this valve controls the overall air pressure.
- Trigger Tightness Adjust Knob: The gold ring in the middle allows fine adjustment of the trigger's tension.
- Air Output Adjust Knob: Located at the tail of the airbrush, this mechanism controls the maximum paint flow by limiting how far back the trigger can be pulled.
Nozzle Types
Your kit includes two types of nozzle caps, each offering distinct advantages:

Image: Visual comparison of the Crown Nozzle Cap and Round Nozzle Cap.
- Crown Nozzle Cap: Decreases paint build-up on the needle and in the nozzle cap, effectively eliminating spitting. Its shorter length allows for finer detail work while still protecting the needle.
- Round Nozzle Cap: Provides a protective cover for your needle, preventing it from becoming damaged or bent.
Applications
The NEOECO airbrush kit is highly versatile and suitable for various applications, including but not limited to:
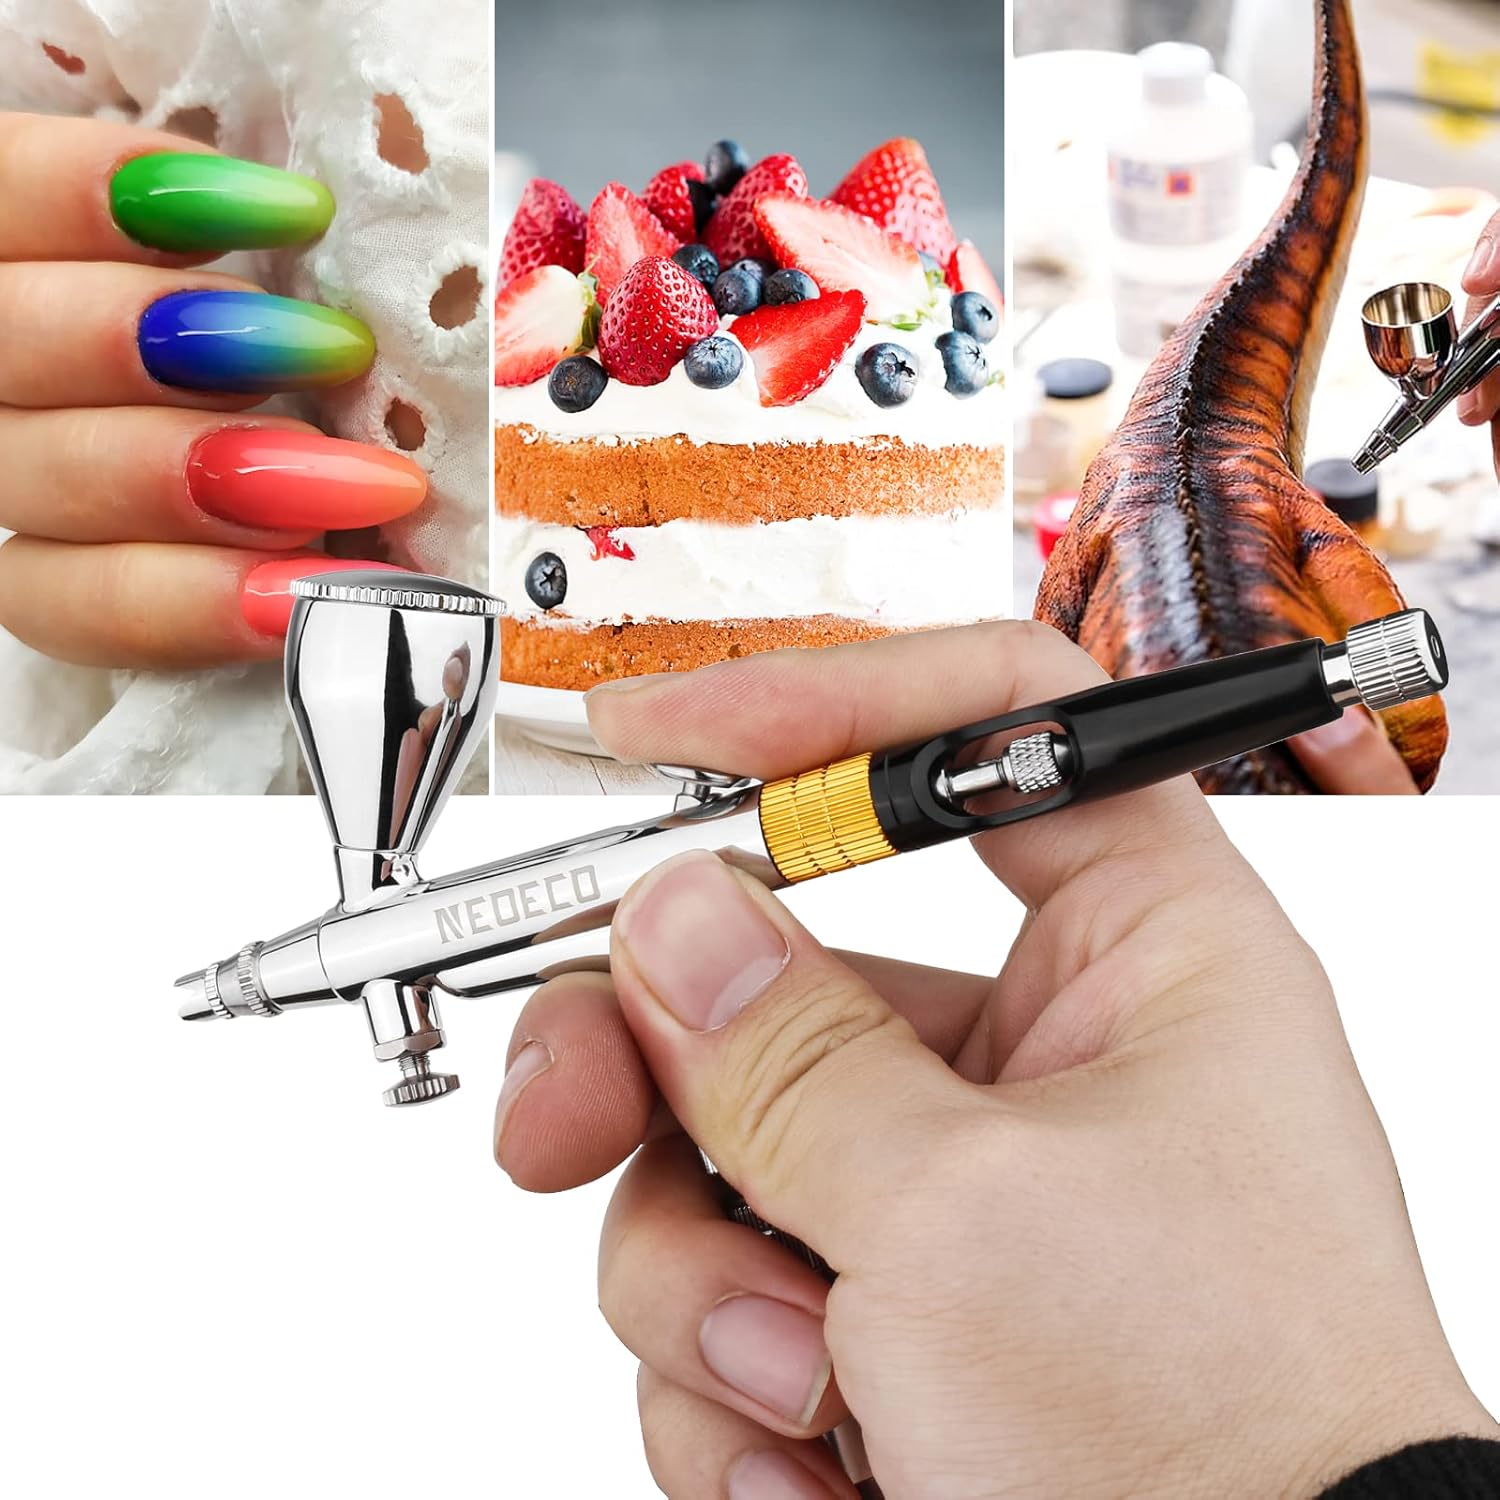
Image: Examples of projects achievable with the airbrush, such as gradient nail art, detailed cake decoration, and model painting.
- Hobbies and Models
- Crafts and Fine Arts
- Nail Art and Makeup
- Automotive and T-shirt painting
- Tattoos and Taxidermy
- Photo Retouching and Illustrations
- Cake Decorating
Cleaning and Maintenance
Proper cleaning and maintenance are crucial for the longevity and optimal performance of your airbrush.
Daily Cleaning
- Empty Cup: After each use, empty any remaining paint from the fluid cup.
- Flush with Cleaner: Add a small amount of appropriate airbrush cleaner or distilled water to the cup. Spray through until the spray runs clear.
- Back-flush: Cover the nozzle with your finger or a cap and pull the trigger back to create bubbles in the cup. This helps clean the fluid passage.
- Wipe Down: Use a soft cloth or paper towel to wipe the exterior of the airbrush and the inside of the fluid cup.
Deep Cleaning
For thorough cleaning or when changing paint types, a deep clean is recommended.

Image: Detailed view of the airbrush nozzle components and the cut-away handle, which facilitates cleaning.
- Disassemble: Carefully disassemble the airbrush, removing the needle, nozzle, and air cap. Refer to the manual for specific disassembly steps.
- Clean Components: Use the provided cleaning brushes and needles to clean all individual components, especially the fluid tip and needle. The golden reamer can assist with stubborn clogs.
- Cut-Away Handle: The cut-away handle design allows you to quickly rinse and clean the air passages and easily access the needle chuck nut for full needle withdrawal, assisting in flushing with cleaner or clearing blockages.
- Rinse and Dry: Rinse all parts with clean water and allow them to air dry completely before reassembly.
- Lubrication: Apply a small amount of airbrush-specific lubricant to the needle and O-rings as needed to ensure smooth operation and prevent wear.
Troubleshooting
This section addresses common issues you might encounter and provides solutions.
| Problem | Possible Cause | Solution |
|---|---|---|
| No paint flow or sputtering | Clogged nozzle/needle, dried paint, insufficient air pressure, bent needle. | Clean nozzle and needle thoroughly. Ensure paint is properly thinned. Check air compressor pressure. Inspect needle for damage and replace if necessary. |
| Air bubbles in fluid cup | Loose nozzle, damaged nozzle, dried paint around nozzle. | Tighten nozzle. Clean nozzle area. Replace nozzle if damaged. |
| Paint leaks from front of airbrush | Loose air cap, damaged nozzle, worn O-rings. | Tighten air cap. Inspect and replace nozzle if damaged. Check and replace O-rings if worn. |
| Trigger sticky or difficult to move | Dried paint in trigger mechanism, lack of lubrication. | Disassemble and clean trigger mechanism. Apply airbrush lubricant. |
Specifications
| Brand | NEOECO |
| Model Number | NCT-SJ81S3-B |
| Color | Black |
| Product Dimensions | 14.8 x 2.5 x 6 cm |
| Product Weight | 500 g |
| Material | Gold (referring to accents/components) |
| Nozzle Sizes Included | 0.2mm, 0.3mm, 0.5mm |
| Fluid Cup Capacities | 9cc, 20cc, 40cc |
Warranty and Support
NEOECO stands behind the quality of its products. Each item undergoes inspection to ensure it meets our standards before reaching you.
For any issues, questions, or support needs regarding your airbrush kit, please refer to the "Instruction link card" included in your package. This card provides access to our online web channel and YouTube resources for expert advice, operational guides, cleaning tips, and troubleshooting solutions.
We are committed to providing a quick response to any problems you may encounter.
Ask a question about this manual
Ask about setup, troubleshooting, compatibility, parts, safety, or missing instructions. Manuals+ will review the question and use this page’s manual context to help answer it.