Introduction
This manual provides detailed instructions for the assembly, operation, and maintenance of your AODSK U-Shaped Keyboard Display Stand, Model AS-UKB. Please read this manual thoroughly before assembly and use to ensure proper setup and safe operation. This stand is designed to securely support 61-key, 76-key, and 88-key digital pianos and keyboards.
Safety Information
- Ensure all components are securely fastened before placing a keyboard on the stand.
- Do not exceed the maximum load capacity of 200 lbs (90 kg).
- Keep small parts away from children during assembly.
- Place the stand on a flat, stable surface to prevent tipping.
Package Contents
Verify that all parts listed below are present before beginning assembly.
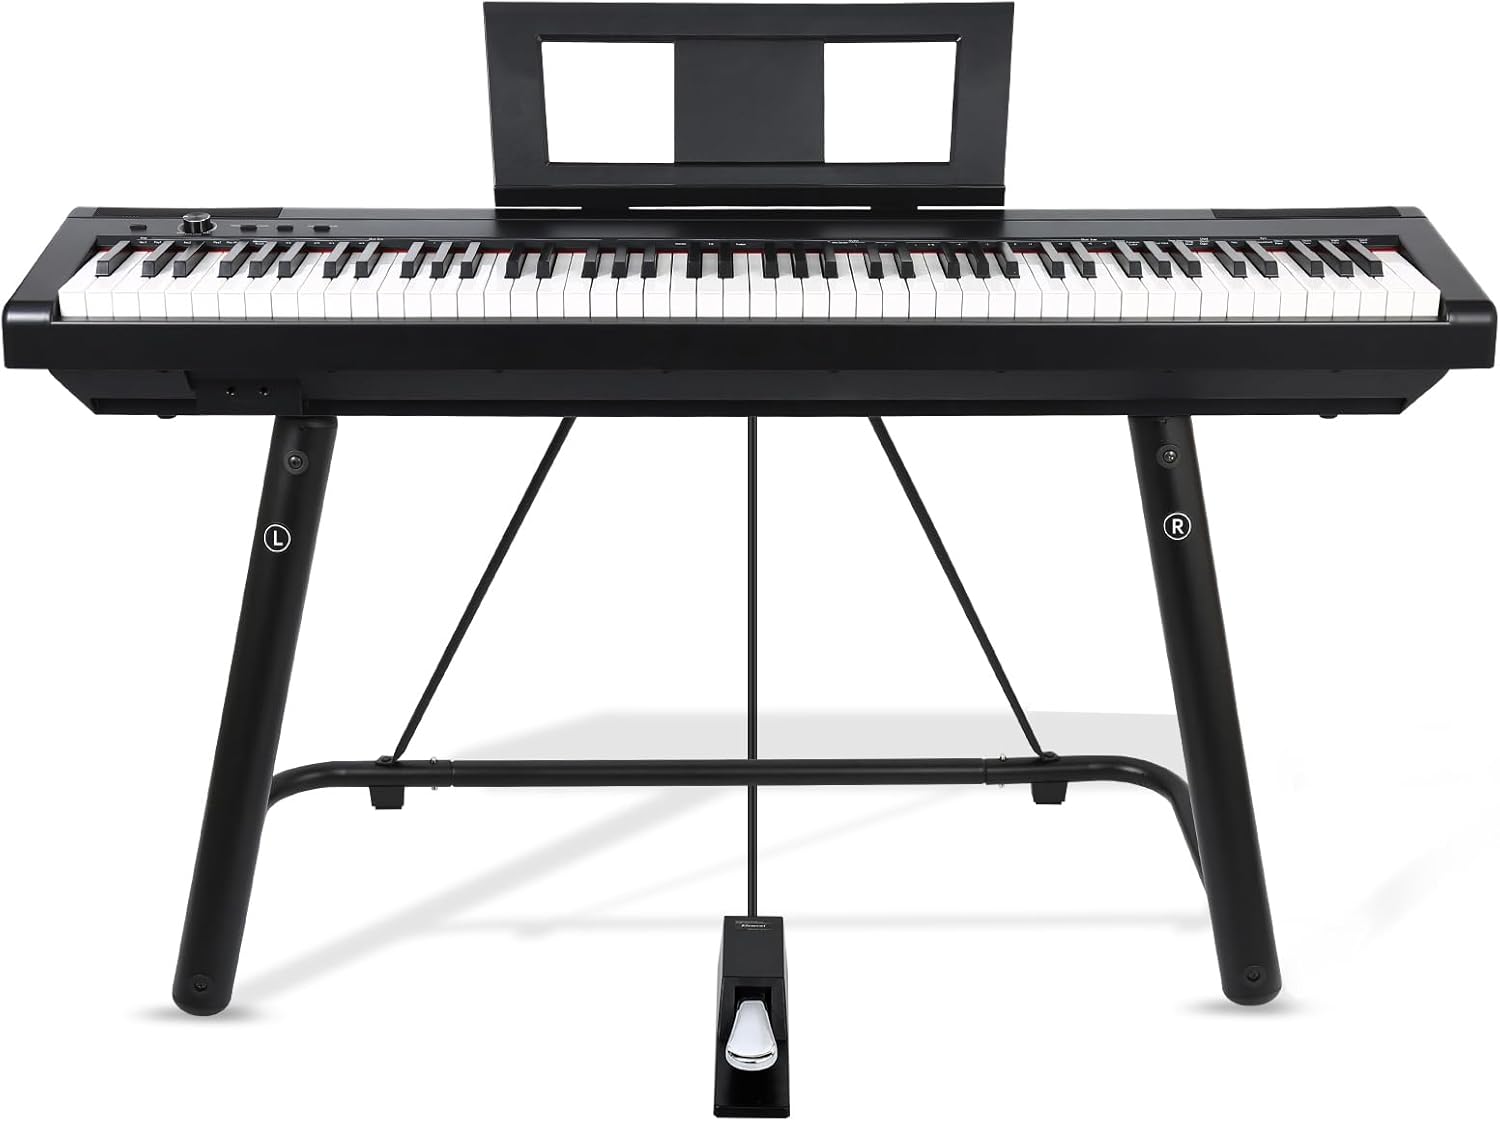
Figure 1: Exploded view of the AODSK U-Shaped Keyboard Display Stand components, detailing each part required for assembly.
- Base U tube (1)
- Top shelf U tube (1)
- Left and right main pipes (2)
- Support tubes (2)
- Fixing straps (4)
- Gaskets (4)
- Connecting rod (1)
- Screws (9)
- Fix screws (4)
- Screwdriver (1)
Assembly Instructions
Follow these steps to assemble your keyboard stand. All necessary tools are included.
- Step 1: Attach Main Pipes to Base U Tube. Connect the left and right main pipes to the base U tube using the provided screws. Ensure the 'L' and 'R' markings on the main pipes align with the corresponding sides.
- Step 2: Install Top Shelf U Tube. Secure the top shelf U tube to the upper ends of the main pipes using the remaining screws.
- Step 3: Connect Support Tubes. Attach the two support tubes diagonally between the main pipes and the base U tube. Fasten them with the appropriate screws.
- Step 4: Insert Connecting Rod. Slide the connecting rod through the designated holes in the lower section of the main pipes to enhance stability.
- Step 5: Attach Fixing Straps and Gaskets. Secure the four fixing straps to the top shelf U tube using the fix screws. Place the gaskets on the top surface of the stand where the keyboard will rest.
- Step 6: Final Check. Verify that all screws are tightened and all components are securely in place.

Figure 2: The AODSK U-Shaped Keyboard Display Stand, fully assembled and ready for use.
Operating Instructions
Placing Your Keyboard
- Carefully lift your keyboard and center it on the top surface of the stand.
- Ensure the keyboard rests evenly on the sponge pads to prevent scratches and provide grip.
- Utilize the adjustable locking straps to secure the keyboard to the stand, preventing accidental movement.

Figure 3: A digital piano placed on the AODSK U-Shaped Keyboard Display Stand, demonstrating proper usage.
Key Features
- U-Shaped Design: Provides triangular support for enhanced stability and ample legroom.
- Non-Slip Padding: Thick sponge padding on the top surface prevents scratches and ensures the keyboard remains securely in place.
- Locking Straps: Adjustable straps are included to further secure your instrument to the stand.
- Floor Protection: Sponge pads on the base protect your floors from scratches.

Figure 4: Diagram illustrating key features of the AODSK keyboard stand, including sponge pads for floor protection, high-elastic sponge for keyboard protection, and porous connection straps for instrument adaptation.

Figure 5: Close-up view of the U-shaped design and triangular support structure of the AODSK keyboard stand, emphasizing its stability.
Maintenance
- Cleaning: Wipe the stand with a soft, damp cloth to remove dust and dirt. Avoid abrasive cleaners or solvents that may damage the finish.
- Inspection: Periodically check all screws and connections to ensure they remain tight. Re-tighten if necessary.
- Storage: Store the stand in a dry environment away from extreme temperatures.
Troubleshooting
Stand Wobbles
- Ensure the stand is placed on a completely flat and level surface.
- Verify that all assembly screws are fully tightened. Refer to the "Assembly Instructions" section.
- Confirm that the connecting rod is properly inserted and secured.
- Ensure the keyboard is centered and evenly distributed on the stand.
Difficulty Assembling
- Review the "Package Contents" and "Assembly Instructions" carefully, paying close attention to the exploded view diagram (Figure 1).
- Ensure you are using the correct screws for each connection point.
- If the included screwdriver does not fit properly, use a standard Phillips head screwdriver of appropriate size.
Specifications
| Model Number | AS-UKB |
| Shape | U shape |
| Material | Metal |
| Color | Black |
| Product Dimensions (L x W x H) | 43.3 x 18 x 24.4 inches (110 x 45.7 x 62 cm) |
| Item Weight | 8 pounds (3.6 kg) |
| Load Capacity | 200 pounds (90 kg) |
| Assembly Required | Yes |

Figure 6: Detailed dimensions of the AODSK U-Shaped Keyboard Display Stand, including height, width, and depth measurements.
Warranty and Support
Specific warranty details are not provided in this manual. For warranty information, technical support, or any inquiries regarding your AODSK U-Shaped Keyboard Display Stand, please contact AODSK customer service through the retailer where the product was purchased or visit the official AODSK brand store online.
You can visit the AODSK Store for more information: AODSK Official Store


