
1. Introduction
This manual provides detailed instructions for the operation and maintenance of your MOOER Micro Drummer II pedal. The Micro Drummer II is a compact drum machine pedal designed for guitarists, offering a wide range of drum grooves and essential features for practice and performance.
2. Features
- Compact Design: A miniature version based on the DRUMMER X2, utilizing authentic sampled drum machine audio samples.
- Extensive Rhythm Library: Offers 48 grooves across 6 different music types (Pop, Funk, Metal, Rock, Blues, Jazz) with 8 different rhythm types for each.
- FILL Function: Allows users to add variation and complexity to drum patterns on the fly.
- Tap Tempo: Enables easy adjustment of the drum speed.
- EQ Setting: Includes two different EQ presets to adapt to various playing situations.
3. Product Overview

Figure 1: Front view of the MOOER Micro Drummer II pedal, showing the main controls and footswitch.

Figure 2: The Micro Drummer II pedal connected to a guitar and amplifier, demonstrating its compact size and connectivity.
Controls and Connections:

Figure 3: Labeled diagram of the Micro Drummer II's controls, including DC IN, Level, EQ/Speed, Pattern selector, LED button, Output, and Footswitch.
- DC IN: Power input (9V DC).
- LEVEL Knob: Adjusts the overall volume of the drum machine.
- EQ/SPEED Knob: Adjusts the EQ preset or the speed of the drum pattern.
- PATTERN Selector: Rotary switch to select between 8 rhythm types within each music genre.
- Music Type Toggle Switch: Selects between Pop/Funk/Metal (left side) and Rock/Blues/Jazz (right side).
- LED Button: Indicates FILL function status (Red: FILL Off, Blue: FILL On).
- INPUT Jack: 1/4-inch audio input for your instrument.
- OUTPUT Jack: 1/4-inch audio output to your amplifier or other effects.
- Footswitch: Activates/deactivates the drum machine and controls Tap Tempo.
4. Setup
- Power Connection: Connect a 9V DC power adapter (center negative) to the DC IN jack. Ensure the power supply meets the pedal's requirements.
- Instrument Connection: Connect your guitar or other instrument to the INPUT jack using a standard 1/4-inch instrument cable.
- Output Connection: Connect the OUTPUT jack to your amplifier, audio interface, or the next pedal in your signal chain using a standard 1/4-inch instrument cable.
- Initial Settings: Set the LEVEL knob to a low position initially to avoid sudden loud sounds. Set the EQ/SPEED knob to a neutral position.
5. Operating Instructions
5.1 Activating/Deactivating the Drum Machine
- Press the footswitch once to activate the drum machine. The LED will illuminate.
- Press the footswitch again to deactivate the drum machine. The LED will turn off.
5.2 Selecting Music Type and Rhythm Pattern
- Use the Music Type Toggle Switch to select one of the six music genres (Pop, Funk, Metal, Rock, Blues, Jazz). The selected genre will be indicated by a small LED next to its name.
- Rotate the PATTERN Selector knob to choose one of the 8 rhythm types available for the selected music genre.

Figure 4: The pedal highlighting the 6 different music types and their corresponding 8 rhythm types.
5.3 Adjusting Tempo (Tap Tempo)
- To set the tempo, hold down the footswitch for approximately 2 seconds until the LED starts blinking.
- Tap the footswitch repeatedly at your desired tempo. The pedal will automatically detect and set the BPM.
- Alternatively, the EQ/SPEED knob can be used to adjust the tempo directly.
5.4 Using the FILL Function
- The FILL function adds a drum fill to the current pattern.
- Press the small LED Button to toggle the FILL function on or off.
- When the LED is Red, the FILL function is off. When the LED is Blue, the FILL function is on.
- When activated, a drum fill will be inserted at appropriate points in the rhythm.
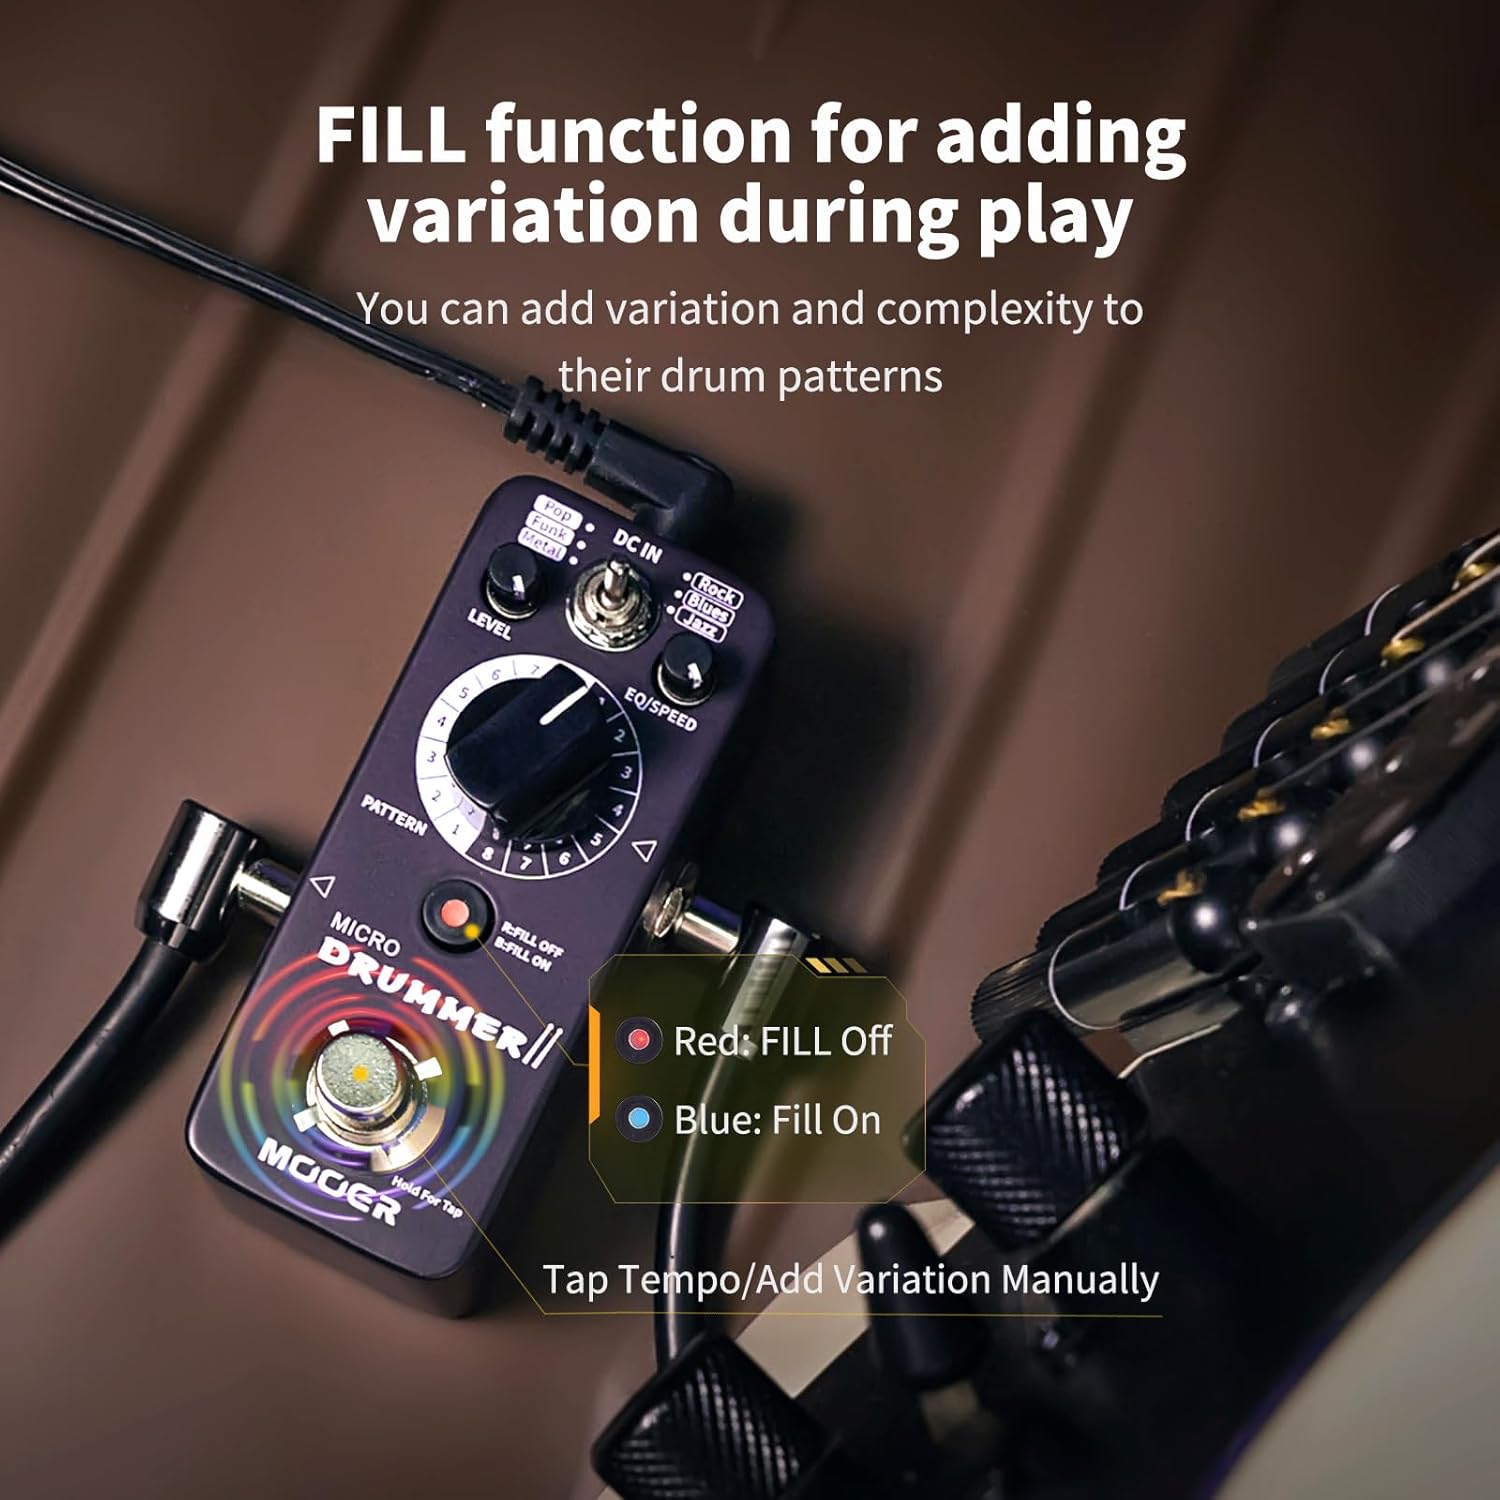
Figure 5: The pedal demonstrating the FILL function, with the LED indicating its status (Red for off, Blue for on).
5.5 Adjusting EQ and Volume
- Use the LEVEL knob to control the overall output volume of the drum machine.
- The EQ/SPEED knob also allows you to select between two different EQ presets to tailor the drum sound to your preference or playing environment.
6. Maintenance
- Cleaning: Use a soft, dry cloth to clean the pedal. Avoid using abrasive cleaners or solvents.
- Storage: Store the pedal in a dry environment away from extreme temperatures and direct sunlight.
- Power Supply: Always use a compatible 9V DC (center negative) power adapter. Using an incorrect power supply can damage the unit and void the warranty.
- Connections: Ensure all cables are securely connected to prevent signal loss or damage.
7. Troubleshooting
| Problem | Possible Cause | Solution |
|---|---|---|
| No sound from the pedal. | Incorrect power supply, loose cables, pedal not activated, volume too low. | Check power adapter, ensure cables are secure, press footswitch to activate, increase LEVEL knob. |
| Drum pattern is too fast/slow. | Incorrect tempo setting. | Use Tap Tempo function or adjust EQ/SPEED knob. |
| Drum sound is distorted or unclear. | Incorrect EQ setting, high input signal. | Adjust EQ/SPEED knob, reduce input signal from instrument. |
8. Specifications
- Model Number: micro-drummer-ii-ea673964da
- Item Weight: 5.9 ounces (0.17 Kilograms)
- Product Dimensions: 2.05"L x 1.65"W x 3.68"H (5.2cm x 4.2cm x 9.35cm)
- Hardware Interface: 1/4-inch Audio
- Signal Format: Analog
- Power Source: Corded Electric
- Voltage: 9 Volts DC
- Date First Available: March 24, 2023

Figure 6: Dimensions of the MOOER Micro Drummer II pedal.
9. Official Product Videos
MOOER Micro Drummer II Demo
Video 1: A demonstration of the MOOER Micro Drummer II pedal by Derek Paul, showcasing its features and sound capabilities.
MOOER New Micro Drummer II 48 Groove Rhythm
Video 2: An overview of the 48 drum grooves available on the MOOER Micro Drummer II, demonstrating the variety of rhythms.
10. Warranty and Support
For warranty information and technical support, please refer to the official MOOER website or contact your local distributor. Keep your purchase receipt as proof of purchase for warranty claims.

