1. Introduction
This manual provides essential information for the safe installation, operation, and maintenance of your Ideal Standard Ceratherm Alu+ Shower Column, Model BD583XG. Please read these instructions carefully before installation and retain them for future reference.
The Ceratherm Alu+ shower column is designed with sustainability in mind, featuring 84% recycled aluminum construction and water-saving technology. It offers a comfortable and efficient showering experience with thermostatic temperature control and multiple spray modes.

Figure 1: Ideal Standard Ceratherm Alu+ Shower Column (Silk Black)
2. Safety Information
Important: Failure to follow these safety instructions could result in injury or damage to the product.
- Installation must be performed by a qualified professional in accordance with local plumbing and building regulations.
- Ensure water supply is turned off before commencing installation or maintenance.
- Verify that the wall structure can support the weight of the shower column and the forces exerted during use.
- Do not use abrasive cleaners, solvents, or harsh chemicals on the product surfaces, as this may damage the finish.
- The thermostatic mixer is designed to prevent scalding. Do not tamper with the temperature settings or safety stop.
- Regularly check for leaks and address them immediately to prevent water damage.
3. Package Contents
Please check that all components are present before beginning installation:
- Shower column with integrated thermostatic mixer
- Overhead shower (rain shower)
- Hand shower
- Shower hose (IdealFlex anti-twist)
- Adjustable shelves (quantity may vary by model variant)
- Mounting hardware (screws, wall plugs, gaskets)
- Instruction manual
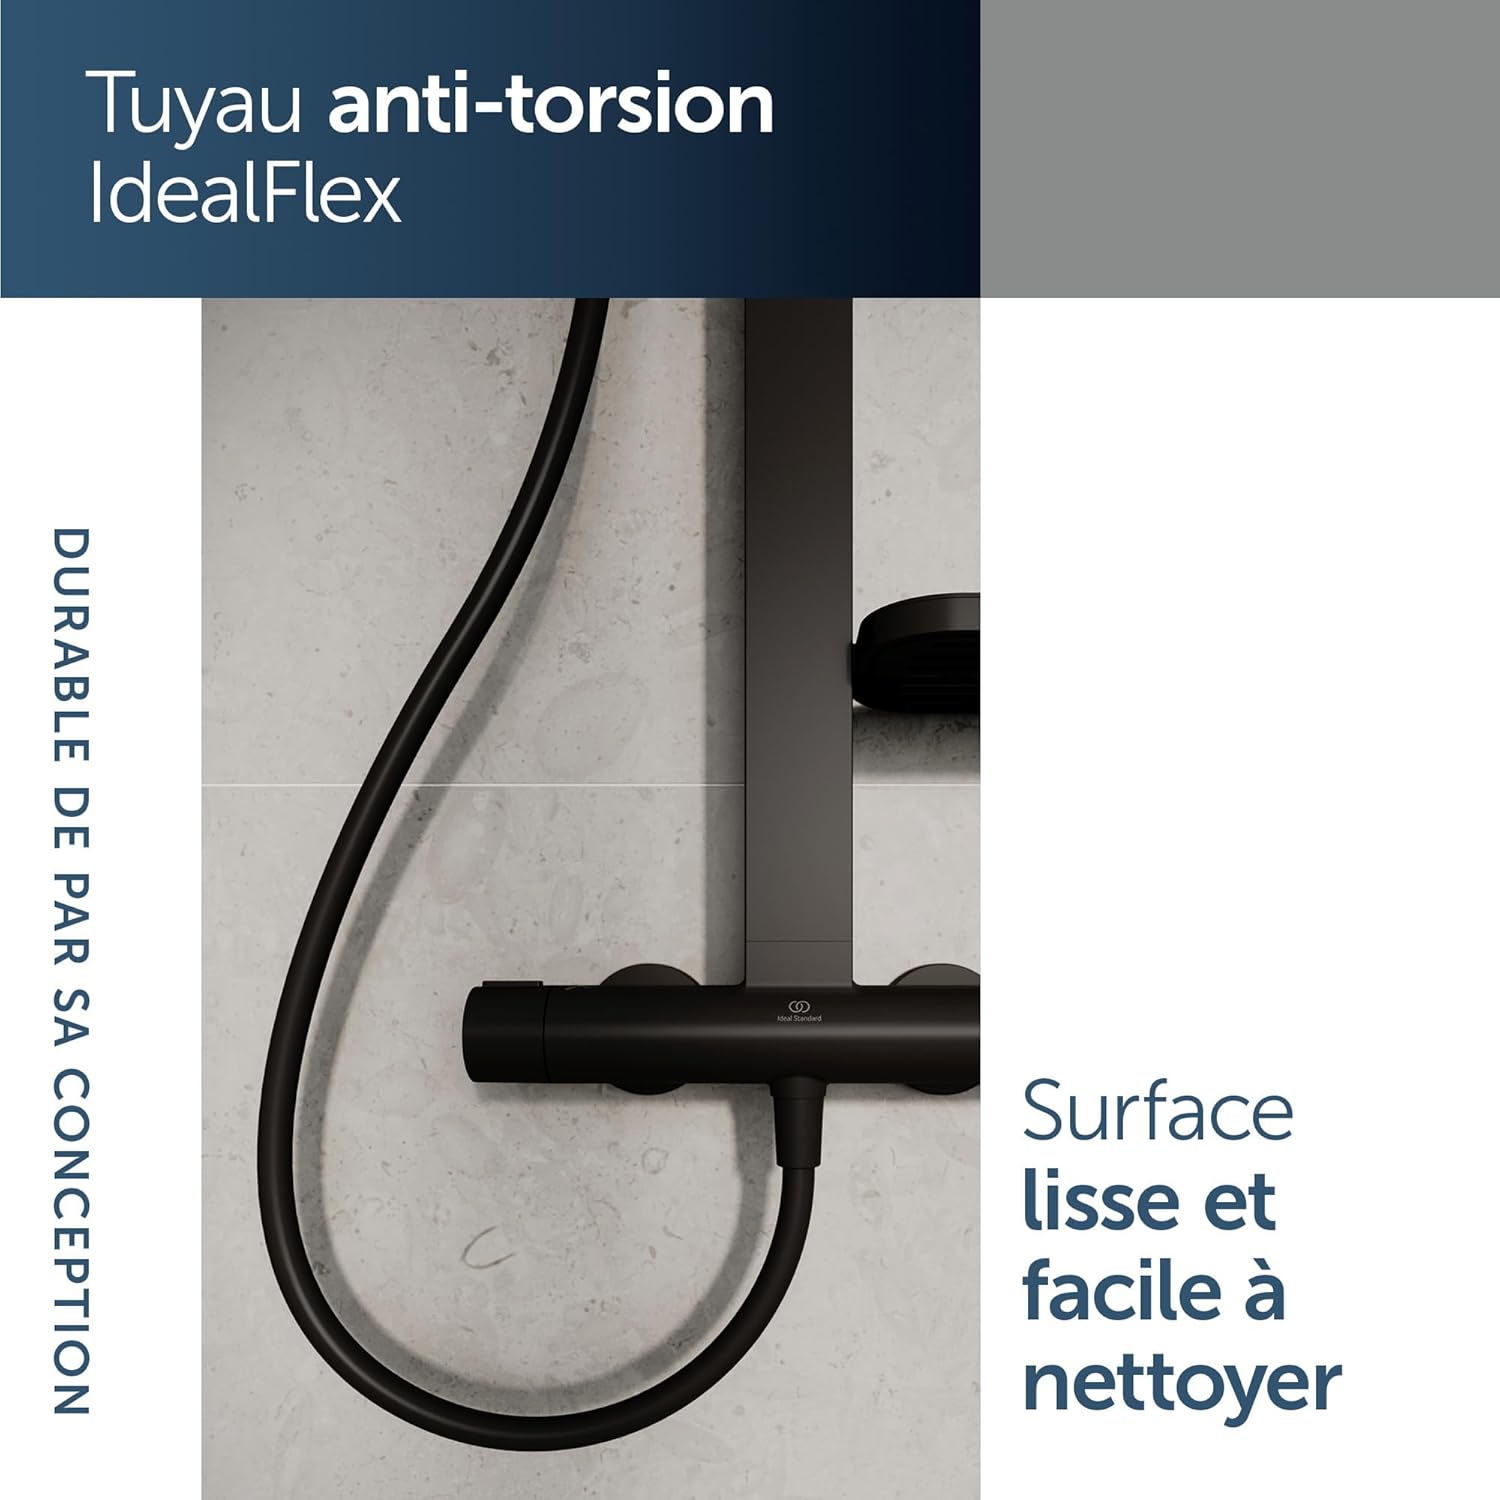
Figure 2: Overview of the Ceratherm Alu+ Shower Column components and sustainable design.
4. Installation
Note: Professional installation is recommended. Ensure you have the necessary tools and protective equipment.
4.1 Pre-Installation Checks
- Turn off the main water supply.
- Flush the water lines to remove any debris.
- Ensure the wall surface is clean, flat, and capable of supporting the shower column.
- Check the hot and cold water connections. The hot water inlet is typically on the left, and cold on the right.
4.2 Mounting the Thermostatic Mixer
- Mark the desired height for the thermostatic mixer on the wall.
- Attach the eccentric connectors to the wall water outlets, ensuring they are level and at the correct distance (typically 150mm center-to-center).
- Install the S-unions and cover plates.
- Mount the thermostatic mixer onto the S-unions, tightening securely.
4.3 Installing the Shower Rail and Head
- Assemble the shower rail components according to the diagram.
- Attach the shower rail to the thermostatic mixer and secure the upper wall bracket. Mark and drill holes for the upper bracket.
- Insert wall plugs and secure the upper bracket with screws.
- Connect the overhead shower to the shower arm and ensure it is securely fastened.
4.4 Connecting the Hand Shower and Hose
- Connect the shower hose to the hand shower and the outlet on the thermostatic mixer.
- Place the hand shower in its holder on the shower rail.

Figure 3: Side view illustrating the shower column's structure and potential mounting points.
4.5 Final Checks
- Turn on the main water supply slowly.
- Check all connections for leaks.
- Test the thermostatic function and spray modes.
5. Operating Instructions
5.1 Temperature Control
The Ceratherm Alu+ features a thermostatic mixer for precise temperature control. Rotate the temperature handle (typically on the right) to adjust the water temperature. A safety stop is set at 40°C to prevent accidental scalding. To exceed 40°C, press the safety button and continue rotating the handle.
5.2 Water Flow and Diverter
Rotate the flow control handle (typically on the left) to turn the water on/off and adjust the flow intensity. This handle also acts as a diverter to switch between the overhead shower and the hand shower.
5.3 Spray Modes
Both the overhead shower and hand shower offer multiple spray modes for a versatile experience:
- Rain: A classic, full-coverage spray.
- Soft Rain (SilkRain): A gentle, fine mist for a luxurious feel.
- Massage: A focused, invigorating spray.
To change the spray mode on the overhead shower, rotate the central part of the shower head. For the hand shower, rotate the spray plate.

Figure 4: Overhead shower head with adjustable spray modes.
6. Maintenance
6.1 Cleaning
- Clean the surfaces regularly with a soft cloth and mild soap or a non-abrasive bathroom cleaner.
- Avoid cleaners containing alcohol, acids, or abrasive particles, as these can damage the Silk Black finish.
- For limescale removal, use a mild descaling solution specifically designed for bathroom fixtures, and rinse thoroughly with water.
- The shower nozzles are equipped with Easy Clean anti-limescale features. Simply rub the silicone nozzles to dislodge limescale deposits.

Figure 5: Integrated shelves for convenient storage, requiring regular cleaning.
6.2 Hose Care
The IdealFlex anti-twist shower hose is designed for durability. Clean it with a soft cloth and mild soap. Avoid kinking or excessive pulling to prolong its lifespan.

Figure 6: IdealFlex anti-twist shower hose.
7. Troubleshooting
| Problem | Possible Cause | Solution |
|---|---|---|
| No water flow or low pressure | Main water supply off, clogged filters, kinked hose. | Check main water supply. Clean filters in the mixer. Straighten the hose. |
| Water temperature fluctuates | Insufficient hot/cold water pressure, thermostatic cartridge issue. | Ensure balanced water pressure. If problem persists, contact a qualified plumber to inspect/replace the cartridge. |
| Water leaks from connections | Loose connections, damaged gaskets. | Tighten connections carefully. Replace worn or damaged gaskets. |
| Shower head/hand shower clogged | Limescale buildup in nozzles. | Rub the silicone nozzles to remove limescale. For stubborn buildup, soak in a mild descaling solution. |
8. Specifications
| Feature | Detail |
|---|---|
| Model Number | BD583XG |
| Brand | Ideal Standard |
| Color | Silk Black |
| Material | Aluminum (84% recycled) |
| Finish | Brushed |
| Product Dimensions (L x W x H) | 29.6 x 53.3 x 111.3 cm |
| Item Weight | 6.3 Kilograms |
| Mounting Type | Wall Mount |
| Overhead Shower Flow Rate | 12 liters/minute (EcoFlow) |
| Hand Shower Flow Rate | 8 liters/minute (EcoFlow) |
| Safety Stop Temperature | 40°C |
| Included Components | Shower column with thermostatic mixer, shelves, hand shower, flexible hose |
| Spare Parts Availability | 10 Years |
9. Warranty and Support
Ideal Standard products are manufactured to high-quality standards and are covered by a manufacturer's warranty. Please refer to the warranty card included in your package for specific terms and conditions.
For technical assistance, spare parts, or warranty claims, please contact Ideal Standard customer service or visit their official website. Ensure you have your model number (BD583XG) and proof of purchase available.
Contact Information:
- Brand: Ideal Standard
- Website: www.idealstandard.com (or local equivalent)


