
1. Important Safety Information
Please read and understand all instructions before assembling and using this product. Keep this manual for future reference.
- Weight Capacity: Do not exceed the maximum weight capacity of 900 lbs. Overloading can lead to structural failure and injury.
- Assembly: Ensure the bed is properly and securely assembled according to the instructions to prevent movement or collapse. All bolts and fasteners must be tightened.
- Children's Safety: Use appropriate bedding materials for infants and young children to prevent entrapment or suffocation hazards. Keep small parts away from children during assembly.
- Electrical Safety: The integrated charging station contains electrical components. Do not expose to water or excessive moisture. Disconnect from power before cleaning or if any damage is suspected.
- Regular Checks: Periodically check all connections and fasteners to ensure they remain tight.
- Placement: Position the bed frame on a level surface to ensure stability.
2. Package Contents
Verify that all components are present and undamaged before beginning assembly. If any parts are missing or damaged, please contact customer support.
- Headboard (2-tier with integrated charging station)
- Footboard
- Metal Frame Side Rails
- Metal Slats
- Support Legs
- Hardware Kit (bolts, nuts, Allen wrench, etc.)
- Instruction Manual

Image 2.1: Overview of the LUXOAK Queen Size Platform Bed Frame.
3. Assembly Instructions
Assembly is designed to be straightforward and can typically be completed in less than 40 minutes with the provided tools. It is recommended to have two people for easier assembly.
- Unpack Components: Carefully remove all parts from the packaging. Lay them out on a soft, clean surface to prevent scratches.
- Assemble Headboard: Attach the headboard sections together using the designated bolts and the provided Allen wrench. Ensure the 2-tier storage shelves are correctly oriented.
- Attach Side Rails: Connect the side rails to the assembled headboard and footboard. Secure all connections firmly.
- Install Support Legs: Fasten the independent support legs to the central frame structure. These legs are crucial for stability and weight distribution.
- Place Metal Slats: Lay the metal slats across the frame. The slats are designed with non-slip strips to prevent noise and mattress movement. Ensure they are evenly spaced and secured if applicable.
- Connect Charging Station: Route the power cord from the integrated charging station to a suitable wall outlet.
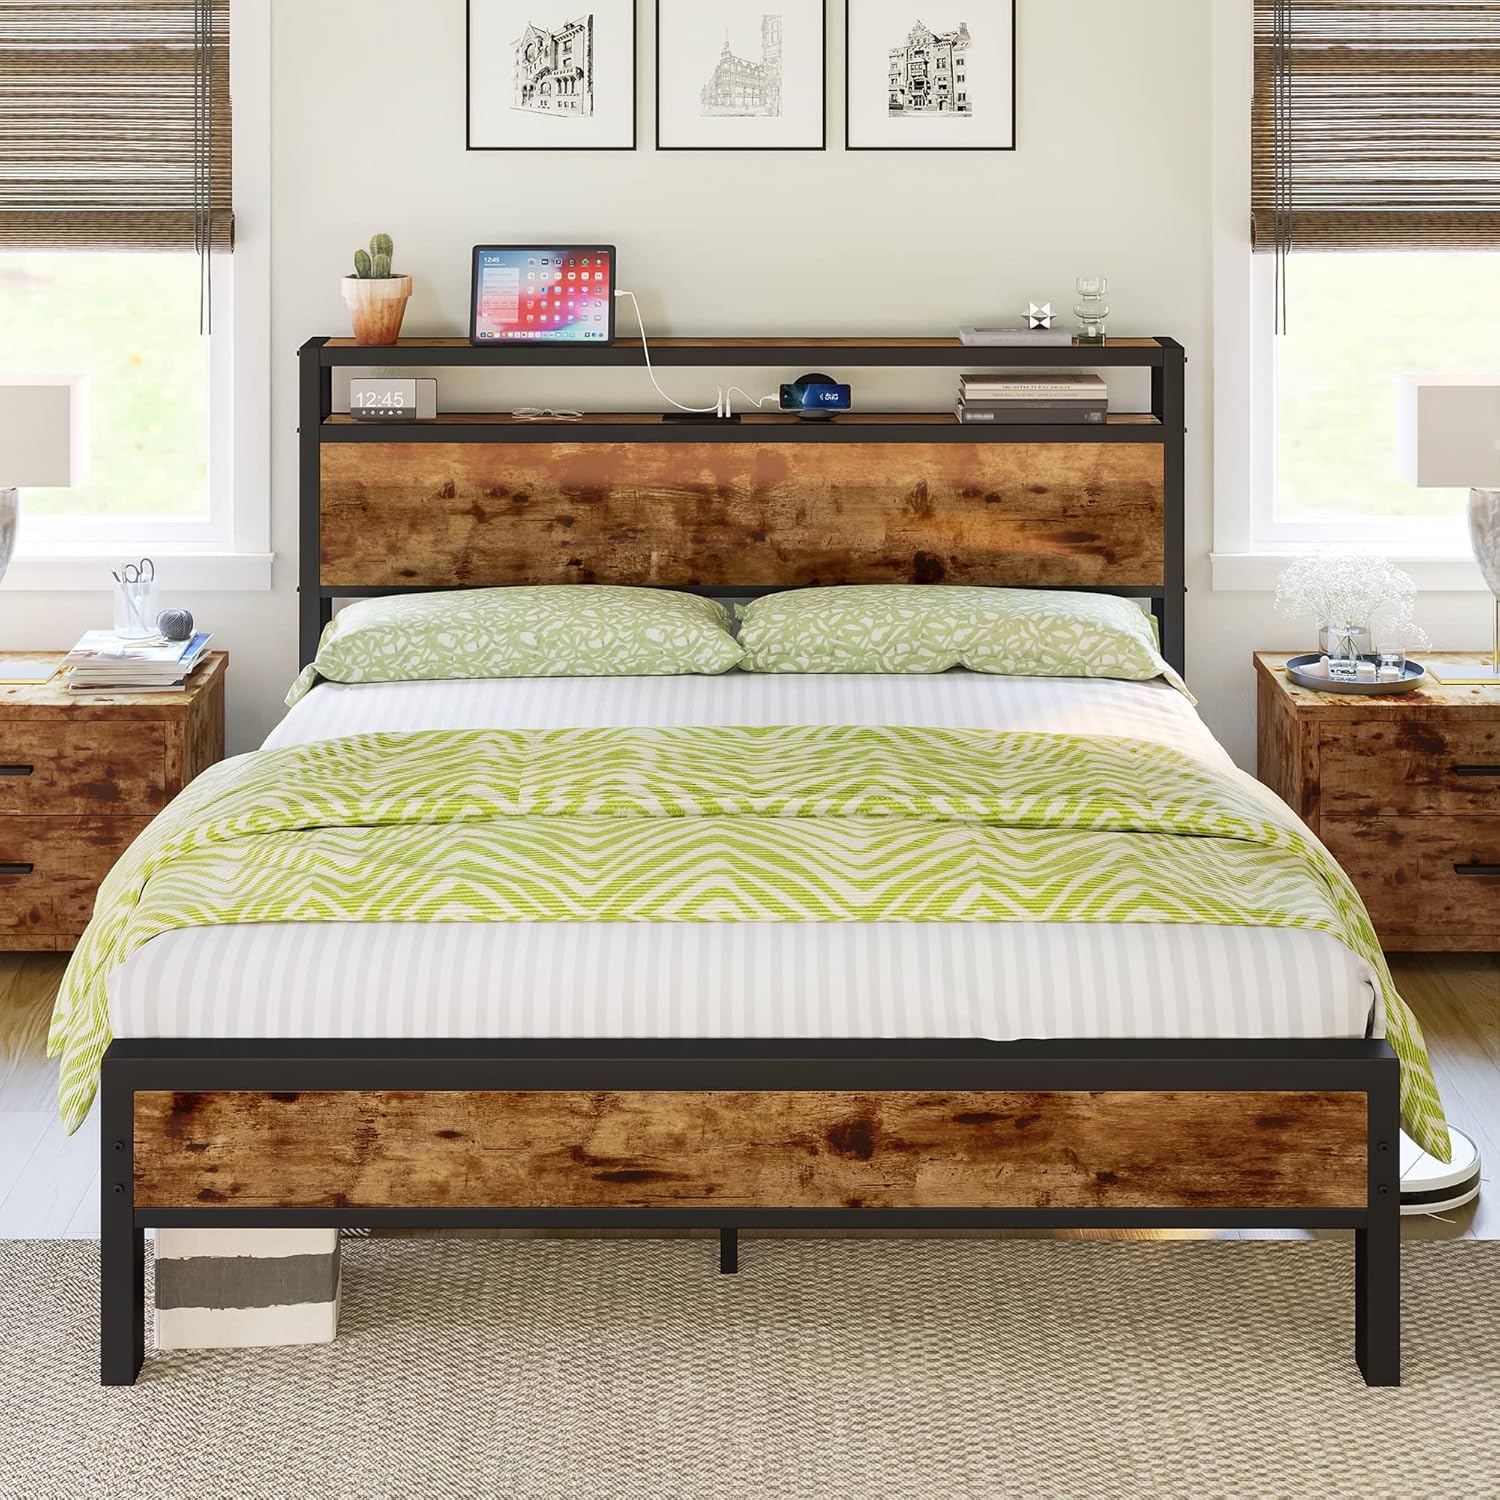
Image 3.1: Assembled bed frame without mattress.

Image 3.2: Detail of a powder-coated metal leg.
4. Operating Instructions
Your LUXOAK bed frame is designed for convenience and functionality.
4.1. 2-Tier Storage Headboard
The headboard features two tiers of shelving, providing accessible storage for personal items such as books, glasses, or decorative pieces. The top tier offers a wider surface, while the lower tier is ideal for smaller essentials.

Image 4.1: The 2-tier headboard provides convenient storage.
4.2. Integrated Charging Station
The headboard includes a built-in charging station with 2 standard plug outlets (110V/12A) and 2 USB ports (5V/2A). This allows for convenient charging of electronic devices directly from your bed.
- Connect the bed frame's power cord to a grounded wall outlet.
- Plug in your devices to the available outlets or USB ports.
- Ensure devices are compatible with the provided voltage and amperage.
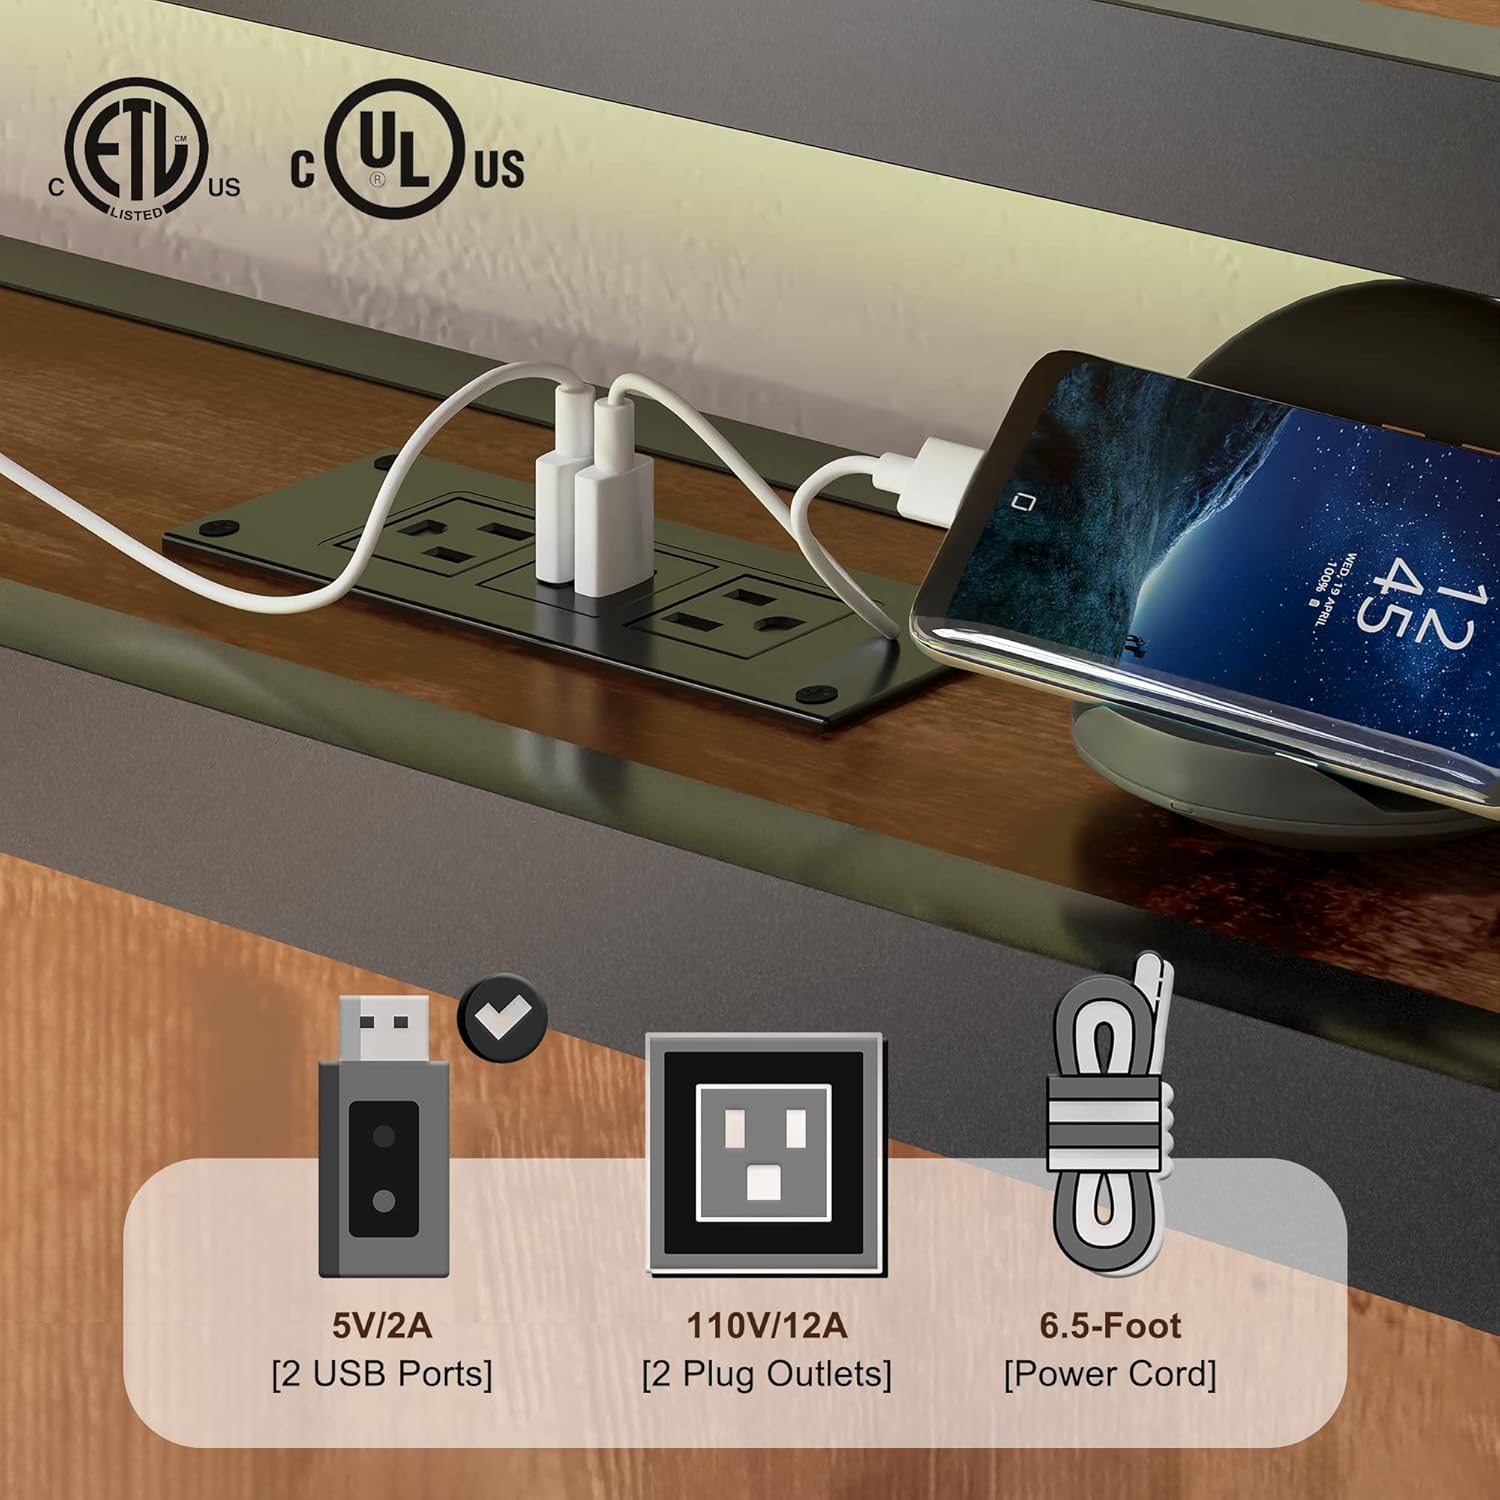
Image 4.2: Integrated charging station with power outlets and USB ports.
4.3. Under-Bed Storage
The platform design provides 12 inches of clearance beneath the bed, offering ample space for storing items in bins or luggage. This maximizes bedroom organization.

Image 4.3: Illustration of the 12-inch under-bed storage space.
5. Maintenance
Proper care will extend the life and appearance of your bed frame.
- Cleaning: Wipe down metal and wood surfaces with a soft, damp cloth. Avoid harsh chemicals or abrasive cleaners that could damage the finish.
- Fastener Checks: Periodically (e.g., every 3-6 months) inspect all bolts and screws to ensure they are tight. Re-tighten as necessary to maintain stability and prevent noise.
- Electrical Components: Keep the charging station free from dust and debris. Do not attempt to repair damaged electrical components yourself; seek professional assistance.
- Noise Prevention: The non-slip strips on the slats are designed to prevent noise. If squeaking occurs, re-check slat placement and frame connections.
6. Troubleshooting
Refer to this section for solutions to common issues.
- Bed Frame is Wobbly:
- Ensure all bolts and screws are fully tightened.
- Verify that the bed frame is on a level surface.
- Check that all support legs are making firm contact with the floor.
- Squeaking Noises:
- Re-tighten all frame connections.
- Confirm that the mattress is properly seated on the slats and not directly contacting the metal frame.
- Ensure the non-slip strips on the slats are intact and properly positioned.
- Charging Station Not Working:
- Check if the power cord is securely plugged into both the bed frame and a functional wall outlet.
- Test the wall outlet with another device to confirm it has power.
- Ensure your device's charging cable is not faulty.
- If a specific port (e.g., USB-C) is not working, it may be damaged. Avoid forcing cables into ports.
- Missing or Damaged Parts:
- If you received a damaged or incomplete package, contact LUXOAK customer service immediately for assistance. Do not attempt to use damaged components.
7. Specifications
| Feature | Detail |
|---|---|
| Model Number | BF001 |
| Size | Queen |
| Product Dimensions | 88"L x 65.2"W x 45.5"H |
| Weight Capacity | 900 lbs |
| Under-bed Clearance | 12 Inches |
| Material | Wood, Metal |
| Color | Rustic Brown |
| Headboard Features | 2-Tier Storage, Integrated Charging Station |
| Charging Station | 2 Standard Plug Outlets (110V/12A), 2 USB Ports (5V/2A) |
| Box Spring Required | No |
| Assembly Time | Approx. 40 minutes |

Image 7.1: Dimensions and weight capacity of the bed frame.
8. Warranty and Customer Support
LUXOAK is committed to providing quality products. While specific warranty details may vary, please retain your proof of purchase for any claims.
- Warranty: Information regarding a specific warranty period was not provided in the product packaging. Please refer to your purchase documentation or contact the seller for warranty details.
- Customer Support: For assistance with assembly, missing parts, or any other product-related inquiries, please contact LUXOAK customer service through the retailer where the product was purchased.