Introduction
Thank you for purchasing the Ankilo WA123W 10.5-inch LED Digital Alarm Clock. This manual provides detailed instructions for setting up, operating, and maintaining your new clock. Please read this manual thoroughly before use and retain it for future reference.

Image: The Ankilo WA123W digital alarm clock displaying time, temperature, and date.
Safety Information
- Do not expose the device to extreme temperatures, direct sunlight, or high humidity.
- Avoid dropping or subjecting the device to strong impacts.
- Use only the provided power adapter or a compatible USB power source.
- Keep out of reach of children.
- Do not attempt to disassemble or repair the device yourself. Contact customer support if service is required.
Package Contents
- Ankilo WA123W Digital Alarm Clock
- USB Power Cable
- User Manual

Image: The Ankilo WA123W clock, USB cable, and user manual in its packaging.
Product Overview
The Ankilo WA123W features a large LED display for clear visibility, showing time, date, and temperature. It includes dual alarms and adjustable brightness.
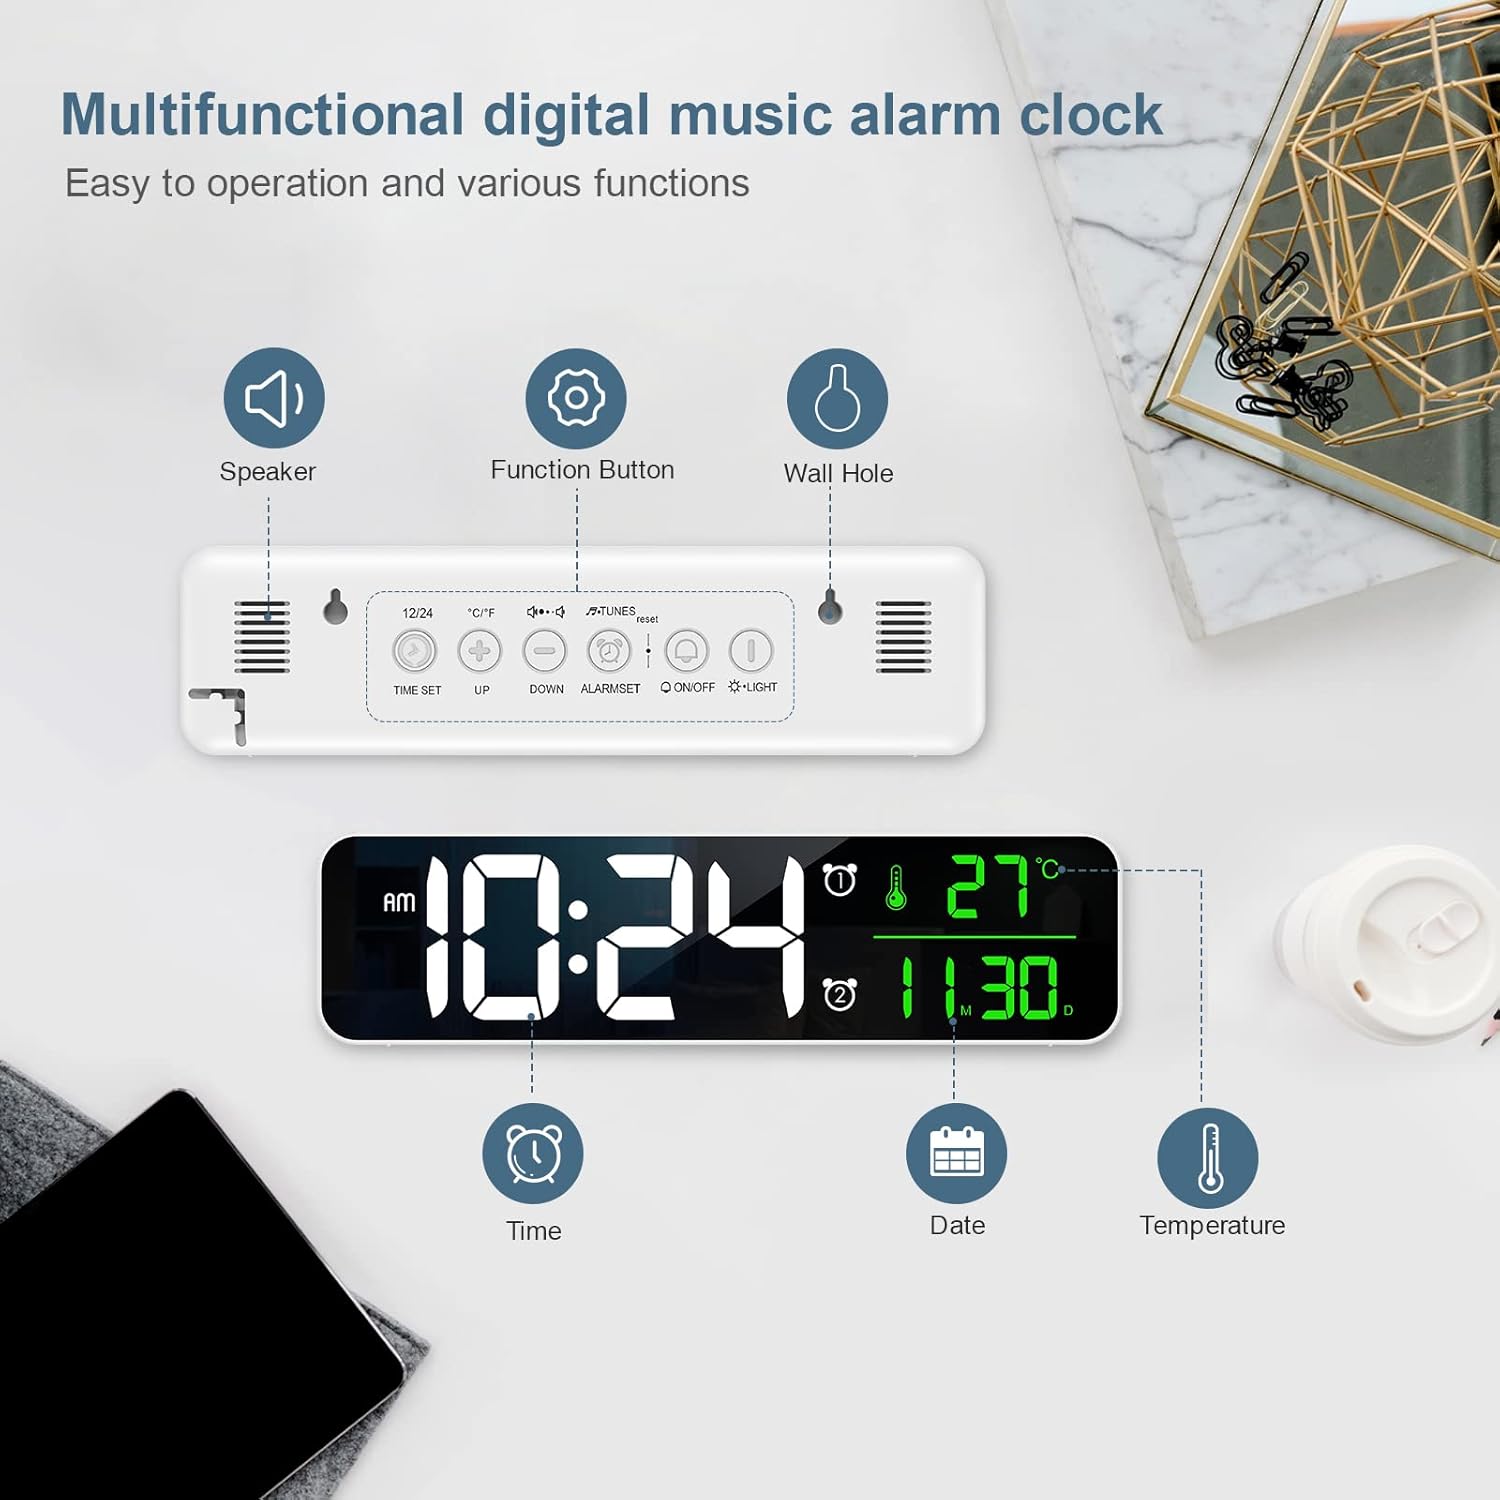
Image: Diagram showing the back panel with speaker, function buttons, and wall hole, along with display elements for time, date, and temperature.
Controls and Display Elements:
- LED Display: Shows time, date, and temperature.
- Speaker: For alarm sounds.
- Function Buttons: (e.g., TIME SET, UP, DOWN, ALARM SET, ON/OFF, LIGHT) located on the back for various settings.
- Wall Hole: For wall mounting.
Setup
Powering On:
- Connect the provided USB cable to the clock's power input port.
- Plug the other end of the USB cable into a compatible USB power adapter (not included) or a powered USB port.
- The display will light up, indicating the clock is powered on.
Placement Options:
The clock can be placed on a flat surface or mounted on a wall.

Image: Demonstrates the clock being wall-mounted and placed on a table.
- Tabletop Placement: Simply place the clock on any stable, flat surface.
- Wall Mounting: Use the integrated wall hole on the back of the clock to hang it securely on a wall hook or screw (not included).
Operating Instructions
Setting Time and Date:
- Press the TIME SET button to enter time setting mode.
- Use the UP and DOWN buttons to adjust the hour.
- Press TIME SET again to move to minute setting, then adjust with UP/DOWN.
- Continue pressing TIME SET to cycle through year, month, and day settings, adjusting each with UP/DOWN.
- Press TIME SET one last time to exit setting mode.
- To switch between 12-hour and 24-hour format, press the 12/24 button (if available, otherwise it might be part of time setting).
Setting Alarms (Dual Alarms):
The clock supports two independent alarms.

Image: The clock display showing two alarm settings and volume levels.
- Press the ALARM SET button to select Alarm 1 or Alarm 2.
- Once an alarm is selected, press ALARM SET again to enter alarm time setting.
- Use UP and DOWN buttons to adjust the alarm hour and minute.
- Press ALARM SET to confirm and move to the next setting (e.g., alarm sound, snooze duration).
- To activate/deactivate an alarm, press the ON/OFF button associated with the alarm (or cycle through modes with ALARM SET until ON/OFF option appears).
- When the alarm sounds, press any button (except snooze/light) to stop it, or press the snooze/light button for snooze function.
Adjusting Brightness:
The clock features 5 levels of brightness adjustment.
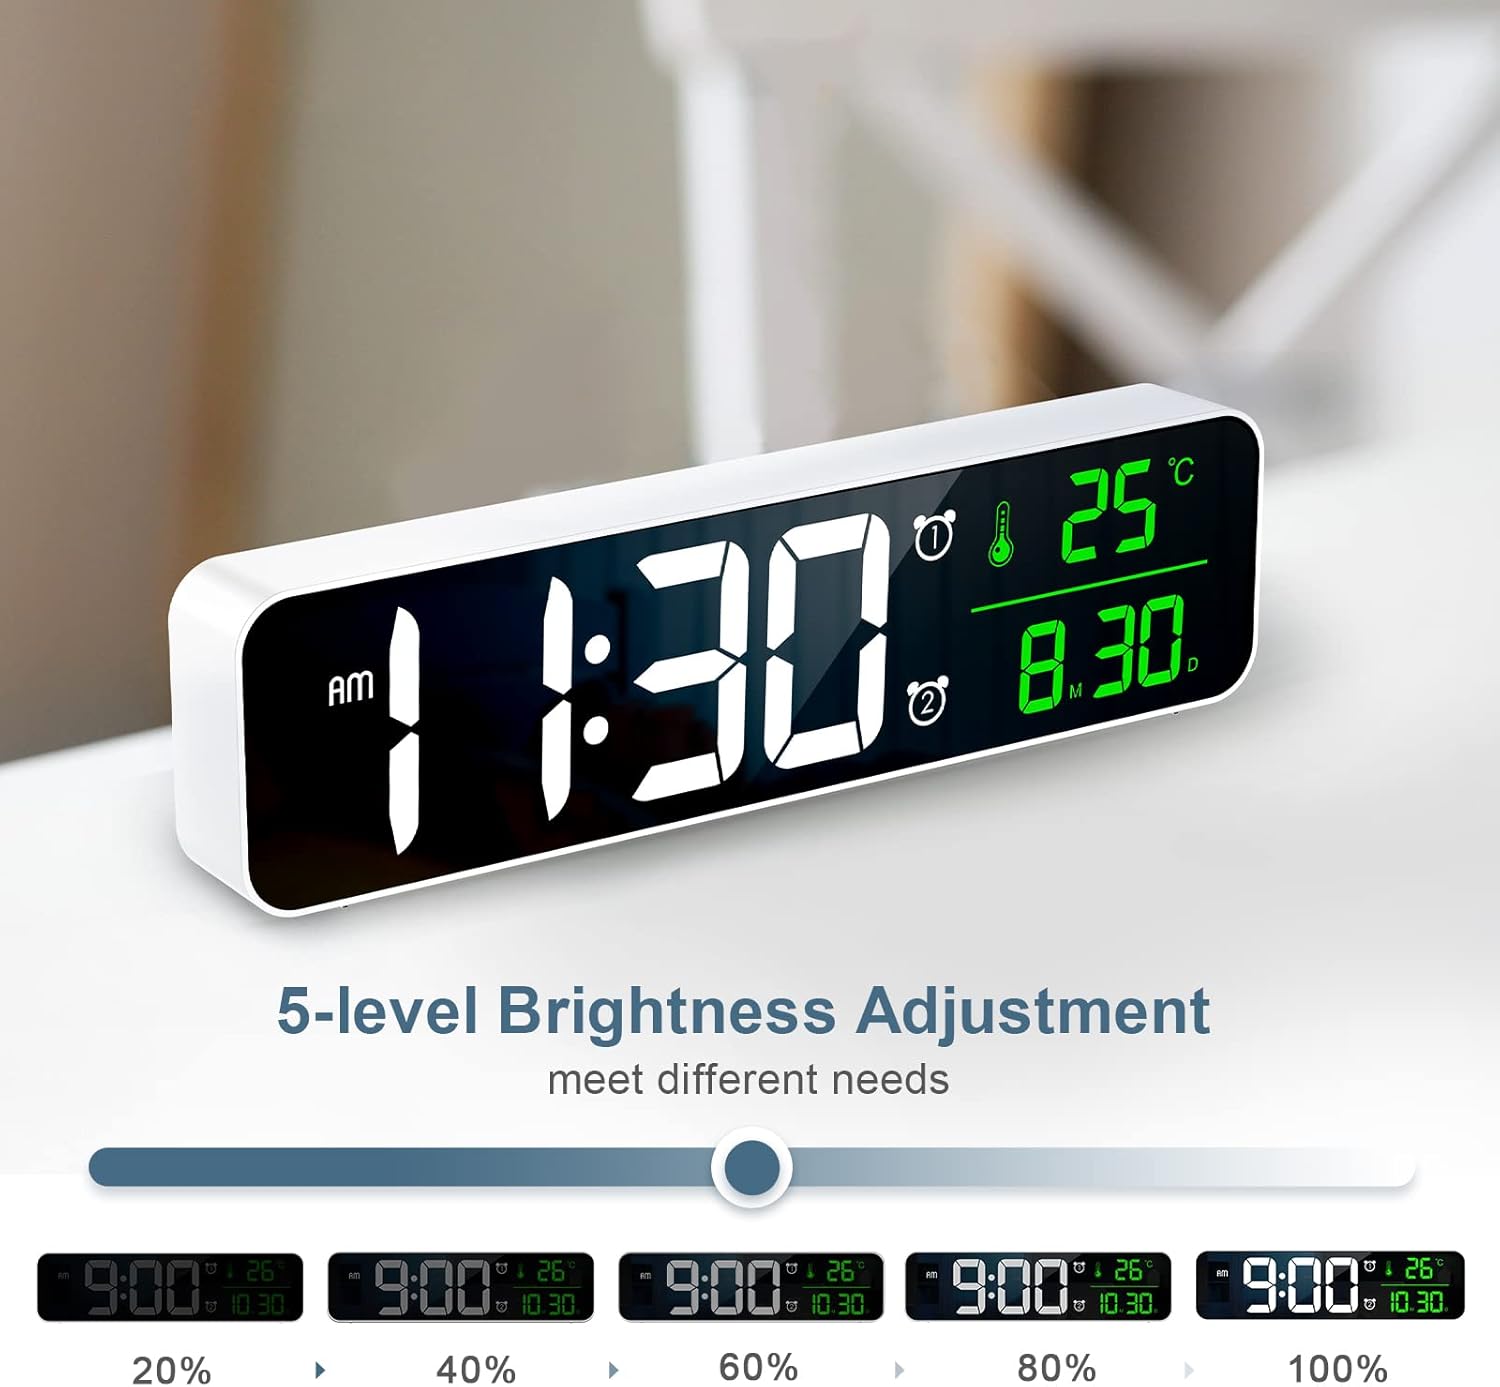
Image: Visual representation of the clock display at different brightness levels (20% to 100%).
- Press the LIGHT button (or a dedicated brightness button) to cycle through the 5 brightness levels.
- Select the desired brightness for optimal visibility in different lighting conditions.
Temperature Display:
The clock displays the ambient temperature. To switch between Celsius and Fahrenheit:
- Press the °C/°F button (if available) or a combination of buttons as indicated on the device (e.g., long press UP button).
Maintenance
- Cleaning: Wipe the clock with a soft, dry cloth. Do not use abrasive cleaners or solvents.
- Storage: If storing for an extended period, disconnect the power cable and store in a cool, dry place.
Troubleshooting
| Problem | Possible Cause | Solution |
|---|---|---|
| Clock does not turn on. | No power or loose connection. | Ensure the USB cable is securely connected and the power source is active. Try a different USB port or adapter. |
| Display is too dim/bright. | Brightness setting is incorrect. | Press the LIGHT button to adjust brightness levels. |
| Alarm does not sound. | Alarm is not activated or volume is too low. | Check if the alarm is set and activated. Ensure alarm volume is not muted or set to minimum. |
| Incorrect time/date. | Time/date not set correctly. | Follow the "Setting Time and Date" instructions to reset. |
Specifications
- Model: WA123W
- Display Type: LED Digital
- Screen Size: Approximately 10.5 inches (26.7 cm)
- Dimensions (L x W x H): 5 x 3.81 x 10 cm
- Weight: 320 g
- Material: Acrylonitrile Butadiene Styrene (ABS)
- Power Source: USB Powered
- Features: Calendar Display, Alarm, Charging Port

Image: The clock displaying time, temperature, and date, with dimensions indicated as 10.4 inches wide and 2.8 inches high.
Warranty and Support
Ankilo products are designed for reliability and performance. For warranty information or technical support, please refer to the contact details provided with your purchase or visit the official Ankilo website.
For further assistance, please contact customer service.
