
Beldray BEL01609
Beldray BEL01609 Titanium 2 In 1 Cordless Steam Iron User Manual
Model: BEL01609
Important Safety Instructions
Please read all instructions carefully before using your Beldray BEL01609 Titanium 2 In 1 Cordless Steam Iron. Retain this manual for future reference.
- Always ensure the iron is unplugged from the mains supply before filling or emptying the water tank, and before cleaning.
- Do not immerse the iron, charging base, or power cord in water or any other liquid.
- Keep the iron and its cord out of reach of children when it is switched on or cooling down.
- Never leave the iron unattended when it is connected to the mains supply.
- Use the iron only for its intended household purpose, which is ironing garments.
- Do not operate the iron if it has been dropped, if there are visible signs of damage, or if it is leaking.
- Always place the iron on a stable, heat-resistant surface, especially when returning it to the charging base.
- Exercise caution when handling hot surfaces and steam. Steam can cause burns.
Product Overview
The Beldray BEL01609 Titanium 2 In 1 Cordless Steam Iron offers versatile ironing with its corded and cordless functionality. It features a ceramic soleplate for smooth gliding and a 360° charging base for convenience.
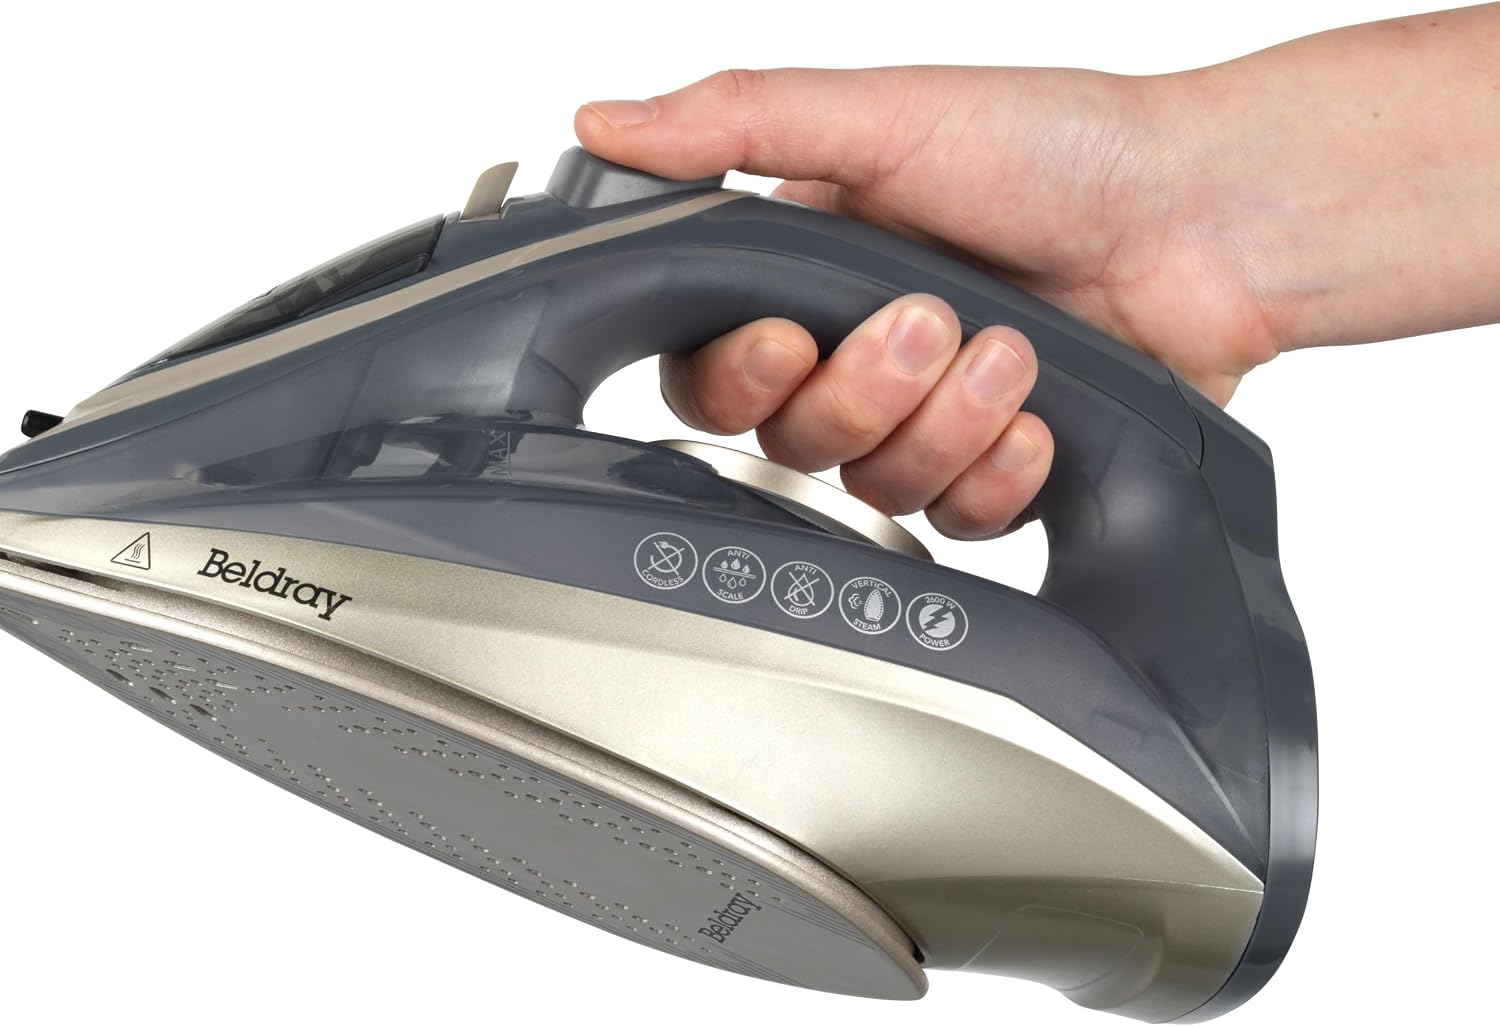
The Beldray Titanium 2 In 1 Cordless Steam Iron, showcasing its sleek design and ergonomic handle.

The iron positioned on its 360-degree charging base, highlighting its dual functionality for corded or cordless use.
Key Components:
- Ceramic Soleplate: Provides effortless gliding over various fabrics.
- Water Tank (230ml): Transparent tank for easy monitoring of water level.
- Temperature Control Dial: Adjusts heat settings for different fabric types.
- Steam Button: Activates continuous steam.
- Steam Shot Button: Delivers a powerful burst of steam (140g/min).
- Water Spray Button: Mists water onto stubborn creases.
- Self-Clean Function: Helps remove mineral build-up.
- Anti-Calc Function: Reduces limescale accumulation for prolonged iron life.
- 360° Charging Base: Allows the iron to be placed in any direction for cordless use and quick reheating.
Setup
Unpacking:
- Carefully remove the iron and all accessories from the packaging.
- Remove any protective films or stickers from the soleplate and body of the iron.
- Inspect the iron for any signs of damage. Do not use if damaged.
First Use Preparation:
Before first use, it is recommended to iron an old piece of fabric to ensure any manufacturing residues are removed.
- Fill the water tank (see Operating Instructions).
- Set the temperature to maximum.
- Allow the iron to heat up fully.
- Use the steam shot and spray functions several times on an old cloth.
Corded or Cordless Setup:
The iron can be used either directly connected to the mains or cordlessly by utilizing the charging base.
- Corded Use: Connect the power cord directly to the iron's rear socket until it clicks into place. Plug the other end into a suitable mains outlet.
- Cordless Use: Place the charging base on a stable, heat-resistant surface. Plug the charging base into a suitable mains outlet. The iron will heat up when placed on the base.
Operating Instructions
Filling the Water Tank:
- Ensure the iron is unplugged from the mains supply.
- Open the water tank filler cap.
- Using a measuring cup, carefully pour clean tap water into the tank up to the 'MAX' fill line. Do not overfill.
- Close the filler cap securely.

Illustration showing the process of filling the 230ml water tank of the iron.
Temperature Settings:
Turn the temperature control dial to select the appropriate heat setting for your fabric. Always check the garment's care label. Start with lower temperatures for delicate fabrics and increase for heavier materials.
| Setting | Fabric Type |
|---|---|
| Low | Synthetics, Silk |
| Medium | Wool |
| High | Cotton, Linen |
Steam Functions:
- Continuous Steam: Once the iron reaches the desired temperature (usually indicated by a light), press the steam button to activate continuous steam.
- Steam Shot (140g/min): For stubborn creases, press the steam shot button. Wait a few seconds between shots to allow the iron to reheat and produce optimal steam.
- Water Spray: Press the water spray button to mist water onto dry or heavily creased areas before ironing.

A person using the Beldray iron to smooth out clothes on an ironing board.
Using Cordless Mode:
When using the iron in cordless mode, place it on the 360° charging base between passes. The iron will quickly reheat to maintain the set temperature. The LED lights on the base indicate charging status.

A close-up view of the iron securely seated on its charging base, showing the connection point.
Maintenance and Care
Emptying the Water Tank:
After each use, ensure the iron is unplugged and cool. Open the filler cap and invert the iron over a sink to drain any remaining water. This prevents limescale build-up and water stagnation.
Self-Cleaning Function:
To maintain optimal performance and prevent mineral build-up, use the self-cleaning function regularly (e.g., once a month or as needed).
- Fill the water tank to the 'MAX' line.
- Set the temperature to maximum and allow the iron to heat up fully.
- Hold the iron horizontally over a sink.
- Press and hold the self-clean button (refer to diagram in product overview for location). Hot water and steam will be expelled from the soleplate, flushing out impurities.
- Continue until the water tank is empty.
- Allow the iron to cool completely before storing.
Cleaning the Soleplate:
- For light marks, wipe the cool soleplate with a damp cloth and a mild, non-abrasive cleaner.
- Do not use abrasive scouring pads or harsh chemicals, as these can damage the ceramic coating.
- If starch or synthetic fibers have melted onto the soleplate, clean it while the iron is still warm (but unplugged) using a non-abrasive cloth.
Storage:
Always store the iron upright on its charging base or heel rest, with the water tank empty and the cord neatly wrapped (if applicable). Store in a cool, dry place away from direct sunlight.
Troubleshooting
| Problem | Possible Cause | Solution |
|---|---|---|
| Iron not heating up. | Not plugged in; power outlet fault; temperature dial set to 'OFF' or too low. | Check power connection; try a different outlet; turn temperature dial to desired setting. |
| No steam or insufficient steam. | Water tank empty; temperature too low for steam; steam vents blocked. | Fill water tank; increase temperature setting; perform self-clean to clear vents. |
| Water leaking/dribbling from soleplate. | Temperature too low for steam; water tank overfilled; filler cap not closed properly. | Ensure iron is at steam-ready temperature; do not overfill; close filler cap securely. |
| Iron not charging in cordless mode. | Charging base not plugged in; iron not correctly seated on base. | Check base power connection; ensure iron is firmly placed on the 360° base. |
| Soleplate sticking or leaving marks. | Residue on soleplate; incorrect temperature for fabric. | Clean soleplate (see Maintenance); adjust temperature according to fabric type. |
Specifications
| Feature | Detail |
|---|---|
| Model Number | BEL01609 |
| Brand | Beldray |
| Type | 2 In 1 Cordless Steam Iron |
| Power | 2600 W |
| Water Tank Capacity | 230 ml |
| Steam Shot | 140 g/min |
| Soleplate Material | Ceramic |
| Product Dimensions | 30.4 x 14.6 x 15.5 cm |
| Weight | 1.41 kg |
| Special Features | Cordless, LED Display, Steam Control, Anti-Calc, Self-Cleaning |
Warranty and Support
This Beldray product comes with a free one-year manufacturer guarantee. To be eligible for a 2-year extended cover, please register your product online within 30 days of purchase. Keep your proof of purchase for warranty claims.
For technical support, troubleshooting beyond this manual, or warranty inquiries, please contact Beldray customer service. Refer to the product packaging or the official Beldray website for the most up-to-date contact information.
Note: The warranty may be voided if the product is not used according to the instructions in this manual or if unauthorized repairs are attempted.
Related documentsBEL01609


Ask a question about this manual
Ask about setup, troubleshooting, compatibility, parts, safety, or missing instructions. Manuals+ will review the question and use this page’s manual context to help answer it.