1. Introduction
Thank you for choosing the Claiks Electric Standing Desk. This manual provides detailed instructions for the assembly, operation, maintenance, and troubleshooting of your new adjustable height desk. Please read this manual thoroughly before assembly and use to ensure safe and efficient operation.

Figure 1: Claiks Electric Standing Desk (Nature Top, White Frame)
2. Important Safety Information
Please observe the following safety guidelines to prevent injury or damage to the product:
- Use responsibly.
- Do not exceed the maximum weight limit of 176 pounds (80 kg).
- Ensure the desk is stable on a level surface before use.
- Follow all assembly instructions carefully.
- Keep children and pets away from the desk during operation.
- Avoid placing liquids directly on the control panel or motor components.
3. Package Contents
Verify that all components are present before beginning assembly. If any parts are missing or damaged, please contact customer support.

Figure 2: Claiks Standing Desk Parts List
The package includes:
- Desktop sections (40x24 inches, Nature finish)
- Electric lifting columns (White frame)
- Desk feet
- Control panel with display
- Motor and power adapter
- Transmission rod
- Side plates and crossbar
- Headphone hook
- Cable clips
- Adjustable feet (x4)
- Assembly hardware (screws, Allen wrench)
- Installation manual
4. Setup and Assembly
The Claiks Electric Standing Desk is designed for easy assembly. A detailed installation manual is included in your package. Please refer to it for step-by-step visual guidance.
4.1 Assembly Overview
Assembly typically involves connecting the lifting columns to the feet, attaching the crossbar, securing the desktop sections, and installing the control panel and accessories.

Figure 3: Desk Dimensions and Key Features
4.2 Desktop Assembly (for Splice Board Models)
For models with a splice board, ensure correct orientation of the desktop sections. The main desktop piece connects to the side pieces. Use the provided screws to securely fasten them together.
4.3 Frame Assembly
Connect the lifting columns to the feet using the designated screws. Then, attach the crossbar between the two lifting columns. Ensure all screws are tightened for stability.
4.4 Transmission Rod Installation
The transmission rod connects the two lifting columns to ensure synchronized movement. Insert the rod into the hexagonal nut on the left leg's hole position. Adjust the rod to the appropriate length and angle, then insert it into the slot of the right leg motor. Ensure it is fully inserted and aligned. If the left leg is unable to synchronize lift, it may be due to incorrect alignment or insufficient insertion of the transmission rod.
Video 1: Correcting Misalignment between Desktop Holes and Table Leg
Video 2: Fixing Asynchronous Elevation of Left Leg (Non-Motor Side)
4.5 Attaching the Desktop to the Frame
Carefully place the assembled desktop onto the frame, aligning the pre-drilled holes. Use the provided screws to secure the desktop to the frame. Ensure the side plates are installed with the outer side connected to the table leg for proper alignment.
4.6 Control Panel and Accessories
Attach the multi-function intelligent keypad to the underside of the desk using the small screws. Connect the motor cable and power cable to the control panel. Install the headphone hook and cable clips as desired for cable management.

Figure 4: Multi-Function Intelligent Keypad
5. Operating Instructions
Your Claiks Electric Standing Desk features an intuitive control panel for easy height adjustment.
5.1 Adjusting Height
- Use the Up (^) and Down (v) arrow buttons to manually adjust the desk height. The height range is from 28.3 inches to 46.5 inches.
- The digital display will show the current height in inches.
5.2 Using Memory Presets
The control panel has three preset buttons (1, 2, 3) to save and recall your preferred heights.
- To Save a Preset: Adjust the desk to your desired height using the Up/Down arrows. Press and hold one of the preset buttons (1, 2, or 3) until the display flashes or beeps, indicating the height has been saved.
- To Recall a Preset: Simply press the corresponding preset button (1, 2, or 3). The desk will automatically move to the saved height.

Figure 5: Sleek Touch Design and Ergonomic Workspace
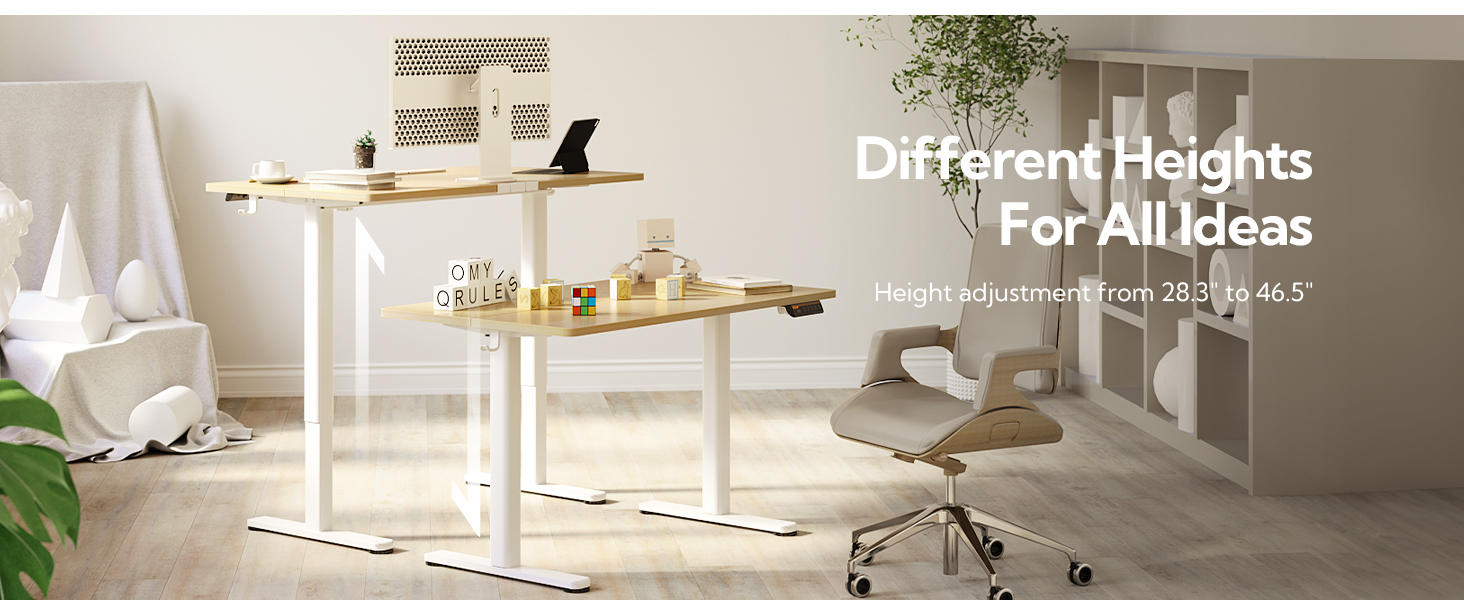
Figure 6: Electric Height Adjustable Functionality
6. Maintenance
To ensure the longevity and optimal performance of your Claiks Electric Standing Desk, follow these maintenance tips:
- Regularly check all screws and connections to ensure they are tight.
- Clean the desktop surface with a soft, damp cloth. Avoid harsh chemicals.
- Keep the motor and electrical components free from dust and moisture.
- Do not overload the desk beyond its 176-pound weight capacity.
7. Troubleshooting
If you encounter any issues with your desk, please refer to the following common troubleshooting solutions:
7.1 Control Panel Display Shows "rES"
If the control panel displays "rES" and none of the buttons are working, the desk needs to be reset.
- To Reset: Press and hold the Down (v) button for 8 seconds until the display shows "28.3", then release the button. Once reset, the up and down buttons on the control panel can adjust the height normally.
Video 3: Step-by-Step: Resolving rES Mode on Desk Control Panels
7.2 Asynchronous Leg Movement
If one leg (non-motor side) is not moving synchronously with the other, it may indicate an issue with the transmission rod installation.
- Solution: Refer to section 4.4 on Transmission Rod Installation. Ensure the rod is correctly aligned with the internal threads of the hex nut and fully inserted into the slot of the right leg motor.
8. Specifications
| Feature | Specification |
|---|---|
| Brand | Claiks |
| Model Number | P1.01.001 |
| Product Dimensions | 24"D x 40"W x 28"H |
| Color | Nature (Top), White (Frame) |
| Minimum Height | 28.3 Inches |
| Maximum Height | 46.5 Inches |
| Maximum Weight Recommendation | 176 Pounds (80 kg) |
| Base Material | Alloy Steel |
| Top Material Type | Metal (with Wood Stain/White finish) |
| Special Features | Adjustable Height, Electric, Ergonomic, Home Office |
| Assembly Required | Yes |
9. Warranty and Support
9.1 Warranty Information
The Claiks Electric Standing Desk comes with a Limited Warranty. Some customers have reported a 2-year warranty period. For specific details regarding your warranty coverage, please refer to the warranty card included in your package or contact Claiks customer support directly.
9.2 Customer Support
If you have any questions, require assistance with assembly, or need troubleshooting support, please visit the Claiks Store on Amazon or contact Claiks customer service through the platform where you purchased the product.


