
GIGABYTE B650M K
Contents
GIGABYTE B650M K Motherboard User Manual
Comprehensive guide for installation, operation, and maintenance.
1. Introduction
The GIGABYTE B650M K motherboard is designed to support AMD Ryzen 7000 Series Processors, offering unparalleled performance for modern computing needs. This motherboard features a robust power design, advanced thermal solutions, and versatile connectivity options to optimize your system's performance.
Key Features:
- AMD AM5 Socket: Supports AMD Ryzen 7000 Series Processors.
- DDR5 Compatible: 4*SMD DIMMs with AMD EXPO & Intel XMP Memory Module Support.
- Sturdy Power Design: Direct 8+2+1 Phases Digital VRM Solution.
- Advanced Thermal Design & M.2 Thermal Guard: Ensures VRM Power Stability & M.2 SSD Performance.
- Stable Connectivity: 2*PCIe 4.0 x4 M.2, USB 3.2 Gen 2 Type-C.
- Fast Networking: 2.5GbE LAN.
- Fine Tuning Features: RGB FUSION 2.0, Supports Addressable LED & RGB LED Strips, Smart Fan 6, Q-Flash Plus Update BIOS without installing, CPU, Memory, and GPU.
2. Setup and Installation
Proper installation is crucial for optimal performance. Follow these guidelines for setting up your GIGABYTE B650M K motherboard.
2.1 Motherboard Overview
Familiarize yourself with the layout of the GIGABYTE B650M K motherboard. This image provides a top-down view of the board, highlighting key components such as the CPU socket, DIMM slots, and M.2 slots.

Figure 1: Top-down view of the GIGABYTE B650M K motherboard, showing the CPU socket, RAM slots, and various headers.
2.2 Component Installation
The B650M K features an innovative easy latch design for simplified component installation. Ensure all components are securely seated.
- CPU Installation: Carefully align your AMD Ryzen 7000 Series Processor with the AM5 socket and gently lower it into place. Secure the retention arm.
- Memory Installation: Insert DDR5 memory modules into the 4 SMD DIMM slots. Ensure they click into place.
- Storage Installation: Utilize the 2 PCIe 4.0 x4 M.2 slots for high-speed NVMe SSDs. The M.2 Thermal Guard helps maintain optimal performance.
- Graphics Card Installation: Install your graphics card into the primary PCIe 4.0 slot.
For detailed step-by-step instructions, refer to the official User Manual (PDF) provided by GIGABYTE.
A side view of the motherboard, showcasing the various ports and connectors on the rear I/O panel.
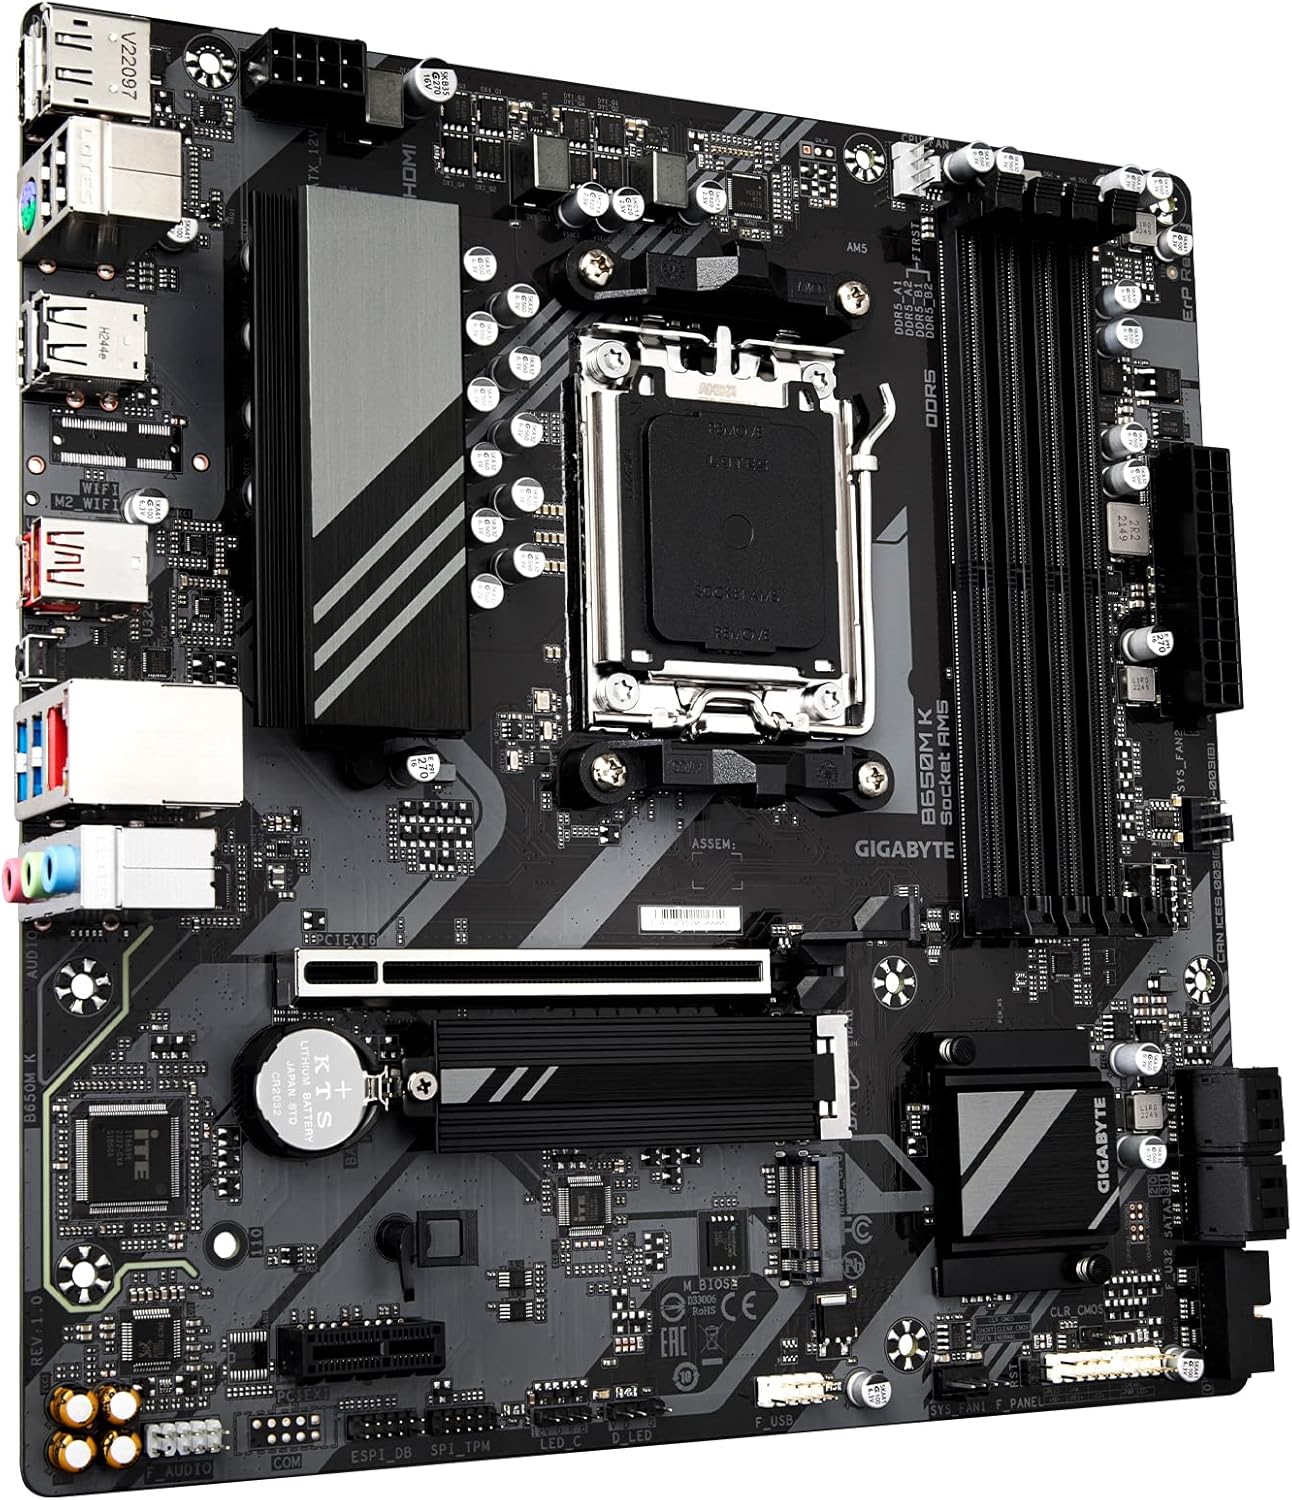
Figure 2: Side view of the GIGABYTE B650M K motherboard, highlighting the rear I/O ports.
3. Operating Your Motherboard
The GIGABYTE B650M K motherboard offers a range of features to enhance your computing experience.
3.1 Connectivity
Experience stable and fast connections with the integrated 2.5GbE LAN for wired networking and USB 3.2 Gen 2 Type-C for high-speed data transfer.
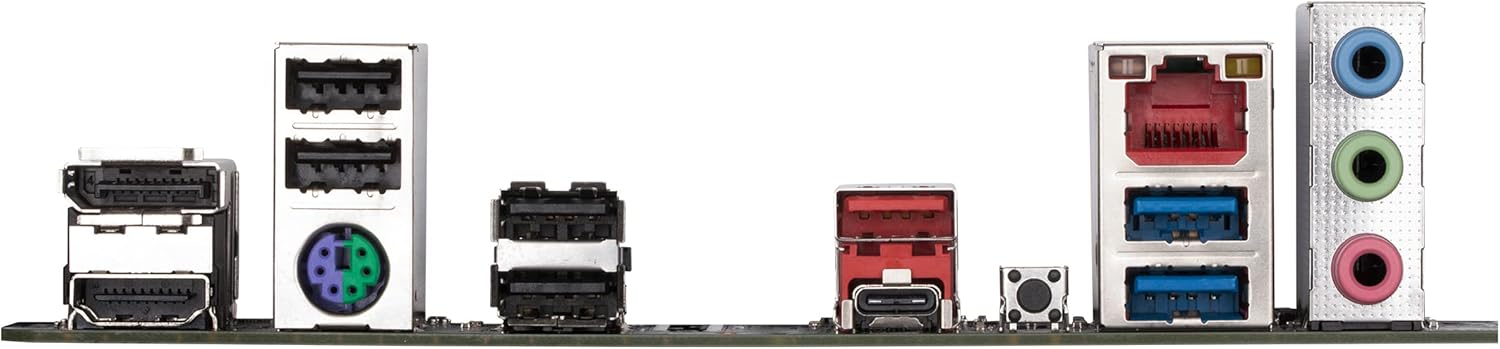
Figure 3: Close-up of the rear I/O panel, showing various USB ports, LAN, and audio jacks.
3.2 Fine Tuning and Customization
Utilize GIGABYTE's fine-tuning features for personalized control:
- RGB FUSION 2.0: Customize lighting effects with support for Addressable LED & RGB LED Strips.
- Smart Fan 6: Advanced fan control for optimal cooling and noise reduction.
- Q-Flash Plus: Update your BIOS without installing the CPU, memory, or graphics card, simplifying the update process.
Watch this official product overview video for a visual guide on the GIGABYTE B650M K motherboard's features.
Video 1: Official Product Overview of the GIGABYTE B650M K Motherboard.
4. Maintenance
Regular maintenance ensures the longevity and stable performance of your motherboard.
- Thermal Management: The Advanced Thermal Design and M.2 Thermal Guard are built to ensure VRM power stability and M.2 SSD performance. Regularly check for dust accumulation on heatsinks and fans and clean as necessary to maintain optimal cooling.
- BIOS Updates: Keep your BIOS updated to the latest version using Q-Flash Plus for improved compatibility and performance.
- Physical Inspection: Periodically inspect all connections and components for any signs of wear or damage.
5. Troubleshooting
If you encounter issues with your GIGABYTE B650M K motherboard, consider the following steps:
- No Power/No Boot:
- Ensure all power cables (24-pin ATX, 8-pin CPU) are securely connected.
- Verify that the CPU, memory, and graphics card are correctly installed.
- Try booting with only one memory stick installed.
- BIOS/UEFI Issues:
- Use the Q-Flash Plus feature to update or re-flash the BIOS if you suspect corruption or compatibility issues.
- Clear CMOS settings by removing the CMOS battery for a few minutes or using the designated jumper.
- Connectivity Problems:
- For LAN issues, ensure the Ethernet cable is properly connected and drivers are installed.
- For USB device issues, try different USB ports or update chipset drivers.
For more in-depth troubleshooting, consult the comprehensive User Manual (PDF) or contact GIGABYTE technical support.
6. Specifications
| Feature | Detail |
|---|---|
| Brand | GIGABYTE |
| Model Name | B650M K |
| CPU Socket | Socket AM5 |
| Compatible Processors | AMD Ryzen 7000, AMD Ryzen 8000 Series |
| RAM Memory Technology | DDR5 |
| Memory DIMMs | 4*SMD DIMMs |
| Chipset Type | AMD B650 |
| Storage Interface | 2*PCIe 4.0 x4 M.2 |
| LAN | 2.5GbE LAN |
| USB Connectivity | USB 3.2 Gen 2 Type-C |
| Product Dimensions | 10.43 x 10.43 x 2.12 inches |
| Item Weight | 1 pounds |
7. Warranty and Support
The GIGABYTE B650M K motherboard comes with a 5-Year Warranty, ensuring long-term reliability and peace of mind.
For further assistance, technical support, or to download the latest drivers and utilities, please refer to the official GIGABYTE website or the provided documentation:
Ask a question about this manual
Ask about setup, troubleshooting, compatibility, parts, safety, or missing instructions. Manuals+ will review the question and use this page’s manual context to help answer it.