
1. Introduction
Thank you for choosing the ErgoFocus Dual Monitor Wall Mount. This product is designed to enhance your workspace by providing an ergonomic and space-saving solution for mounting two computer screens. Featuring full-motion gas spring arms, it allows for flexible adjustment of monitor height, tilt, swivel, and rotation, optimizing your viewing experience and promoting a comfortable posture. This manual provides detailed instructions for safe installation, operation, and maintenance of your new monitor mount.
2. Important Safety Information
Please read all instructions carefully before installation and use. Failure to follow these instructions may result in property damage, serious injury, or death. If you do not understand these instructions, or have doubts about the safety of the installation, please contact customer support.
- Weight Capacity: Do not exceed the maximum weight capacity of 19.8 lbs (9 kg) per arm. Ensure your monitors' combined weight is within this limit.
- Screen Size: Compatible with monitors from 13 to 32 inches.
- VESA Compatibility: Supports VESA patterns 75x75mm and 100x100mm. Verify your monitor's VESA pattern before installation.
- Wall Type: This mount is designed for installation on wood studs, concrete walls, or brick walls. DO NOT install into drywall alone. Always ensure the mounting surface can safely support the combined weight of the mount and monitors.
- Gas Spring Tension: The gas spring arms are under high tension. Exercise caution when releasing the shipping ties and adjusting the tension. Adjust tension before mounting monitors to prevent unexpected movement.
- Professional Installation: If you are unsure about your ability to safely install this product, seek assistance from a qualified professional.
3. Package Contents
Verify that all components are present and undamaged. If any parts are missing or damaged, please contact ErgoFocus customer service.
- Dual Monitor Wall Mount Assembly
- Wall Plate
- VESA Plates (2x)
- Mounting Hardware Kit (screws, anchors, washers, spacers)
- Cable Management Clips
- Instruction Manual
- Hex Keys for Adjustment
4. Product Specifications
| Feature | Specification |
|---|---|
| Brand | ErgoFocus |
| Model | B0BYZ5S5L7 |
| Screen Size Compatibility | 13 to 32 inches |
| Weight Capacity per Arm | Up to 19.8 lbs (9 kg) |
| VESA Compatibility | 75x75mm, 100x100mm |
| Movement Type | Articulating, Swivel, Tilt, Rotation |
| Tilt Range | +90° to -90° |
| Swivel Range | 180° (at wall plate), ±135° (at arm joint), ±90° (at VESA plate) |
| Rotation | 360° |
| Maximum Extension | 20.4 inches |
| Material | Metal |
| Color | Black |
5. Installation Guide
5.1 Pre-Installation Checklist
- Tools Required: Pencil, drill, stud finder, level, Phillips head screwdriver, socket wrench (recommended for lag bolts).
- Wall Type: Confirm your wall type (wood stud, concrete, or brick) and ensure it can support the mount and monitors.
- Location: Determine the optimal mounting location, considering viewing angles, desk space, and stud availability.
5.2 Step-by-Step Installation
- Locate Wall Studs: Use a stud finder to locate the center of a wood stud. For concrete or brick walls, mark your desired drilling points. Use the provided paper template to mark pilot hole locations accurately.
- Mount the Wall Plate: Drill pilot holes at the marked locations. Secure the wall plate to the wall using the provided lag bolts. Ensure the plate is level before fully tightening. For concrete/brick, use appropriate anchors.
- Attach VESA Plates to Monitors: Carefully attach the VESA plates to the back of your monitors using the appropriate screws and spacers from the hardware kit. Ensure a secure fit.
- Adjust Gas Spring Tension (Crucial Step): Before mounting monitors, adjust the gas spring tension. The arms are under strong pressure. Use the included hex key to turn the adjustment screw on each arm. Turn counter-clockwise to reduce tension (for lighter monitors) or clockwise to increase tension (for heavier monitors). It is recommended to set the tension to its minimum before mounting monitors, then adjust upwards as needed.
- Mount Monitors to Arms: Carefully lift each monitor and slide its VESA plate onto the corresponding arm's mounting head. Ensure it clicks securely into place.
- Cable Management: Route monitor cables through the integrated cable management channels on the arms to maintain a tidy workspace.

Image: Wall compatibility options for secure installation. Do not mount on drywall alone.

Image: The ErgoFocus Dual Monitor Wall Mount fully assembled, illustrating its design.
6. Operating and Adjusting Your Monitor Mount
The ErgoFocus Dual Monitor Wall Mount offers extensive adjustability to achieve your ideal ergonomic setup.
6.1 Height Adjustment
The gas spring arms allow for smooth vertical height adjustment. Gently push or pull your monitor to the desired height. If the monitor drifts up or down, adjust the gas spring tension as described in Section 5.2, Step 4.

Image: Diagram showing the height adjustment capability of the monitor arm.
6.2 Tilt Adjustment
You can tilt your monitors +90° upwards and -90° downwards to reduce glare and optimize viewing angles. Loosen the tilt screw on the VESA plate, adjust the monitor, and then re-tighten the screw.
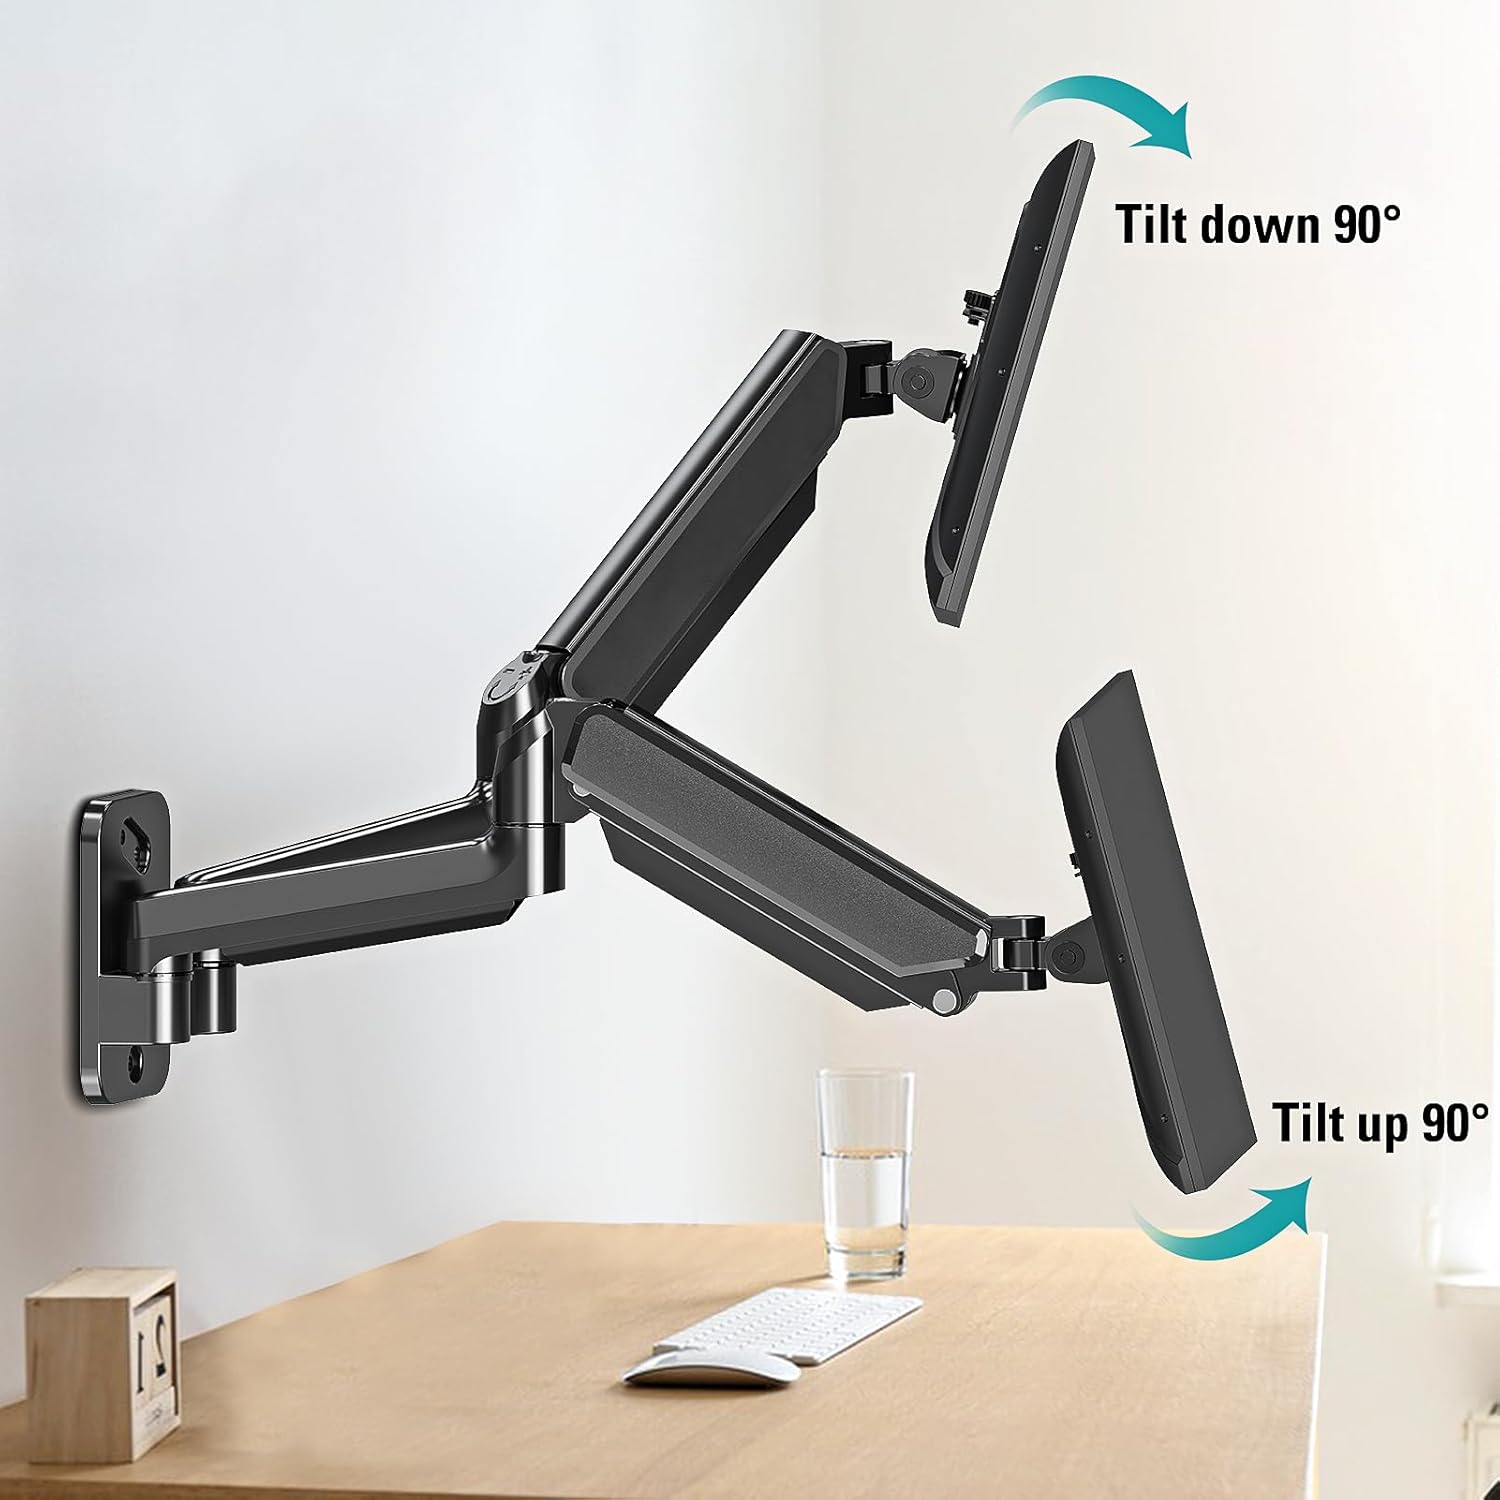
Image: Illustration of the monitor tilt adjustment range, from 90 degrees down to 90 degrees up.
6.3 Swivel Adjustment
The arms offer multiple swivel points: 180° at the wall plate, ±135° at the arm joint, and ±90° at the VESA plate. This allows for flexible positioning of your monitors to share your screen or adjust for different tasks.

Image: Demonstrating the swivel range and maximum extension of the monitor arms.
6.4 Rotation Adjustment
Rotate your monitors 360° from landscape to portrait orientation without removing them from the mount. Simply grasp the monitor edges and turn to the desired orientation.

Image: Illustration of 360-degree monitor rotation for landscape or portrait viewing.
7. Maintenance
To ensure the longevity and optimal performance of your ErgoFocus Dual Monitor Wall Mount, follow these simple maintenance guidelines:
- Regular Cleaning: Wipe down the mount with a soft, damp cloth to remove dust and dirt. Avoid using abrasive cleaners or solvents.
- Check Connections: Periodically inspect all screws and bolts to ensure they remain tight and secure. Re-tighten if necessary.
- Gas Spring Adjustment: If your monitors feel too loose or too stiff, re-adjust the gas spring tension as needed (refer to Section 5.2, Step 4).
8. Troubleshooting
If you encounter any issues with your monitor mount, refer to the following common problems and solutions:
- Monitor drifts up or down / Does not stay in position:
This indicates incorrect gas spring tension. Adjust the gas spring tension using the provided hex key. Turn clockwise to increase tension for heavier monitors, or counter-clockwise to decrease tension for lighter monitors. Ensure this adjustment is made without monitors attached initially, then fine-tune with monitors in place. - Monitor is difficult to move or adjust:
The gas spring tension might be too high for your monitor's weight. Decrease the gas spring tension by turning the adjustment screw counter-clockwise. Also, check if any pivot points are overly tightened and loosen slightly if necessary. - Mount feels unstable or wobbly:
Ensure all mounting bolts securing the wall plate to the wall are fully tightened. Verify that the wall type is appropriate for the installation and that the mount is secured to a stud or using proper anchors for concrete/brick. Re-check VESA plate screws on the monitors. - Monitors are not level:
Check the level of the wall plate during installation. Some VESA plates may have a slight leveling adjustment. If not, minor adjustments can sometimes be made by slightly loosening and re-tightening the VESA plate screws while holding the monitor level.
If these solutions do not resolve your issue, please contact ErgoFocus customer support for further assistance.
9. Warranty and Customer Support
ErgoFocus is committed to providing high-quality products. For warranty information or technical support, please refer to the contact details provided with your purchase or visit the official ErgoFocus website. Our customer service team is available to assist you with any questions or concerns regarding your dual monitor wall mount.
For further assistance, please visit: ErgoFocus Store on Amazon