
1. Introduction
Thank you for choosing the PERLESMITH Rolling TV Stand. This mobile TV cart is designed to provide a versatile and portable viewing solution for your flat or curved screen television. With its robust construction, adjustable features, and integrated cable management, it offers convenience and flexibility for various settings, including homes, offices, and commercial spaces.
This manual provides detailed instructions for assembly, operation, maintenance, and troubleshooting to ensure safe and optimal use of your TV stand. Please read all instructions carefully before beginning assembly and retain this manual for future reference.
2. Safety Information
WARNING: Failure to read and follow all instructions may result in personal injury or property damage. If you have any questions, please contact customer support.
- Do not exceed the maximum load capacity of 55 lbs (25 kg).
- Ensure your TV's VESA pattern is within the supported range: 100x100mm to 400x400mm.
- This stand is designed for TVs between 23 and 60 inches.
- Always ensure the stand is on a stable, level surface.
- Lock the wheels when the stand is in a stationary position to prevent accidental movement.
- Keep children and pets away from the stand during assembly and operation.
- Do not allow children to climb on or play with the TV stand.
- Use only the parts provided by the manufacturer. Substitution of parts may result in instability and injury.
3. Package Contents
Please verify that all components are present and undamaged before beginning assembly. Refer to the assembly diagrams in the following section for a visual representation of all parts.
4. Assembly Instructions
Follow these steps carefully to assemble your PERLESMITH Rolling TV Stand. It is recommended to have a second person assist with mounting the TV.
- Assemble the Base:
Attach the four legs to the central base column. Ensure all connections are secure. Install the four locking casters (wheels) into the ends of the base legs. Press down on the locking mechanism of each wheel to secure the stand in place once assembled.

Figure 4.1: Stable X-Shaped Base with Wheels
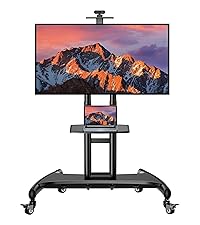
Figure 4.2: Detail of the X-shaped base for stability
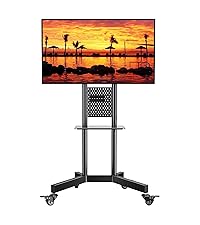
Figure 4.3: Detail of the 360-degree locking casters
- Attach the Main Column:
Secure the main vertical column to the assembled base. Ensure it is firmly attached and upright.
- Install the AV Shelf:
Attach the sturdy media shelf to the main column at your desired height. The shelf is designed to hold laptops, DVD players, gaming devices, or other accessories. The distance from the floor to the AV shelf can be adjusted from 12" to 24".

Figure 4.4: AV Shelf for accessories
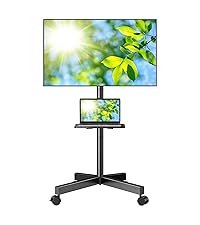
Figure 4.5: Detail of the AV shelf surface
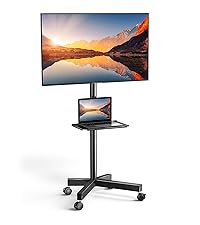
Figure 4.6: Detail of the shelf mounting bracket
- Attach TV Brackets to TV:
Carefully place your TV face down on a soft, clean surface. Attach the TV mounting brackets to the back of your television using the appropriate screws and spacers provided. Ensure the brackets are centered and securely fastened to match your TV's VESA pattern.

Figure 4.7: VESA Compatibility Diagram (100x100mm - 400x400mm)
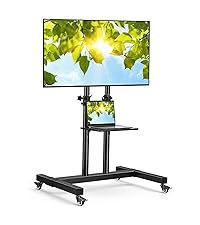
Figure 4.8: Detailed VESA compatibility chart
- Mount TV to Stand:
With assistance, carefully lift the TV and hook the attached brackets onto the mounting plate on the main column of the stand. Secure the TV to the stand using the safety screws or locking mechanisms provided.

Figure 4.9: Fully assembled TV stand with TV and laptop on shelf
- Cable Management:
Utilize the built-in wire management solution within the metal column to organize and conceal cables. This helps maintain a clean and tidy appearance and prevents tripping hazards.

Figure 4.10: Illustration of integrated cable management
5. Operating Instructions
- Adjusting TV Height:
The wall mount plate can be adjusted along the main column to customize your viewing experience. Loosen the securing bolts, adjust the TV to the desired height, and then firmly tighten the bolts to secure the TV in its new position.

Figure 5.1: TV height adjustment mechanism
- Moving the Stand:
To move the TV stand, unlock all four casters by flipping their locking mechanisms upwards. Gently push or pull the stand to its new location. Once positioned, press down on the locking mechanisms of all four wheels to secure the stand and prevent unintended movement.

Figure 5.2: Stand being moved, showing smooth rolling wheels
- Using the AV Shelf:
The integrated AV shelf provides a convenient surface for media devices. Ensure devices placed on the shelf do not exceed its weight capacity and are positioned securely to prevent falling during movement.
- Low-Profile Design:
The stand features a low-profile design, allowing the rear wheels to fit close to a wall, minimizing the space required when positioned against a flat surface.

Figure 5.3: Stand positioned against a wall, showcasing low-profile design
6. Maintenance
- Regularly check all screws and connections to ensure they remain tight and secure.
- Clean the stand with a soft, damp cloth. Avoid using abrasive cleaners or solvents.
- Inspect the wheels periodically for any debris or damage that might hinder smooth movement.
7. Troubleshooting
- Stand is not stable: Ensure all screws are tightened. Verify that the TV's weight and VESA pattern are within the stand's specifications. Make sure the stand is on a flat, level surface.
- Difficulty moving the stand: Check if the wheels are unlocked. Clean any debris from the casters.
- TV does not fit the stand: Confirm your TV's VESA pattern and weight are compatible with the stand's specifications (Max VESA 400x400mm, Max 55 lbs).
8. Specifications
| Feature | Specification |
|---|---|
| Model Number | PSTVMC04 |
| Compatible TV Sizes | 23 - 60 inches |
| Max Load Capacity | 55 lbs (25 kg) |
| VESA Compatibility | 100x100mm, 200x100mm, 200x200mm, 300x200mm, 300x300mm, 400x200mm, 400x300mm, 400x400mm |
| Material | Alloy Steel |
| Color | Deeep Black |
| Product Dimensions | 17.32 x 12.6 x 5.08 inches (packaged) |
| Item Weight | 14.43 pounds |
| AV Shelf Height Range | 12 - 24 inches from floor |
9. Warranty & Support
PERLESMITH products are designed for durability and performance. For any questions, missing parts, or technical assistance, please contact PERLESMITH customer support. Please have your model number (PSTVMC04) and purchase information ready when contacting support.
For the most up-to-date warranty information and support resources, please visit the official PERLESMITH website or refer to your product packaging.


