1. Introduction
This manual provides essential information for the safe and efficient operation of your HOLMES 16-inch Outdoor Misting Stand Fan. Please read these instructions thoroughly before assembly, installation, and use. Retain this manual for future reference.
2. Important Safety Instructions
When using electrical appliances, basic safety precautions should always be followed to reduce the risk of fire, electric shock, and injury to persons, including the following:
- Read all instructions before using this fan.
- This fan is designed for outdoor use only. Do not use indoors.
- Always connect to a Ground Fault Circuit Interrupter (GFCI) protected outlet. The fan is equipped with a GFCI plug for added safety.
- Do not operate any fan with a damaged cord or plug. Discard fan or return to an authorized service facility for examination and/or repair.
- Do not run cord under carpeting. Do not cover cord with throw rugs, runners, or similar coverings. Arrange cord away from traffic area and where it will not be tripped over.
- Do not insert or allow foreign objects to enter any ventilation or exhaust opening as this may cause an electric shock or fire, or damage the fan.
- To disconnect the fan, turn controls to the OFF position, then remove the plug from the outlet.
- Do not use the fan near a window or in direct sunlight where water could enter the motor housing.
- Ensure the fan is placed on a stable, level surface to prevent tipping.
- Do not immerse the fan in water or other liquids.
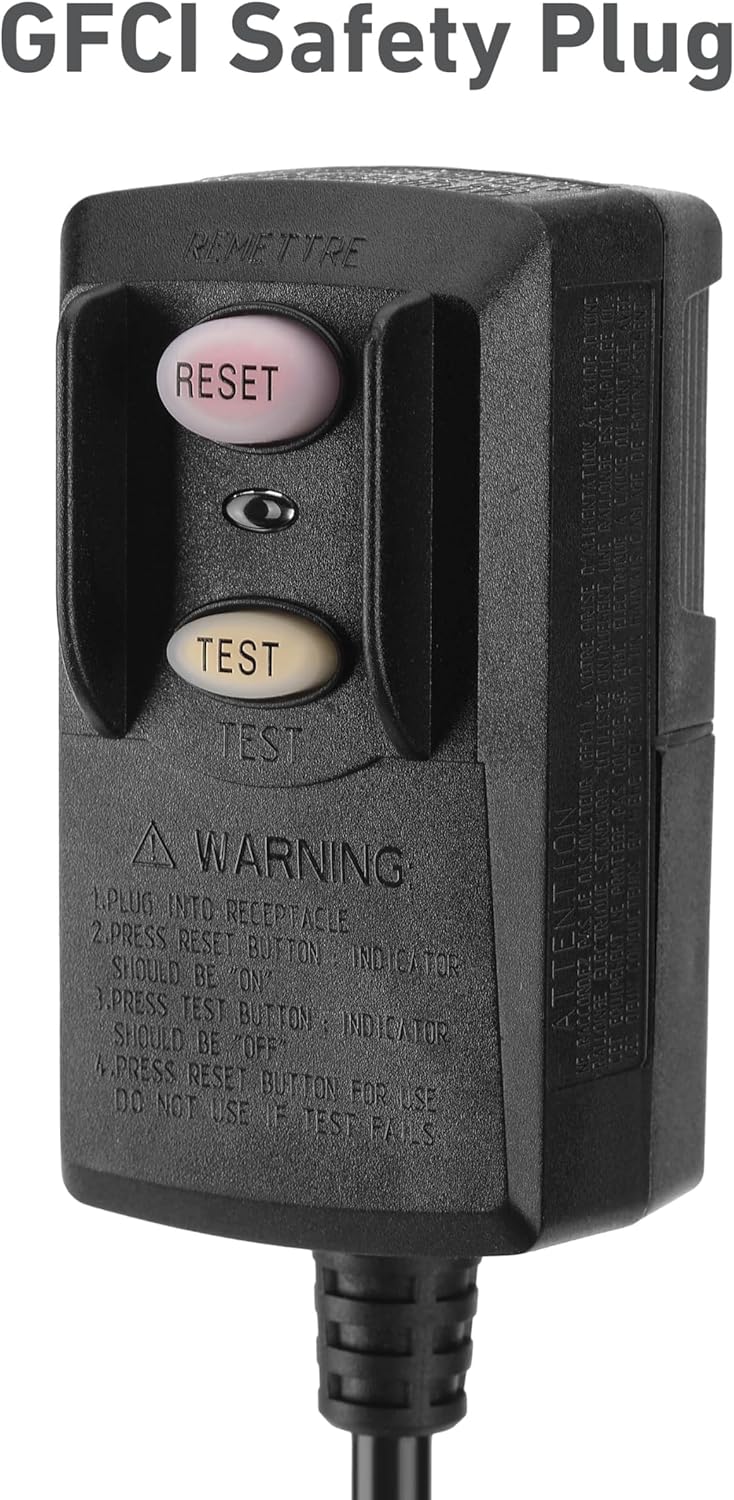
Figure 2.1: The GFCI safety plug. Always ensure this plug is functioning correctly before use by pressing the 'Test' and 'Reset' buttons as indicated on the plug.
3. Package Contents
Verify that all components are present in the package:
- 16-inch Outdoor Misting Fan Unit
- Fan Base
- Adjustable Stand Pole
- Hose Connector
- Hose Clips
- Instruction Manual
4. Assembly Instructions
Assembly is required. Follow these steps to assemble your misting stand fan:
- Attach the Stand Pole to the Base: Securely fasten the adjustable stand pole to the fan base. Ensure it is stable and tightened appropriately.
- Mount the Fan Head: Carefully attach the fan head unit to the top of the adjustable stand pole. Ensure all connections are firm.
- Connect the Hose: The fan is designed to connect directly to a standard garden hose. Attach the provided hose connector to your garden hose and then to the fan's water inlet.
- Manage the Cord and Hose: Use the included hose clips to secure the power cord and water hose along the stand pole, preventing entanglement and tripping hazards.
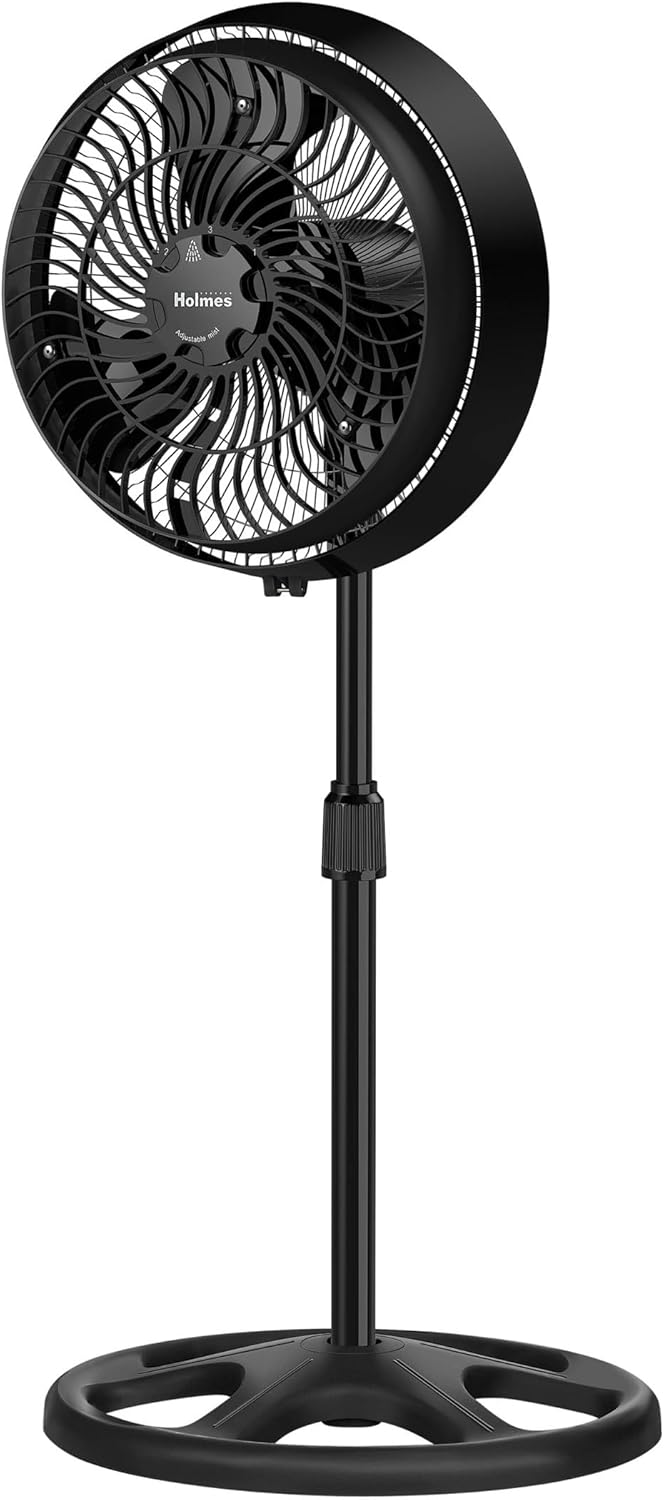
Figure 4.1: The HOLMES Misting Stand Fan fully assembled, showing the fan head, adjustable pole, and sturdy base.
5. Operating Instructions
Familiarize yourself with the fan's controls and features for optimal performance.
5.1. Power On/Off and Fan Speed Control
The fan features 3 customized speeds for airflow control.
- Plug the GFCI plug into a suitable outdoor electrical outlet.
- Locate the control knob on the fan head.
- Turn the knob to select your desired fan speed: Low, Medium, or High.
- To turn off the fan, turn the knob to the '0' position.
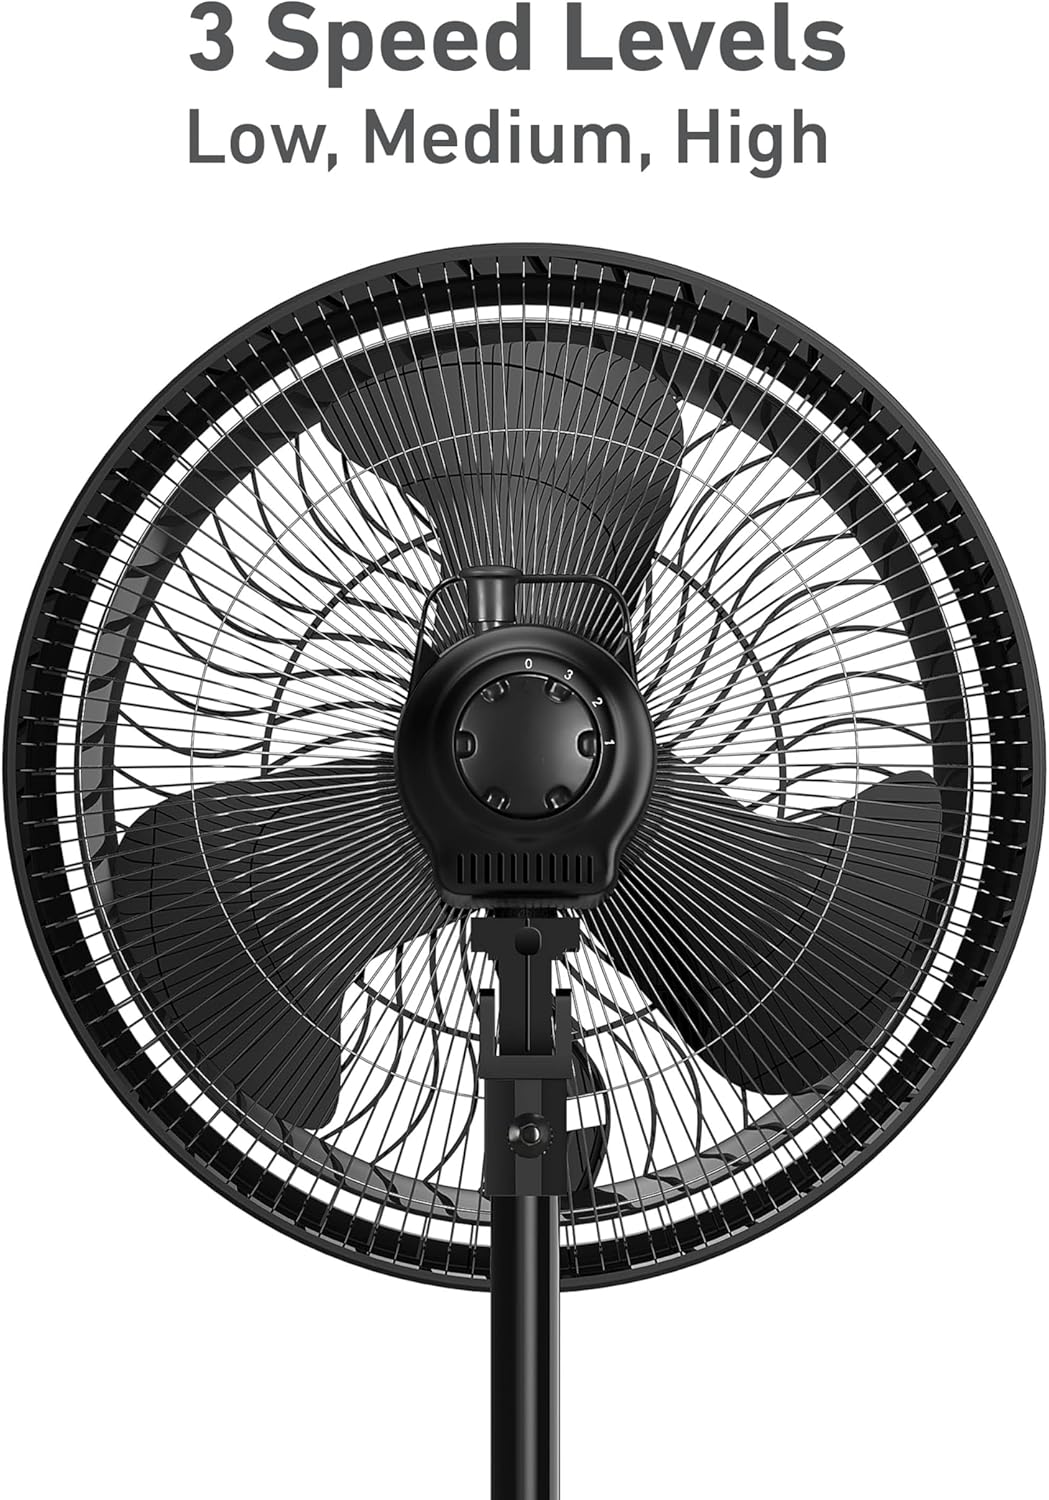
Figure 5.1: The fan control knob for selecting one of the three speed levels (Low, Medium, High).
5.2. Misting Function
The fan includes 3 micro-mist settings to add moisture to the air.
- Ensure the garden hose is connected and the water supply is turned on.
- Locate the mist control knob/switch on the fan head.
- Select one of the 3 micro-mist levels (1, 2, or 3) to adjust the intensity of the mist.
- To turn off the misting function, set the control to the '0' position.

Figure 5.2: Detail of the three micro-mist settings, allowing adjustment of mist intensity.
5.3. Oscillation
The fan features motorized 80° oscillation to cool larger areas.
- To activate oscillation, locate the oscillation button or switch, typically on the top or rear of the fan head.
- Press the button to start the fan head moving from side to side.
- Press the button again to stop oscillation at the desired direction.

Figure 5.3: The fan demonstrating its 80-degree wide-angle oscillation feature, distributing airflow across a broad area.
5.4. Adjusting Height and Tilt
The fan's height and head tilt are adjustable to direct airflow precisely.
- Height Adjustment: Loosen the height adjustment knob on the stand pole. Adjust the pole to your desired height (between 37" and 53"), then tighten the knob securely.
- Head Tilt: The fan head can be tilted up to 25°. Gently adjust the fan head vertically to direct the airflow as needed.
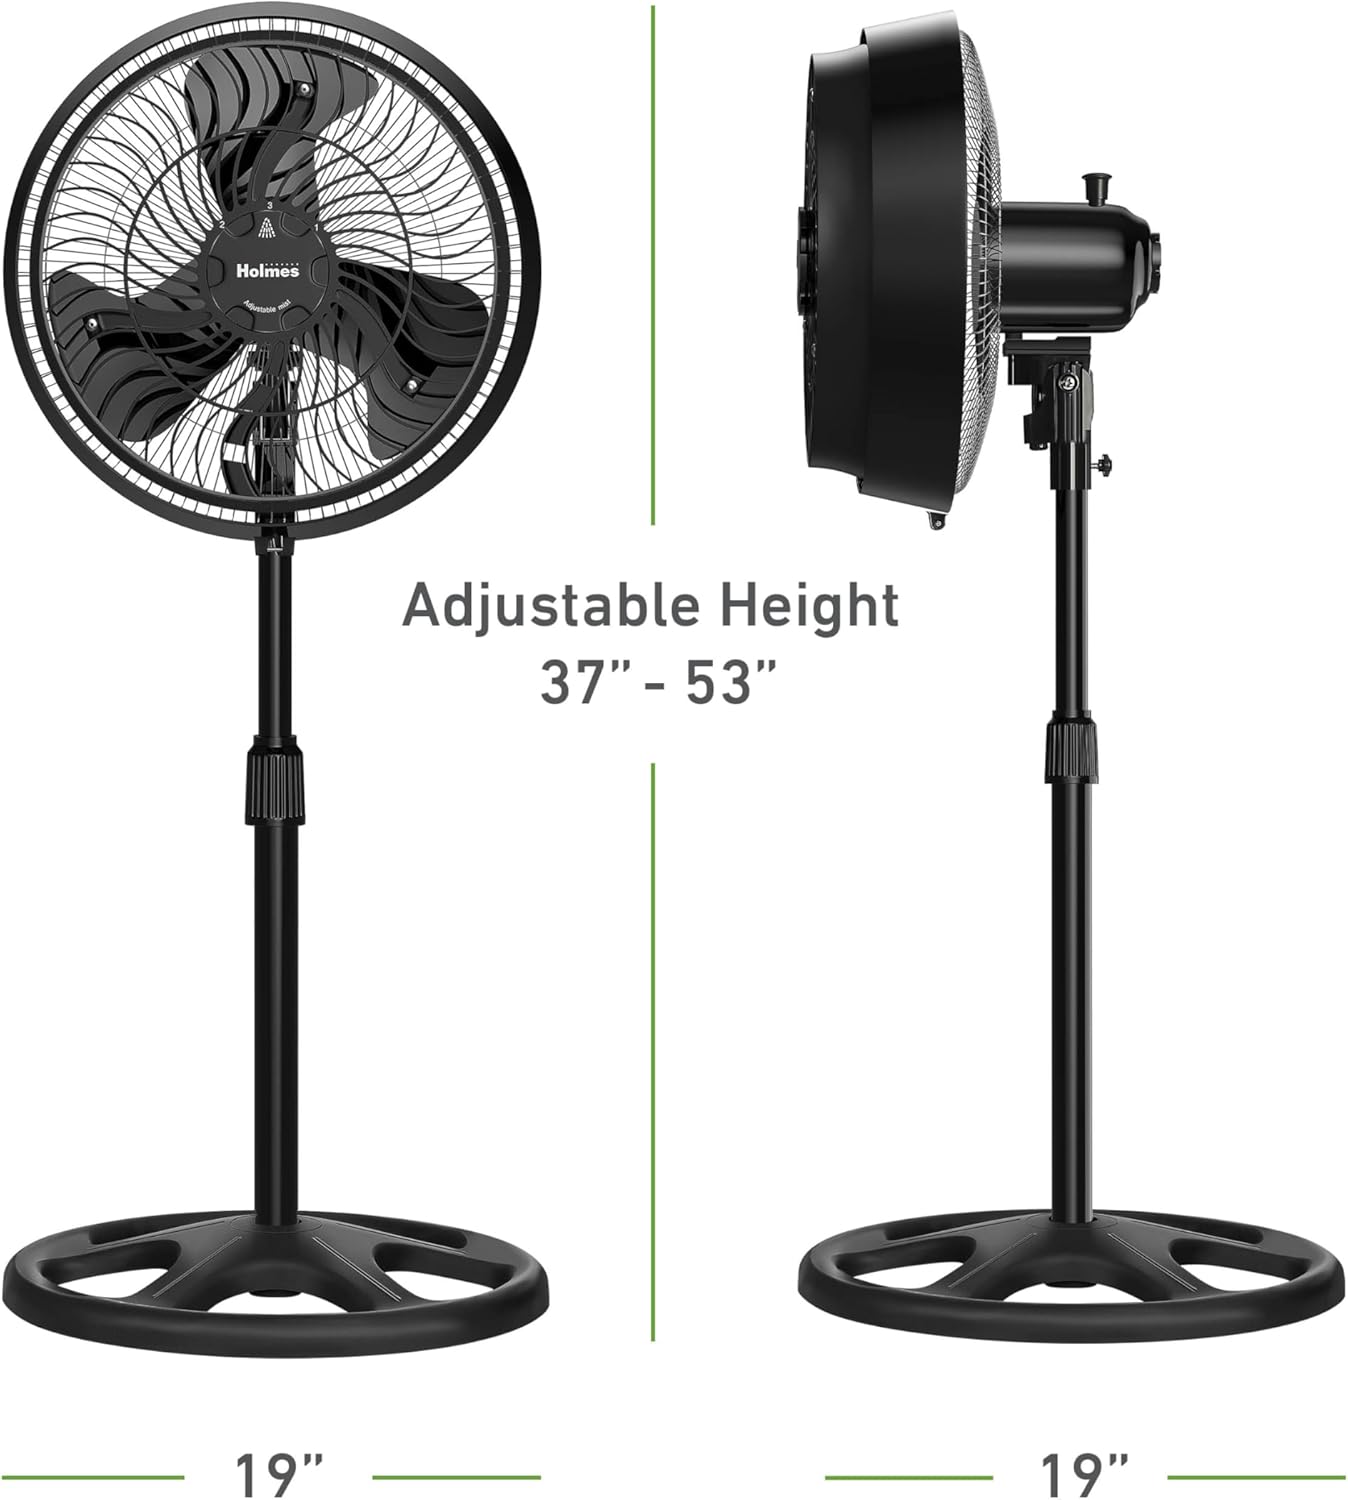
Figure 5.4: Illustration of the fan's adjustable height range, from 37 to 53 inches.
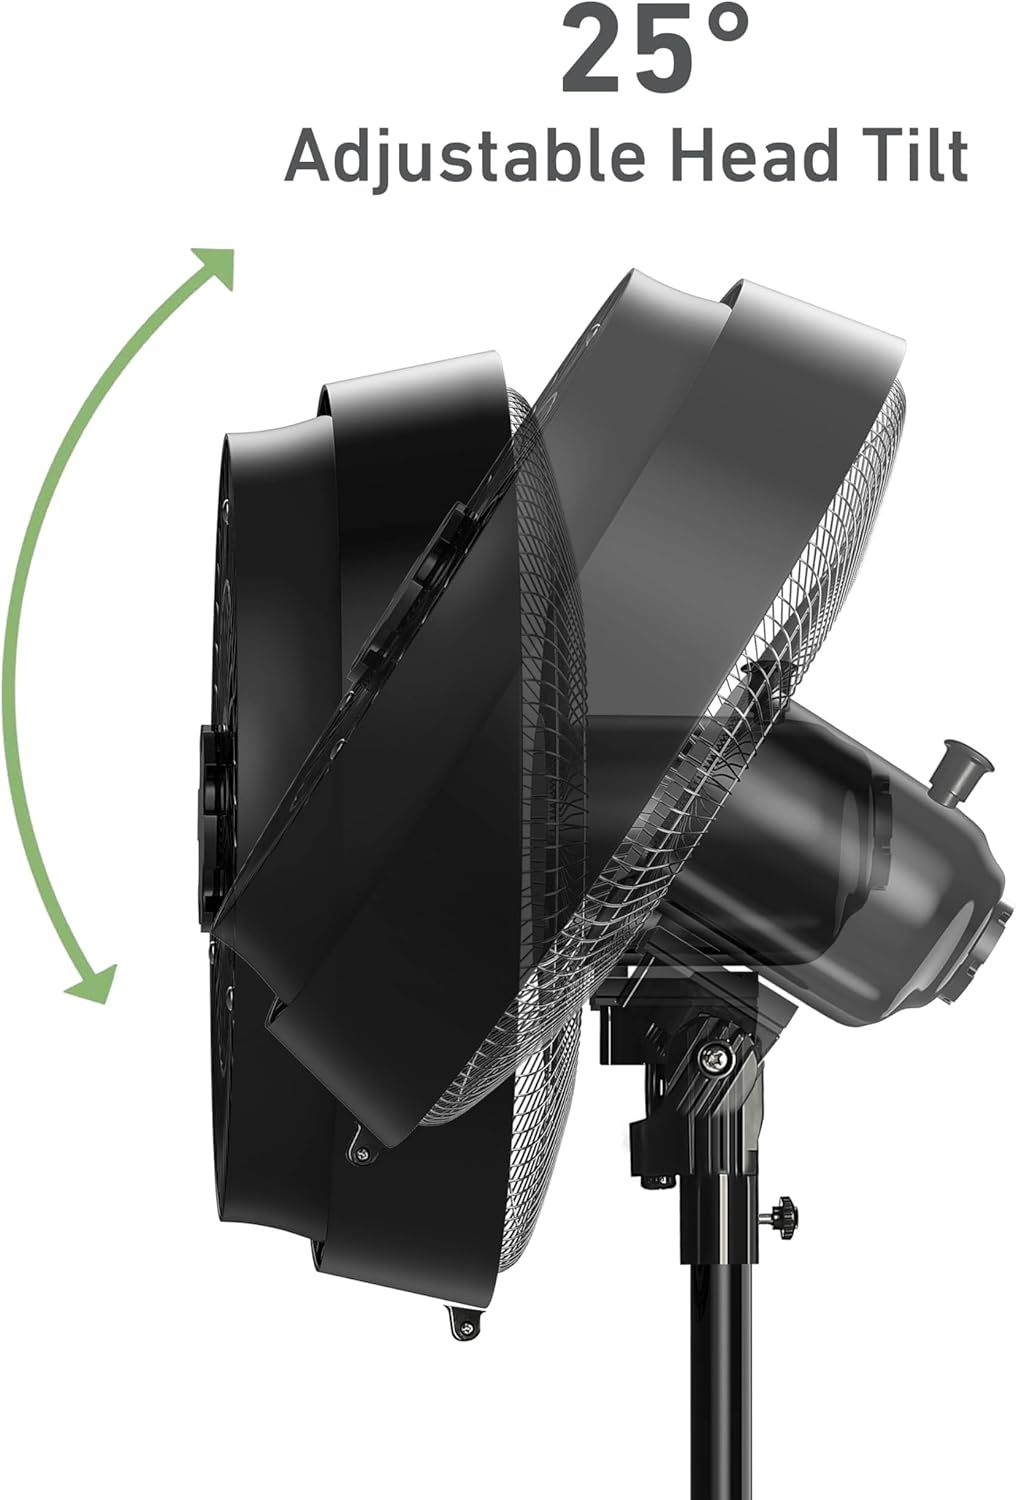
Figure 5.5: The fan head demonstrating its 25-degree adjustable tilt for precise airflow direction.
6. Maintenance
Regular maintenance ensures the longevity and efficient operation of your fan.
6.1. Cleaning
- Always unplug the fan from the electrical outlet and disconnect the water hose before cleaning.
- Wipe the exterior surfaces of the fan with a soft, damp cloth. Do not use abrasive cleaners or solvents.
- For stubborn dirt, a mild soap solution can be used, followed by wiping with a clean, damp cloth.
- Ensure no water enters the motor housing or electrical components.
- Periodically check the misting nozzles for mineral buildup. If clogged, gently clean with a small brush or pin.
6.2. Storage
- Before storing, ensure the fan is completely dry.
- Drain any remaining water from the hose and misting system.
- Store the fan in a cool, dry place, away from direct sunlight and extreme temperatures.
- It is recommended to cover the fan to protect it from dust and debris during storage.
7. Troubleshooting
If your fan is not operating as expected, refer to the following common issues and solutions:
| Problem | Possible Cause | Solution |
|---|---|---|
| Fan does not turn on. | No power supply. GFCI tripped. | Ensure the fan is securely plugged into a working outlet. Check if the GFCI plug has tripped and press the 'Reset' button. Check household circuit breaker. |
| Misting function is weak or absent. | Water supply off. Clogged nozzles. Low water pressure. | Ensure the garden hose is connected and the water supply is turned on. Clean the misting nozzles. Verify adequate water pressure from the hose. |
| Water leaks from misting connection. | Loose hose connection. Damaged O-ring/washer. | Tighten all hose connections. Check for and replace any damaged O-rings or washers in the hose connector. |
| Fan is noisy. | Loose parts. Fan not on a level surface. | Check for any loose screws or components and tighten them. Ensure the fan is placed on a stable, level surface. |
8. Specifications
| Feature | Detail |
|---|---|
| Brand | HOLMES |
| Model Name | HOLMES Outdoor Misting Fan |
| Item Model Number | 32510091 |
| Color | Black |
| Power Source | Corded Electric |
| Product Dimensions | 19.69"D x 19.69"W x 55.12"H |
| Item Weight | 12.74 Pounds |
| Room Type | Outdoor |
| Special Features | Adjustable Height, Adjustable Tilt, Misting, Oscillating |
| Recommended Uses | Air Circulation |
| Wattage | 50 watts |
| Voltage | 120.0 V |
| Blade Length | 16 Inches |
| Switch Type | Push Button |
| Included Components | 16" Outdoor Misting Fan, Hose Connector |
| Indoor/Outdoor Usage | Outdoor |
| Specification Met | ETL |
| Control Method | Touch |
| Number of Power Levels | 3 (Fan Speeds) |
| Assembly Required | Yes |
| Care Instructions | Wipe with damp cloth |
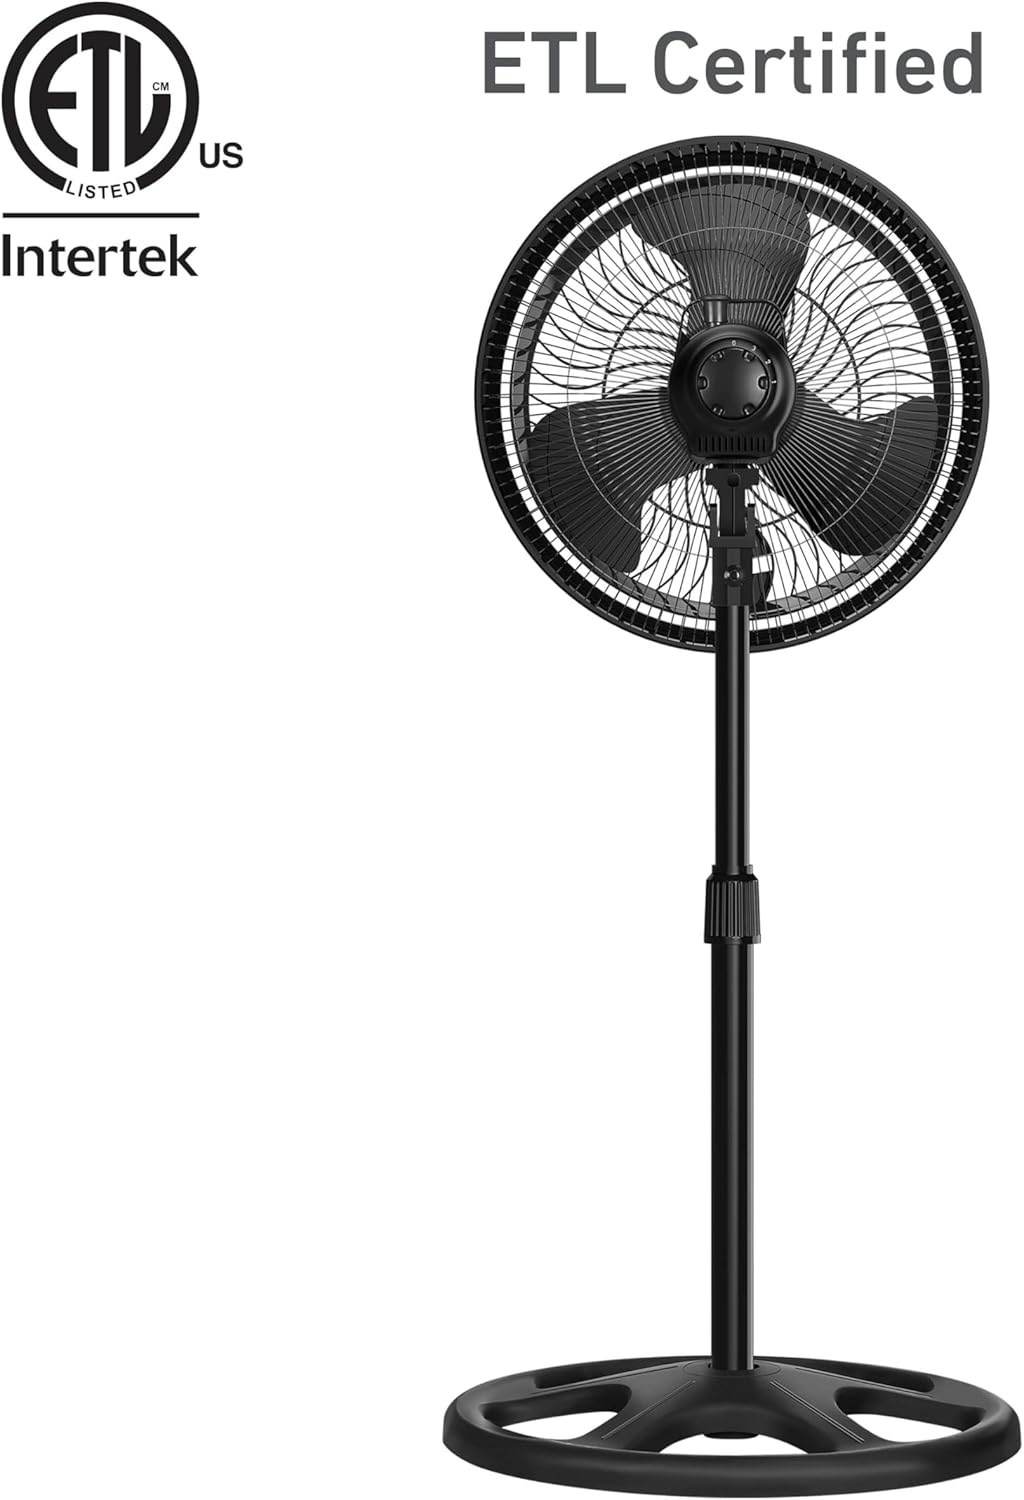
Figure 8.1: The ETL certification mark, indicating compliance with North American safety standards.
9. Warranty Information
This HOLMES 16-inch Outdoor Misting Stand Fan comes with a Limited 3-Year Warranty. For detailed terms and conditions, please refer to the warranty card included with your product or contact HOLMES customer support.
10. Customer Support
For technical assistance, replacement parts, or warranty inquiries, please contact HOLMES customer support. Refer to the product packaging or the official HOLMES website for current contact information.


