
Sttoraboks 68inch 4 panels+12 hooks
Contents
Sttoraboks Heavy Duty Garage Tool Storage Rack (68-inch, 4 Panels, 12 Hooks) Instruction Manual
Model: 68inch 4 panels+12 hooks | Brand: Sttoraboks
Introduction
This instruction manual provides detailed guidance for the installation, operation, and maintenance of your Sttoraboks Heavy Duty Garage Tool Storage Rack. Designed for efficient organization, this wall-mounted system helps keep your garage, workshop, or storage space clutter-free. Please read this manual thoroughly before installation and use to ensure proper setup and safe operation.
Key Features:
- Perfect Fit Design: The 17-inch total length of each slot board and 16-inch distance between outermost holes are engineered to align with standard 2"x4" stud spacing in American homes, ensuring stable mounting.
- Customizable Storage: Features 4 steel rails and 12 rubber-coated, removable double hooks, allowing flexible spacing adjustments to suit various tools and equipment.
- Heavy-Duty Construction: Manufactured from high-strength steel with a powder-coated finish, capable of supporting up to 600 lbs. This construction resists rusting, chipping, and cracking.
- Versatile Mounting: Includes different screw types and anchors for compatibility with various wall surfaces: wood, brick, and gypsum board.
- Convenient Access: Hooks are designed for easy tool storage and retrieval, helping to eliminate clutter and improve accessibility.
Product Overview
The Sttoraboks Garage Tool Storage Rack system consists of multiple steel rails and various hooks designed to hold a wide range of items. Below are the key components and their dimensions.

Figure 1: Detailed dimensions of the storage rack panels and various hook types included in the system. Each panel is 17 inches long, with 16 inches between the outermost holes. Maximum load per panel is 150 lbs.
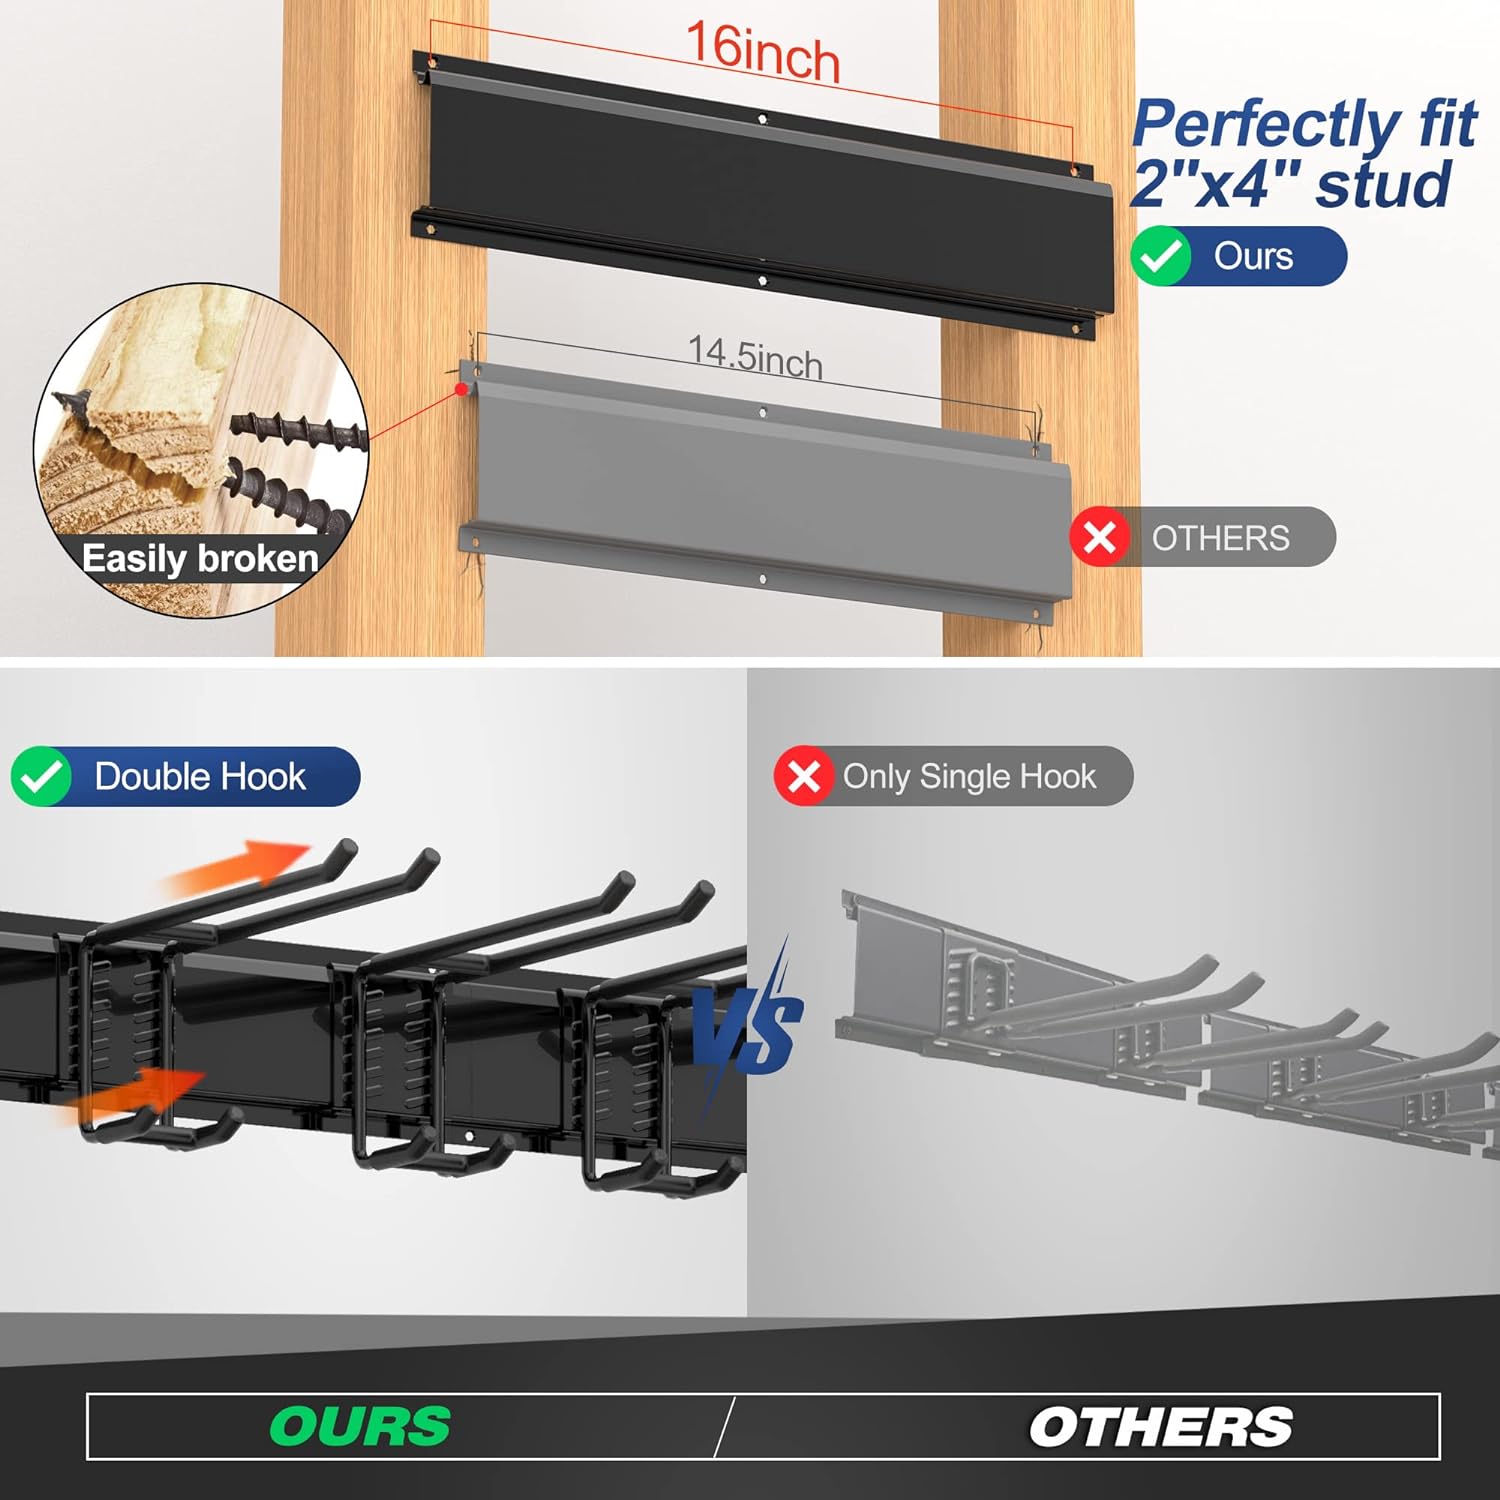
Figure 2: Illustration demonstrating the optimal 16-inch stud spacing for secure installation, contrasting with an incorrect spacing that can lead to instability.

Figure 3: Product details showcasing the rubber base on hooks to prevent scratches and the waterproof, anti-rust coating on the steel rails.
Setup and Installation
Proper installation is essential for the stability and load-bearing capacity of your storage rack. Follow these steps carefully.
1. Choose Your Wall Type and Screws:
The kit includes different types of screws and anchors suitable for various wall materials. Select the appropriate hardware for your installation surface:
- Wood Walls: Use self-tapping screws.
- Brick Walls (Cement Brick Wall): Use self-tapping screws with expansion tubes.
- Gypsum Board Walls (Plasterboard): Use wall anchors. For plasterboard, it is recommended to install a wood panel (within 20mm thickness) first for added stability.
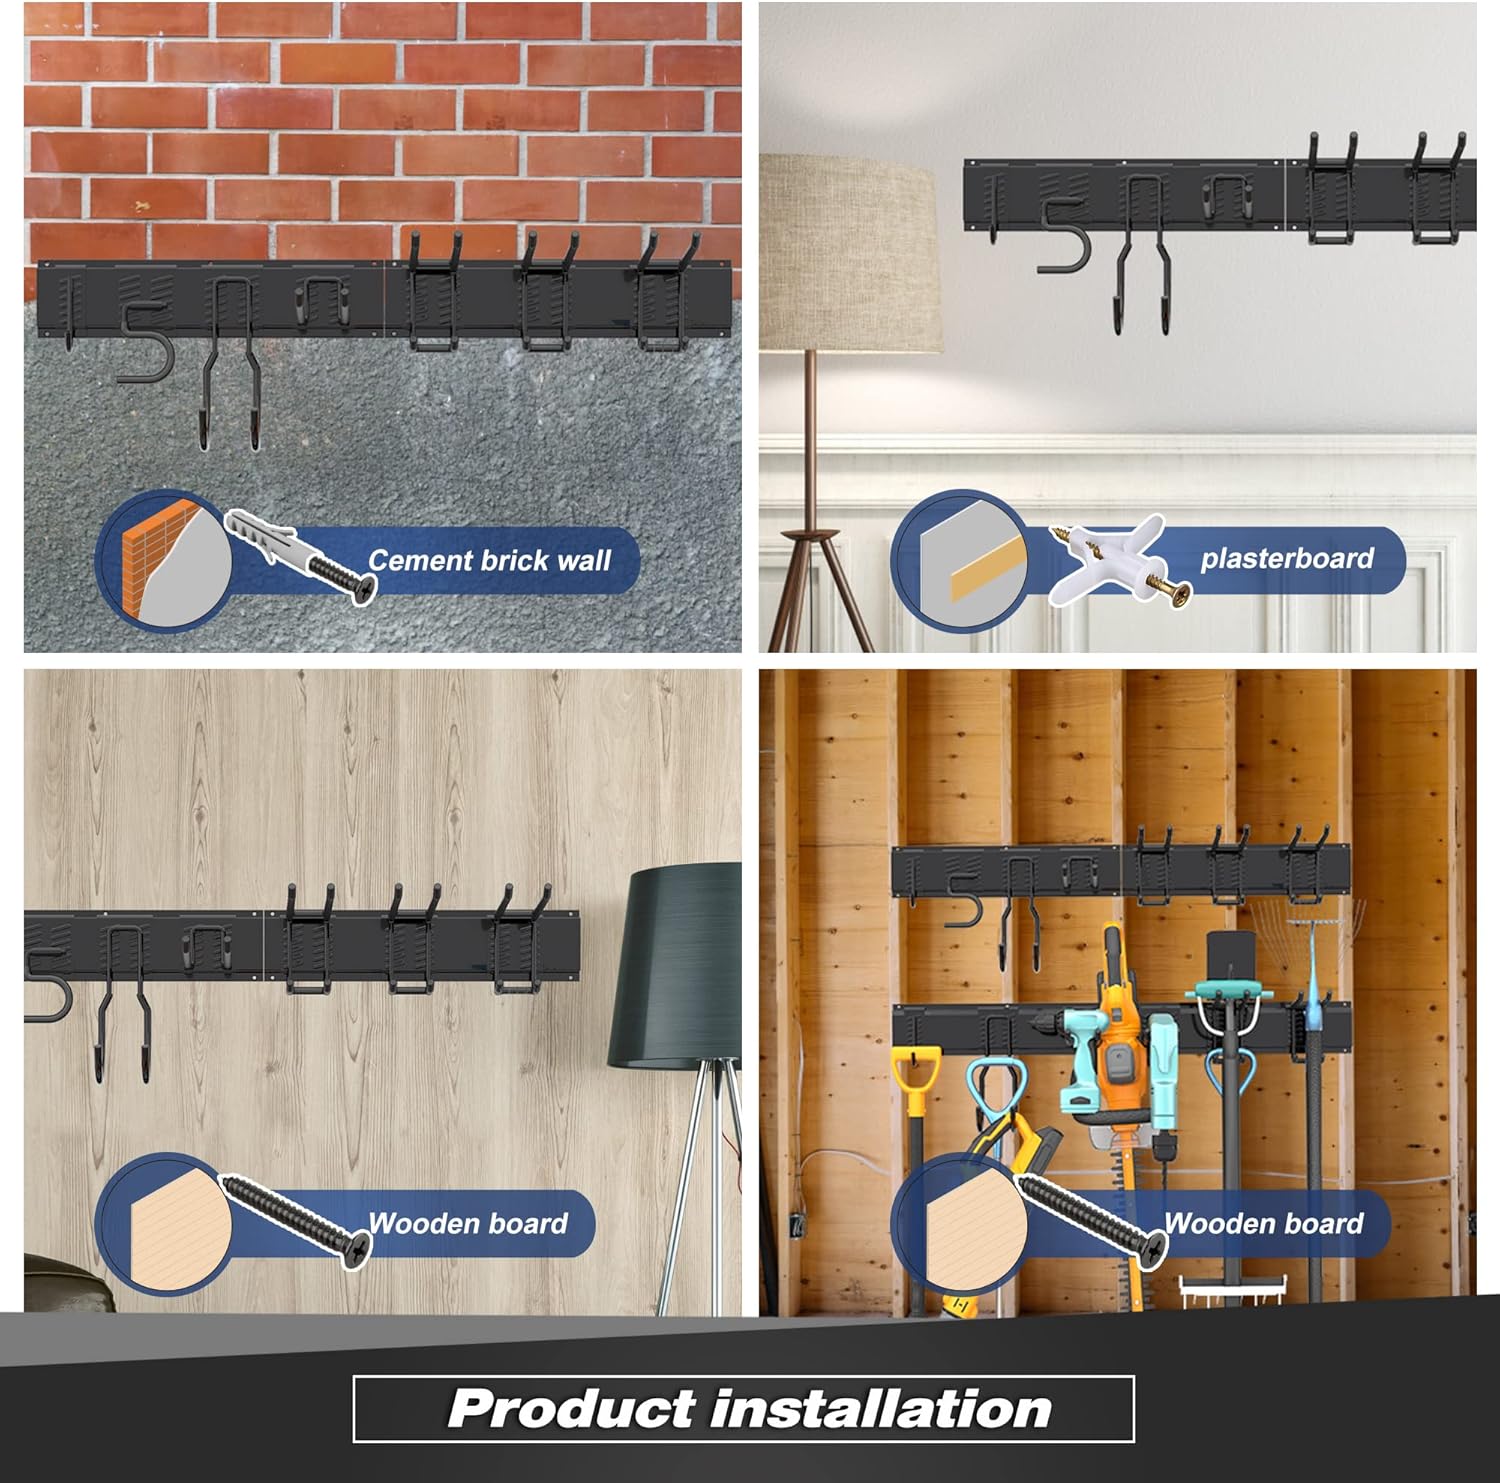
Figure 4: Guide for selecting appropriate screws and anchors based on your wall type.
2. Installation Steps:
- Mark Position: Before mounting, mark the desired height from the ground and the position of the rail on the wall. Ensure the rail is parallel to the horizontal using a level. The 16-inch distance between the outermost holes is designed for standard 2"x4" stud spacing.
- Drill Holes: Drill holes at the marked positions. For plasterboard, an 8mm drill bit is needed for the plasterboard itself, and a 4mm drill bit for the wood panel if you are adding one. For other wall types, use the appropriate drill bit size for the selected anchors/screws.
- Insert Anchors (if applicable): If using expansion screws for brick walls or wall anchors for gypsum board, insert them into the drilled holes. This step can be ignored for wooden walls where self-tapping screws are used directly.
- Mount Rails: Align the pre-drilled holes on the rails with the wall holes/anchors. Insert and tighten the screws securely. Pay attention to distinguishing between the top and bottom of the rail for correct orientation.
- Attach Hooks: Once the rails are securely mounted, snap the desired hooks into the rail slots. The hooks are designed to be easily inserted and removed.
- Adjust Hooks: Relocate hooks easily along the rail to customize spacing according to your storage needs.
Installation Video for Plasterboard:
Video 1: Step-by-step installation guide for mounting the storage rack on plasterboard walls. This video demonstrates marking, drilling, and securing the rails and hooks.
Installation Video for Brick and Plank Walls:
Video 2: Installation instructions specifically for brick and plank walls, detailing the process of marking, drilling, and securing the storage rack.
Operating Instructions
The Sttoraboks Garage Tool Storage Rack is designed for straightforward use and maximum flexibility.
- Placing Tools: Hang your tools and equipment directly onto the rubber-coated hooks. The rubber coating helps protect your tools from scratches and prevents them from sliding.
- Adjusting Hooks: To adjust the position of a hook, simply lift it slightly and slide it along the rail to the desired location. Push it down to secure it in place. This allows you to customize the layout as your storage needs change.
- Weight Distribution: Distribute the weight of your items evenly across the rack. While the system can support up to 600 lbs total, each individual panel has a maximum load of 150 lbs. Avoid concentrating heavy items on a single hook or a small section of the rail.
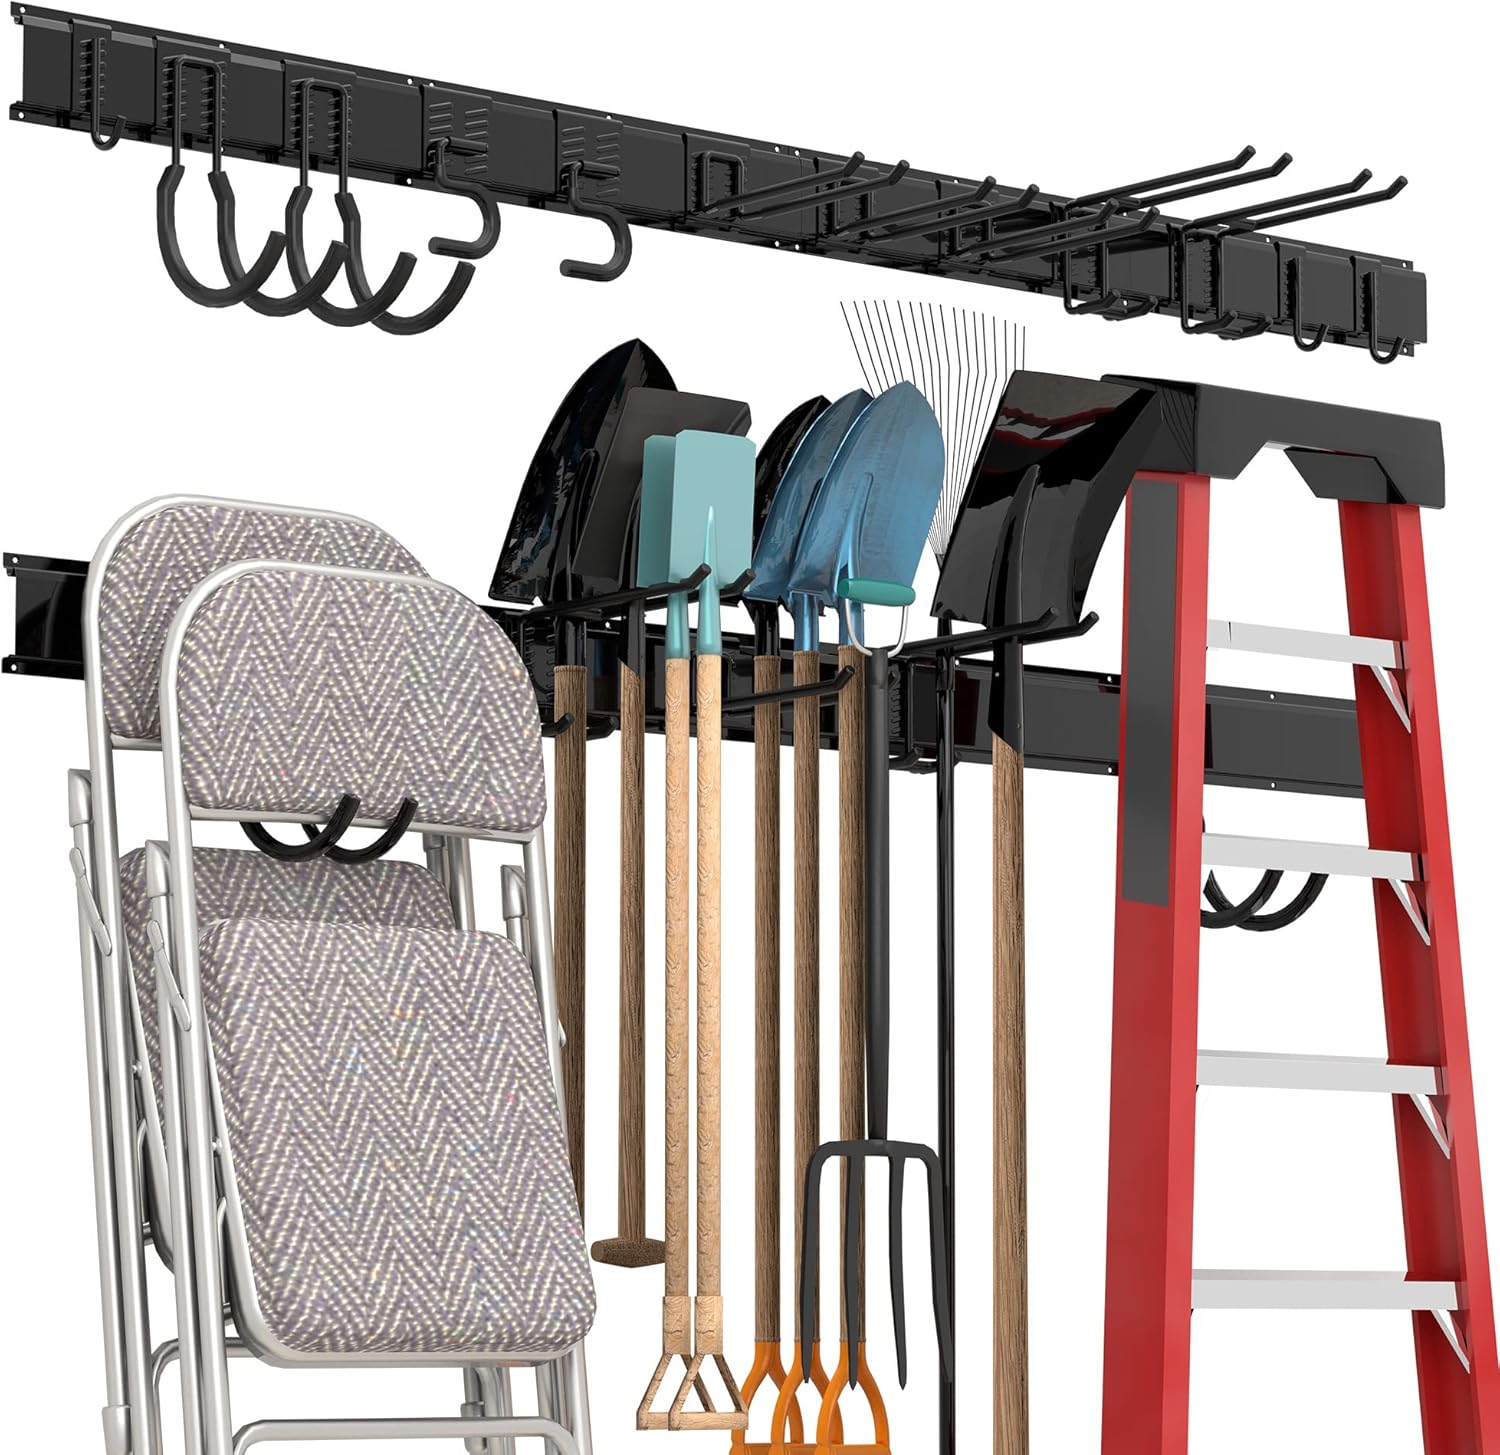
Figure 5: Example of various tools and equipment organized on the storage rack, demonstrating its versatility.
Maintenance
To ensure the longevity and continued performance of your Sttoraboks Garage Tool Storage Rack, follow these simple maintenance guidelines:
- Regular Cleaning: Wipe down the steel rails and hooks periodically with a damp cloth to remove dust and dirt. Avoid abrasive cleaners that could damage the powder-coated finish.
- Inspect for Damage: Regularly check the rails, hooks, and mounting hardware for any signs of wear, damage, or loosening. Tighten any loose screws immediately.
- Rust Resistance: The rack features a rust-resistant powder-coated finish. While designed for durability, prolonged exposure to extreme moisture or harsh chemicals should be avoided to maintain its protective coating.
Troubleshooting
If you encounter any issues with your storage rack, refer to the following common solutions:
- Rack feels unstable:
- Ensure all mounting screws are fully tightened.
- Verify that the rails are installed into wall studs (for wood walls) or appropriate anchors are used for other wall types.
- Check if the weight is evenly distributed and not exceeding the 150 lbs per panel or 600 lbs total capacity.
- Hooks are difficult to move or secure:
- Ensure the hooks are correctly aligned with the rail slots.
- Clean any debris from the rail slots or hook mechanisms.
Specifications
| Brand | Sttoraboks |
| Model | 68inch 4 panels+12 hooks |
| Material | Alloy Steel |
| Color | Black |
| Product Dimensions | 10"D x 68"W x 5.9"H |
| Shelf Type | Hanging Shelf |
| Number of Shelves/Panels | 4 |
| Item Weight | 12.5 pounds (5.68 Kilograms) |
| Shelf Weight Capacity | 600 Pounds (Total) |
| Mounting Type | Wall Mount |
| Special Feature | Rust Resistant |
| Assembly Required | No (for the main rack, hooks are attachable) |
Warranty and Customer Support
The Sttoraboks Garage Tool Storage Organizer is designed as a versatile and practical solution for organizing your workspace. If you are not satisfied with your wall mount tool organizer, please contact us via email. We are committed to ensuring customer satisfaction and will provide a refund with no questions asked.
For further assistance or inquiries, please refer to the contact information provided with your purchase or visit the official Sttoraboks website.
Ask a question about this manual
Ask about setup, troubleshooting, compatibility, parts, safety, or missing instructions. Manuals+ will review the question and use this page’s manual context to help answer it.