1. Introduction
This manual provides essential information for the safe and effective operation of your Apt RHINE 50 12/24 Volt 50 Amp Battery Charger. Please read these instructions carefully before using the device to ensure proper function and to prevent damage or injury. Keep this manual for future reference.
2. Safety Instructions
Always observe the following safety precautions when operating the battery charger:
- Electrical Safety: Ensure the charger is connected to a grounded outlet. Do not operate the charger with damaged cords or plugs. Avoid exposing the charger to rain or excessive moisture.
- Battery Safety: Always wear eye protection and gloves when working with batteries. Batteries can produce explosive gases; ensure adequate ventilation. Do not smoke or allow sparks or flames near batteries.
- Compatibility: Use this charger only for 12V or 24V lead-acid batteries (WET, MF, CA/CA, EFB, GEL, AGM). Do not attempt to charge non-rechargeable batteries.
- Children and Pets: Keep the charger and batteries out of reach of children and pets.
- Ventilation: Ensure the charger has proper ventilation during operation to prevent overheating. Do not cover the charger.
- Disconnection: Always disconnect the AC power from the charger before connecting or disconnecting the battery clamps.
3. Package Contents
Verify that all items are present in your package:
- Apt RHINE 50 Battery Charger
- Battery Clamps (Red for positive, Black for negative)
- Power Cord
- User Manual
- Basic Tools (as indicated in product specifications)
4. Product Overview
The Apt RHINE 50 is a robust battery charger designed for various 12V and 24V lead-acid batteries. It features a durable casing and clear indicators for monitoring the charging process.
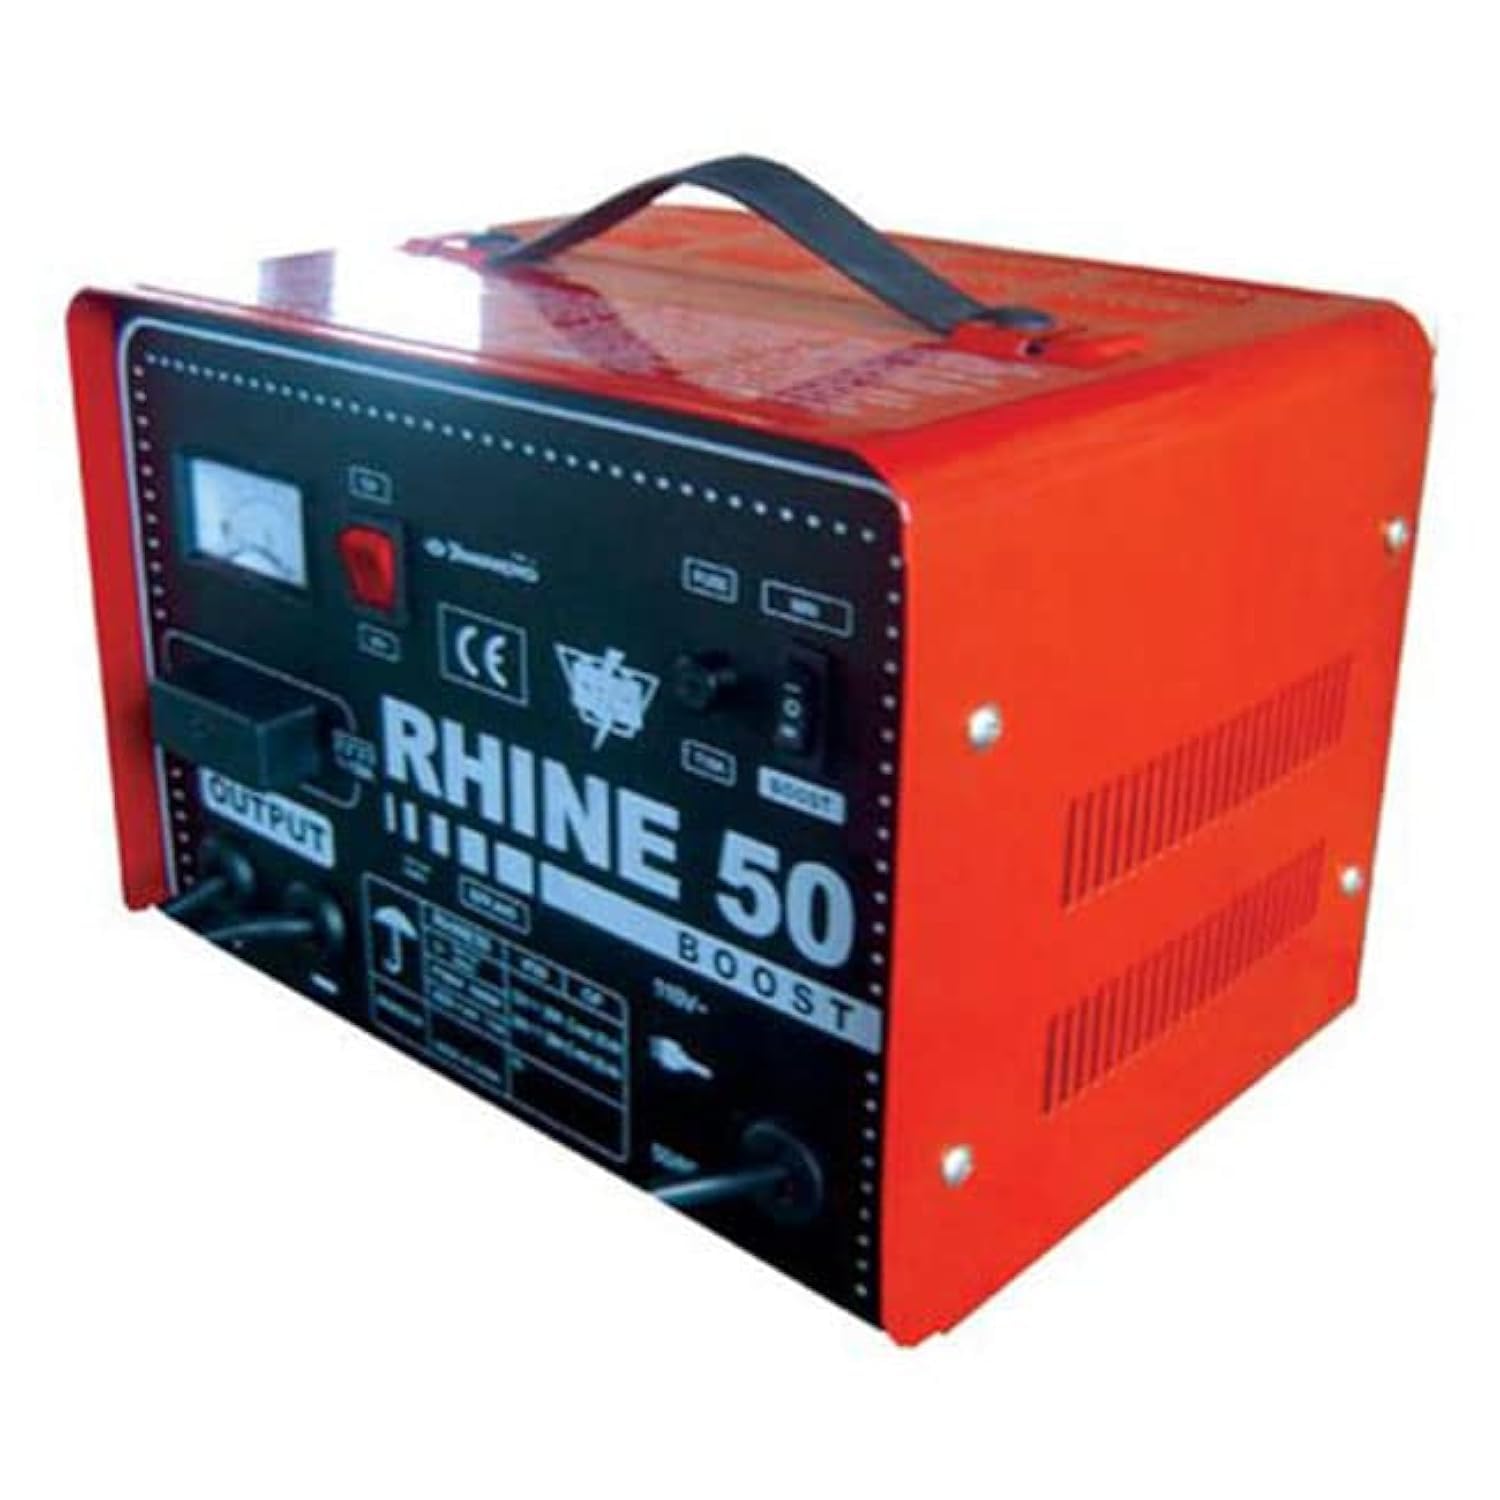
Figure 1: Front view of the Apt RHINE 50 Battery Charger. The front panel includes an analog meter, power switch, fuse, voltage selector (12V/24V), boost switch, and output terminals. The charger features a red and black metal casing with a carrying handle.
Key components include:
- Analog Ammeter: Displays the charging current.
- Power Switch: Turns the charger ON/OFF.
- Fuse: Provides overcurrent protection.
- Voltage Selector: Allows selection between 12V and 24V charging modes.
- Boost Switch: Activates a boost charge function for deeply discharged batteries (use with caution).
- Output Terminals: Connect to the battery using the provided clamps.
5. Setup
- Placement: Place the charger on a stable, flat surface in a well-ventilated area, away from direct sunlight, heat sources, and flammable materials.
- Battery Preparation: Ensure the battery terminals are clean and free of corrosion. If charging a vehicle battery, ensure the vehicle is turned off and in park/neutral with the parking brake engaged.
- Voltage Selection: Before connecting, set the voltage selector on the charger to match your battery's voltage (12V or 24V). Incorrect voltage selection can damage the battery and charger.
- Connect Battery Clamps:
- Connect the RED (+) positive clamp to the positive (+) battery terminal.
- Connect the BLACK (-) negative clamp to the negative (-) battery terminal.
- Ensure a secure connection.
- Connect to Power: Plug the charger's power cord into a standard, grounded AC power outlet.
6. Operating Instructions
- Start Charging: Turn on the charger using the power switch. The ammeter will indicate the charging current.
- Monitor Charging: Observe the ammeter. The charging current will gradually decrease as the battery charges.
- Boost Function (if needed): For deeply discharged batteries, you may use the "Boost" function. Activate the boost switch. Monitor the battery closely during boost charging to prevent overcharging. Do not use boost for extended periods.
- Charging Completion: Charging is complete when the ammeter reading drops to a very low level or zero, indicating the battery is fully charged.
- Disconnecting:
- First, turn off the charger using the power switch.
- Unplug the charger from the AC power outlet.
- Disconnect the BLACK (-) negative clamp from the battery.
- Disconnect the RED (+) positive clamp from the battery.
7. Maintenance
- Cleaning: Clean the charger's exterior with a soft, dry cloth. Do not use solvents or abrasive cleaners.
- Storage: Store the charger in a cool, dry place when not in use. Keep cables neatly coiled.
- Inspection: Periodically inspect the power cord and battery clamps for any signs of damage. Replace damaged components immediately.
8. Troubleshooting
| Problem | Possible Cause | Solution |
|---|---|---|
| Charger does not turn on. | No power from outlet; power switch off; blown fuse. | Check AC outlet; ensure power switch is ON; check and replace fuse if necessary. |
| No charging current indicated. | Incorrect battery connection; battery fully charged; severely discharged battery. | Verify correct polarity (+ to +, - to -); battery may not need charging; try boost function cautiously for deeply discharged batteries. |
| Charger overheats. | Poor ventilation; prolonged boost charging. | Ensure adequate airflow around the charger; reduce charging time or discontinue boost. |
If problems persist, contact customer support.
9. Specifications
| Feature | Detail |
|---|---|
| Brand | Apt |
| Model Number | RHINE/RAYLEK50 |
| Part Number | RHINE/RAYLEK50 |
| Input Power Source | AC |
| Output Voltage | 12V / 24V |
| Amperage | 50 Amp (implied from product title) |
| Product Dimensions | 10 x 20 x 37 cm |
| Item Weight | 209 grams |
| Included Components | Tools (as per product data) |
| Batteries Required | No |
| First Available Date | March 15, 2023 |
10. Warranty and Support
For warranty information or technical support, please refer to the documentation included with your purchase or contact Apt customer service directly. Keep your proof of purchase for warranty claims.
You can visit the Apt store for more information: Apt Official Store


