1. Introduction
This manual provides detailed instructions for the VAABZZ D4000 Native 1080P Portable Projector. It covers setup, operation, maintenance, and troubleshooting to ensure optimal performance and longevity of your device. The D4000 projector features native 1920x1080p resolution, 1800 ANSI typical brightness, a 10000:1 contrast ratio, and supports up to a 300-inch display. It includes 2.4G/5G dual-band Wi-Fi and Bluetooth 5.0 for versatile connectivity, along with built-in dual Hi-Fi stereo speakers.
2. Safety Instructions
Please read all safety instructions carefully before using the projector. Keep this manual for future reference.
- Do not look directly into the projector lens when the lamp is on. The bright light can cause eye damage.
- Ensure proper ventilation around the projector. Do not block ventilation openings.
- Use only the power adapter supplied with the projector.
- Do not expose the projector to rain, moisture, or extreme temperatures.
- Avoid placing the projector on unstable surfaces.
- Do not attempt to open or repair the projector yourself. Refer all servicing to qualified personnel.
- Keep the projector away from water and other liquids.
3. Package Contents
Verify that all items are present in the package:
- VAABZZ D4000 Portable Projector
- Power Cable
- Remote Control
- HDMI Cable
- User Manual
- Projection Screen (if included)
- Carry Bag (if included)
4. Product Overview
Familiarize yourself with the projector's components and connection ports.
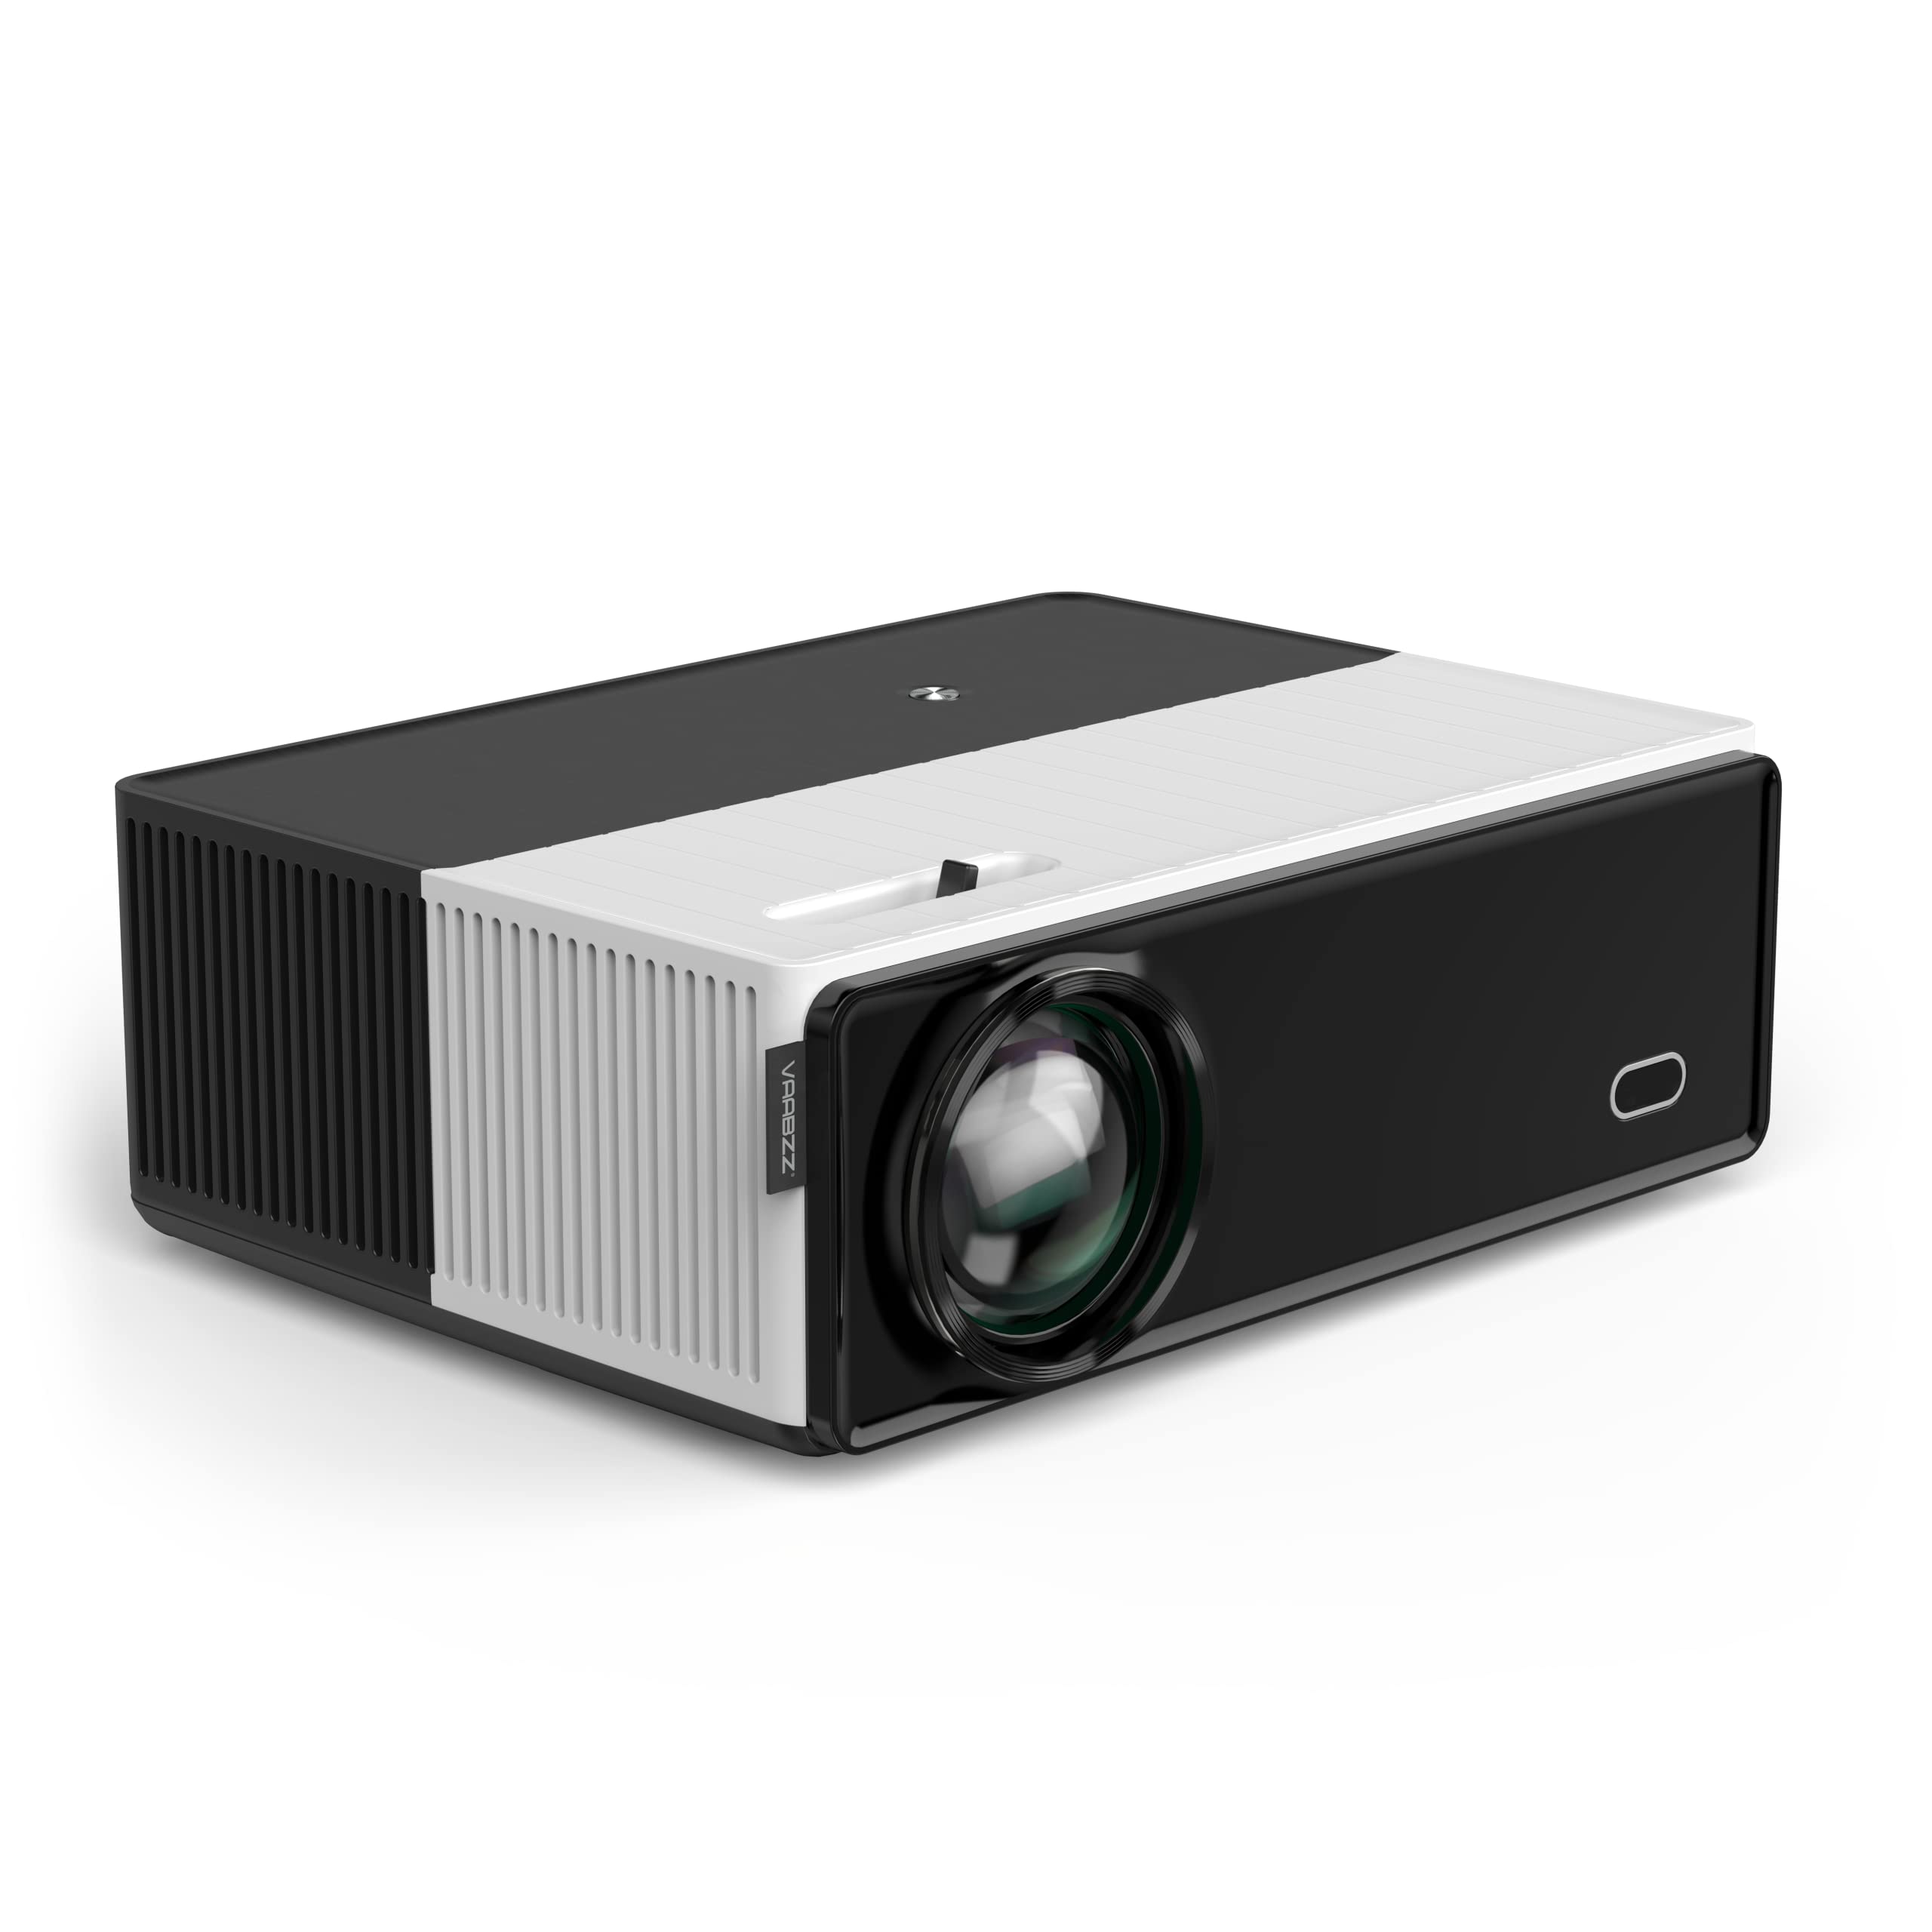
Image showing the front of the VAABZZ D4000 projector, highlighting the lens and ventilation. This view typically includes the main projection lens and possibly an IR receiver for the remote control.
4.1 Front Panel
- Projection Lens: Emits the image.
- IR Receiver: Receives signals from the remote control.
4.2 Top Panel
- Control Buttons: Power, Menu, Navigation (Up/Down/Left/Right), OK/Enter, Back.
- Focus Ring: Adjusts image sharpness.
- Keystone Correction: Adjusts image shape (trapezoidal distortion).
4.3 Rear/Side Panels
- HDMI Ports: Connect to HDMI-enabled devices (laptops, gaming consoles, TV boxes).
- USB Ports: Connect USB drives for media playback or external devices.
- Audio Out (3.5mm Jack): Connect external speakers or headphones.
- Power Input: Connect the power cable.
- Ventilation Grilles: Ensure these are not blocked for proper heat dissipation.
5. Setup
5.1 Powering On/Off
- Connect the power cable to the projector's power input and then to a power outlet.
- Press the power button on the projector or the remote control to turn it on.
- To turn off, press the power button again and confirm shutdown if prompted.
5.2 Projector Placement
Place the projector on a stable, flat surface or mount it securely. Ensure the projection path is clear of obstructions. The optimal projection distance varies, but generally, a larger image requires a greater distance from the screen.
5.3 Focus and Keystone Correction
- Focus: Rotate the focus ring near the lens until the projected image appears sharp and clear.
- Keystone Correction: If the image appears trapezoidal (wider at the top or bottom), adjust the keystone correction dial or digital setting (if available in the menu) until the image is rectangular.
5.4 Initial Setup
Upon first use, you may be guided through an initial setup wizard:
- Language Selection: Choose your preferred language.
- Network Setup: Connect to your Wi-Fi network (see Section 6.2).
6. Operating the Projector
6.1 Selecting Input Source
Use the "Source" button on the remote control or the projector's control panel to select the desired input:
- HDMI: For connecting laptops, Blu-ray players, gaming consoles, or TV boxes.
- USB: For playing media files directly from a USB flash drive.
- Screen Mirroring: For wirelessly displaying content from your smartphone or tablet.
6.2 Wi-Fi Connection (2.4G/5G Dual-Band)
- Navigate to the "Settings" menu on the projector.
- Select "Network" or "Wi-Fi Settings".
- Turn on Wi-Fi and select your desired network from the list.
- Enter the Wi-Fi password using the on-screen keyboard.
- The projector supports both 2.4GHz and 5GHz networks. Choose the 5GHz network for faster, more stable connections if available.
6.3 Bluetooth Connection (Bluetooth 5.0)
Connect external Bluetooth speakers for enhanced audio output.
- Ensure your Bluetooth speaker is in pairing mode.
- On the projector, go to "Settings" and select "Bluetooth".
- Turn on Bluetooth and scan for available devices.
- Select your Bluetooth speaker from the list to pair.
6.4 Screen Mirroring / AirPlay
The projector supports wireless screen mirroring from compatible smartphones and tablets.
- Select the "Screen Mirroring" or "AirPlay" option from the projector's main menu.
- Follow the on-screen instructions to connect your iOS or Android device. This typically involves connecting your device to the same Wi-Fi network as the projector and then initiating screen mirroring from your device's settings.
6.5 Audio Output
The projector has built-in dual Hi-Fi stereo speakers with SRS audio. For external audio, use the 3.5mm audio out jack or connect via Bluetooth (Section 6.3).
7. Maintenance
7.1 Cleaning the Projector
- Lens: Use a soft, lint-free cloth specifically designed for optical lenses. Do not use abrasive cleaners.
- Casing: Wipe the projector casing with a soft, dry cloth. For stubborn dirt, use a slightly damp cloth and then dry thoroughly.
- Ventilation Vents: Periodically clean the vents with a soft brush or compressed air to prevent dust buildup, which can affect cooling performance.
7.2 Storage
When not in use for extended periods, store the projector in a cool, dry place, away from direct sunlight and extreme temperatures. Use the provided carry bag for protection.
7.3 LED Lamp Life
The VAABZZ D4000 projector utilizes an LED light source with an estimated lifespan of up to 100,000 hours, significantly reducing the need for lamp replacement.
8. Troubleshooting
If you encounter issues, refer to the following common problems and solutions:
| Problem | Possible Cause | Solution |
|---|---|---|
| No image projected | Power not connected, incorrect input source, lens cap on. | Check power connection, select correct input source, remove lens cap. |
| Image is blurry | Focus not adjusted, projector too close/far. | Adjust the focus ring, reposition the projector. |
| Image is trapezoidal | Keystone not adjusted. | Adjust the keystone correction dial/setting. |
| No sound | Volume too low, incorrect audio output selected, external speakers not connected/paired. | Increase volume, check audio settings, ensure Bluetooth speakers are paired or wired speakers are connected. |
| Wi-Fi/Bluetooth connection issues | Incorrect password, device out of range, interference. | Re-enter password, move devices closer, restart projector and router/Bluetooth device. |
| Remote control not working | Batteries dead, IR receiver blocked. | Replace batteries, ensure no obstructions between remote and projector. |
9. Specifications
| Feature | Detail |
|---|---|
| Brand | VAABZZ |
| Model Series | D4000 |
| Manufacturer | VIVIBRIGHT |
| Standard Resolution | Native 1920 x 1080p |
| Supported Resolution | Up to 4K |
| Brightness | 1800 ANSI typical brightness |
| Contrast Ratio | 10,000:1 |
| Maximum Screen Size | 300 inches |
| LED Lamp Life | 100,000 hours |
| Wireless Connectivity | Wi-Fi (2.4G/5G Dual-Band), Bluetooth 5.0 |
| Wired Connectivity | HDMI, USB |
| Audio | Built-in Dual Hi-Fi Stereo Speakers, SRS Audio System |
| Form Factor | Portable |
| Recommended Use | Home Theater |
10. Warranty and Support
10.1 Warranty Information
The VAABZZ D4000 Projector comes with a 2-year customer service guarantee. This warranty covers manufacturing defects and ensures support for product-related issues during the specified period. Please retain your proof of purchase for warranty claims.
10.2 Customer Support
For technical assistance, troubleshooting beyond this manual, or warranty inquiries, please contact VAABZZ customer support. Refer to the contact information provided on the product packaging or the official VAABZZ website.
Online Support: Visit the official VAABZZ website for FAQs, updated manuals, and support contact details.
Email Support: Refer to website
Phone Support: Refer to website


