
Introduction
This manual provides essential information for the installation and handling of the A-MIND LCD Display Touch Digitizer Full Assembly Repair Kit for Oppo A15 (CPH2185) and Oppo A15s (CPH2179) models. This product is designed to replace damaged or malfunctioning screens, addressing issues such as liquid crystal ruptures, dead pixels, touch unresponsiveness, and display problems.
Important: Installation of this component requires specific technical skills and equipment. For optimal results and to prevent damage, professional installation is strongly recommended. We are not responsible for damages incurred due to incorrect installation.
Safety Information and Precautions
- The LCD is a fragile component. Handle with extreme care to avoid breakage. Glass fragments from a broken screen can cause injury.
- Always take precautions against electrostatic discharge (ESD). Ground yourself using an ESD wrist strap to prevent damage to electronic components.
- Do not apply excessive force or pressure to the screen, especially on the edges, corners, or the area directly above the flex cable chip.
- Avoid bending or strongly pulling the flex cables. Damage to these cables will render the display inoperable.
- Ensure the phone's battery is disconnected before beginning any repair work.

Image: Critical handling points on the LCD assembly. Avoid pressing hard on the screen edges, corners, flex cable, and the chip located under the screen.
Compatibility
This LCD display and touch digitizer assembly is compatible exclusively with the following models:
- Oppo A15 (Model Number: CPH2185)
- Oppo A15s (Model Number: CPH2179)
Please verify your phone's model number before proceeding with installation to ensure compatibility.

Image: Front view of the LCD display, indicating compatibility and key specifications.
Package Contents
The repair kit typically includes the following items:
- 1 x LCD Touch Digitizer Full Assembly
- 1 x Set of Basic Repair Tools (Note: These tools are general-purpose and may not be suitable for all phone models or specific repair steps.)

Image: Front and back view of the LCD display assembly.
Setup: Pre-Installation and Testing
Before proceeding with the full installation, it is crucial to perform the following steps:
- Inspect Upon Receipt: Carefully inspect the product immediately upon receipt for any visible damage, cracks, or missing components. If any issues are found, do not proceed with installation and contact customer service immediately with photos.
- Pre-Installation Test (Simulation Test): This step is critical to ensure the new screen is fully functional before permanent installation.
- Do not remove any protective films or labels from the new screen during this test.
- Ensure you are grounded using an ESD wrist strap to prevent static electricity damage.
- Disconnect the phone's battery cable connector.
- Carefully disassemble your phone to access the motherboard.
- Disconnect the old LCD display or touch screen flex cable from the motherboard.
- Connect the new LCD display's flex cable to the motherboard.
- Reconnect the battery cable.
- Turn on the phone and thoroughly test all functions of the new screen: display quality, touch responsiveness across the entire screen, dead pixels, and color accuracy.
- If any abnormality is detected during this test, disconnect the screen and contact customer service with video or photo evidence. Do not proceed with full installation.
- Seek Professional Guidance: Installation tutorials are not included in the package. If you lack experience, it is highly recommended to search for detailed installation videos on platforms like YouTube or seek professional repair services.

Image: Close-up of the LCD display front.
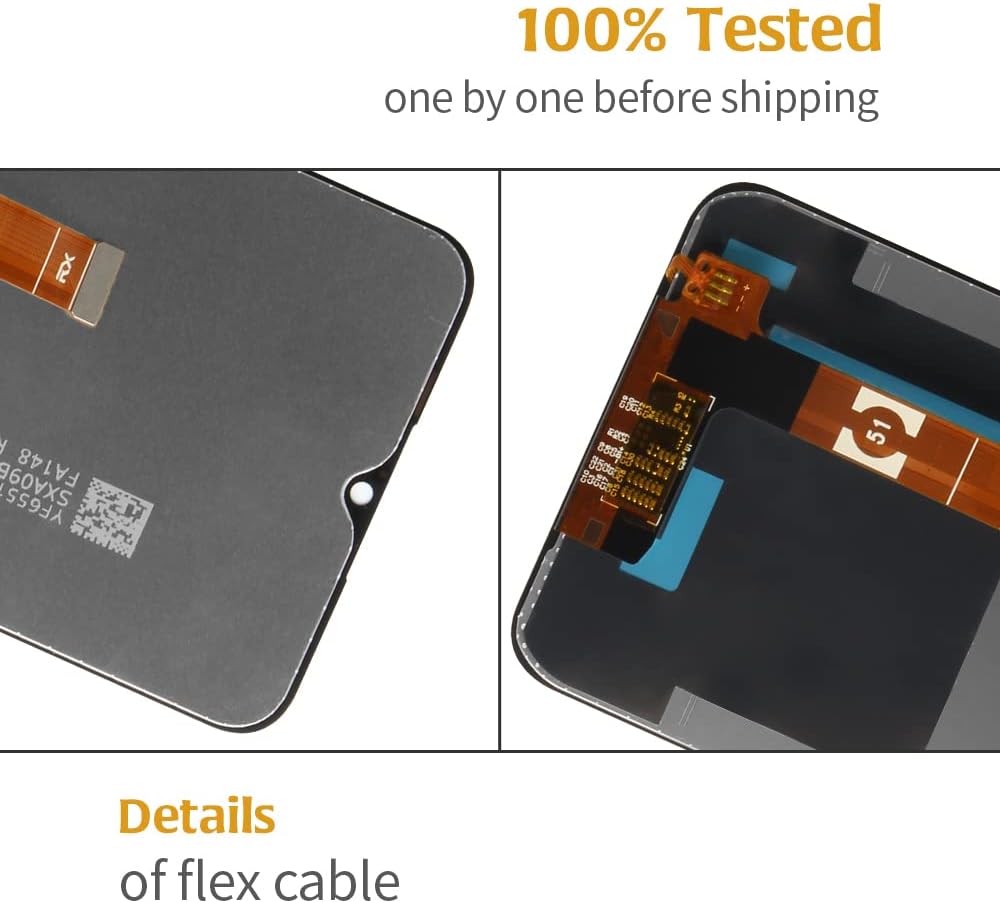
Image: Close-up of the LCD display back, detailing flex cable.
Operating: Installation Guidelines
Once the pre-installation test is successful, you may proceed with the full installation. Remember to handle all components with care.
- Carefully remove the old, damaged screen from your device.
- Clean any adhesive residue from the phone frame.
- Apply new adhesive (not included) to the phone frame if necessary.
- Carefully align and seat the new LCD assembly into the phone frame.
- Connect all flex cables securely to the motherboard.
- Reconnect the battery and reassemble the phone.
- Perform a final test of the screen and touch functions after reassembly.
Note: Parts damaged during the installation process will not be accepted for return or warranty claims.
Maintenance
To ensure the longevity and optimal performance of your new screen:
- Avoid dropping your phone or subjecting it to strong impacts.
- Use a screen protector and a protective case for added durability.
- Clean the screen with a soft, lint-free cloth. Avoid harsh chemicals or abrasive materials.
- Keep the phone away from extreme temperatures and moisture.
Troubleshooting
If you encounter issues after installation, consider the following:
- Screen Not Turning On / Black Screen:
- Ensure all flex cables are securely connected to the motherboard.
- Verify the battery is charged and properly connected.
- Try restarting the phone.
- Touch Not Responding / Ghost Touch:
- Check the touch digitizer flex cable connection.
- Ensure there is no debris or foreign material between the screen and the frame.
- A factory reset (after backing up data) can sometimes resolve software-related touch issues.
- Display Anomalies (Lines, Spots, Discoloration):
- This often indicates a damaged LCD. Recheck flex cable connections.
- If the issue persists, the screen may be defective or damaged during installation.
If troubleshooting steps do not resolve the issue, please refer to the Warranty and Support section for assistance.
Specifications
| Feature | Detail |
|---|---|
| Compatibility | Oppo A15 (CPH2185), Oppo A15s (CPH2179) |
| Screen Size | 6.52 inches |
| Resolution | 720*1600 pixels |
| Pixel Density | 269 ppi |
| Item Model Number | CPH2185, CPH2179 |
| Package Dimensions | 7.52 x 4.06 x 1.14 inches |
| Item Weight | 4.9 ounces |
| Color | Black |
| Manufacturer | A-MIND |
Warranty and Support
Warranty Coverage: We offer a 3-month free replacement or refund for non-human product damage or manufacturing faults. This warranty covers defects in materials and workmanship under normal use.
Exclusions: This warranty does not cover damages or malfunctions caused by incorrect installation work, accidental breakage, misuse, or any human-induced damage. Products damaged during installation are not eligible for return or replacement.
Claim Process:
- If the product is broken, damaged, or has missing items upon receipt, do not install it. Take clear photos or videos of the issue and email our service team immediately.
- For any other warranty claims, please contact our customer service team via email, providing a detailed description of the issue and any supporting photos or videos.
Our customer service staff is available to assist you with any questions or concerns regarding your product.


