
1. Introduction
The MAONO GamerWave DGM20 is a high-performance USB condenser microphone designed for gaming, streaming, recording, podcasting, and online communication. It features advanced noise cancellation, customizable RGB lighting, intuitive controls, and plug-and-play compatibility for a seamless user experience.

Figure 1.1: MAONO GamerWave DGM20 USB Gaming Microphone.
2. Package Contents
Verify that all items listed below are included in your package:
- USB Gaming Microphone (GamerWave DGM20) x1
- Sturdy Desktop Stand x1
- Pop Filter x1
- Shock Mount x1
- USB-C to USB-A/USB-C 2-in-1 Cable x1
- Boom Arm Adapter x1
- User Manual x1
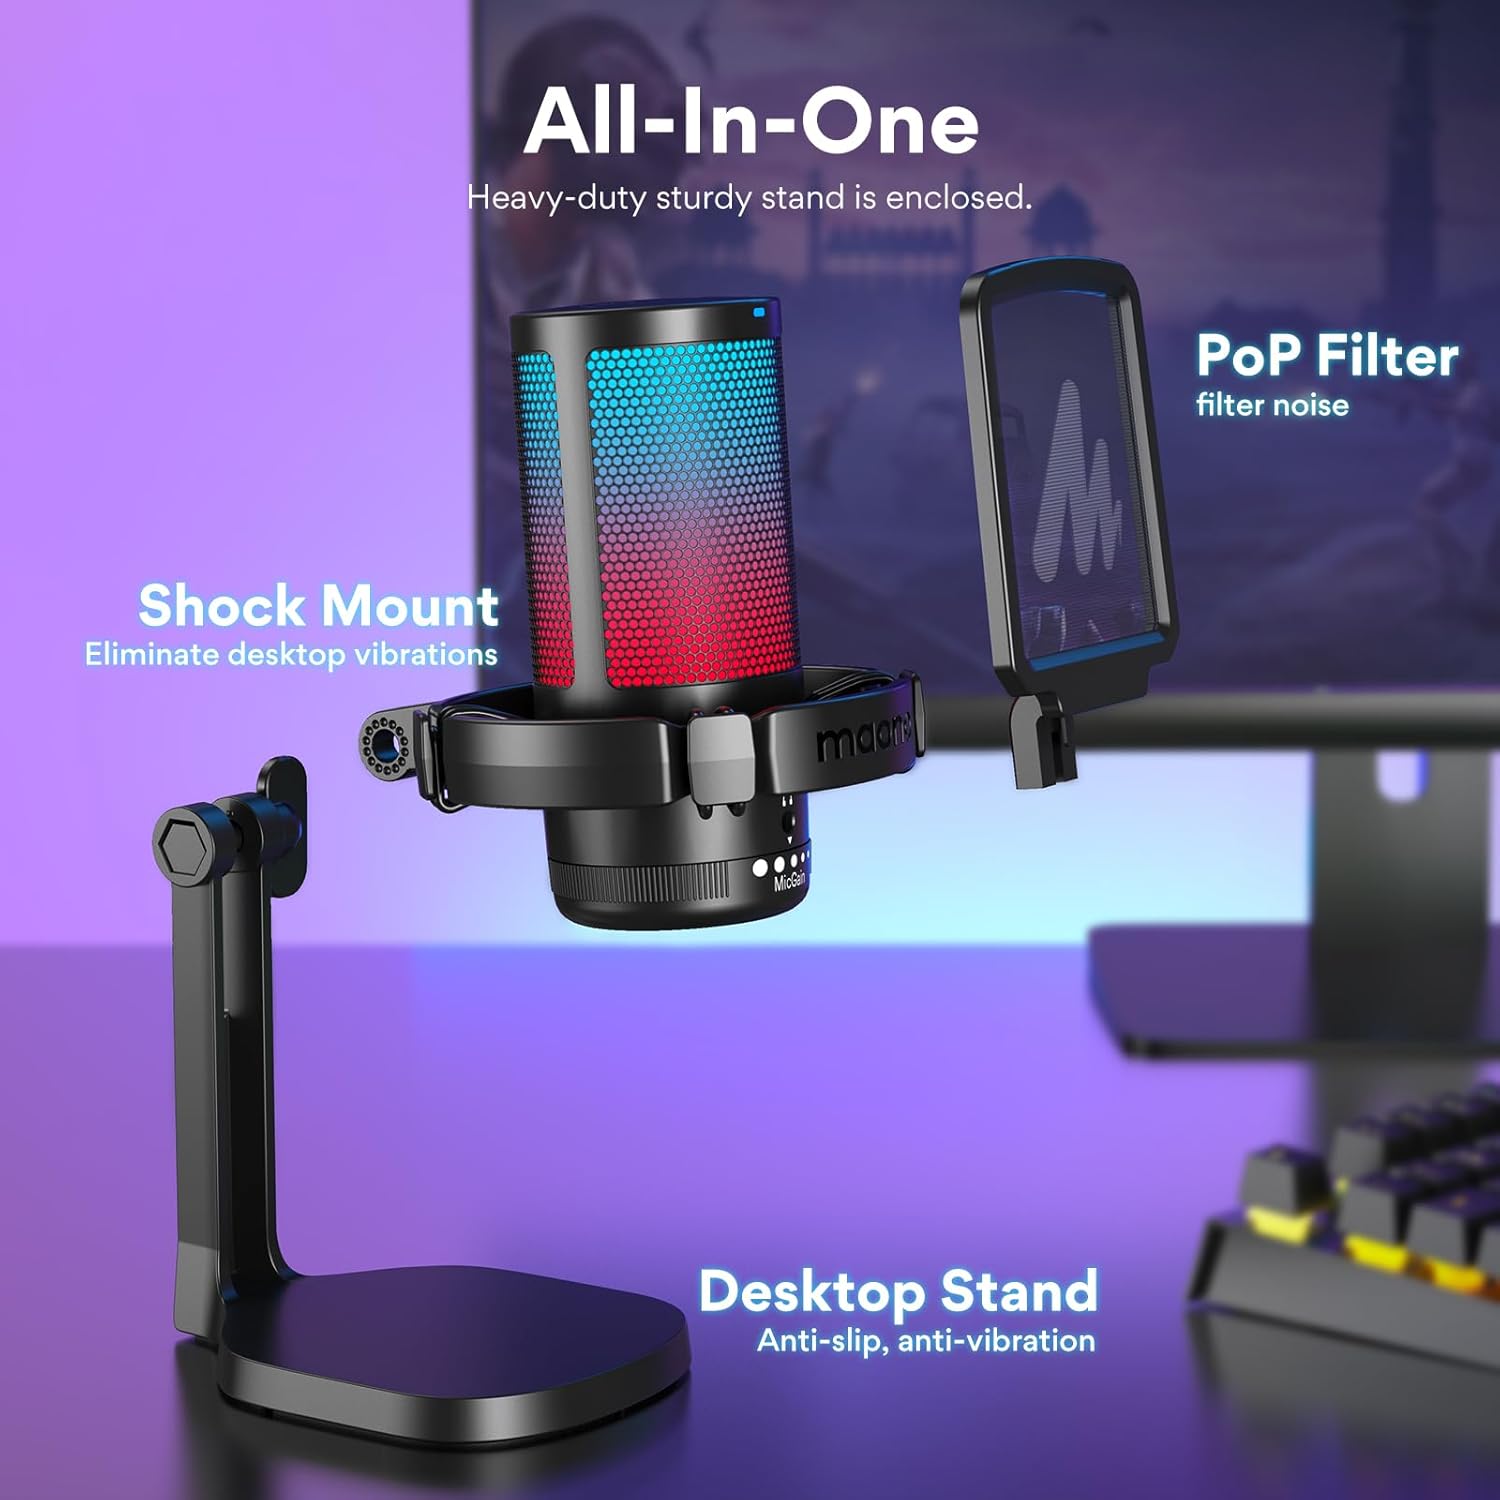
Figure 2.1: Included components of the GamerWave DGM20 kit.
3. Features Overview
- Voice Clarity with Noise Cancellation: Equipped with a one-key noise cancellation function (long press for 3 seconds to turn on/off) to suppress background noises. The cardioid polar pattern focuses on sound directly in front of the mic.
- Stunning RGB Lighting: Dynamic multicolor, breathing light, or static solid color modes to enhance your gaming setup.
- One-Click Mute with LED Indicator: Instantly mute the mic with a single click. Red LED indicates mute, green indicates active.
- Mic Gain Control and Monitoring: Adjust microphone sensitivity with the gain control knob. Real-time audio monitoring available via the 3.5mm headphone jack.
- Plug and Play: Simple connection via USB-C to USB/USB-C 2-in-1 cable to PC, computer, laptop, desktop, Mac, and Android phones. (Note: Not compatible with XBOX).
- All-in-One Kit: Includes microphone, sturdy stand, pop filter, shock mount, and cables for immediate use.
4. Setup Guide
- Unpack Components: Carefully remove all items from the packaging.
- Assemble Stand: Attach the microphone to the sturdy desktop stand. Ensure the shock mount is securely in place to eliminate desktop vibrations.
- Attach Pop Filter: Secure the pop filter to the microphone assembly. The pop filter helps to reduce plosive sounds (like 'p' and 'b') for clearer audio.
- Connect to Device: Use the provided USB-C to USB-A/USB-C 2-in-1 cable. Plug the USB-C end into the microphone and the appropriate USB-A or USB-C end into your computer, laptop, desktop, Mac, PS4, PS5, or Android phone. The microphone is plug-and-play and does not require additional drivers.

Figure 4.1: Simple plug-and-play connection for the microphone.
5. Operating Instructions
5.1 Noise Cancellation
The microphone features a one-key noise cancellation function to minimize background noise. This is particularly useful in noisy environments to ensure your voice comes through clearly.
- Activate/Deactivate: Long press the noise cancellation button (usually integrated with the mute button) for 3 seconds to toggle the feature on or off.

Figure 5.1: Visual representation of noise cancellation.
Video 5.1: Demonstration of MAONO's noise cancellation feature.
5.2 RGB Lighting
Customize the microphone's appearance with various RGB lighting modes.
- Change Modes: Short press the RGB lighting button (usually on top) to cycle through static solid colors, dynamic breathing light, and dynamic multi-color gradient modes.
- Turn Off: Long press the RGB lighting button for 3 seconds to turn off the lights.

Figure 5.2: Various RGB lighting options for personalization.
Video 5.2: Demonstration of MAONO Gaming Mic RGB Light features.
5.3 Mute Function
Quickly mute or unmute your microphone during use.
- Toggle Mute: Press the mute button once to mute the microphone. The LED indicator will turn red. Press again to unmute, and the LED will turn green.

Figure 5.3: Mute button and LED indicators.
5.4 Mic Gain Control & Monitoring
Adjust the microphone's sensitivity and monitor your audio in real-time.
- Adjust Gain: Rotate the 'Mic Gain' knob located at the base of the microphone to increase or decrease sensitivity.
- Real-time Monitoring: Plug headphones into the 3.5mm jack on the microphone for zero-latency monitoring of your voice.

Figure 5.4: Mic gain control and headphone monitoring.
6. Maintenance
To ensure the longevity and optimal performance of your MAONO USB Gaming Microphone, follow these maintenance guidelines:
- Cleaning: Use a soft, dry cloth to wipe down the microphone's exterior. Avoid using harsh chemicals or abrasive materials.
- Storage: When not in use, store the microphone in a cool, dry place away from direct sunlight and extreme temperatures.
- Handle with Care: Avoid dropping the microphone or subjecting it to strong impacts, as this can damage internal components.
- Cable Management: Do not excessively bend or pull the USB cable. Store it neatly to prevent tangles and damage.
7. Troubleshooting
If you encounter issues with your microphone, refer to the following common troubleshooting steps:
- No Sound Output:
- Ensure the USB cable is securely connected to both the microphone and your device.
- Check your device's sound settings to confirm the MAONO GamerWave DGM20 is selected as the input device.
- Verify the mic gain knob is not set to minimum.
- Ensure the microphone is not muted (red LED indicator).
- Background Noise/Echo:
- Activate the noise cancellation feature by long-pressing the button for 3 seconds.
- Adjust the mic gain to an appropriate level; too high gain can pick up more ambient noise.
- Ensure you are speaking directly into the front of the microphone (where the logo is visible) due to its cardioid polar pattern.
- RGB Lights Not Working:
- Check the USB connection.
- Short press the RGB button to cycle through modes. If off, long press for 3 seconds to turn on.
- Audio Distortion:
- Reduce the mic gain if your audio sounds distorted or


